Introduction
Overview#
This quickstart will guide you through how to set up a basic project that uses SuperTokens to authenticate users. The tutorial shows a Thirdparty Login flow, rendered by either our Prebuilt UI components or by your own Custom UI.
If you want to skip straight to an example application you can choose between:
- Checking our live demo application
- Running a SuperTokens project from your local machine. You just have to use our CLI app and execute the following command:
npx create-supertokens-app@latest --recipe=thirdparty
You can also get an example of our User Management Dashboard through this page.
Use the following credentials to log in: [email protected], abcd1234.
Before you start#
Before going into the actual tutorial, let's get a clear picture of how SuperTokens works and some of the terms that we will use throughout the documentation.
SuperTokens Core#
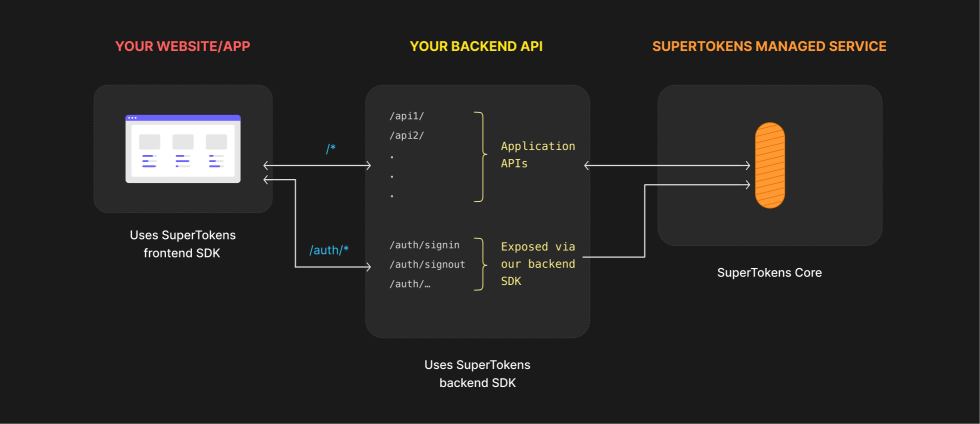
The main service that provides all the functionality is called the SuperTokens Core. SDKs communicate over an API with this service in order to perform authentication related tasks.
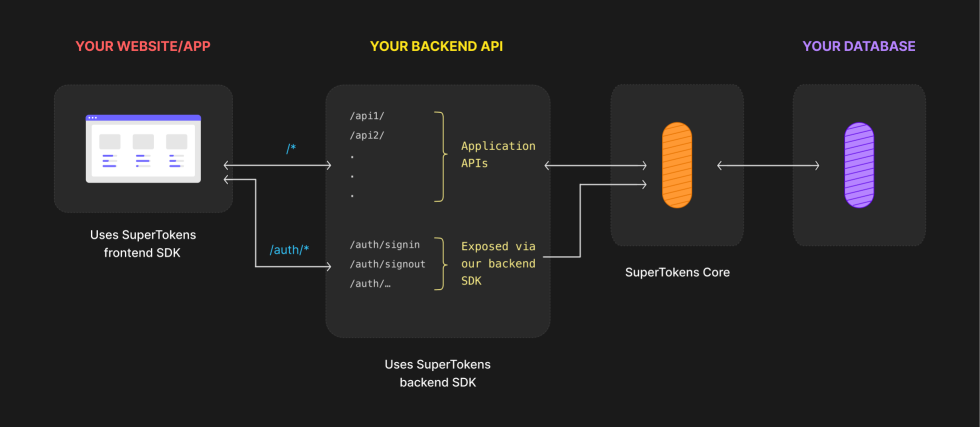
Unlike with other providers, the SuperTokens Frontend SDK never talks to the Authentication Service directly. All the requests target your existing Backend Service. From there, the Backend SDKs are used to expose new authentication routes. Those in turn communicate with the SuperTokens Core.
You can check the following diagram for a high level overview of how the services will interact within an authentication setup that involves SuperTokens.
- Managed service
- Self hosted


Edge Cases
- You can also host the SuperTokens Core yourself. In that case your backend will communicate with a service that exists inside your infrastructure.
- If you are using a backend for which we do not have an SDK, you will have to spin up an additional auth service in a language for which we do have a backend SDK (NodeJS, Python or Golang).
Recipes#
The functionalities that SuperTokens provides are bundled into objects that can be reffered to as Recipes. Everything from authentication methods to session and user management can be included under this concept. In the following sections, we will see how recipes get initialised and configured and how you can customise them to fit your use case.
Now that we have cleared all this out, we can move forward with the actual tutorial. Go to the next page to see how to configure your Frontend Application.
 Pre built UI