Session management
Overview
SuperTokens provides session management out of the box. Sessions get created when a user signs in and maintained throughout the authentication lifecycle. In the next graphic you can see a high level overview of how the session flow works.
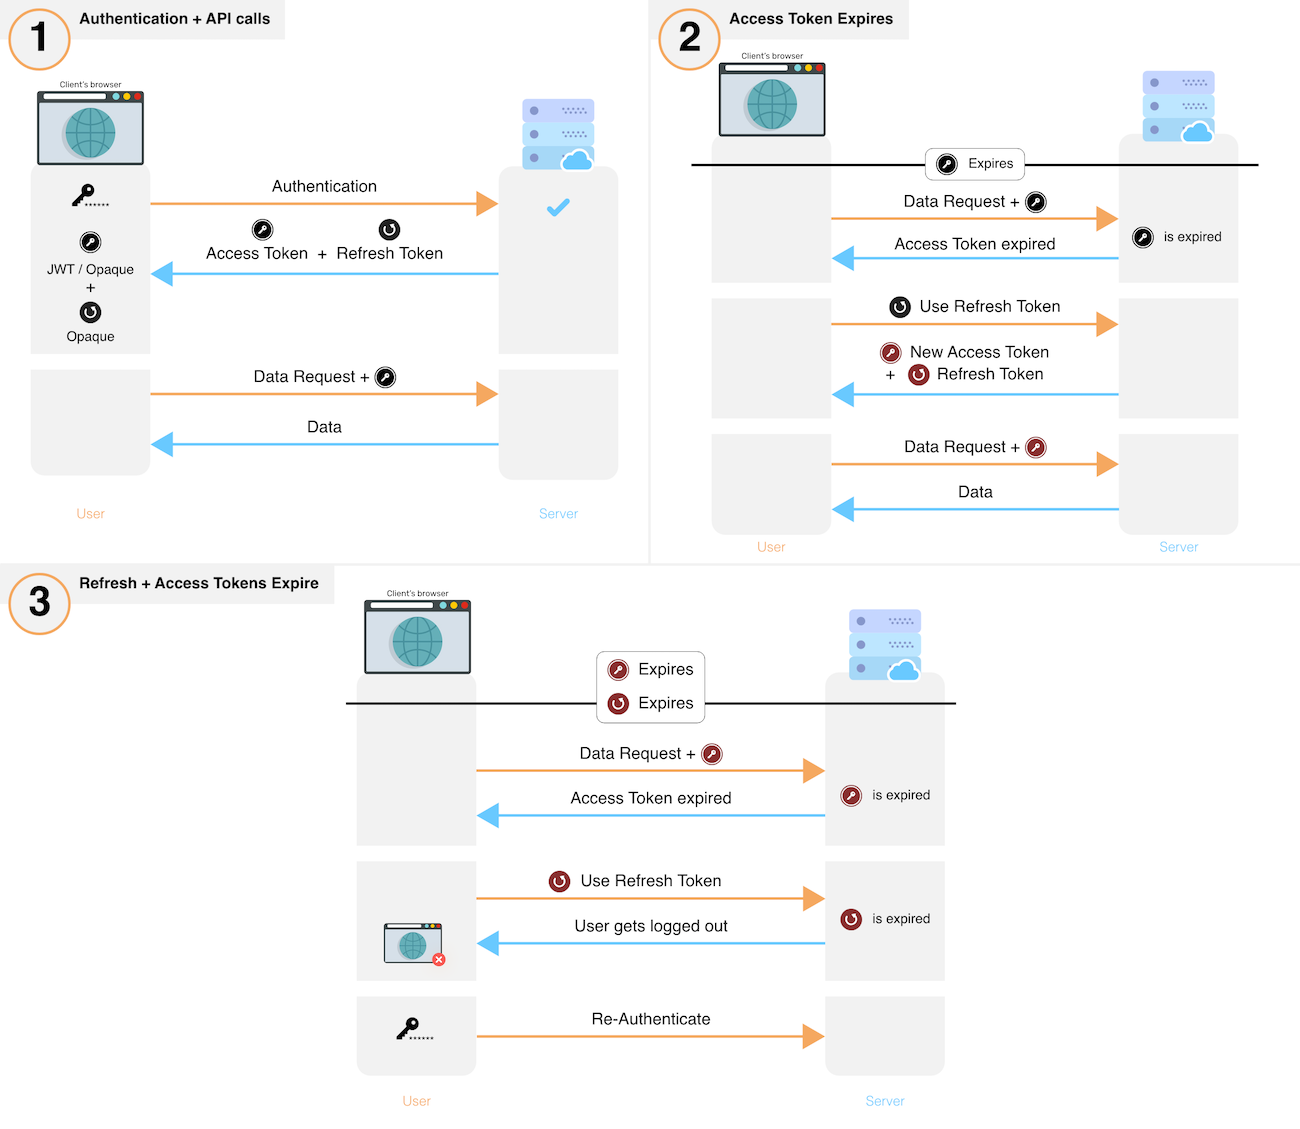
- After sign in, the system creates a new session by issuing a refresh and access token to the frontend.
- The frontend sends the access token for each API call that requires session authentication.
- These API calls verify the access token and its expiry. If verification fails, the API throws a session expired error, else, execution continues.
- If an API throws session expired error, the frontend uses its refresh token to get a new refresh and a new access token. The frontend performs this action via a special API on your backend. If you revoke a session, this API also throws session expired after which the user has to login again.
- After obtaining a new set of tokens, the frontend retries the original API call, yielding the desired result.
- To revoke a session, the backend removes the refresh token and its session information from its database.
Information about session cookies
Getting started
Including the Session recipe in the initial configuration enables sessions. This step is outlined in all the guides that show you how to integrate different authentication methods: Email Password, Passwordless or Social Login.
Additionally, this section includes information on how to work with sessions after a user has signed in.
Access Session Data
See how you can read the properties of an active session.
Invalidate Sessions
Learn how to revoke a session either through a user action or programmatically.
Customization
Share sessions across subdomains
Update the configuration to share sessions across different subdomains.
Switch between cookie and header based authentication
Choose how tokens are sent and stored during the authentication lifecycle.
Implement anonymous sessions
Learn how to track session data event if a user has not logged in.
Implement user impersonation
See how to act as a different user during the authentication flow.
Customize error handling
Change the default error handling behaviour.
Work with multiple API endpoints
Use the same session management logic for multiple API endpoints.
Blacklist Access Tokens
Block access tokens from being used.