Pre built UI
Managing Third-party Providers
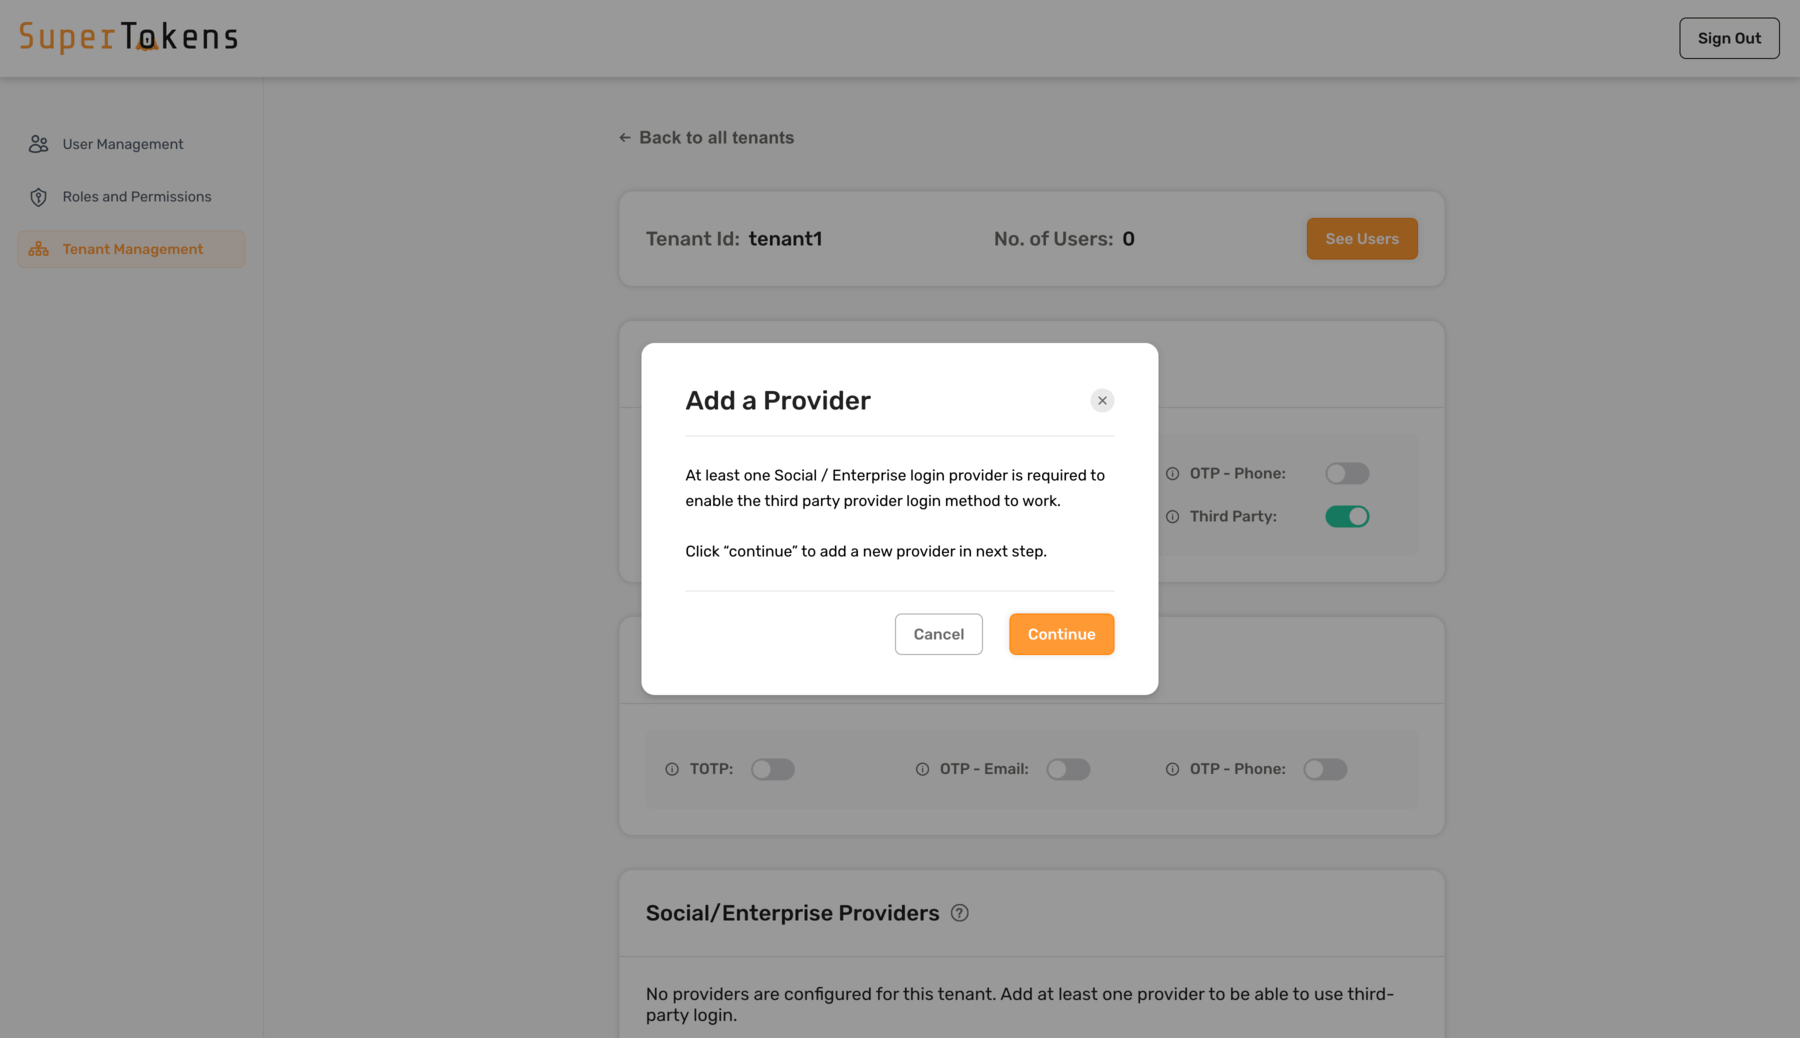
The Social/Enterprise providers section will be available once Third Party login method is enabled for the tenant.
Initially, you will be prompted to configure a new provider.
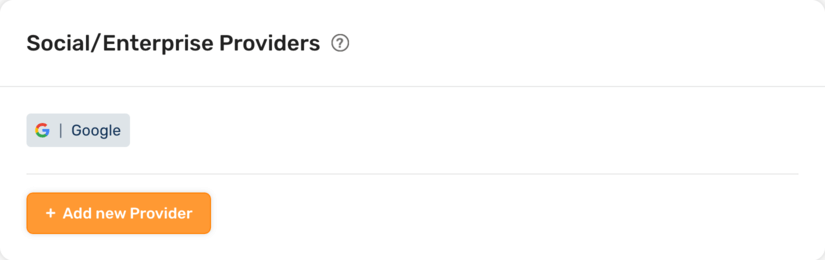
Later on, new or existing third-party providers can be configured from the Social/Enterprise providers section.
Configuring a new Social/Enterprise provider#
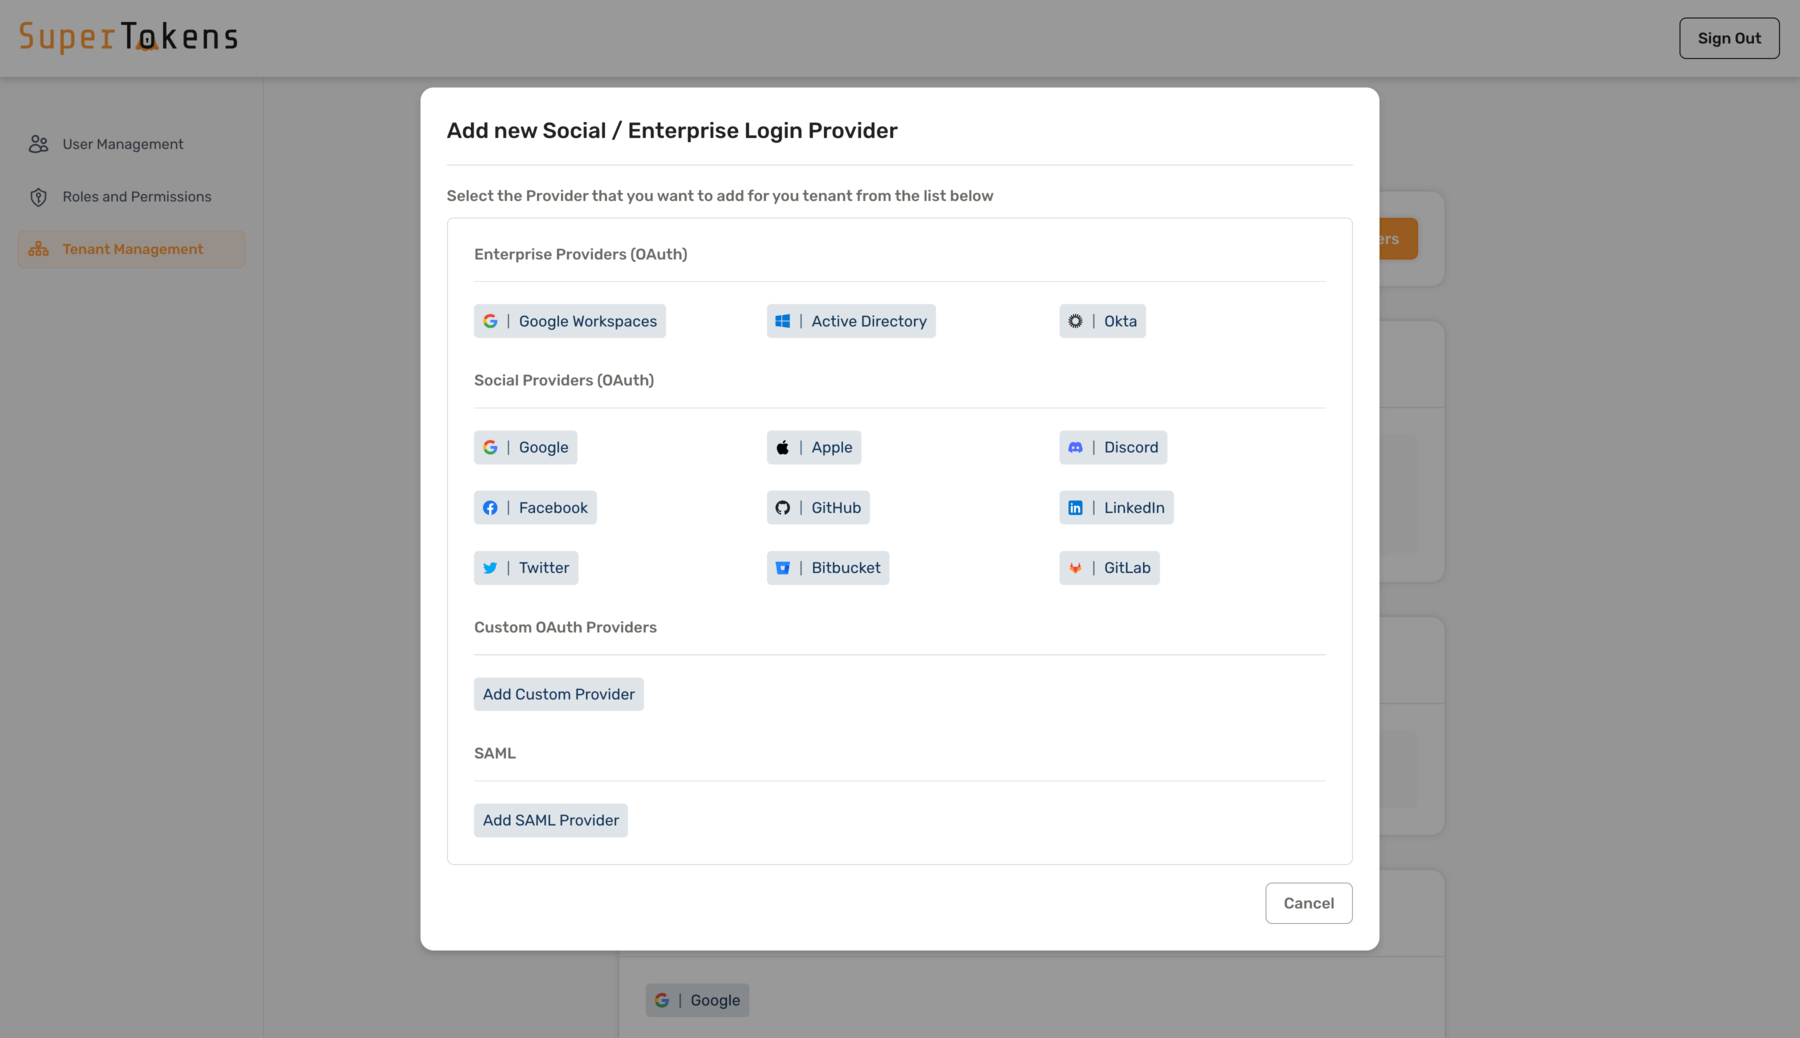
When adding a new third-party provider, you will be provided with the list of available options, including built-in enterprise and social providers, custom and SAML.
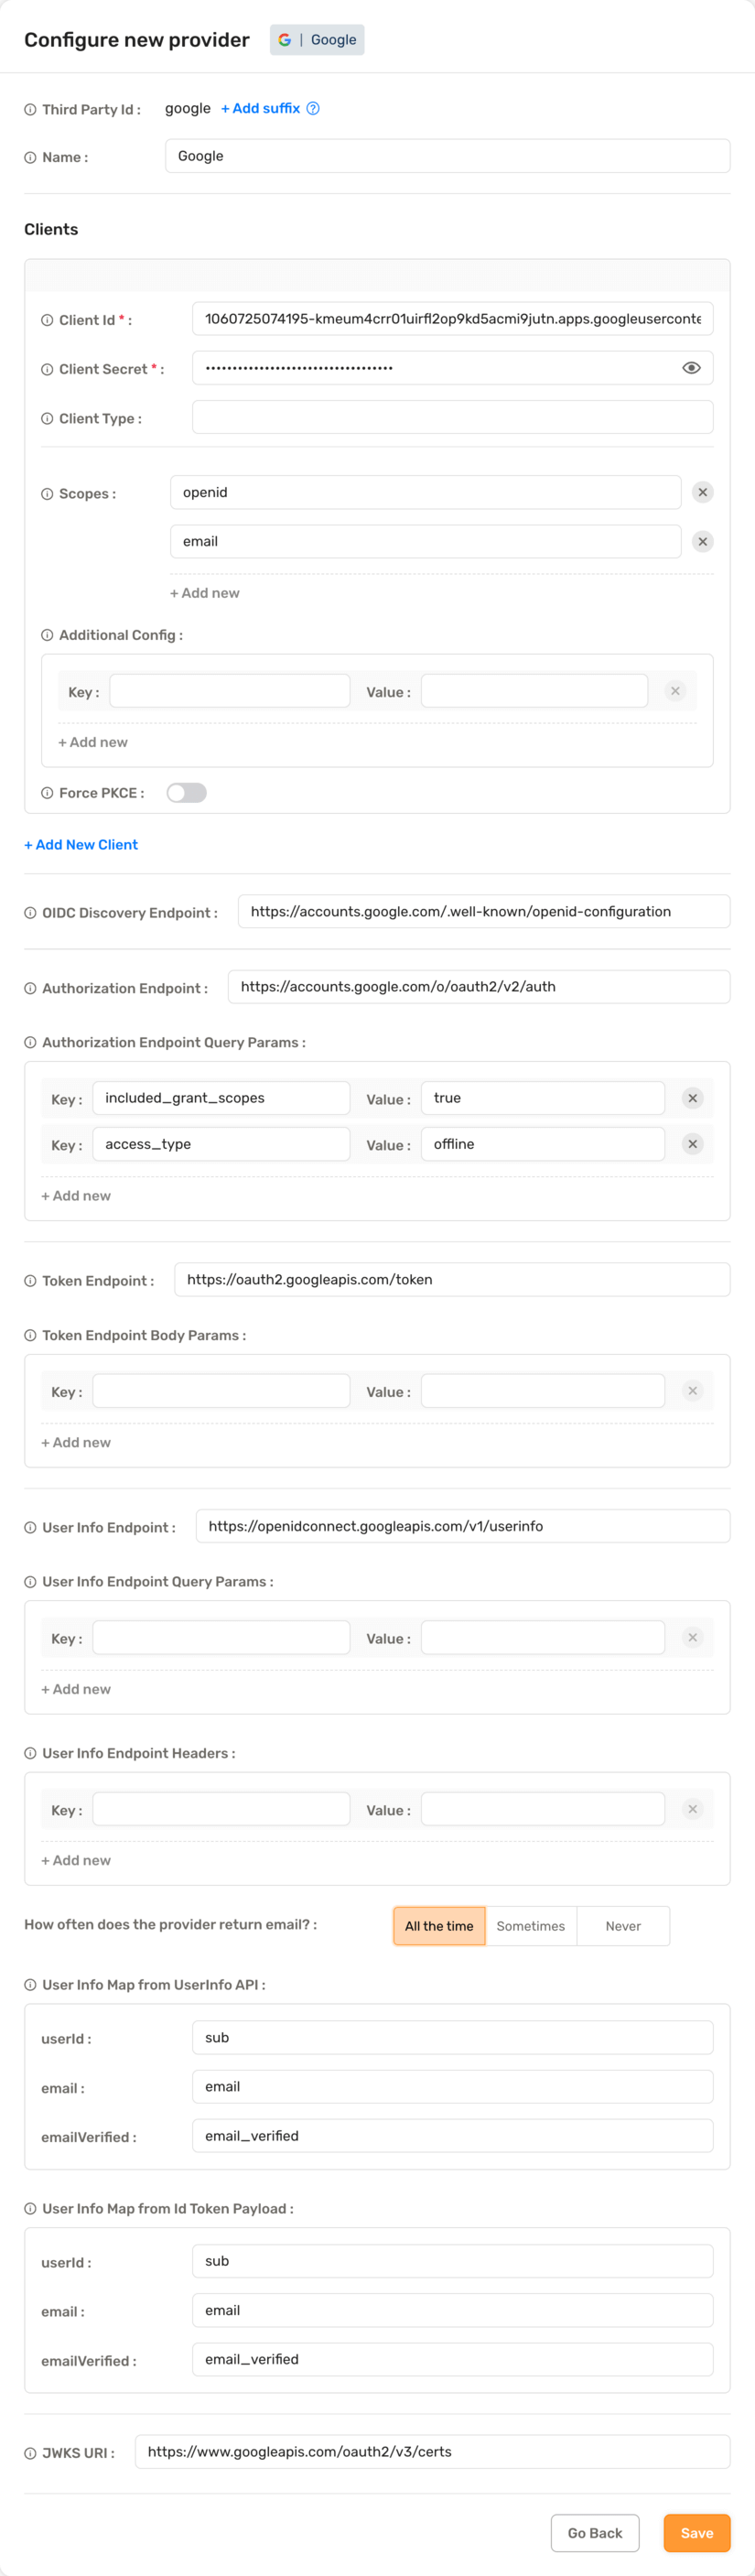
Upon selection of the desired provider, you will be prompted to provide further details such as Client ID, Client Secret, etc.
Enterprise providers#
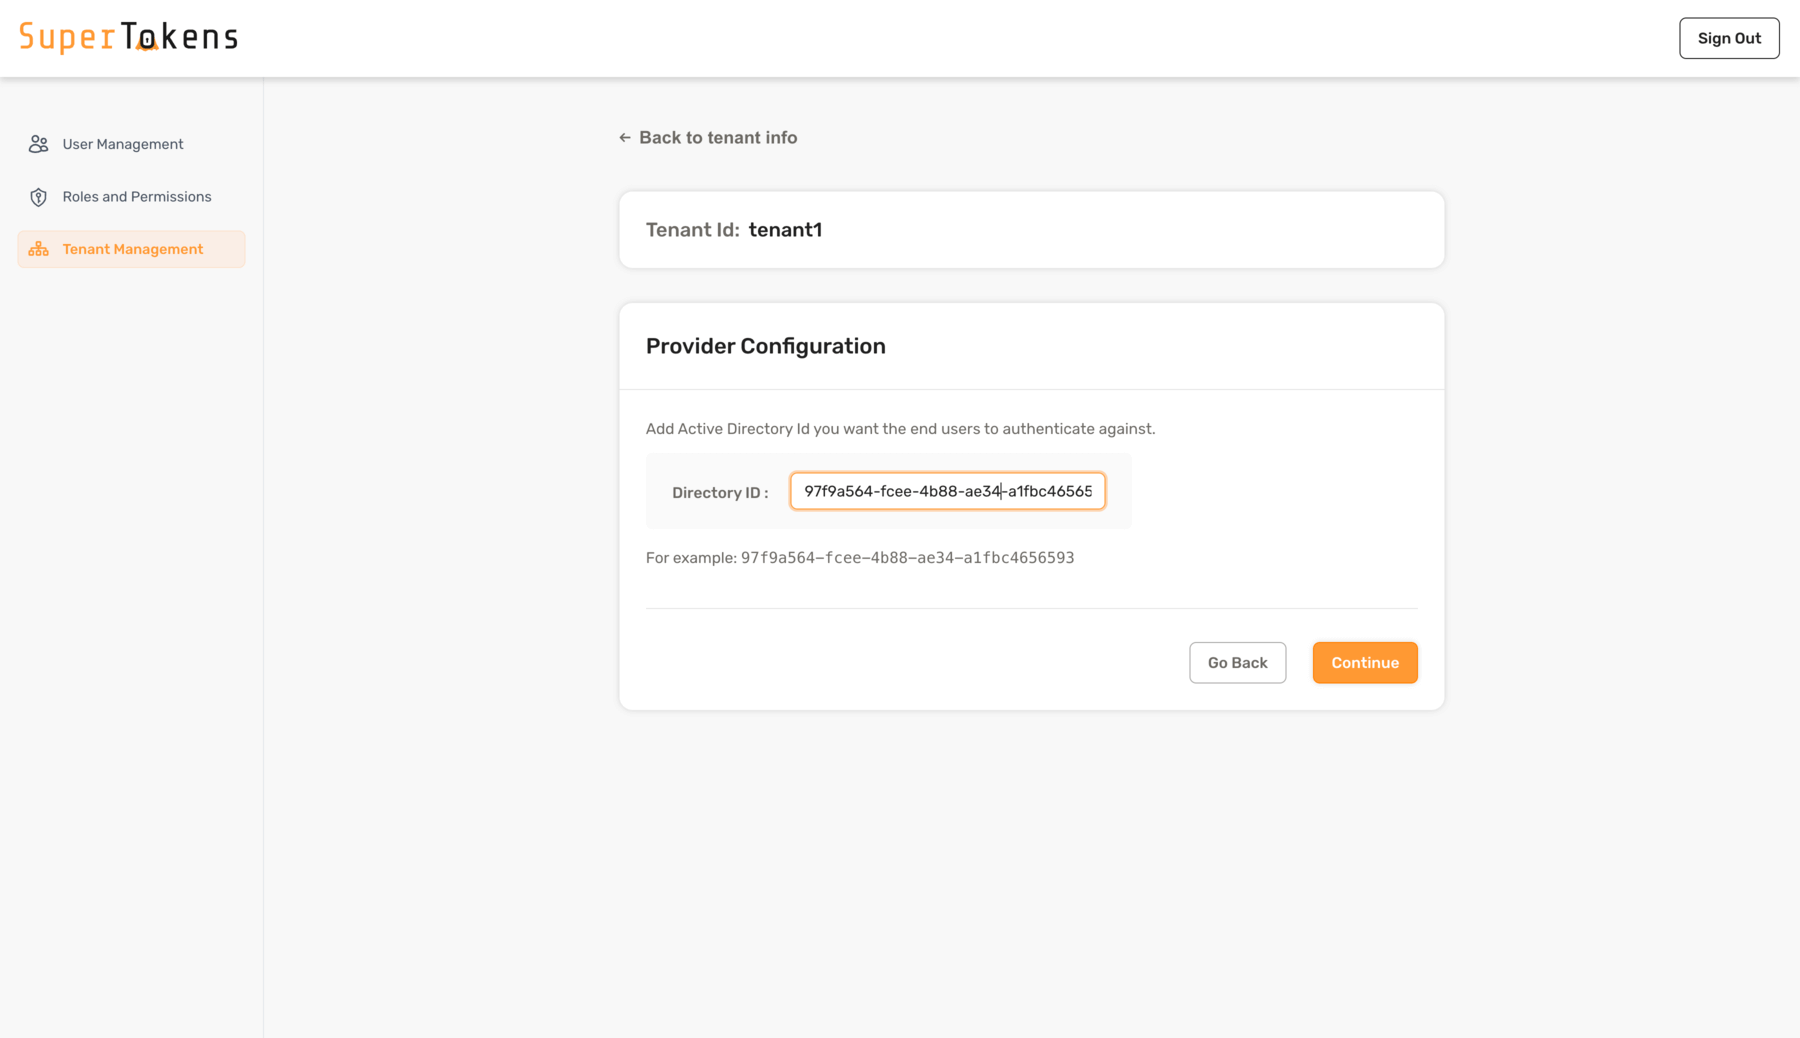
For the Enterprise providers, you will be prompted to provide certain extra information before proceeding to the Provider details. For example, Active Directory provider would require a Directory ID before editing further details.
Custom Providers#
If a Social/Enterprise provider is not available in the list of built-in providers, you can still use them by selecting the Add Custom Provider option.
Start off by providing ThirdParty ID, Name and Client details such as Client ID, Secret, Scope, etc.

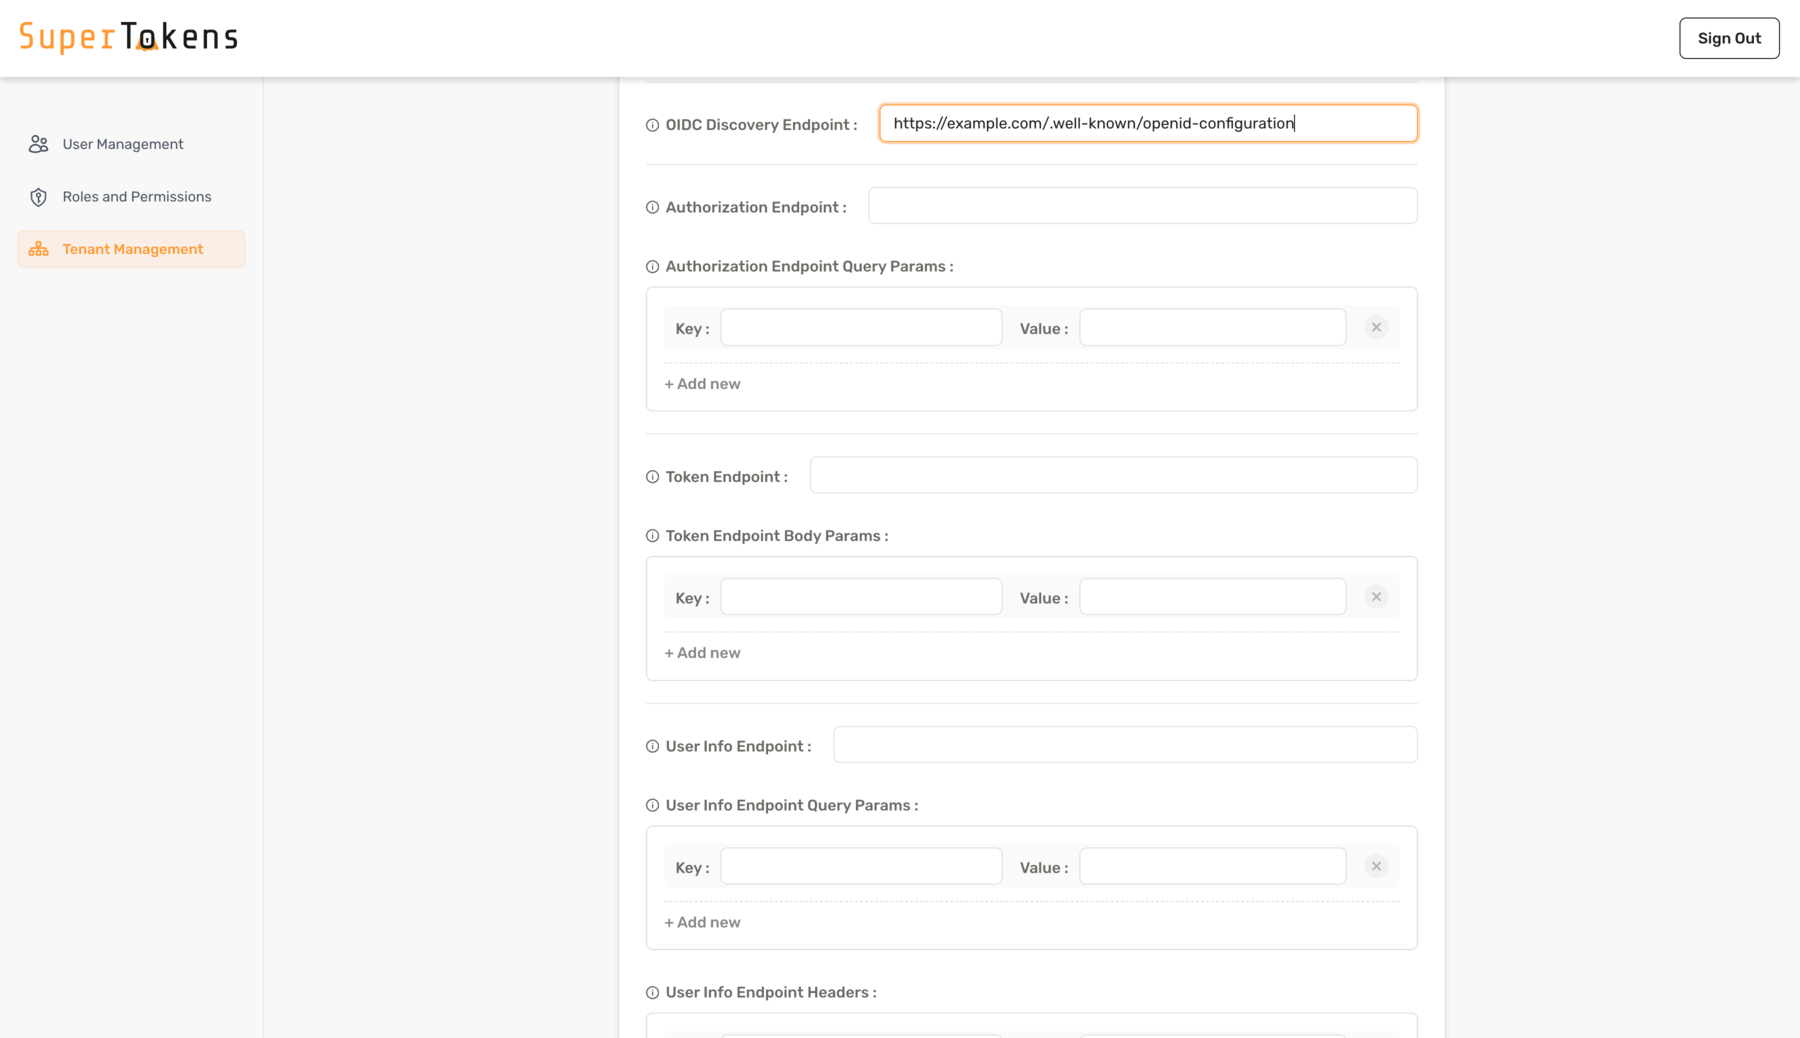
If using an OpenID compliant provider, you could simply add the OIDC Discovery Endpoint. Otherwise, the provider can be configured by manually providing Authorization Endpoint, Token Endpoint, User Info Endpoint, etc.
Finally, clicking on Save will add the Social/enterprise provider for the tenant.
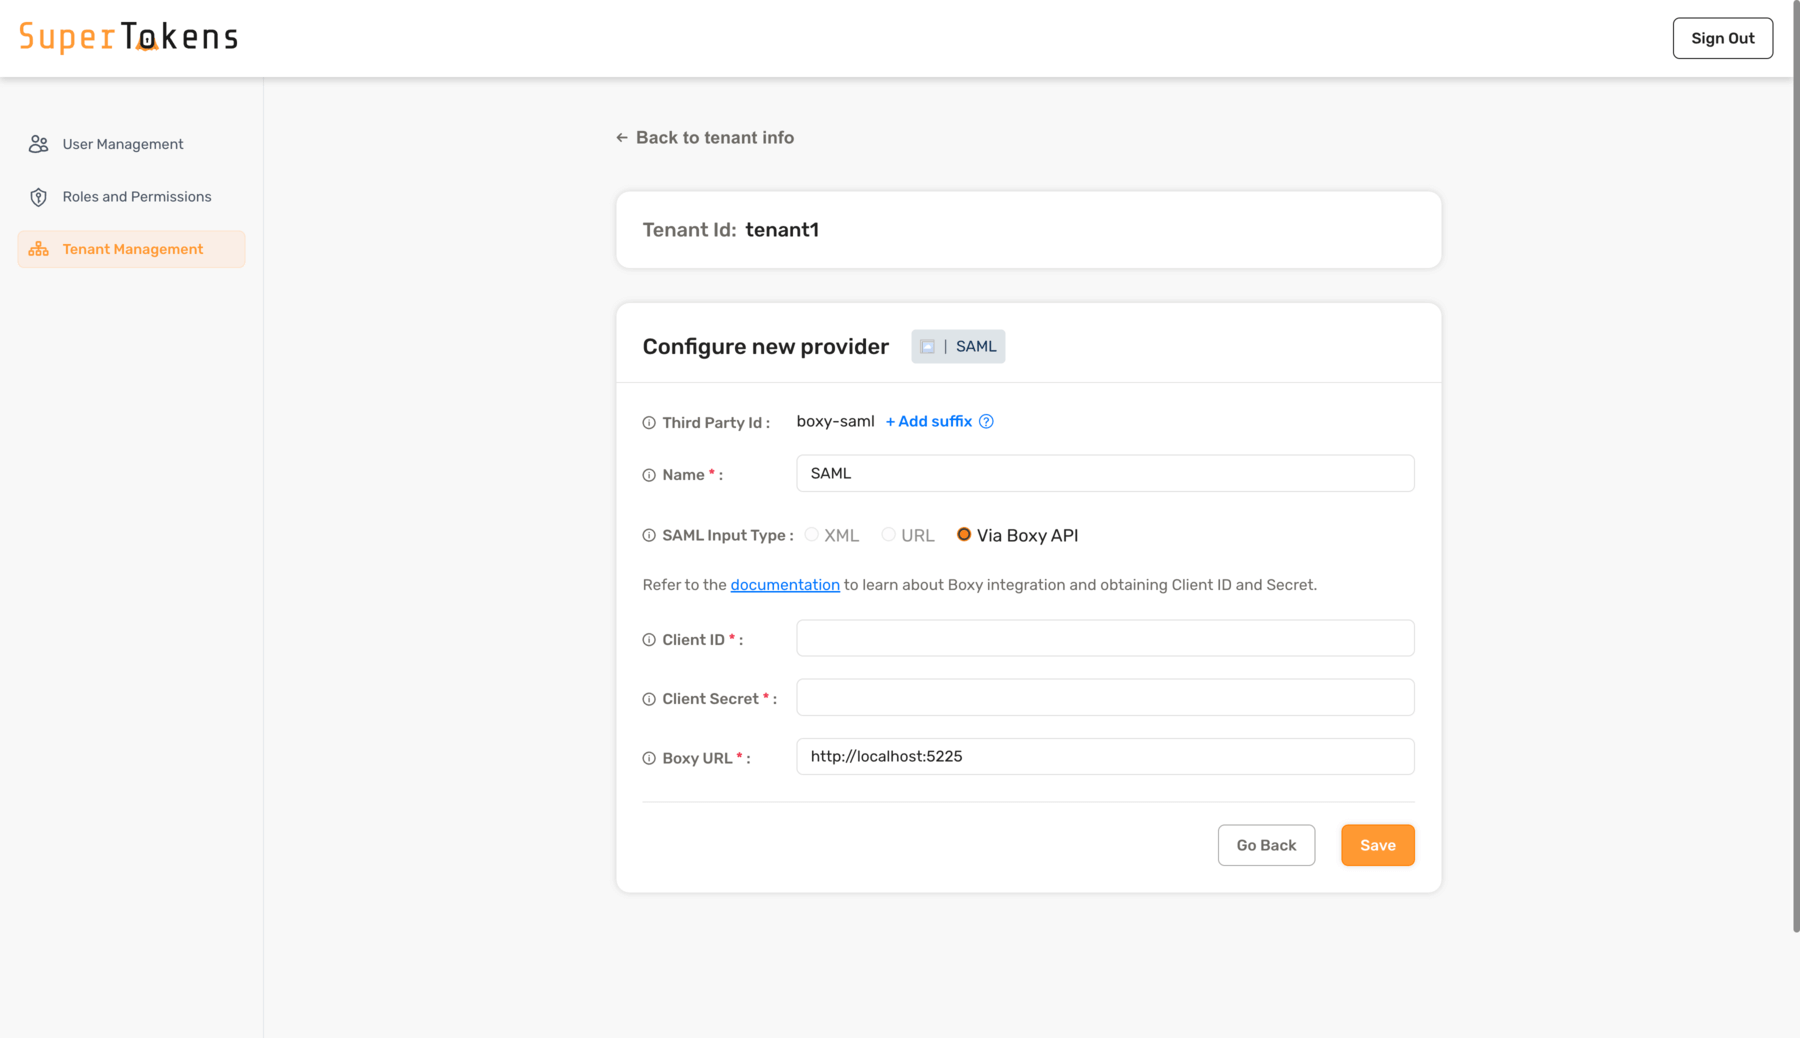
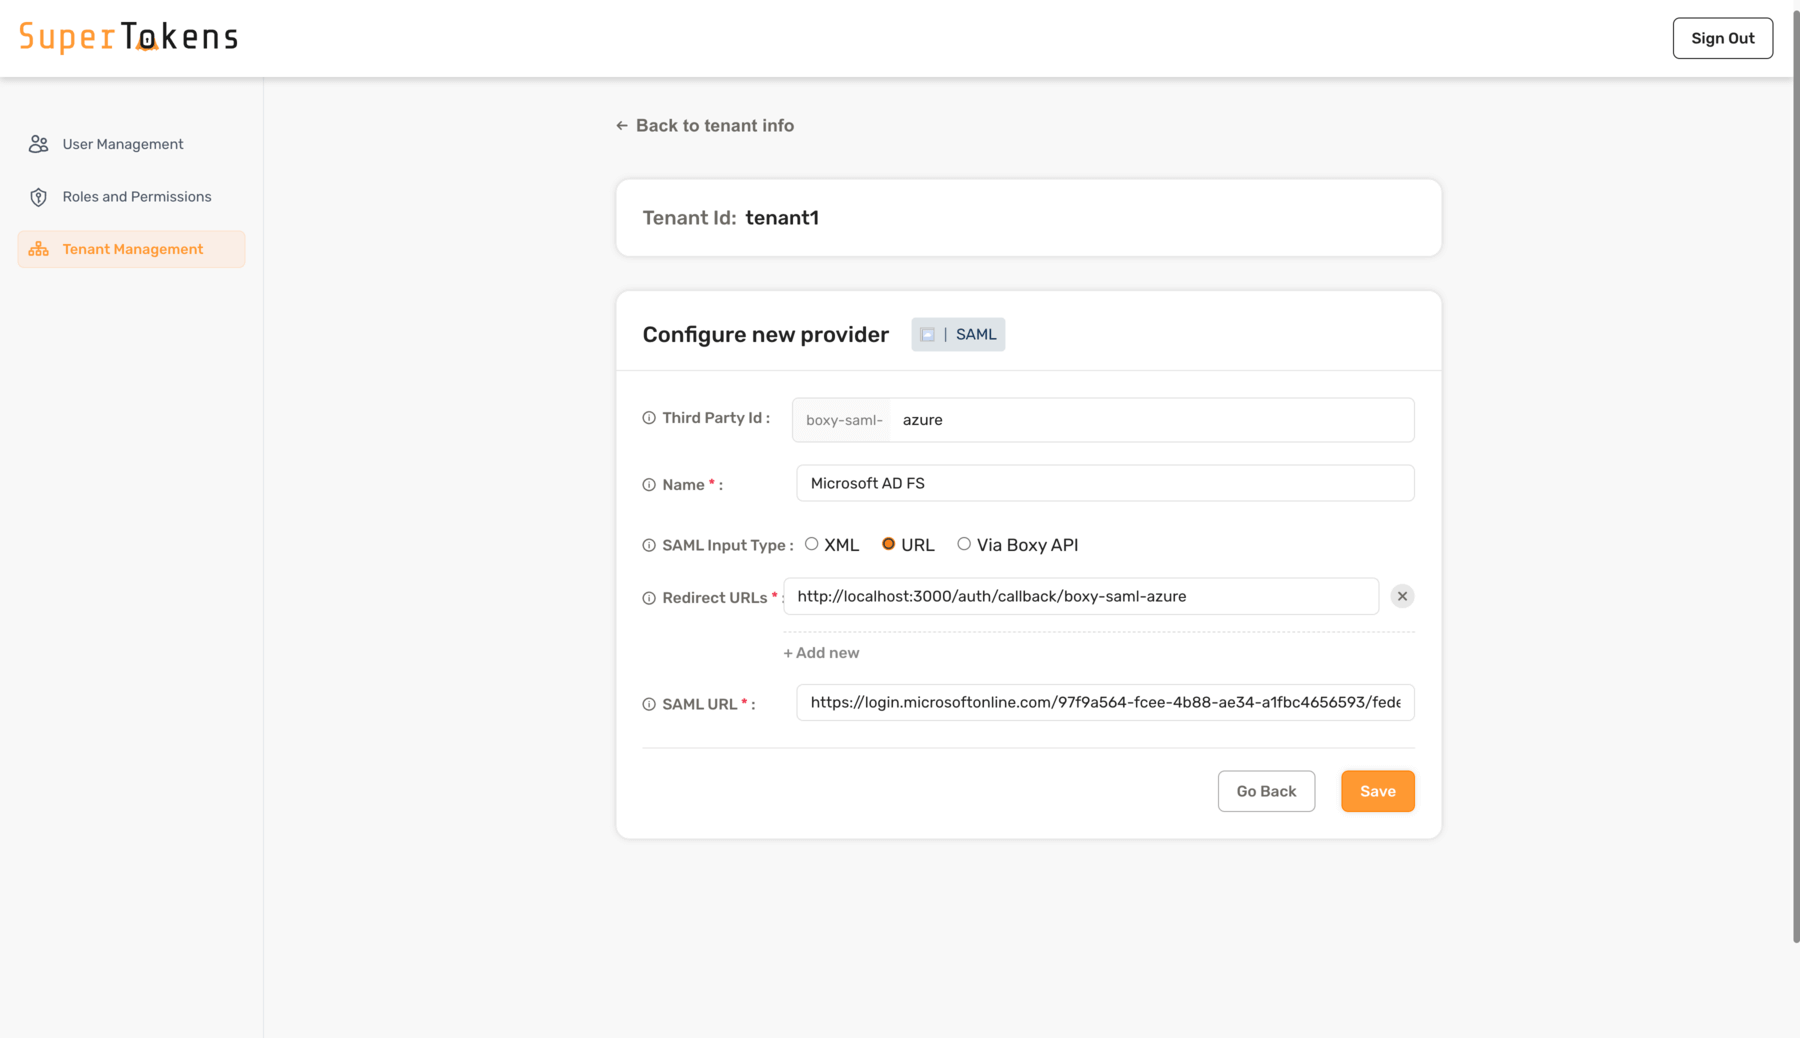
SAML Providers#
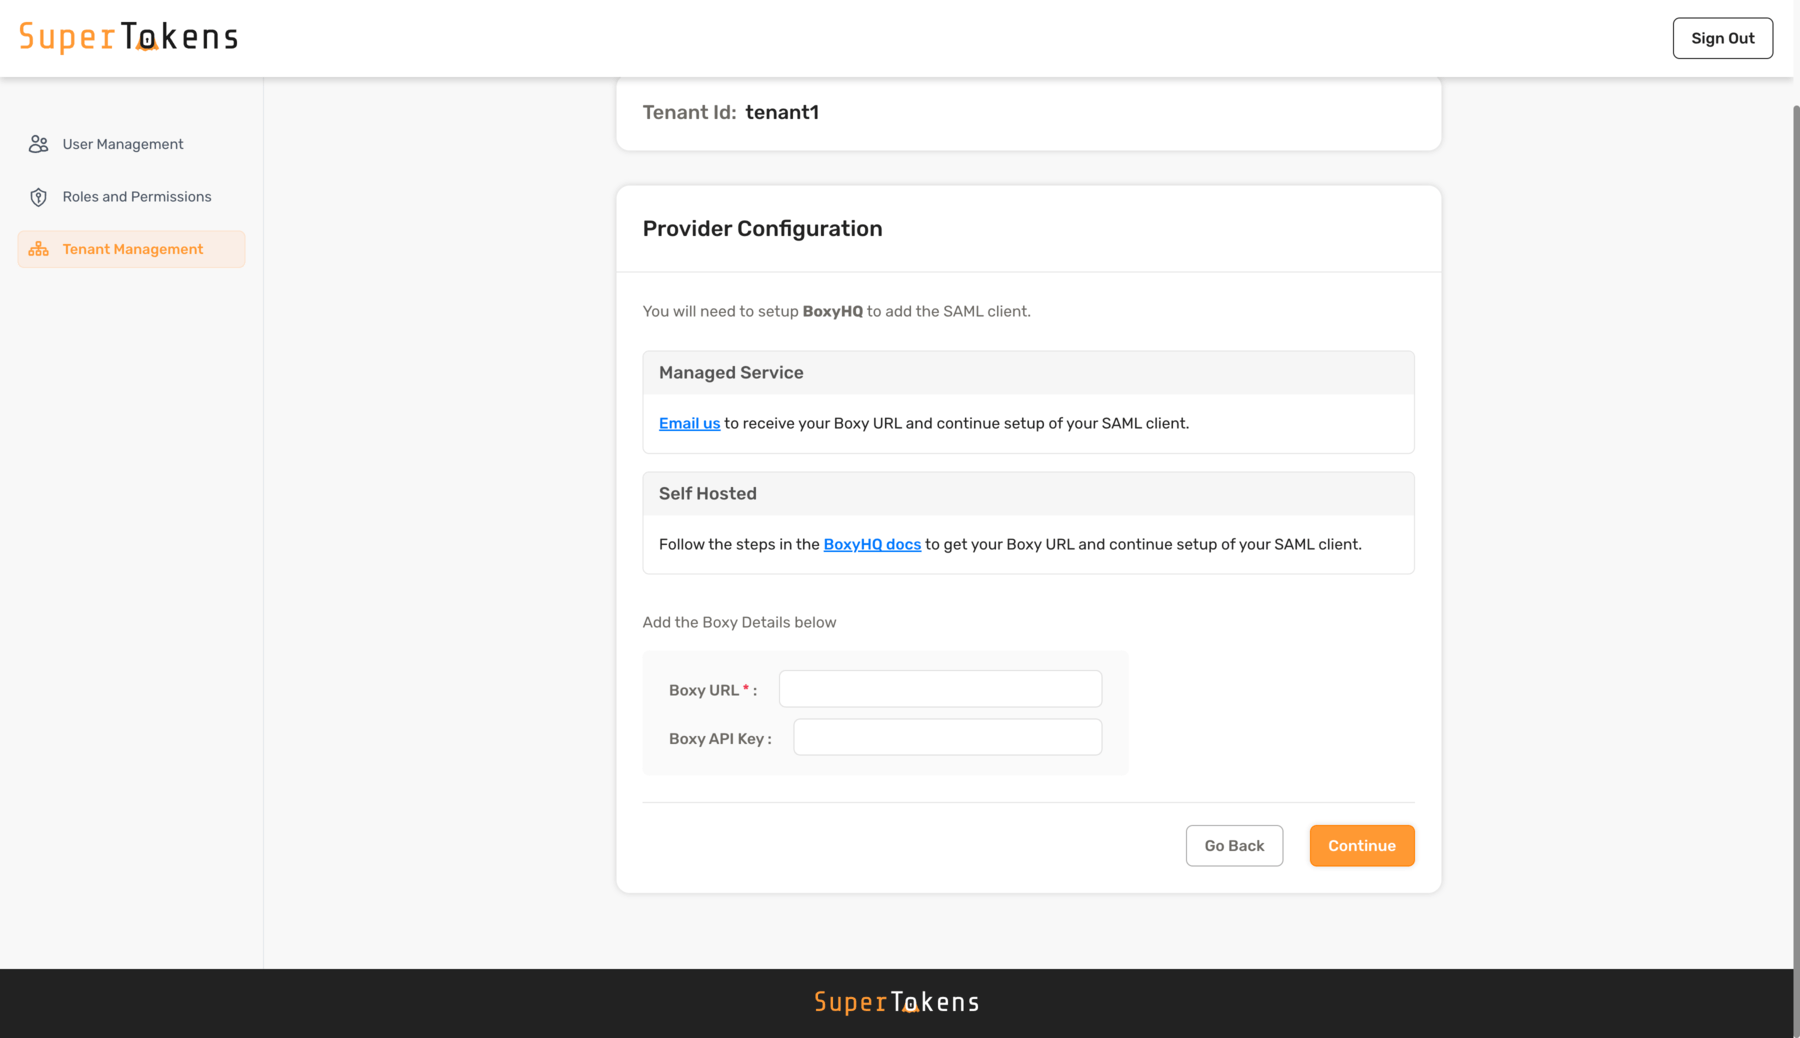
To add a SAML provider, use the Add SAML Provider option. For more information on what is SAML and how it works with SuperTokens, refer SAML docs.
Upon selection, you would then be prompted to provide the Boxy URL and the Boxy API Key.
important
To be able to use SAML providers, an additional Boxy HQ service is required. You can either self-host yourself or email us to provide you a managed instance. Details for them are also available on this page.
On continuing, you will be further asked for the SAML config. You have an option to either provide SAML XML directly or via the Metadata URL from the Provider. Also, fill in other details such as Suffix, Name, Redirect URLs and click on Save to add the SAML provider.
caution
Adding ThirdParty suffix is not compulsory, however if you wish to add multiple SAML providers for a tenant, you will need to add unique suffixes for each of them.
If you did not provide the Boxy API Key, you will need to add the Client ID and Secret obtained by calling the Boxy APIs manually. More details are available here.