Quickstart Guide
The following guide shows you how to use SuperTokens in an AWS Lambda environment. You can also check out the example repository for a full implementation.
Before you start
These instructions assume that you have completed the quickstart guide. If not, please go through it and create the example application before you start this tutorial.
Steps
Follow the quickstart guide first to learn how to set up the frontend.
1. Set up API Gateway
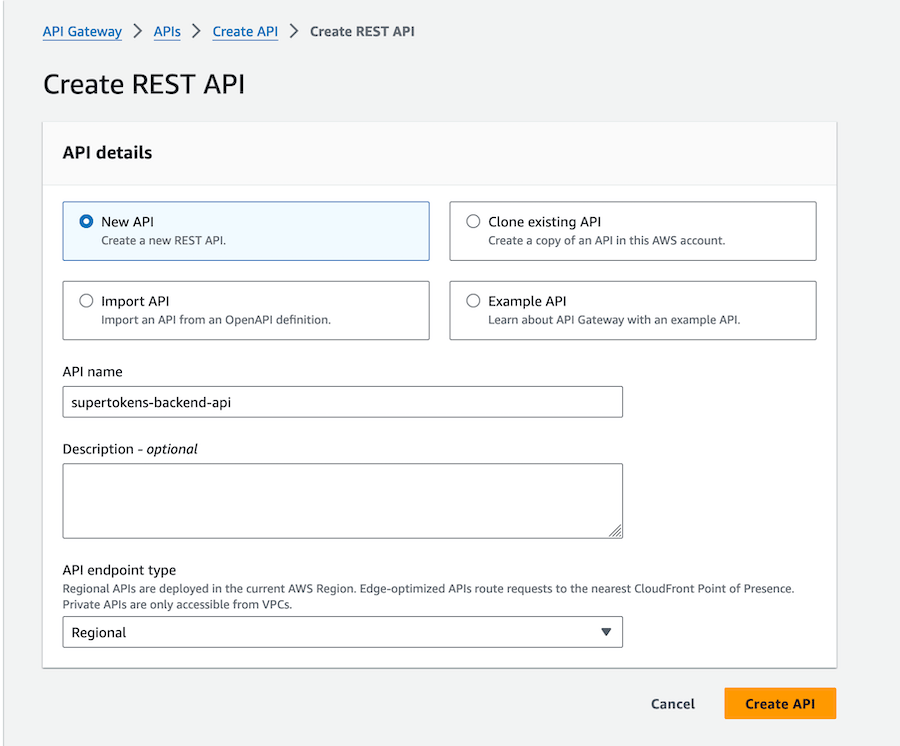
1.1 Create a REST API Gateway
We will be using AWS API Gateway to create a REST API that will be used to communicate with our Lambda functions.
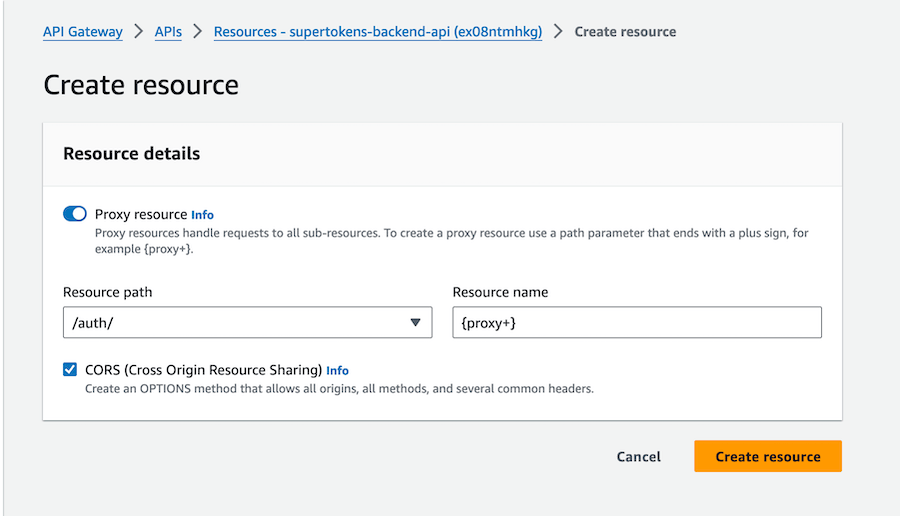
1.2 Set up authentication routes
Create a /auth resource and then /auth/{proxy+} resources. This will act as a catch-all for all SuperTokens auth routes. Enable CORS while creating the proxy resource.
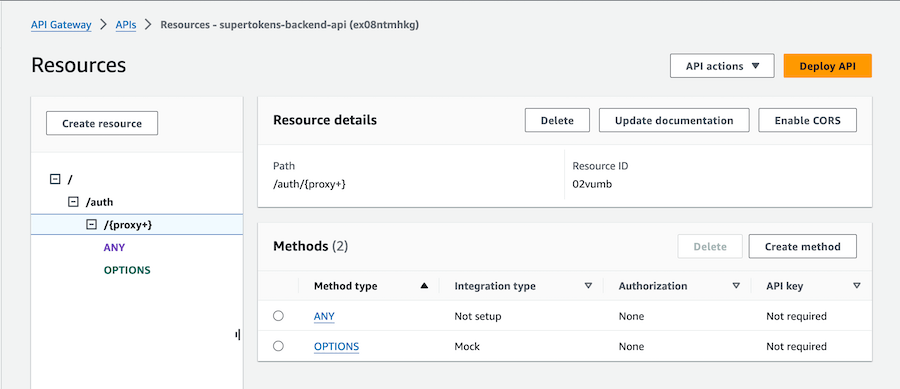
1.3 Attach lambda to the ANY method of the proxy resource
Click on the "ANY" method and then "Integration" to configure the lambda function. Check Lambda proxy integration and then select your lambda function.
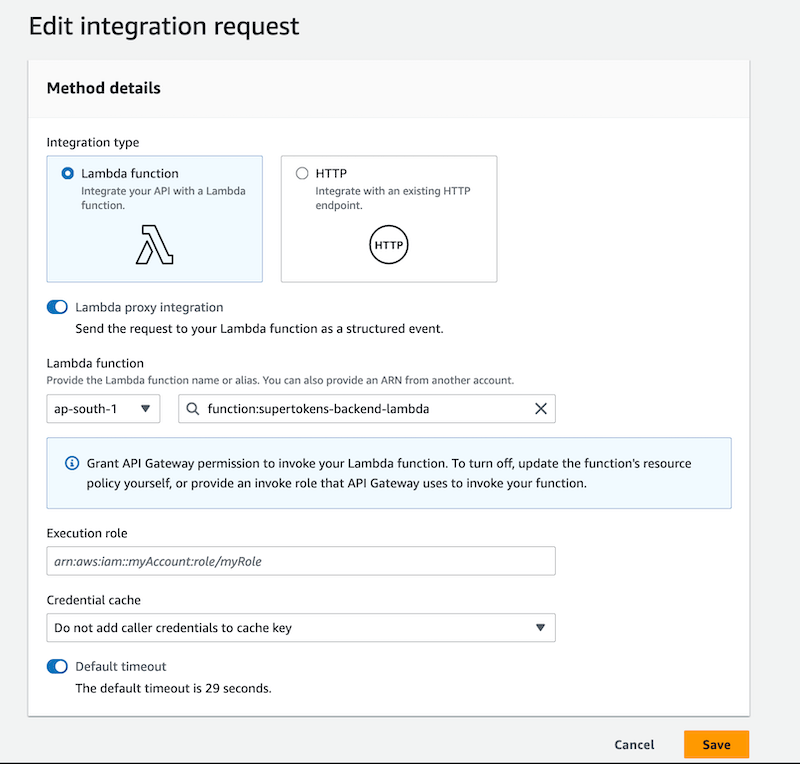
Ensure that the Lambda proxy integration toggle is turned on.
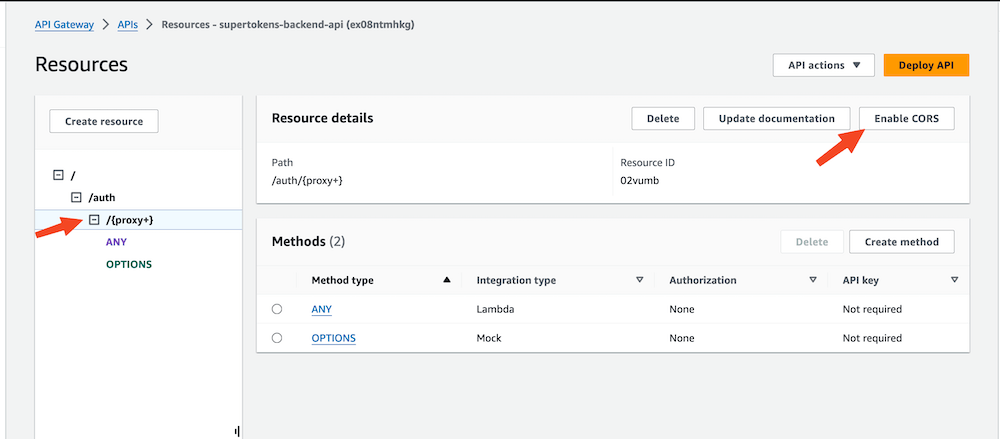
1.4 Enable CORS for the proxy path
Click on the {proxy+} resource and then "Enable CORS" button to open the CORS configuration page.
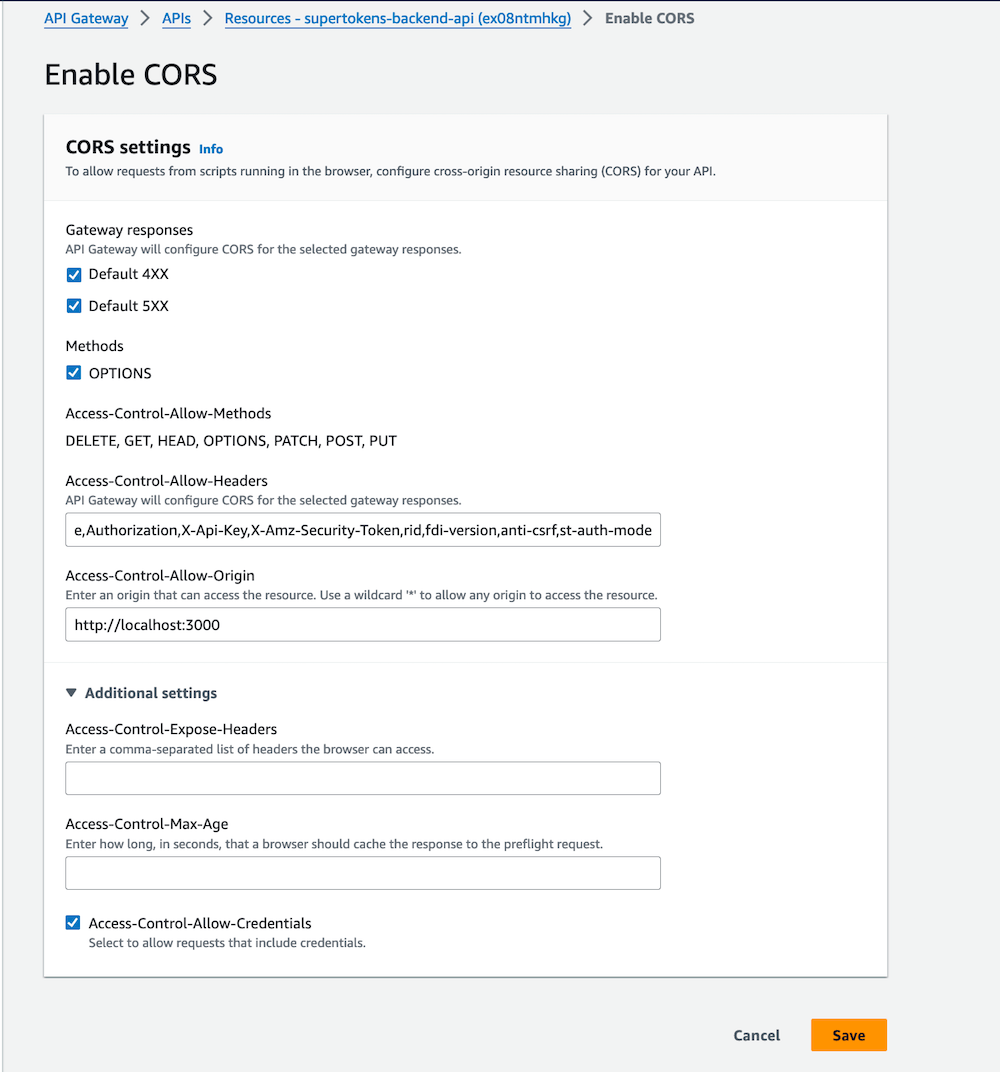
In the CORS configuration page do the following:
- Select the 'Default 4XX' and 'Default 5XX' checkboxes under Gateway responses
- Select the 'OPTIONS' checkbox under Methods
- Add rid,fdi-version,anti-csrf,st-auth-mode to the existing Access-Control-Allow-Headers
- Set Access-Control-Allow-Origin to '<YOUR_WEBSITE_DOMAIN>'
- Select Access-Control-Allow-Credentials checkbox
1.5 Deploy the API Gateway
Click the Deploy API button in the top right corner to deploy the API. During deployment, you'll be prompted to create a stage; for this tutorial, name the stage dev. After deployment, you will receive your Invoke URL.
Update apiDomain, apiBasePath, and apiGatewayPath in both Lambda configuration and your frontend config if they have changed post API Gateway configuration.
2. Set up Lambda layer
2.1 Create Lambda layer with required libraries
mkdir lambda && cd lambda

npm i -s supertokens-node @middy/core @middy/http-cors
mkdir nodejs && cp -r node_modules nodejs
zip -r supertokens-node.zip nodejs/
2.2 Upload SuperTokens lambda layer
Open AWS Lambda dashboard and click on layers:
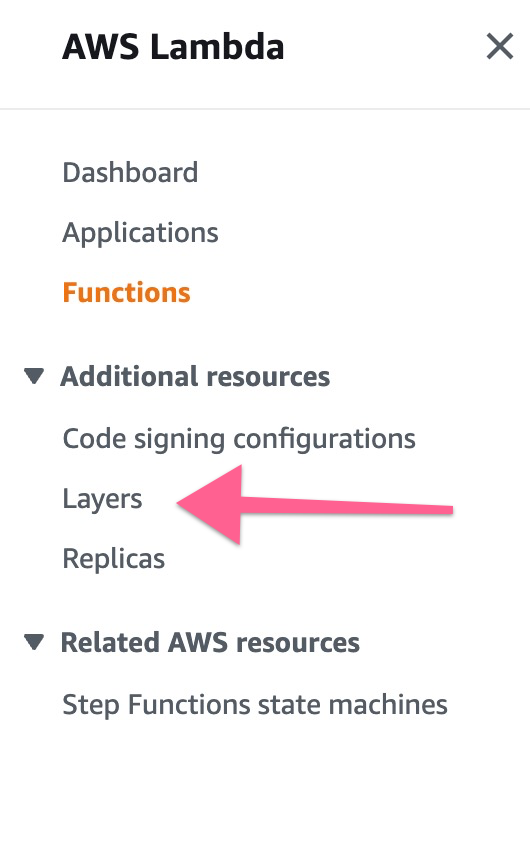
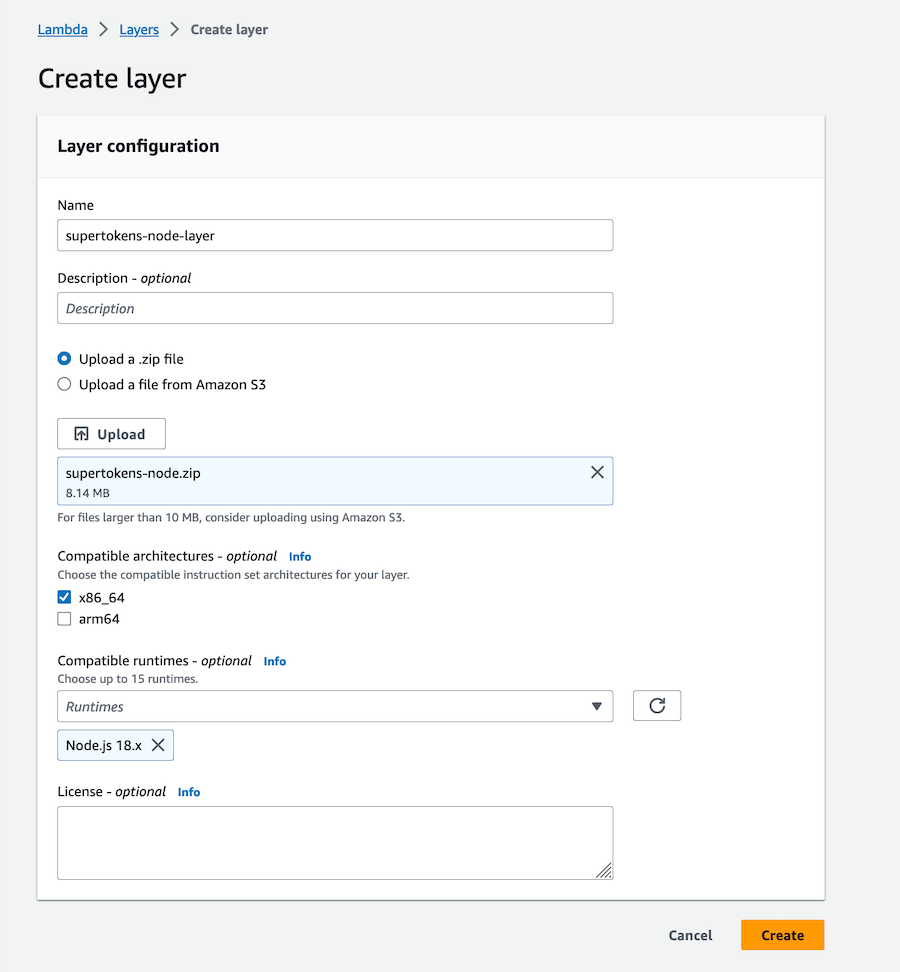
Click "Create Layer" button:

Give a name for your layer, upload the zip and select the runtime
3. Set up Lambda
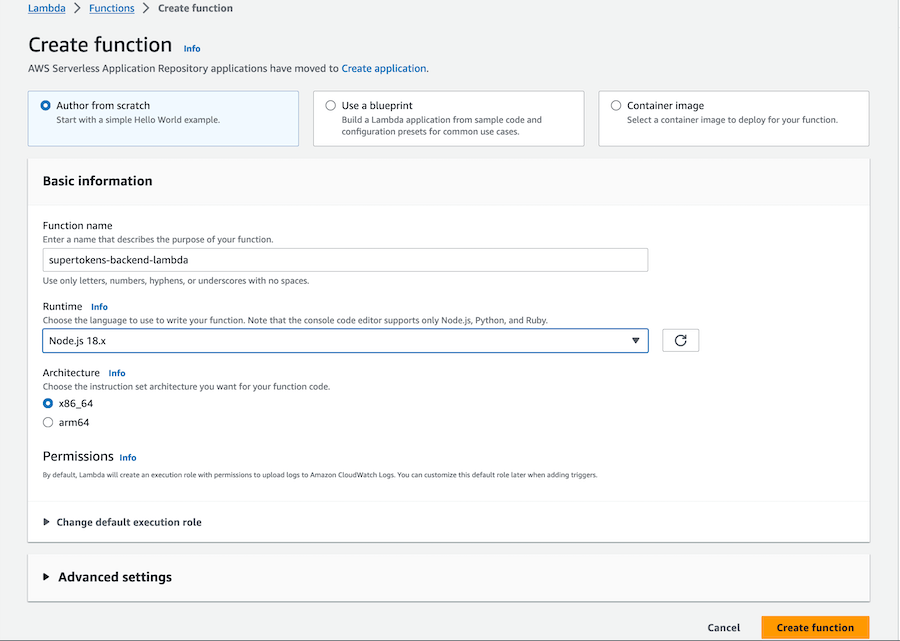
3.1 Create a new lambda
Click "Create Function" in the AWS Lambda dashboard, enter the function name and runtime, and create your Lambda function.
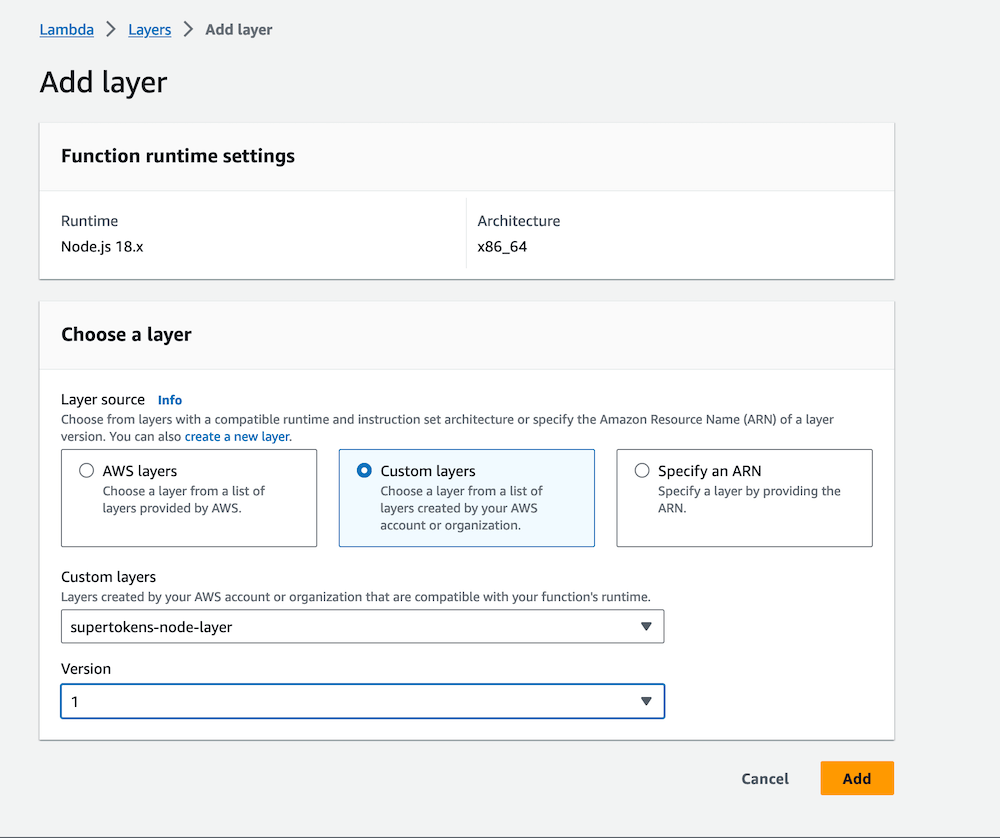
3.2 Link lambda layer with the lambda function
Scroll to the bottom and look for the Layers tab. Click on Add a layer

Select Custom Layer and then select the layer we created in the first step:
3.3 Create a backend config file
Using the editor provided by AWS, create a new config file and write the following code:
App Info
Adjust these values based on the application that you are trying to configure. To learn more about what each field means check the references page.import EmailPassword from "supertokens-node/recipe/emailpassword";
import Session from "supertokens-node/recipe/session";
export function getBackendConfig() {
return {
framework: "awsLambda",
supertokens: {
connectionURI: "<CORE_API_ENDPOINT>",
// apiKey: "<YOUR_API_KEY>",
},
appInfo: {
// learn more about this on https://supertokens.com/docs/references/backend-sdks/reference#sdk-configuration
appName: "<YOUR_APP_NAME>",
apiDomain: "<YOUR_API_DOMAIN>",
websiteDomain: "<YOUR_WEBSITE_DOMAIN>",
apiBasePath: "/auth",
websiteBasePath: "/auth",
apiGatewayPath: "/dev"
},
recipeList: [
EmailPassword.init(),
Session.init(),
],
isInServerlessEnv: true,
}
}
In the above code, notice the extra config of apiGatewayPath that was added to the appInfo object. The value of this should be whatever you have set as the value of your AWS stage which scopes your API endpoints. For example, you may have a stage name per development environment:
- One for development (/dev).
- One for testing (/test).
- One for prod (/prod).
So the value of apiGatewayPath should be set according to the above based on the environment it's running under.
You also need to change the apiBasePath on the frontend config to append the stage to the path. For example, if the frontend is query the development stage and the value of apiBasePath is /auth, you should change it to /dev/auth.
You may edit the apiBasePath and apiGatewayPath value later if you haven't setup the API Gateway yet.
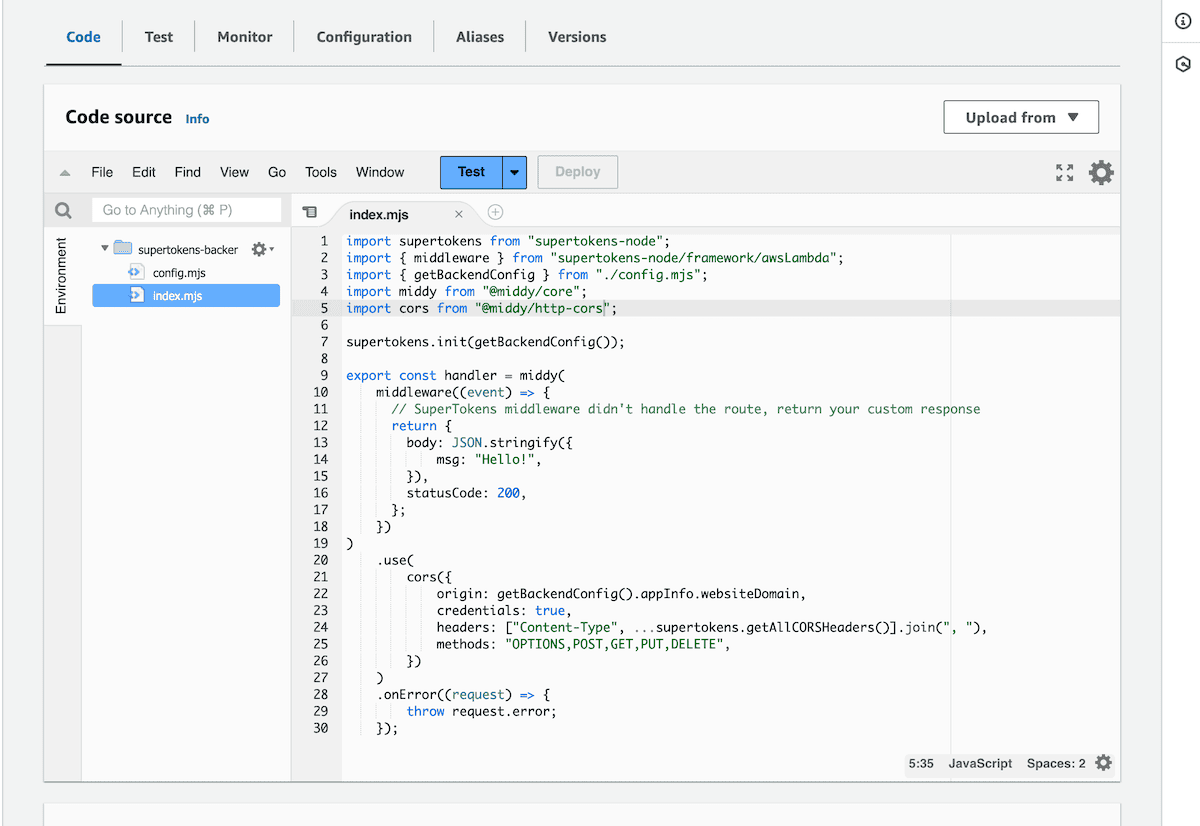
3.4 Add the SuperTokens auth middleware
Using the editor provided by AWS, create/replace the handler file contents with the following code:
import supertokens from "supertokens-node";
import { middleware } from "supertokens-node/framework/awsLambda";
import { getBackendConfig } from "./config.mjs";
import middy from "@middy/core";
import cors from "@middy/http-cors";

supertokens.init(getBackendConfig());

export const handler = middy(
    middleware((event) => {
      // SuperTokens middleware didn't handle the route, return your custom response
      return {
        body: JSON.stringify({
            msg: "Hello!",
        }),
        statusCode: 200,
      };
    })
)
    .use(
        cors({
            origin: getBackendConfig().appInfo.websiteDomain,
            credentials: true,
            headers: ["Content-Type", ...supertokens.getAllCORSHeaders()].join(", "),
            methods: "OPTIONS,POST,GET,PUT,DELETE",
        })
    )
    .onError((request) => {
        throw request.error;
    });
Since, we are using esm imports, we will need to set NODE_OPTIONS="--experimental-specifier-resolution=node" flag in the lambda environment variables. See the Node.js documentation for more information.

3.5 Filter additional plugins or extensions Optional
If you are using AWS Lambda plugins, extensions, or anything that adds events to the lambda function (e.g. serverless-plugin-warmup), then you may need to prevent calling SuperTokens with them.
These kind of events lack request details that SuperTokens expects, thus might lead to un-intended errors.
Here's an example of how you can filter them out:
import supertokens from "supertokens-node";
import { middleware } from "supertokens-node/framework/awsLambda";
import { getBackendConfig } from "./config.mjs";
import middy from "@middy/core";
import cors from "@middy/http-cors";

supertokens.init(getBackendConfig());

const httpHandler = middy(
    middleware((event) => {
      // SuperTokens middleware didn't handle the route, return your custom response
      return {
        body: JSON.stringify({
            msg: "Hello!",
        }),
        statusCode: 200,
      };
    })
)
    .use(
        cors({
            origin: getBackendConfig().appInfo.websiteDomain,
            credentials: true,
            headers: ["Content-Type", ...supertokens.getAllCORSHeaders()].join(", "),
            methods: "OPTIONS,POST,GET,PUT,DELETE",
        })
    )
    .onError((request) => {
        throw request.error;
    });

const postAuth = async (event, context) => {
  // Plugins generally inject a `source` property in the event object.
  if (event.source === 'serverless-plugin-warmup') {
    console.info('postAuth 010: warming up lambda. Bypassing authMiddleware.');
    return {
      statusCode: 200,
      body: JSON.stringify({ message: 'Warm-up successful' }),
    };
  }

  return httpHandler(event, context);
};

export const handler = postAuth;