How SuperTokens works
Overview
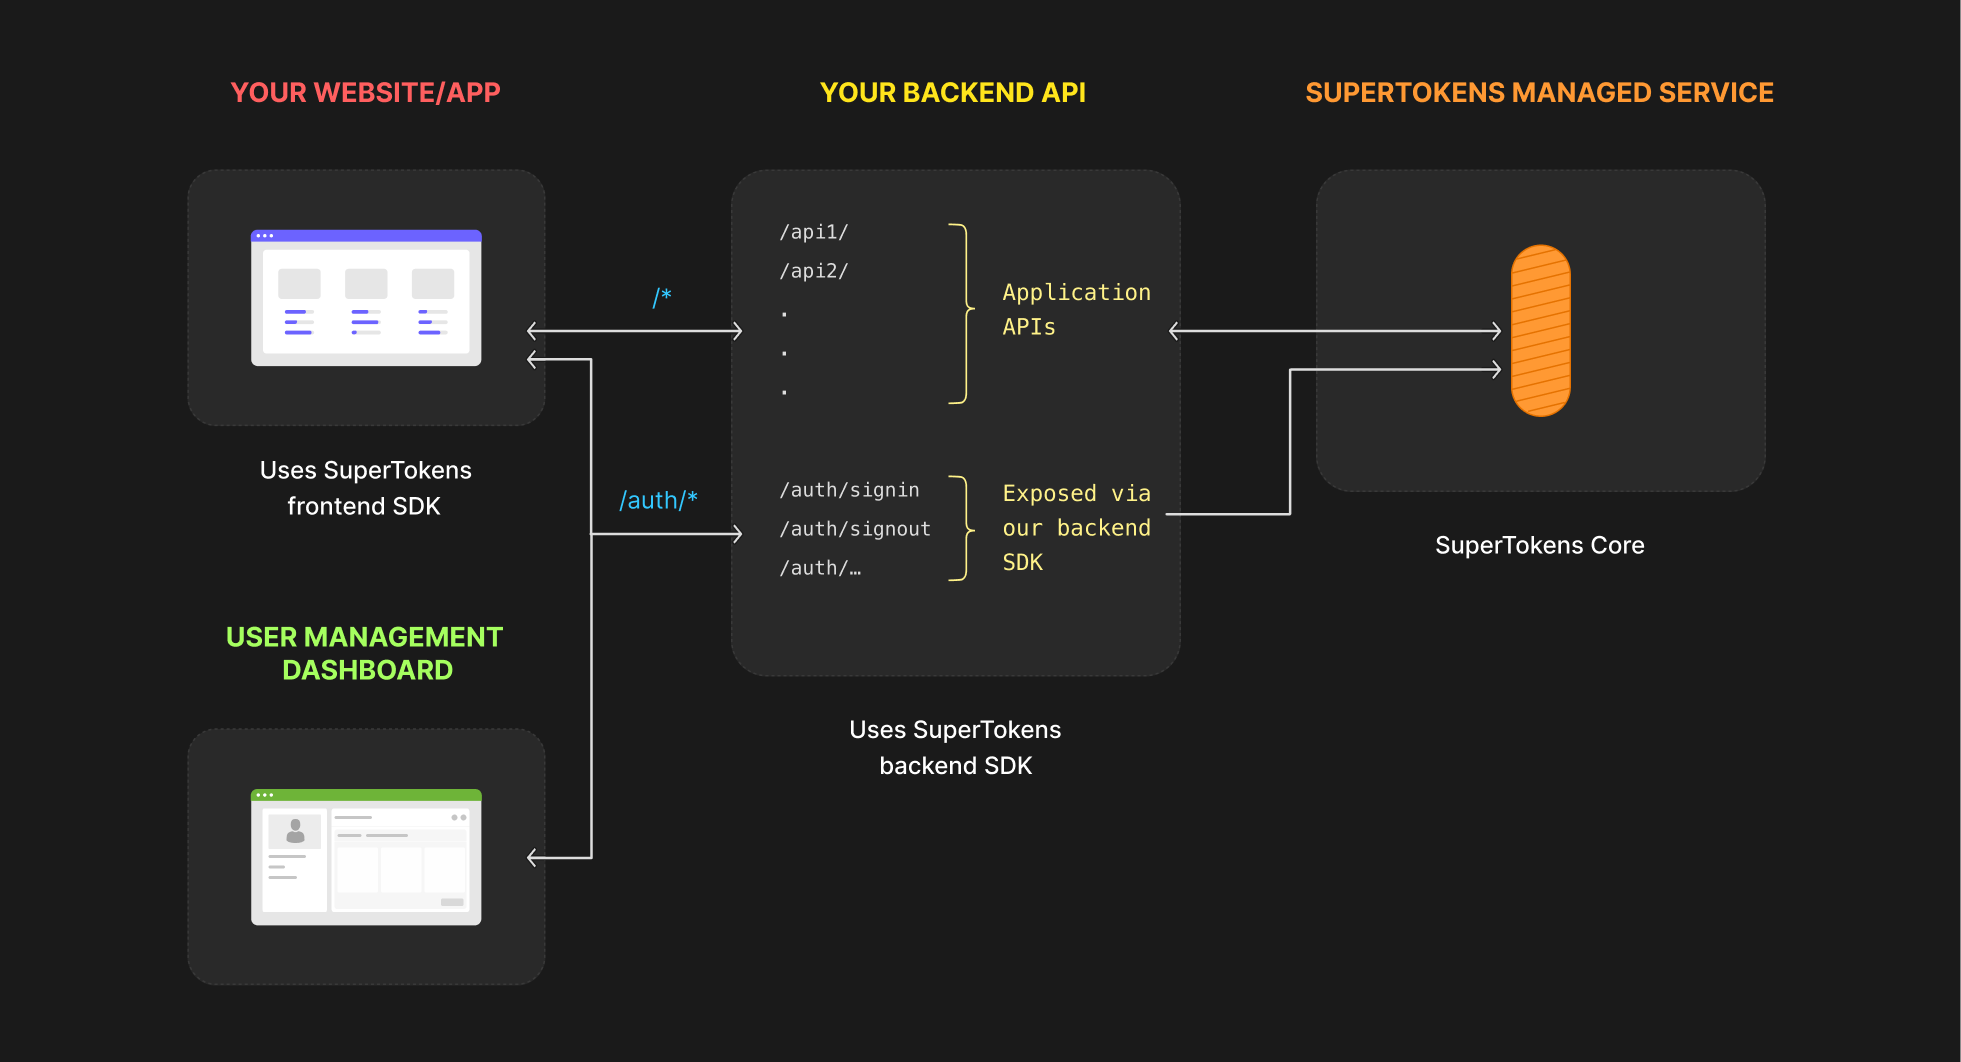
A SuperTokens deployment consists of three components:
- Frontend SDK: Responsible for rendering the login UI widgets and managing authentication sessions automatically.
- Backend SDK: Provides authentication APIs for the frontend and communicates with the SuperTokens core These APIs appear on the same domain as your application's APIs.
- SuperTokens Core: A HTTP service that contains the core business logic for authentication. It interfaces with the database and gets queried by the backend SDK for operations that require the database. This component can be self hosted by you, inside your own infrastructure.

Your app's frontend doesn't talk to the SuperTokens core directly. Instead, it talks to the authentication APIs exposed by the backend SDK in your API layer. The SDK then talks to the SuperTokens core.
If you need to call the APIs directly keep in mind the following aspects:
- You should never call the SuperTokens core API from your frontend. The frontend should only communicate using the routes exposed by the backend SDK.
You can follow the next video for a more detailed explanation on how each component works.
Examples
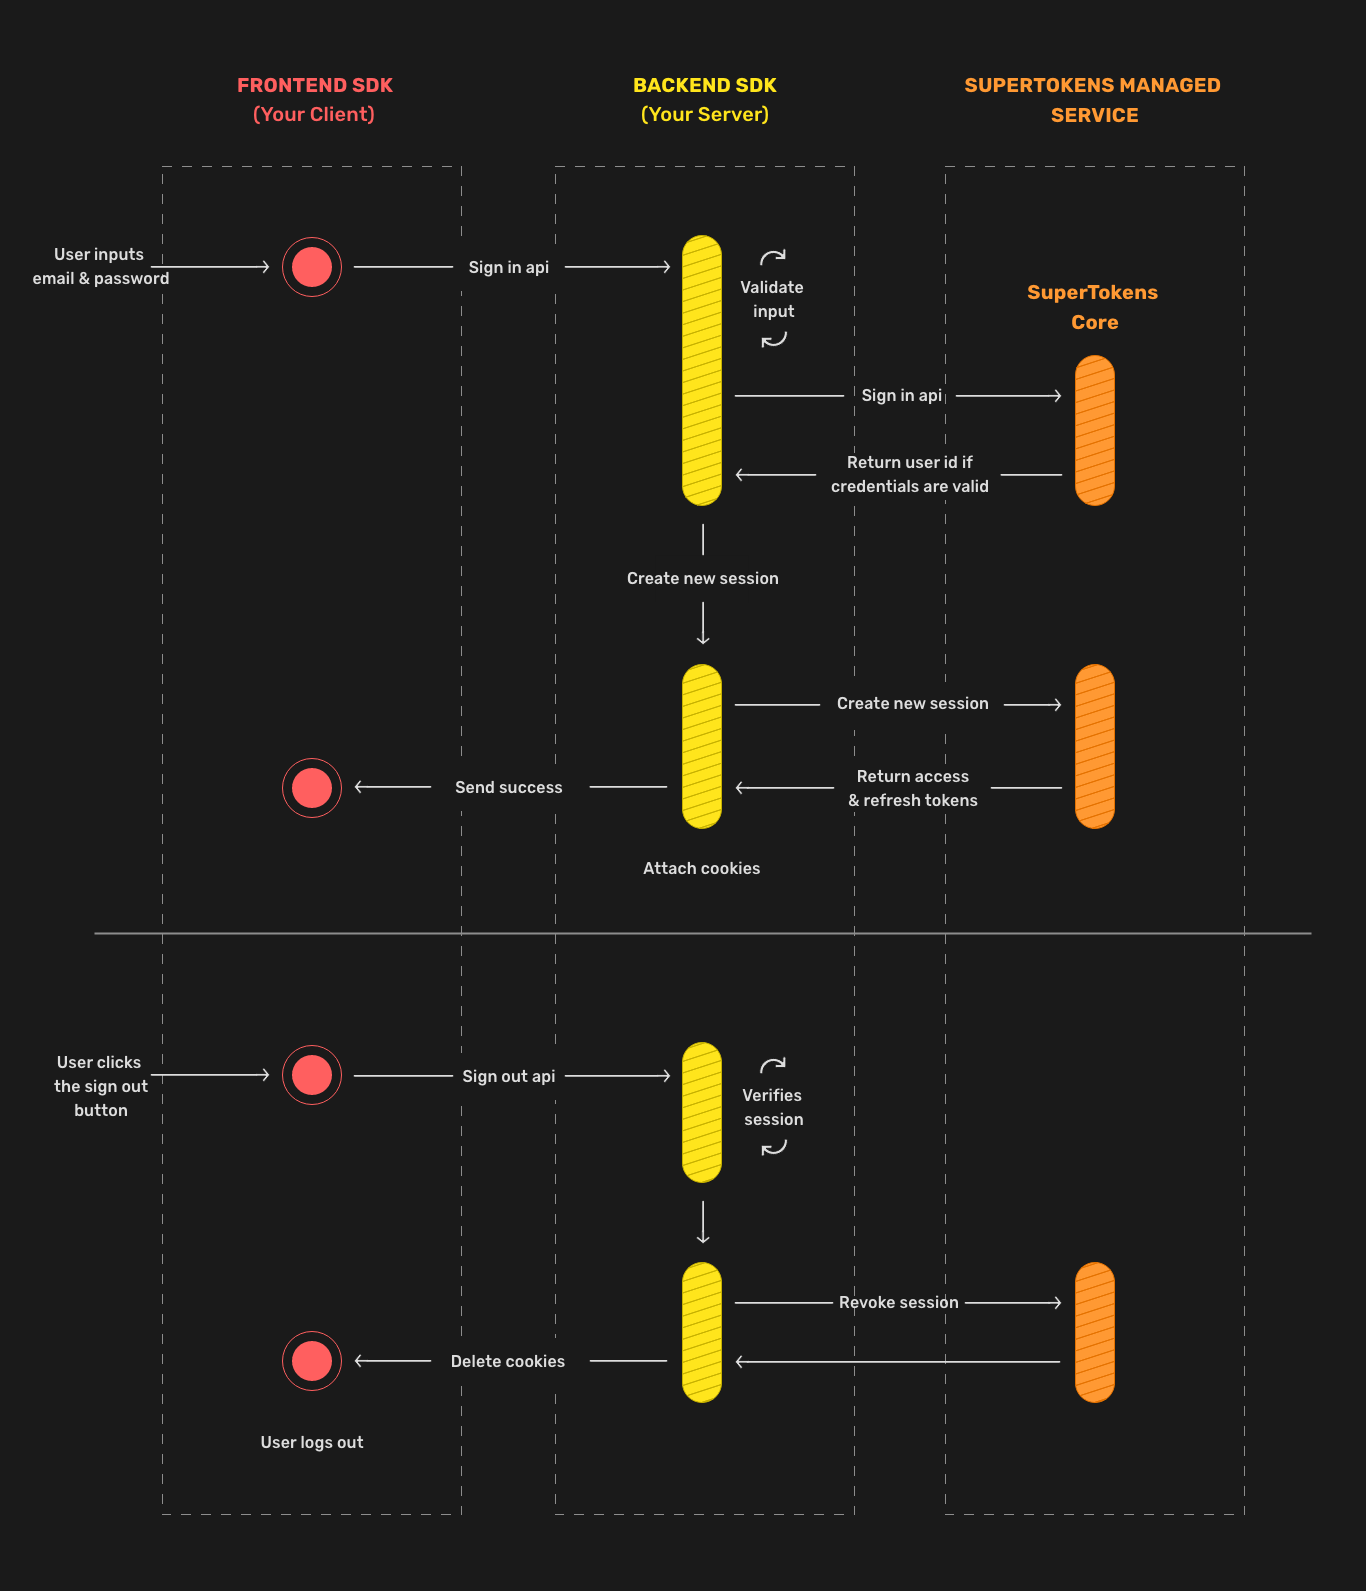
Sign in flow
Whilst this section explains the flow for email / password login, other login methods are similar on a conceptual level - it's with a different set of APIs
By default, web clients use cookies and all other clients use headers.
The next high level diagram shows the entire communication flow between the components.

Session verification flow
After sign in, the frontend receives the access and refresh tokens. For web-based clients, the system uses HttpOnly cookies by default. The access token is short lived, whilst the refresh token is long lived.
Refresh flow
FAQs
What about OAuth 2.0 flows?
If you are familiar with OAuth 2.0 and its flows, you may have noticed that we didn't mention any of them above. That is because, if your application doesn't have multiple websites, all logging in via a common login portal, you don't need OAuth 2.0. In fact, you don't even need OAuth 2.0 if you have multiple sub domains for your application - it can all work using session cookies.
However, in case you have applications that are on different domains and need to login via a common site (for example, foo.com and bar.com both login via auth.com), then you require OAuth. For that you can use the OAuth2 recipe which allows you to implement a common authentication service for web applications or microservices.
What is a recipe?
Each login method is a separate recipe. If you want email password login, you should see the email password recipe docs, for passwordless, you should see the passwordless recipe docs. You can use multiple recipes at once too. Most of these guides use the Session recipe along with one of the login recipes. SuperTokens divides its structure into recipes because when using a recipe, all the configurations and types are specific to that recipe's feature set. This, in turn, makes it easier for you to customize the auth logic.