Create Policies to enforce Row Level Security for Select and Insert requests
To enforce Row Level Security for the Users table we will need to create policies for Select and Insert requests.
-
These polices will retrieve the userId from the JWT and check if it matches the userId in the Supabase table.
-
We will need a PostgreSQL function to extract the userId from the JWT.
The payload in the JWT will have the following structure:
{
    userId,
    exp
}
Step 1. Create PostgreSQL function to retrieve userId from JWT
To create the PostgreSQL function, let's navigate back to the Supabase dashboard, select SQL from the sidebar menu, and click New query. This will create a new query called new sql snippet, which will allow us to run any SQL against our Postgres database.
-
Write the following and click
Run.create or replace function auth.user_id() returns text as $$
select nullif(current_setting('request.jwt.claims', true)::json->>'userId', '')::text;
$$ language sql stable; -
This will create a function called
auth.user_id(), which will inspect theuserIdfield of our JWT payload.
Step 2. Create Policies for SELECT and INSERT queries:
SELECT query policy
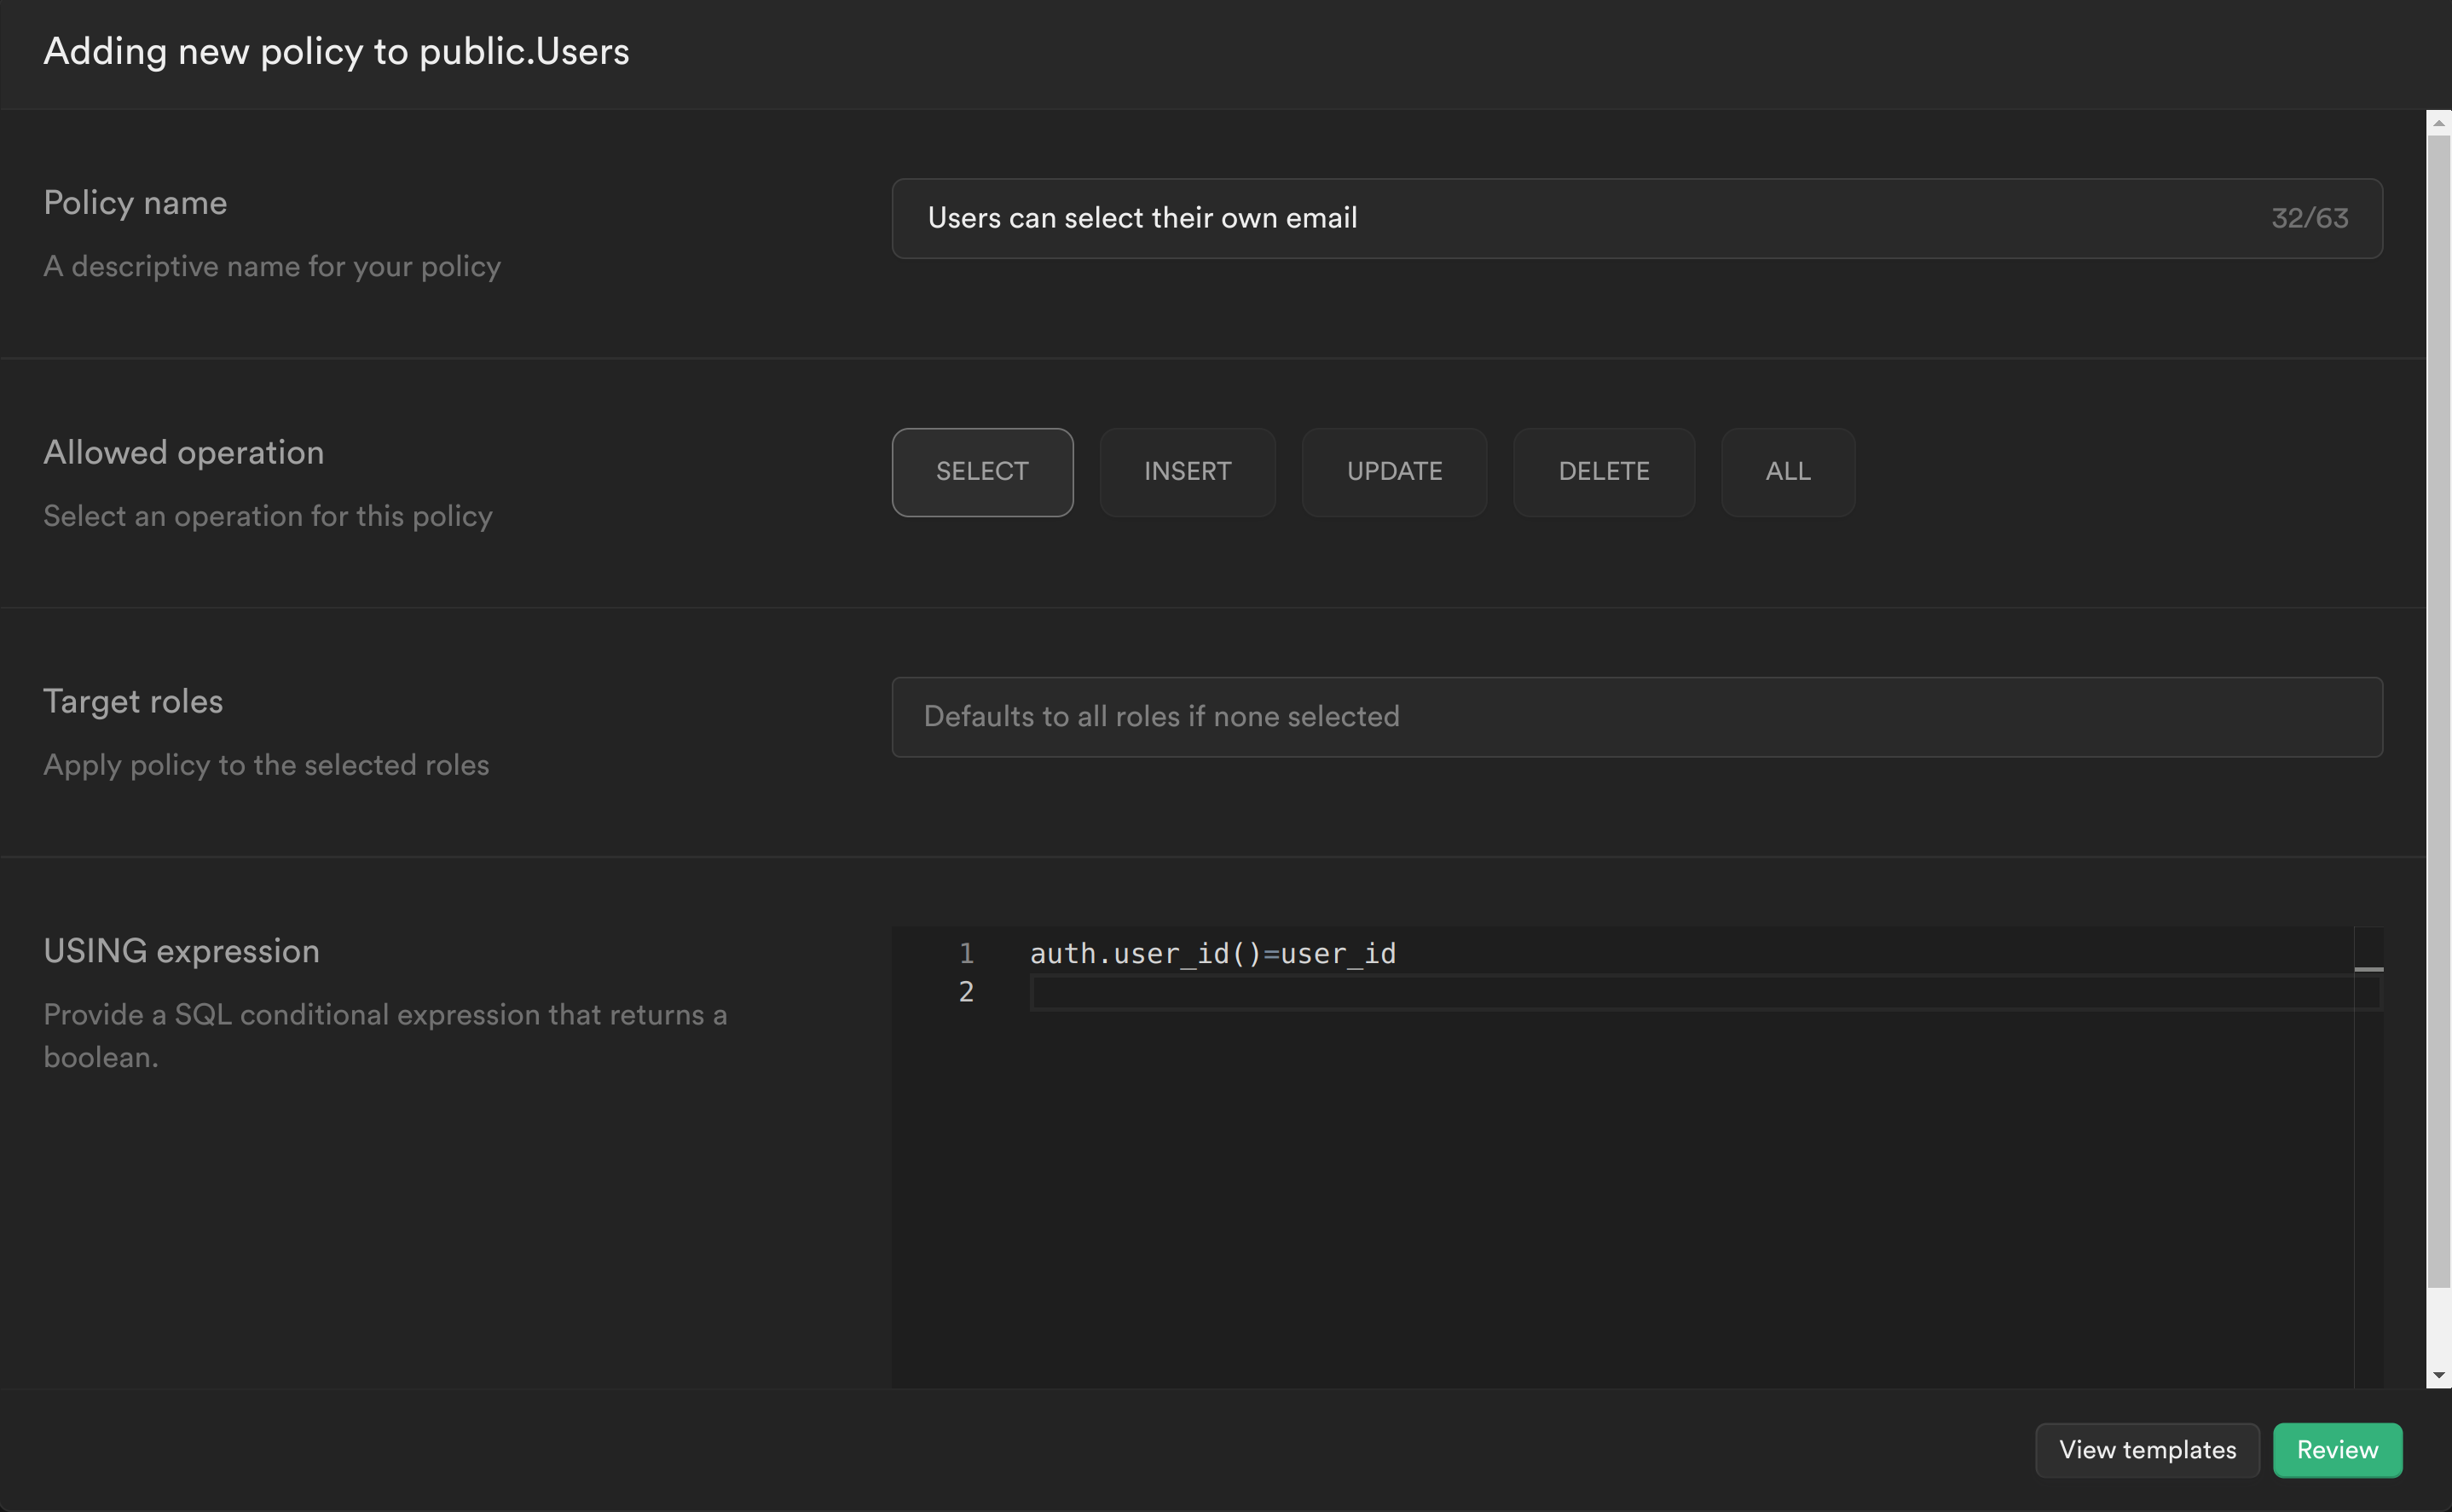
Our first policy will check whether the user is the owner of the email being retrieved.
-
Select
Authenticationfrom the Supabase sidebar menu, clickPolicies, and thenNew Policyon theUserstable.
-
From the modal, select
Create a policy from scratchand add the following.
-
This policy is calling the PostgreSQL function we just created to get the currently logged in user's ID
auth.user_id()and checking whether this matches theuser_idcolumn for the currentemail. If it does, then it will allow the user to select it, otherwise it will continue to deny. -
Click
Reviewand thenSave policy.
INSERT query policy
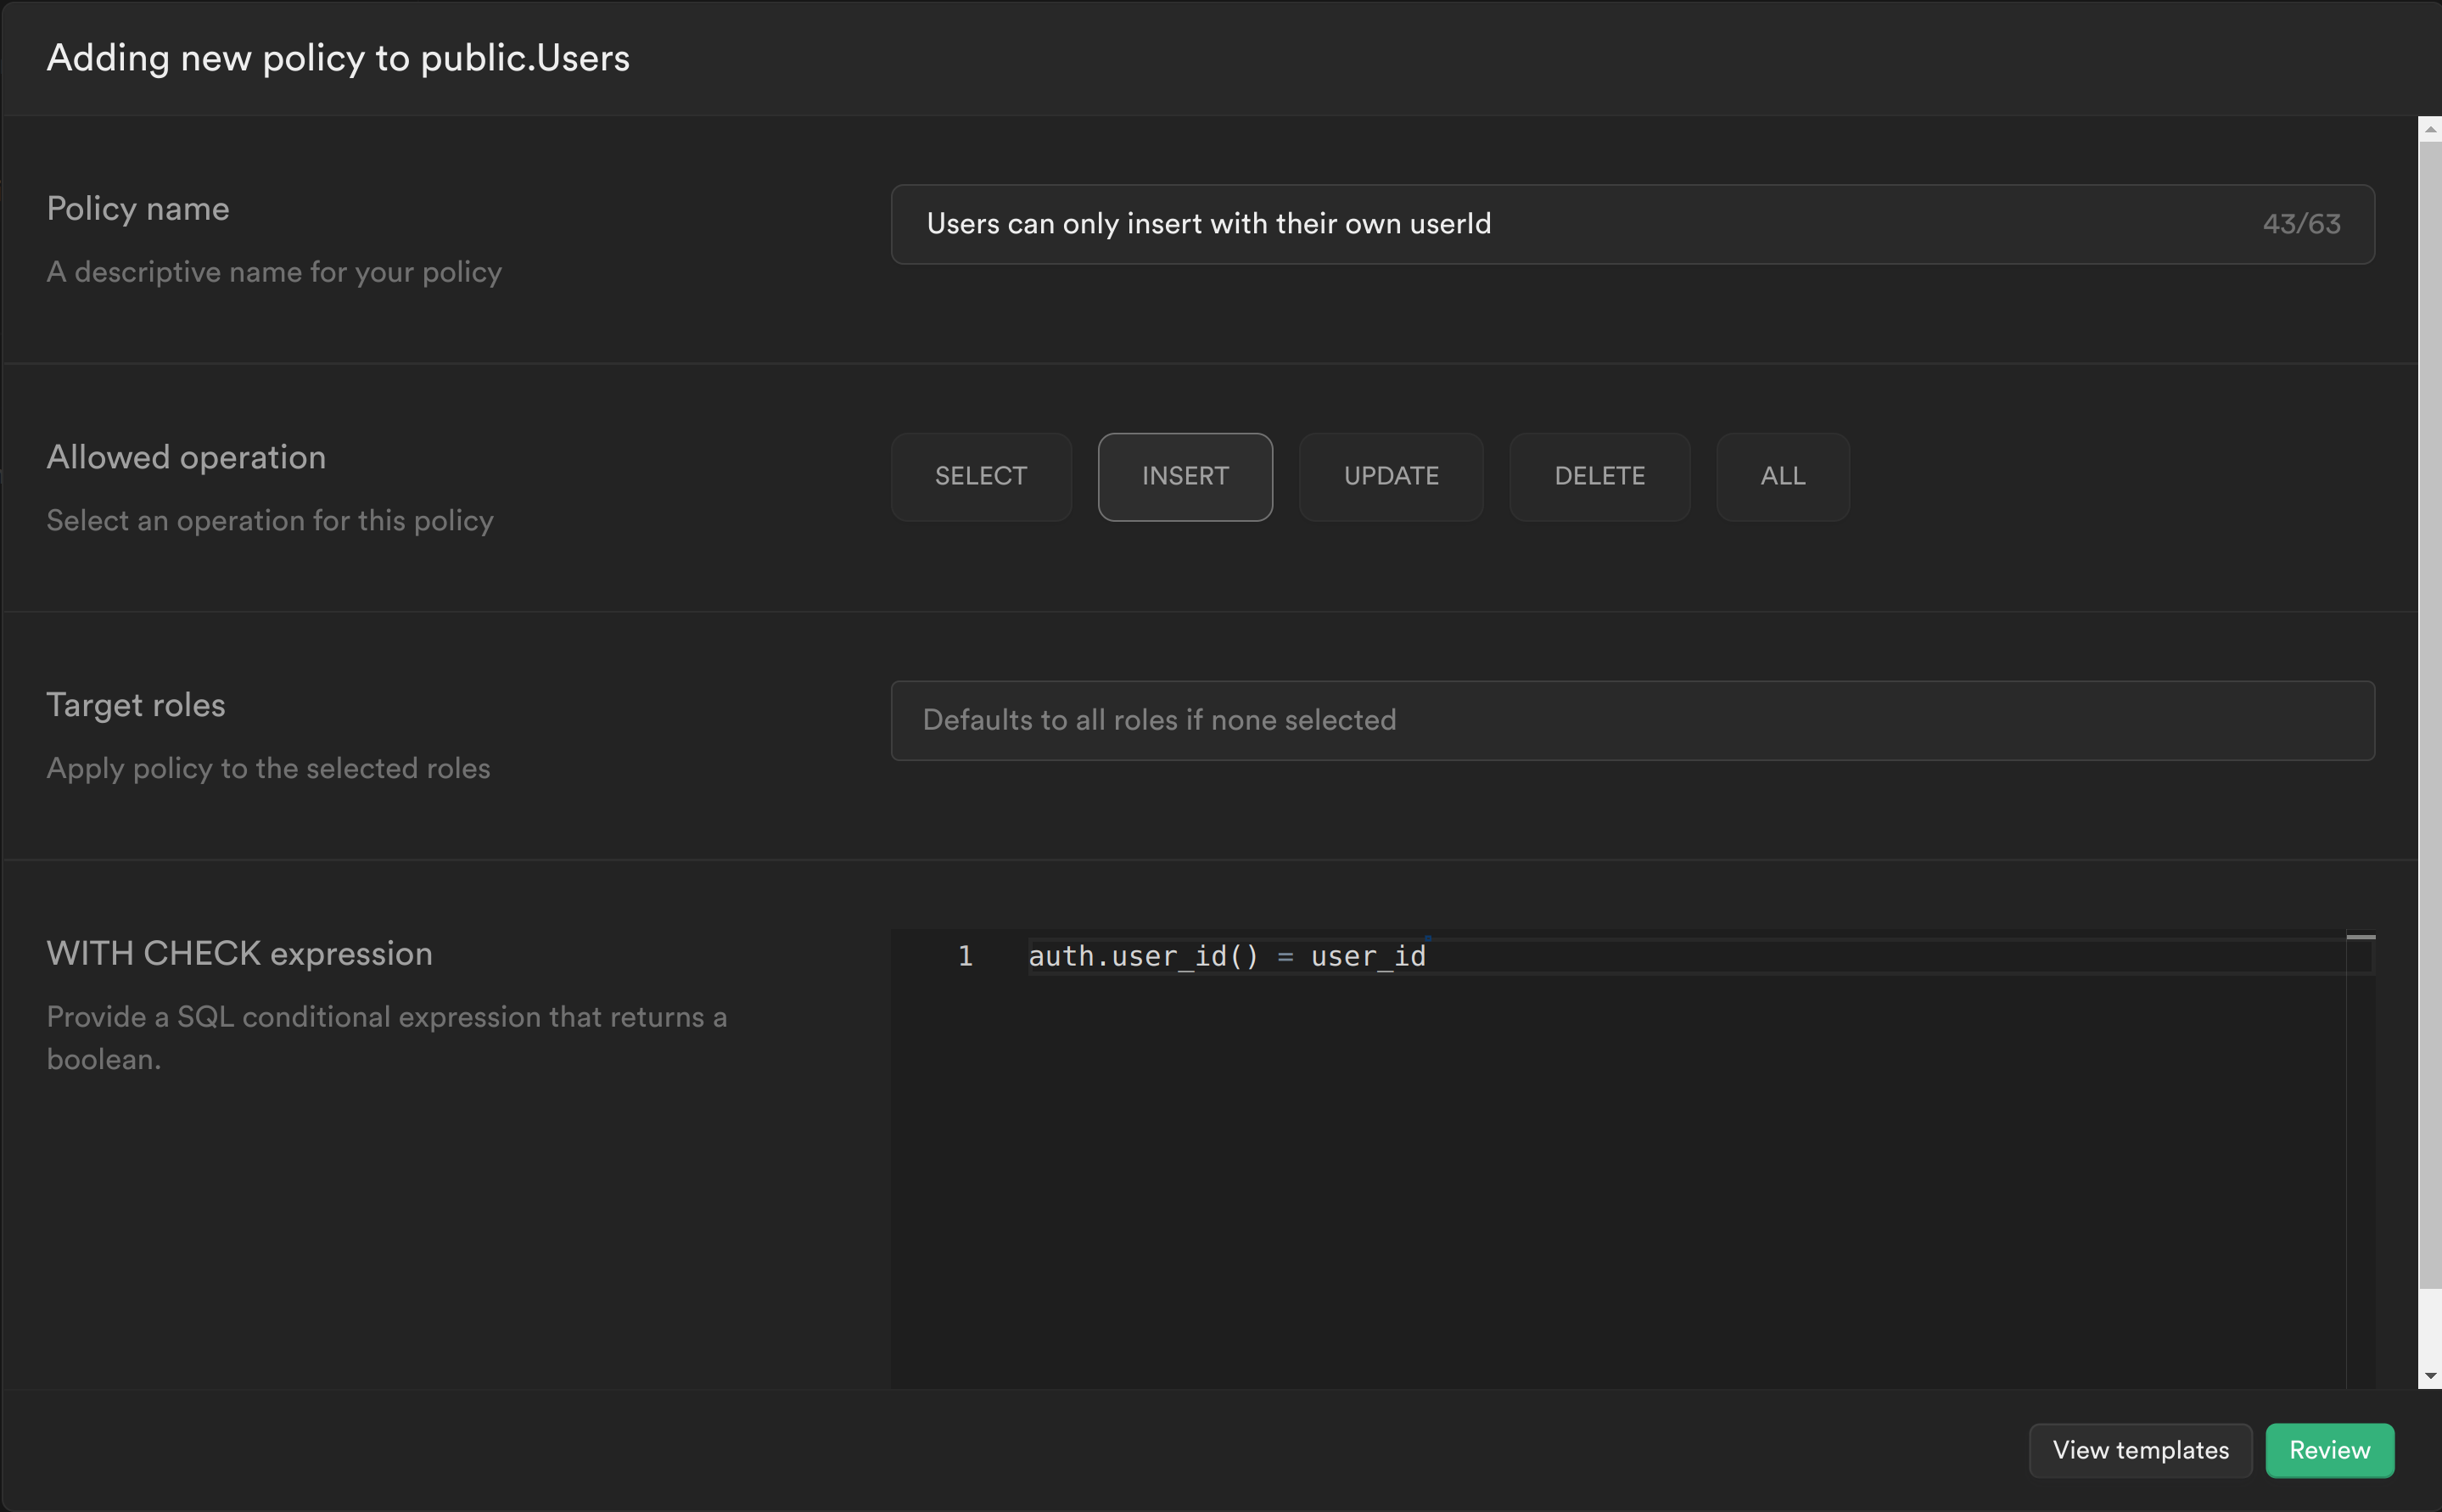
Our second policy will check whether the user_id being inserted is the same as the userId in the JWT.
-
Create another policy and add the following:

Similar to the previous policy we are calling the PostgreSQL function we created to get the currently logged in user's ID and check whether this matches the user_id column for the row we are trying to insert. If it does, then it will allow the user to insert the row, otherwise it will continue to deny.
Click Review and then Save policy.
Step 3. Test your changes
You can now sign up and you should see the following screen:

If you navigate to your table you should see a new row with the user's user_id and email.
