File length: 4327
# Quickstart - Next Steps
Source: https://supertokens.com/docs/quickstart/next-steps
## Overview
Now that you have completed the quickstart guide there are a few more things that you need to take care of on the road towards a production ready authentication experience.
## Configure the Core Service
If you have signed up and deployed a SuperTokens environment already, you can skip this step.
Otherwise, please follow these instructions to use the correct **SuperTokens Core** instance in your application.
The steps show you how to connect to a **SuperTokens Managed Service Environment**.
If you want to self host the core instance please check the [following guide](/docs/deployment/self-host-supertokens).
### 1. Sign up for a SuperTokens account
Open this [page](https://supertokens.com/auth) in order to access the account creation page.
Select the account that you want to use and wait for the action to complete.
### 2. Create a deployment
 After you have signed up, you can skip over the initial wizard that generates an example application.
You already have created one by going though the quickstart guide.
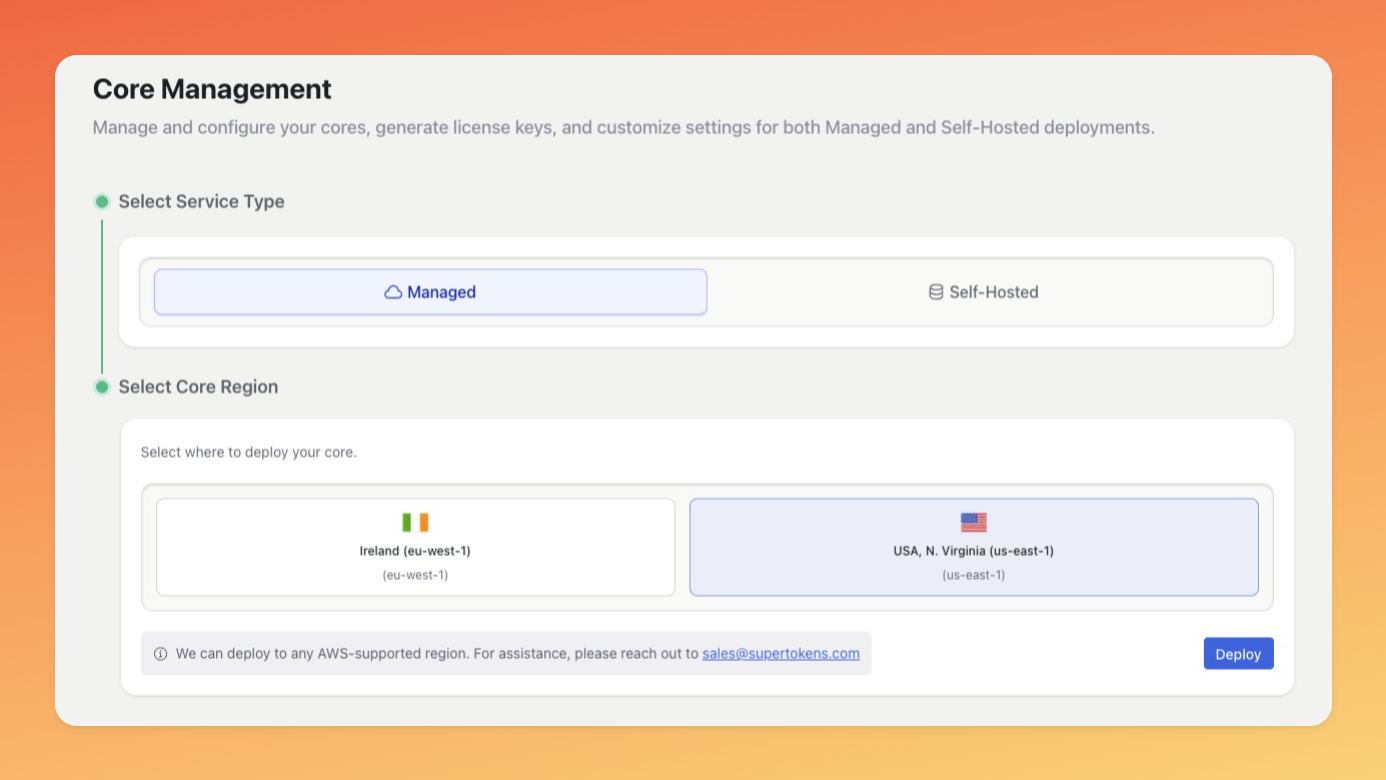
Once you are on the main dashboard page, select a region that is closest to where your services are hosted.
Click **Deploy** and wait for the action to complete.
Our internal service will deploy a separate environment based on your selection.
After this process is complete, the UI will render the new list of deployments.
:::info
The initial setup flow only configures a development environment.
In order to use SuperTokens in production, you will have to create a separate deployment.
:::
### 3. Connect the Backend SDK with SuperTokens 🔌
After you have signed up, you can skip over the initial wizard that generates an example application.
You already have created one by going though the quickstart guide.
Once you are on the main dashboard page, select a region that is closest to where your services are hosted.
Click **Deploy** and wait for the action to complete.
Our internal service will deploy a separate environment based on your selection.
After this process is complete, the UI will render the new list of deployments.
:::info
The initial setup flow only configures a development environment.
In order to use SuperTokens in production, you will have to create a separate deployment.
:::
### 3. Connect the Backend SDK with SuperTokens 🔌
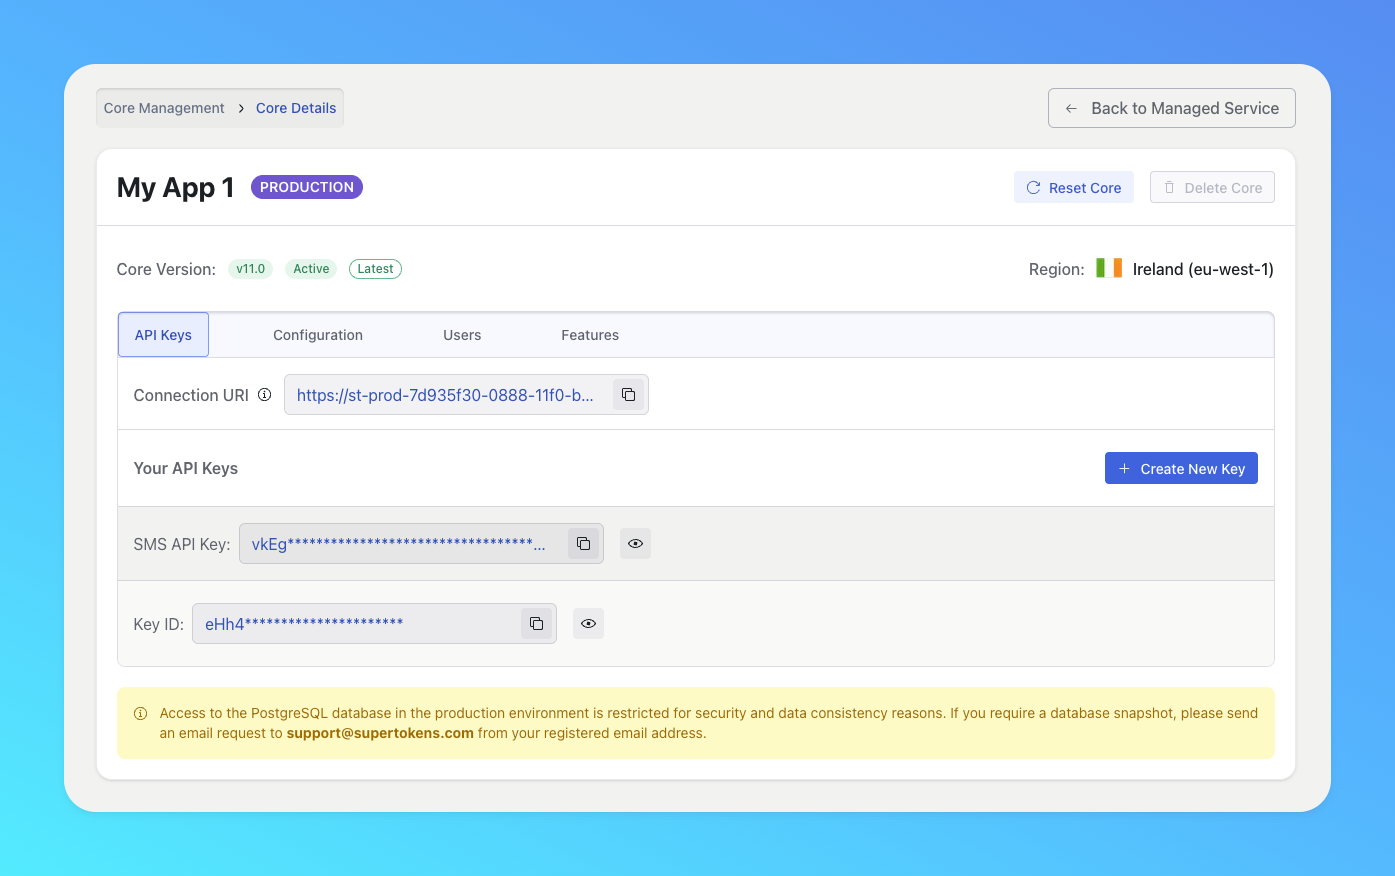 Select the newly created deployment in order to access its details.
Copy the `Connection URI` and `API Key` values from this page and paste them in your backend code.
```tsx
supertokens.init({
// highlight-start
supertokens: {
connectionURI: "",
apiKey: "",
},
// highlight-end
appInfo: {
apiDomain: "...",
appName: "...",
websiteDomain: "...",
},
recipeList: [],
});
```
```go
Post Sign In Actions
Add custom logic in the authentication flow.
## Explore Additional Features
You can also review the additional features that **SuperTokens** exposes.
Those can help you extend the authentication implementation on different levels.
Self Host SuperTokens Core
Run the SuperTokens in your own infrastructure.
Migration Guide
Migrate your data from other authentication providers.
Multi Factor Authentication
Set up additional authentication layers in you sign in process.
User Management Dashboard
Administrate your users from the SuperTokens Dashboard.
User Roles and Permissions
Adjust the authorization settings in your application.
Select the newly created deployment in order to access its details.
Copy the `Connection URI` and `API Key` values from this page and paste them in your backend code.
```tsx
supertokens.init({
// highlight-start
supertokens: {
connectionURI: "",
apiKey: "",
},
// highlight-end
appInfo: {
apiDomain: "...",
appName: "...",
websiteDomain: "...",
},
recipeList: [],
});
```
```go
Post Sign In Actions
Add custom logic in the authentication flow.
## Explore Additional Features
You can also review the additional features that **SuperTokens** exposes.
Those can help you extend the authentication implementation on different levels.
Self Host SuperTokens Core
Run the SuperTokens in your own infrastructure.
Migration Guide
Migrate your data from other authentication providers.
Multi Factor Authentication
Set up additional authentication layers in you sign in process.
User Management Dashboard
Administrate your users from the SuperTokens Dashboard.
User Roles and Permissions
Adjust the authorization settings in your application.