You are authenticated with SuperTokens! (UserId: {session.userId})
Your email retrieved from Supabase: {userEmail}
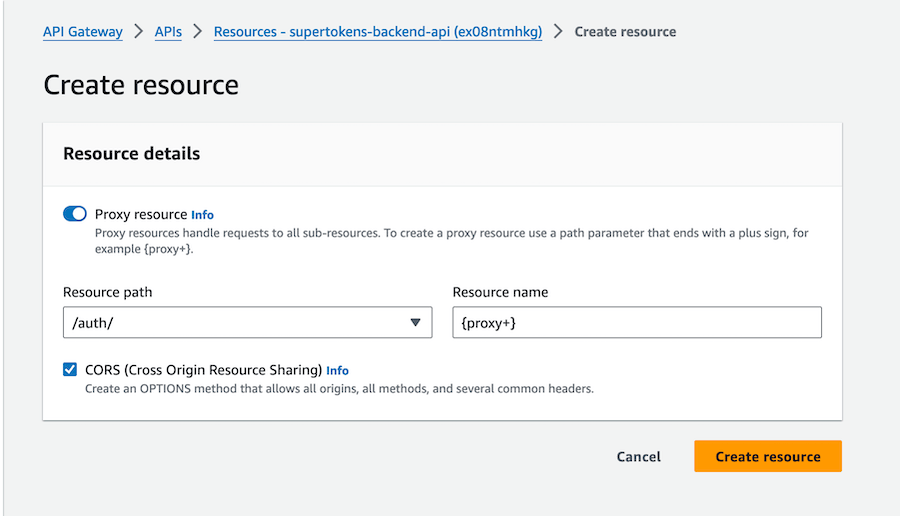
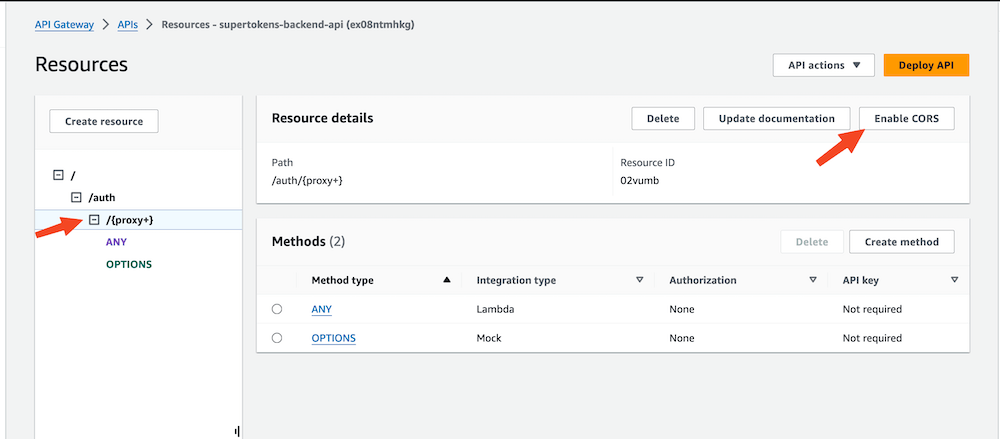
 #### 1.2 Set up authentication routes
Create a `/auth` resource and then `/auth/{proxy+}` resources.
This will act as a catch-all for all SuperTokens auth routes.
**Enable CORS** while creating the proxy resource.
#### 1.2 Set up authentication routes
Create a `/auth` resource and then `/auth/{proxy+}` resources.
This will act as a catch-all for all SuperTokens auth routes.
**Enable CORS** while creating the proxy resource.
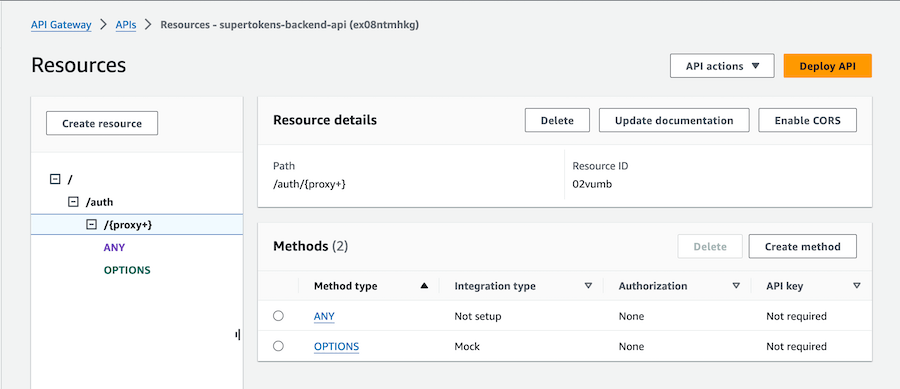 #### 1.3 Attach lambda to the `ANY` method of the proxy resource
Click on the "ANY" method and then "Integration" to configure the lambda function.
Check **Lambda proxy integration** and then select your lambda function.
#### 1.3 Attach lambda to the `ANY` method of the proxy resource
Click on the "ANY" method and then "Integration" to configure the lambda function.
Check **Lambda proxy integration** and then select your lambda function.
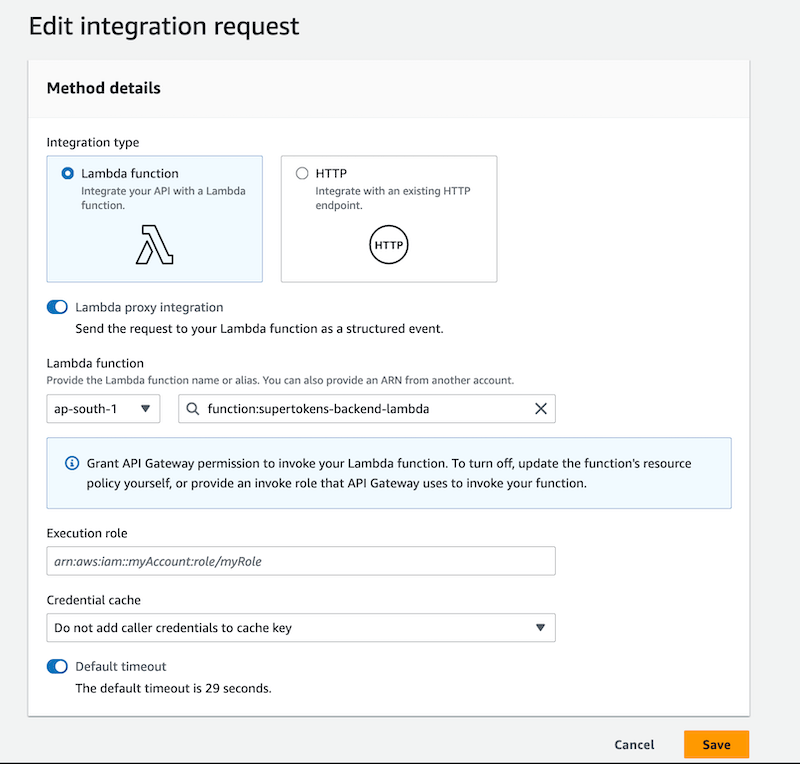 :::important
Ensure that the **Lambda proxy integration** toggle is turned on.
:::
#### 1.4 Enable CORS for the proxy path
Click on the `{proxy+}` resource and then "Enable CORS" button to open the CORS configuration page.
:::important
Ensure that the **Lambda proxy integration** toggle is turned on.
:::
#### 1.4 Enable CORS for the proxy path
Click on the `{proxy+}` resource and then "Enable CORS" button to open the CORS configuration page.
 In the CORS configuration page do the following:
- Select the 'Default 4XX' and 'Default 5XX' checkboxes under Gateway responses
- Select the 'OPTIONS' checkbox under Methods
- Add `rid,fdi-version,anti-csrf,st-auth-mode` to the existing `Access-Control-Allow-Headers`
- Set `Access-Control-Allow-Origin` to `'
In the CORS configuration page do the following:
- Select the 'Default 4XX' and 'Default 5XX' checkboxes under Gateway responses
- Select the 'OPTIONS' checkbox under Methods
- Add `rid,fdi-version,anti-csrf,st-auth-mode` to the existing `Access-Control-Allow-Headers`
- Set `Access-Control-Allow-Origin` to `'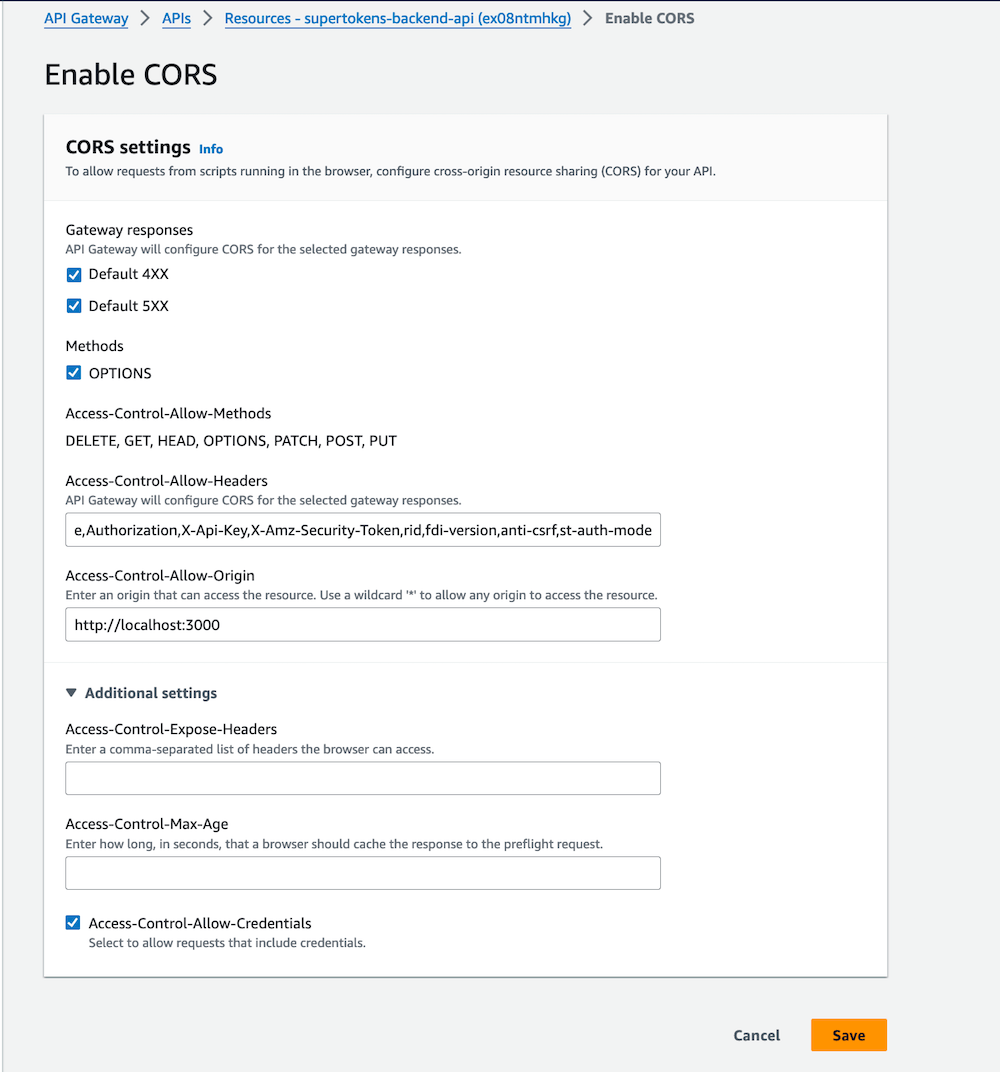 #### 1.5 Deploy the API Gateway
Click the **Deploy API** button in the top right corner to deploy the API. During deployment, you'll be prompted to create a stage; for this tutorial, name the stage `dev`. After deployment, you will receive your `Invoke URL`.
:::important
Update `apiDomain`, `apiBasePath`, and `apiGatewayPath` in both Lambda configuration and your frontend config if they have changed post API Gateway configuration.
:::
### 2. Set up Lambda layer
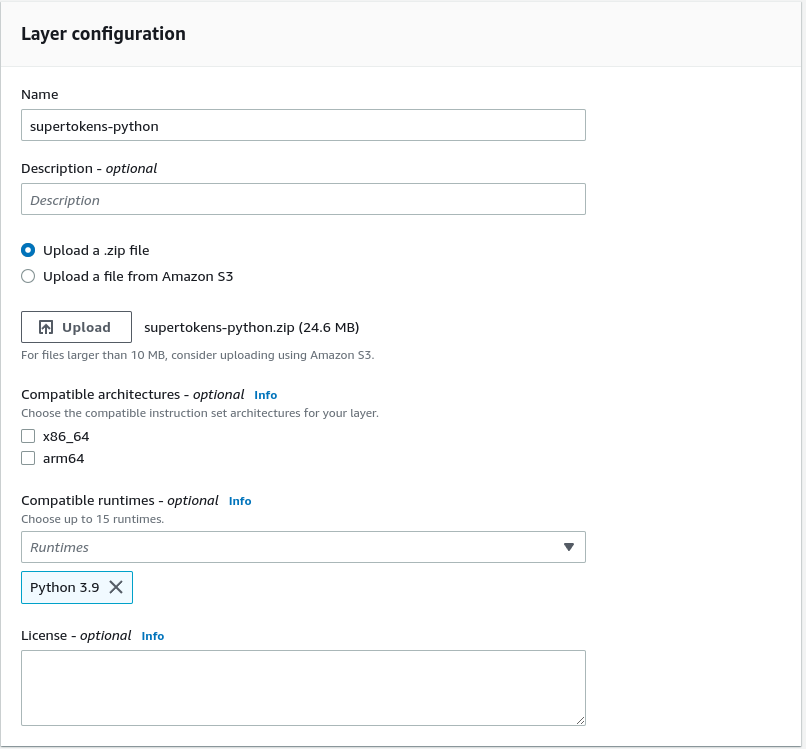
#### 2.1 Create Lambda layer with required libraries
#### 1.5 Deploy the API Gateway
Click the **Deploy API** button in the top right corner to deploy the API. During deployment, you'll be prompted to create a stage; for this tutorial, name the stage `dev`. After deployment, you will receive your `Invoke URL`.
:::important
Update `apiDomain`, `apiBasePath`, and `apiGatewayPath` in both Lambda configuration and your frontend config if they have changed post API Gateway configuration.
:::
### 2. Set up Lambda layer
#### 2.1 Create Lambda layer with required libraries
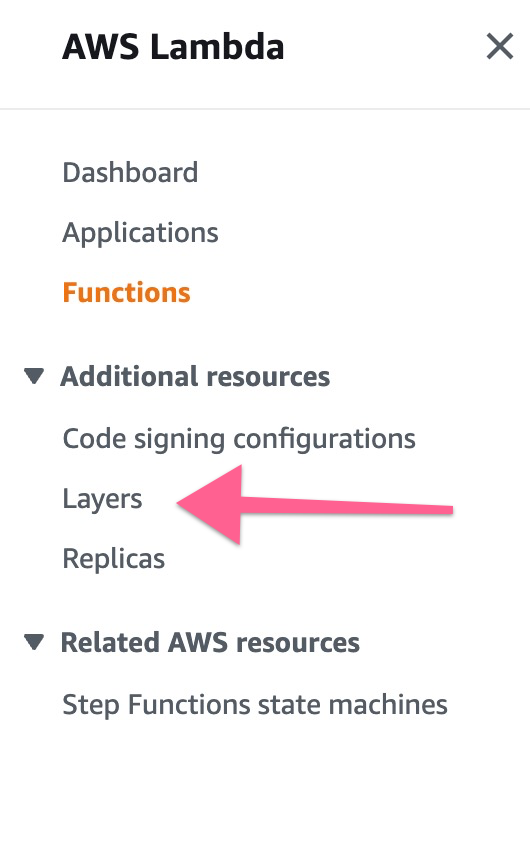 Click "Create Layer" button:
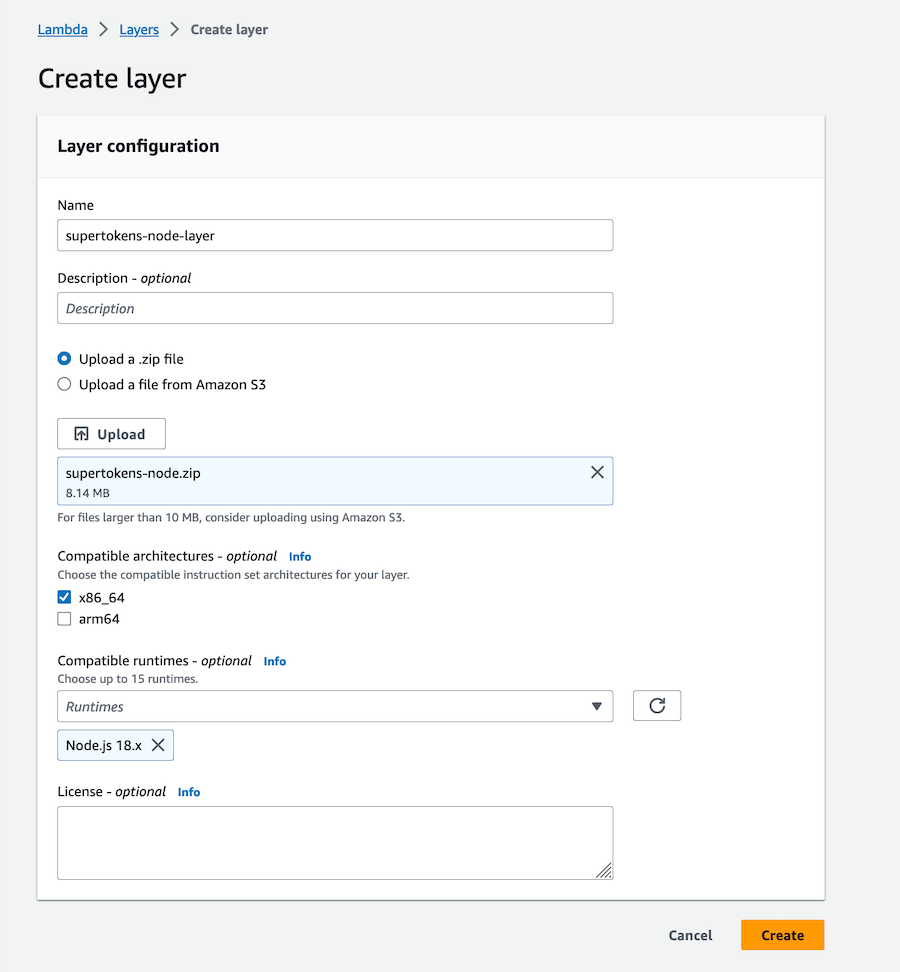
 Give a name for your layer, upload the zip and select the runtime
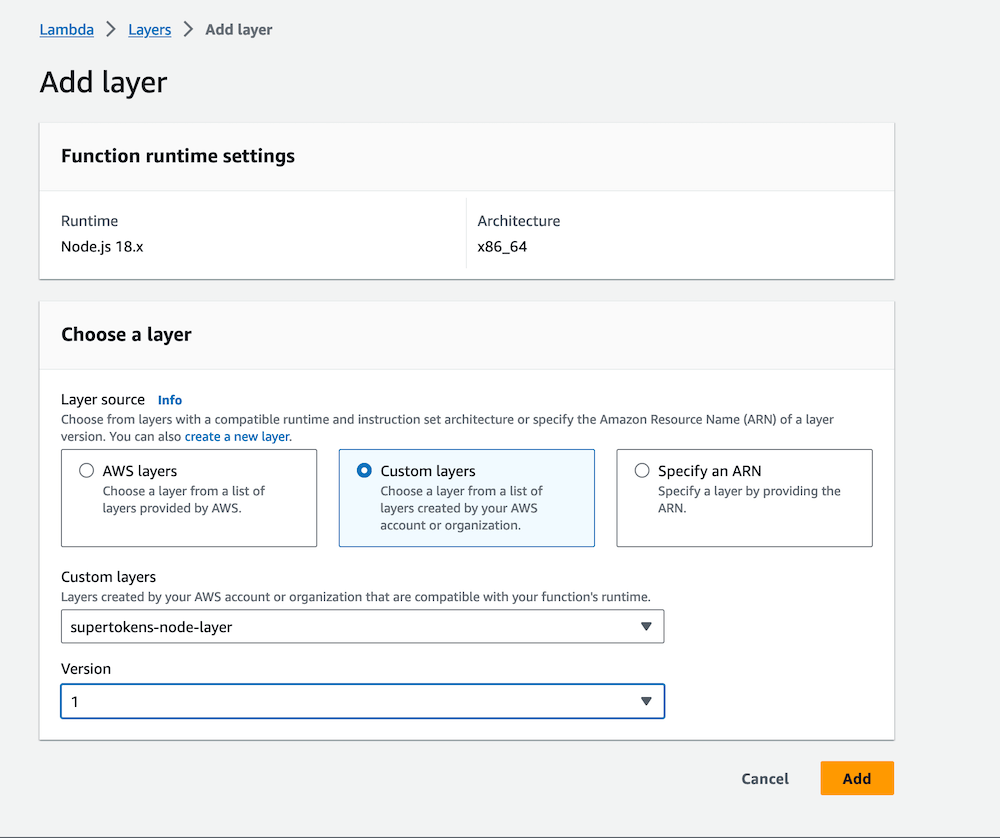
 Select `Custom Layer` and then select the layer we created in the first step:
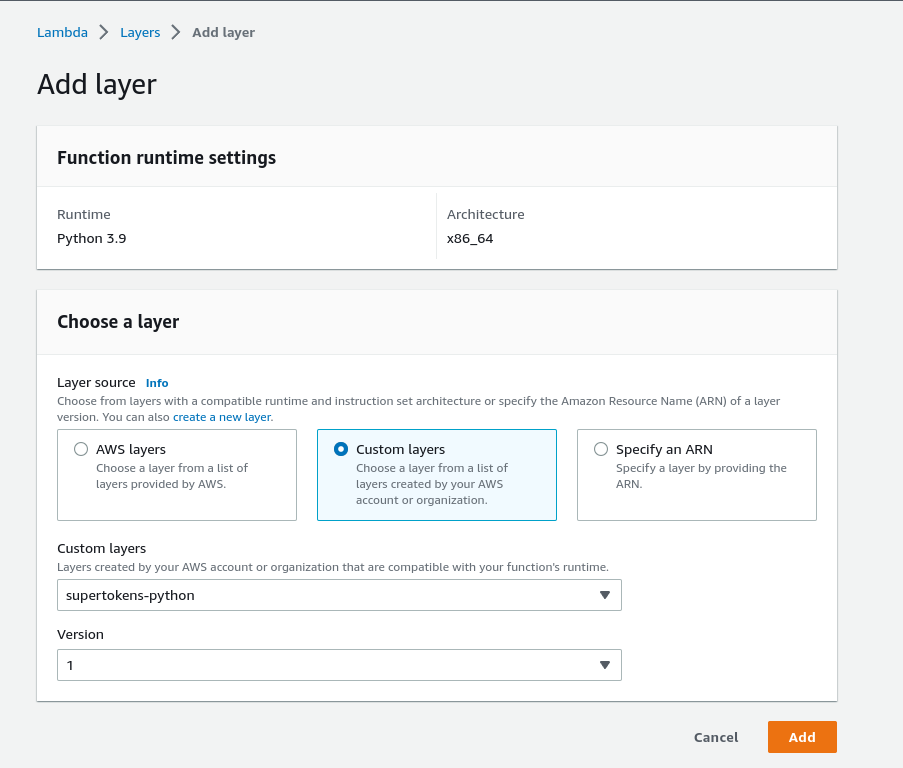
:::important Since, we are using `esm` imports, we will need to set `NODE_OPTIONS="--experimental-specifier-resolution=node"` flag in the lambda environment variables. See the [Node.js](https://nodejs.org/docs/latest-v16.x/api/esm.html#customizing-esm-specifier-resolution-algorithm) documentation for more information.
 :::
:::
https://try.supertokens.com as the connection URI in the init function?
)
}} defaultAnswer="Yes">
onChange(e.target.checked.toString())}>
I agree to the{" "}
Terms and Conditions
),
}]
}
// highlight-end
}
}),
Session.init()
]
});
```
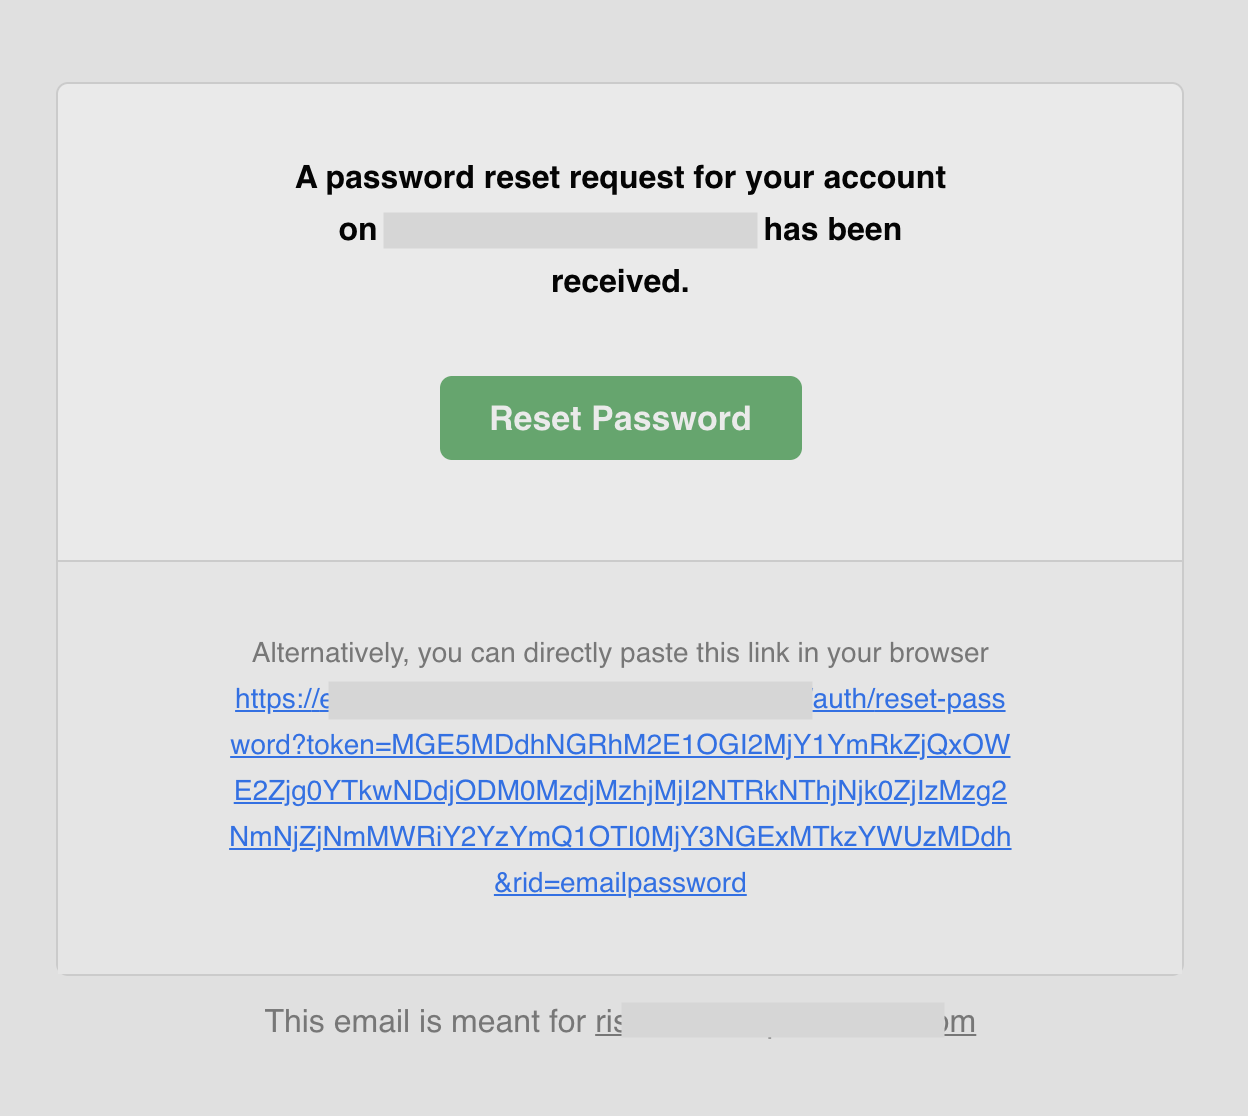 You can find the [source code of this template on GitHub](https://github.com/supertokens/email-sms-templates/blob/master/email-html/password-reset.html).
To customize the template check the [email delivery](/docs/platform-configuration/email-delivery) section for more information.
---
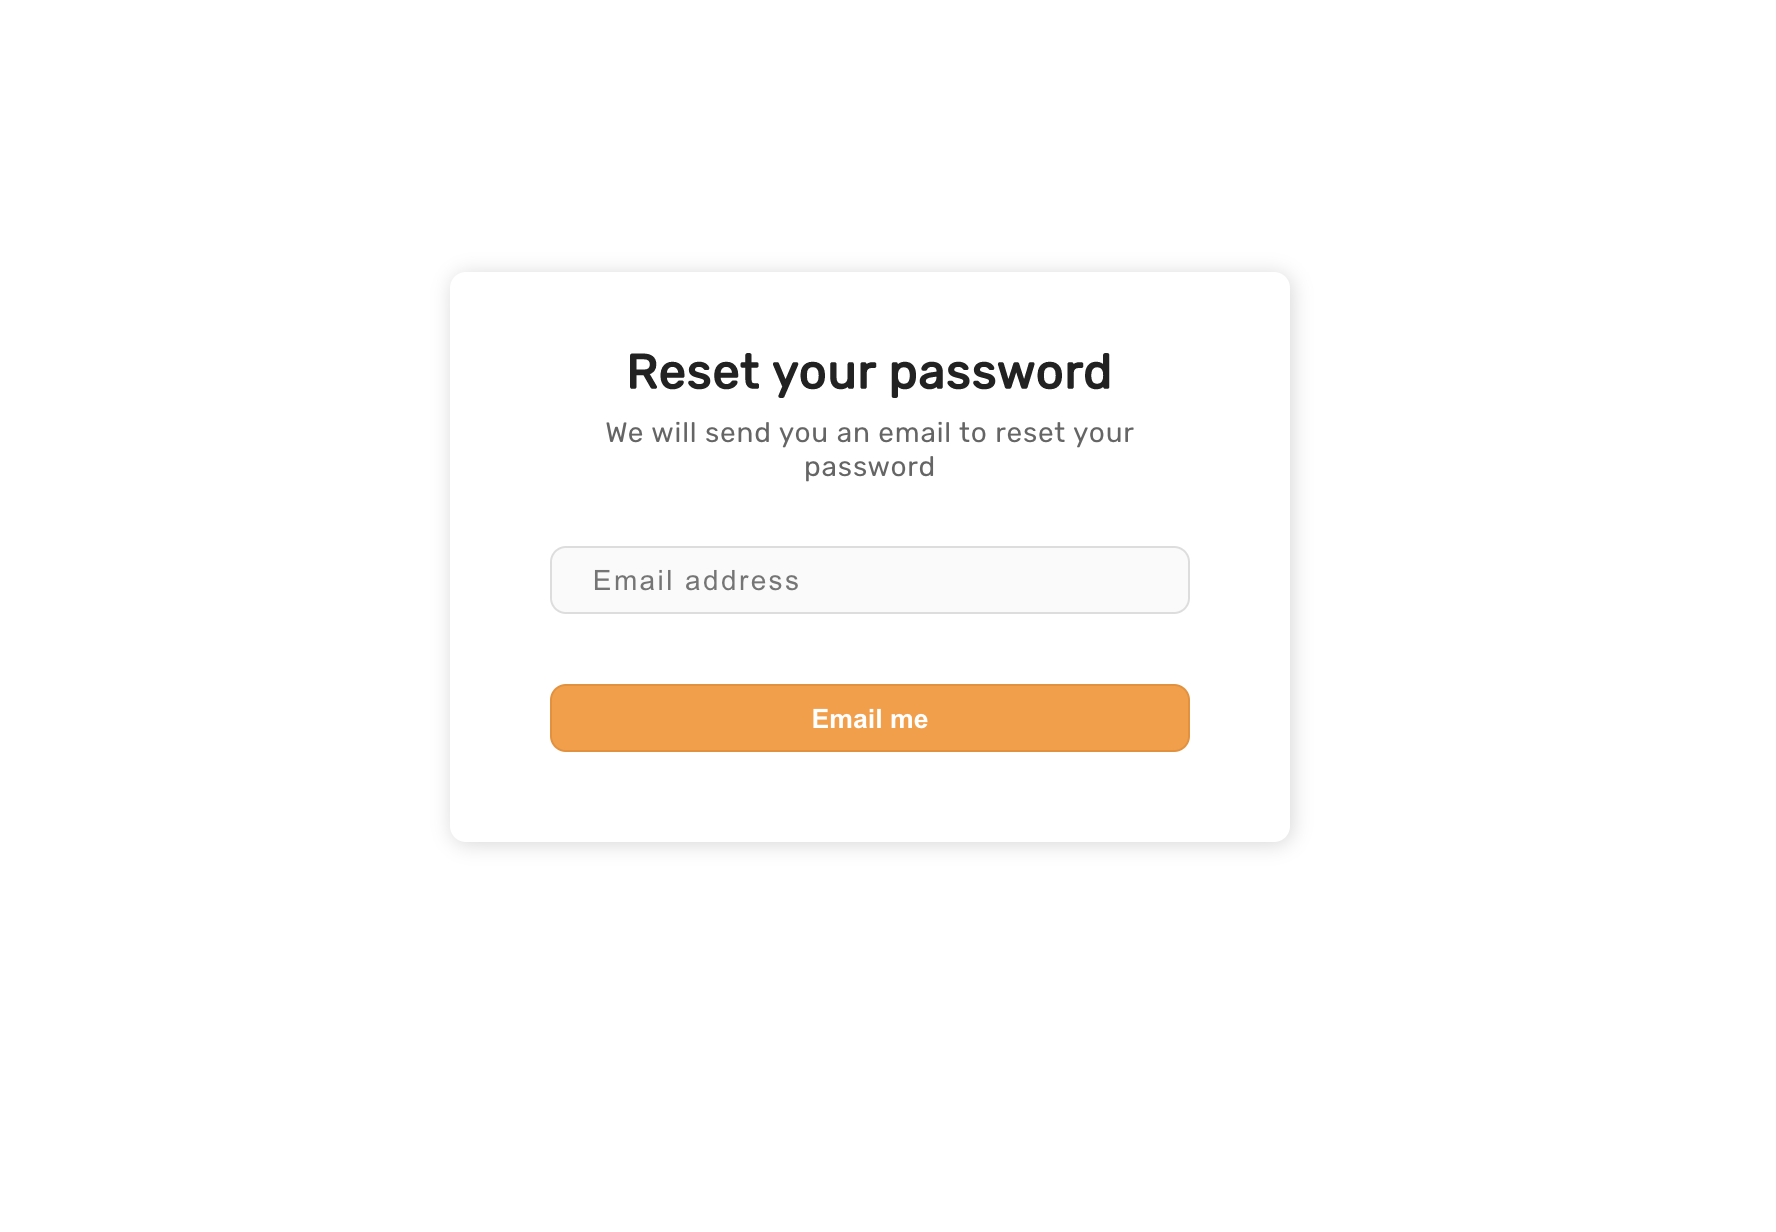
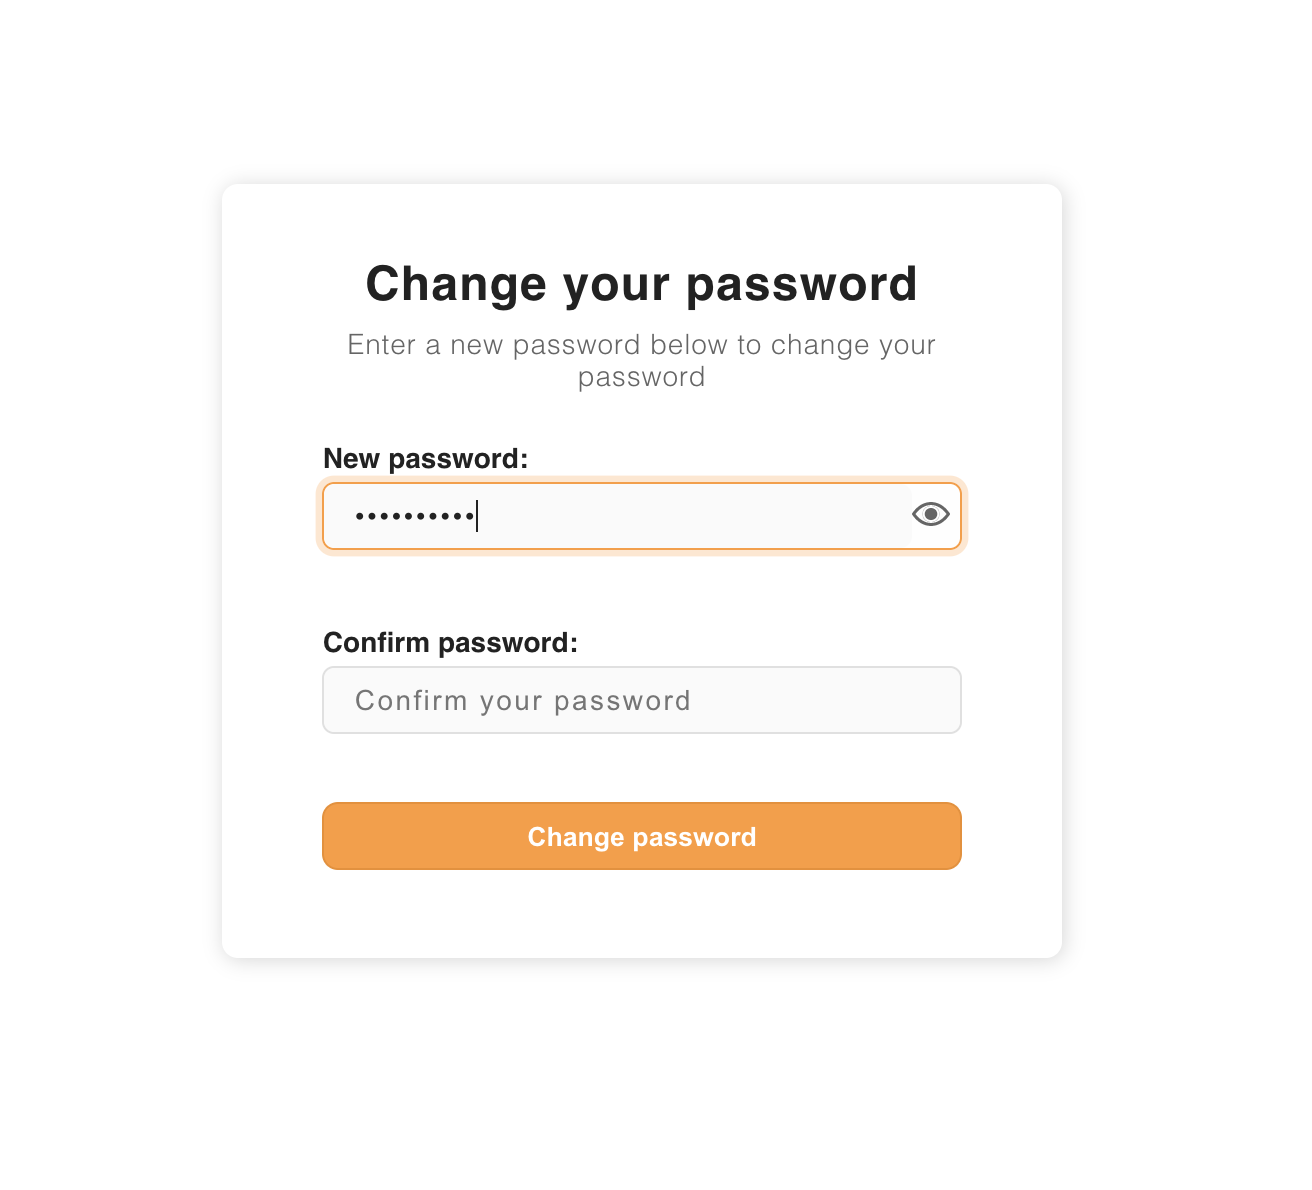
## Embed the reset form in a page
To embed the reset form in a page you can use the next steps.
You can find the [source code of this template on GitHub](https://github.com/supertokens/email-sms-templates/blob/master/email-html/password-reset.html).
To customize the template check the [email delivery](/docs/platform-configuration/email-delivery) section for more information.
---
## Embed the reset form in a page
To embed the reset form in a page you can use the next steps.
// highlight-next-line
)
}
}
```
Step 2) Calling the `signinup` API to consume the authorisation token
Once you have the authorization code from the auth provider, you need to call the `signinup` API exposed by the backend `SDK` as shown below: ```bash curl --location --request POST '{"Login with " + props.name}
}
],
// highlight-end
// ...
},
// ...
}),
// ...
]
});
```
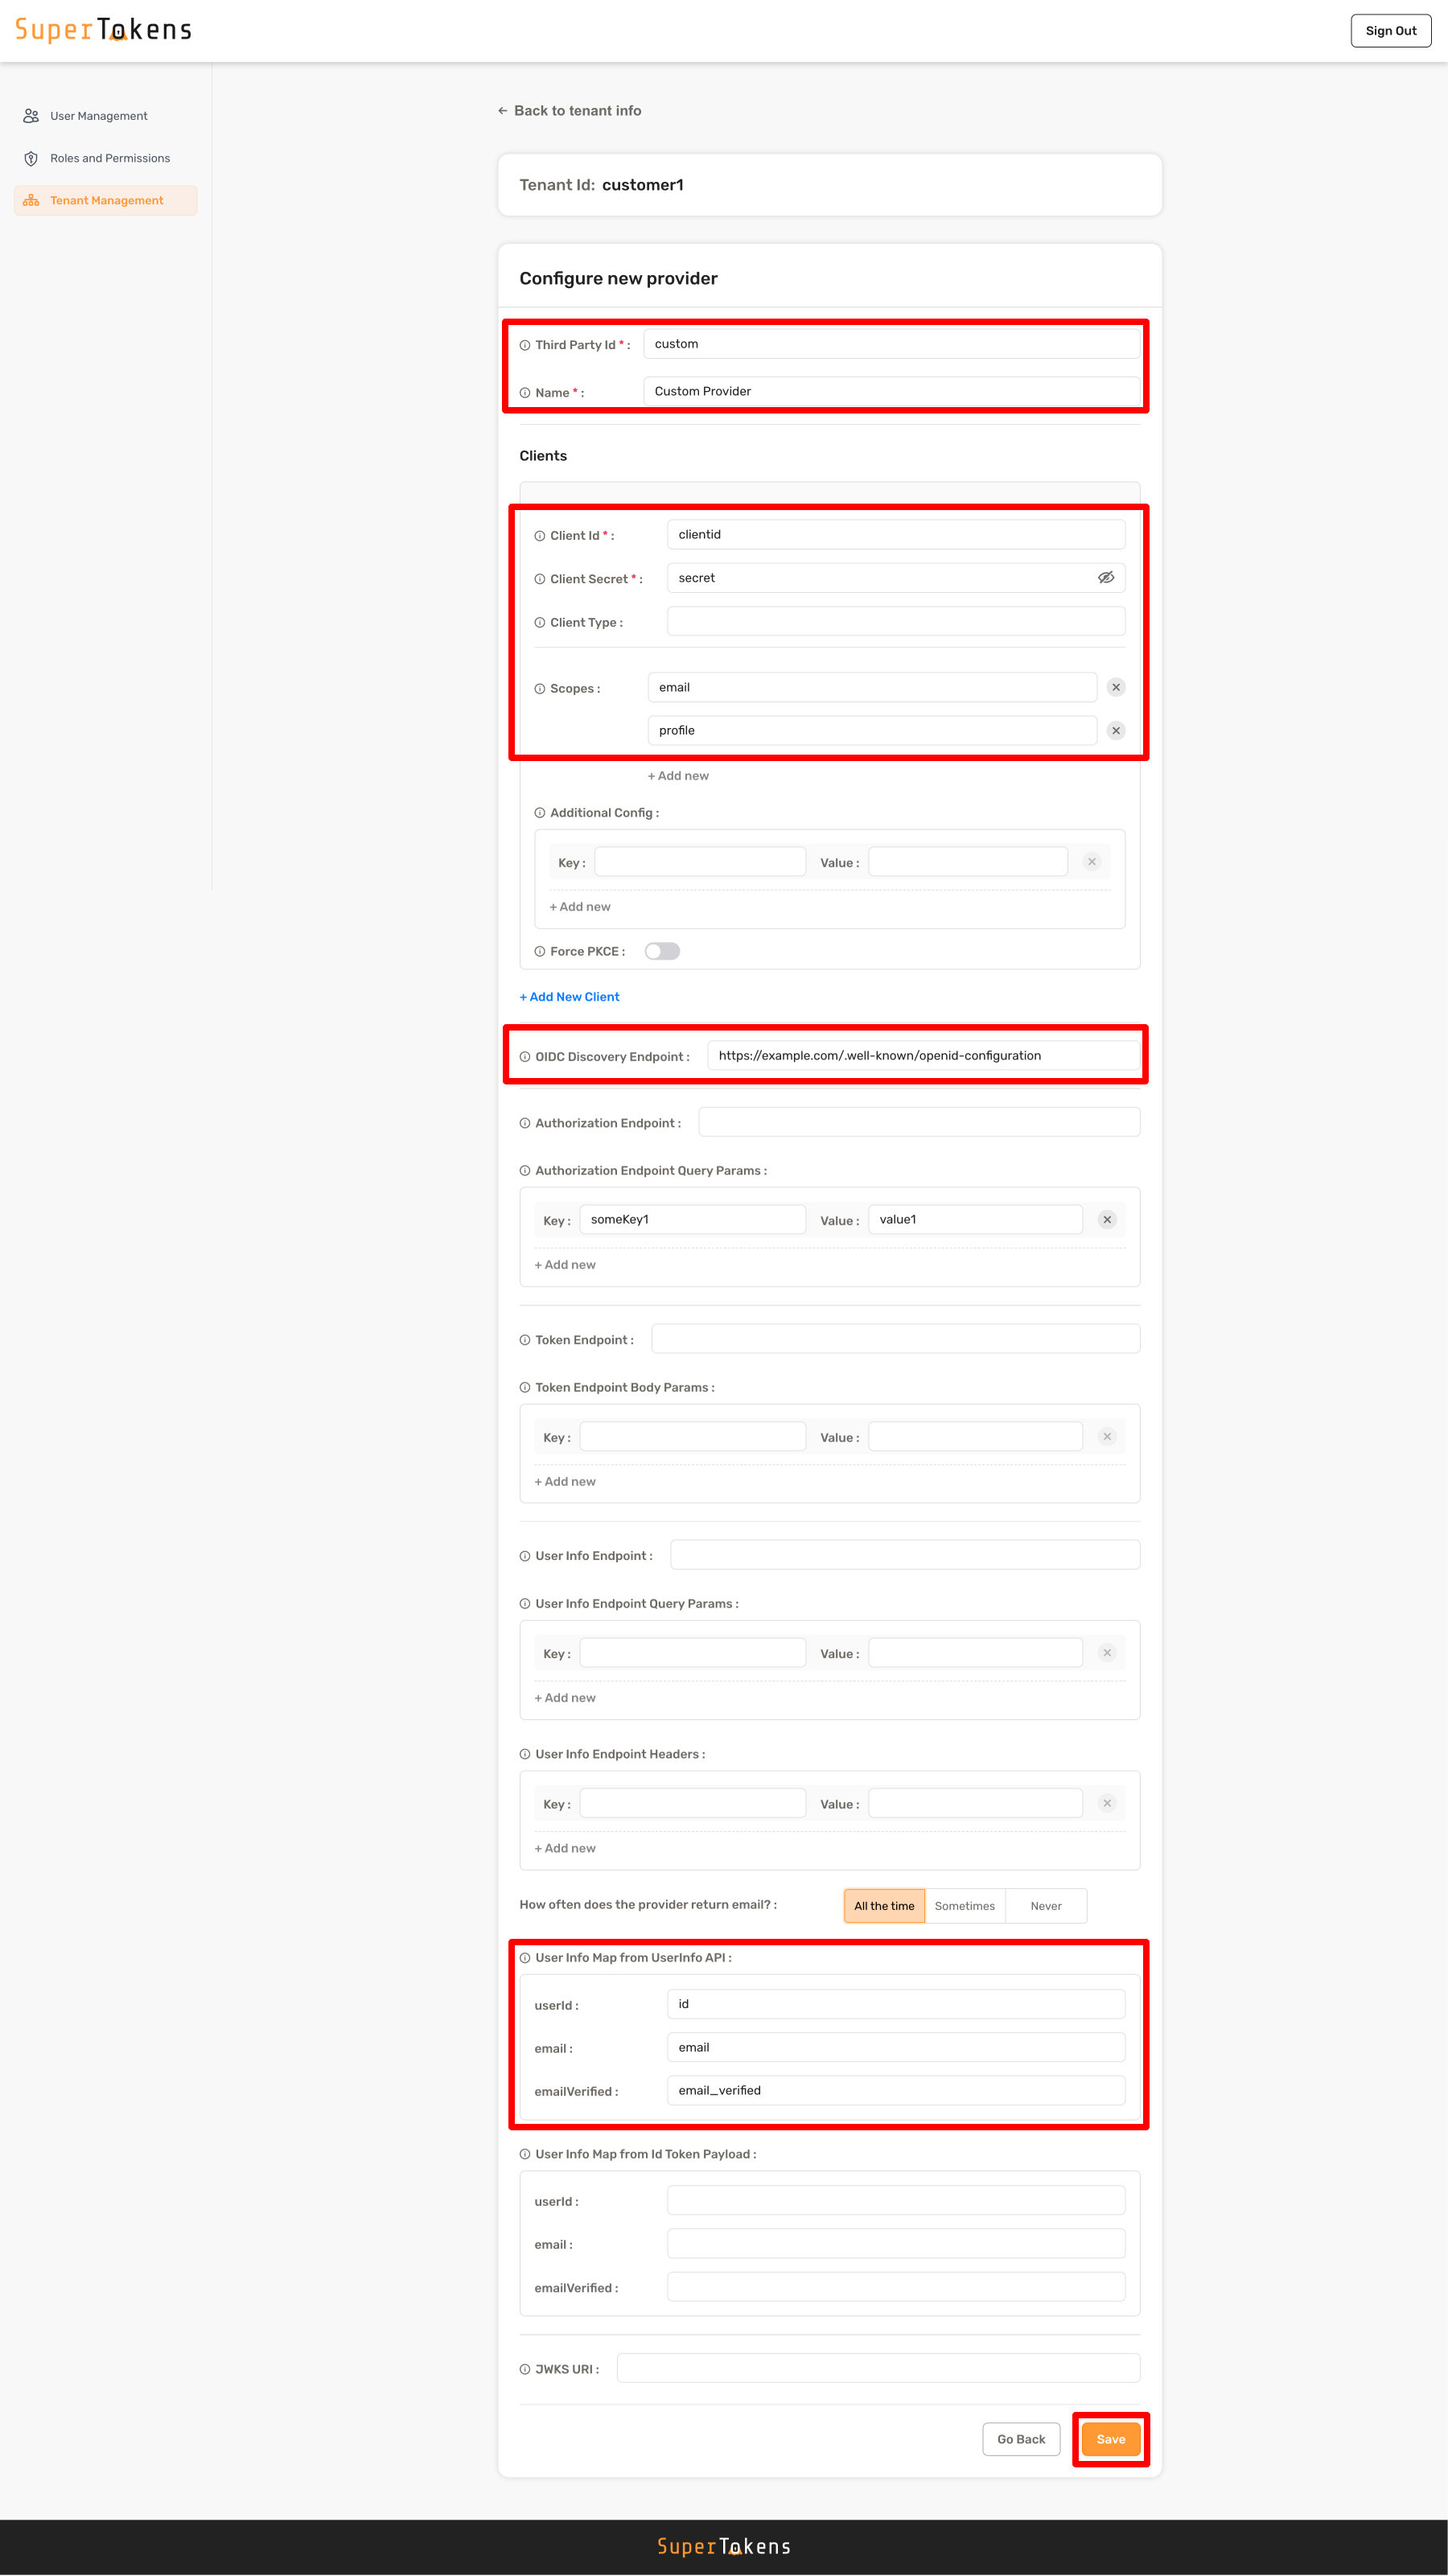
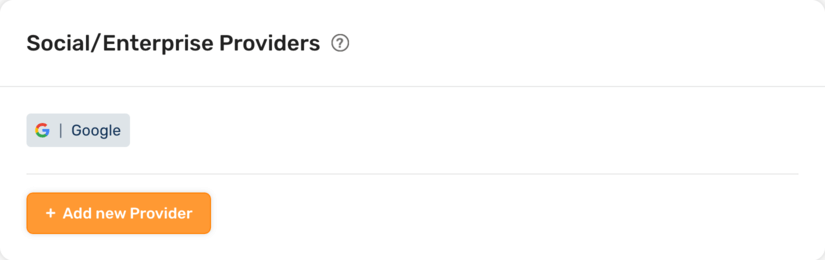 Select **Add Custom Provider** option
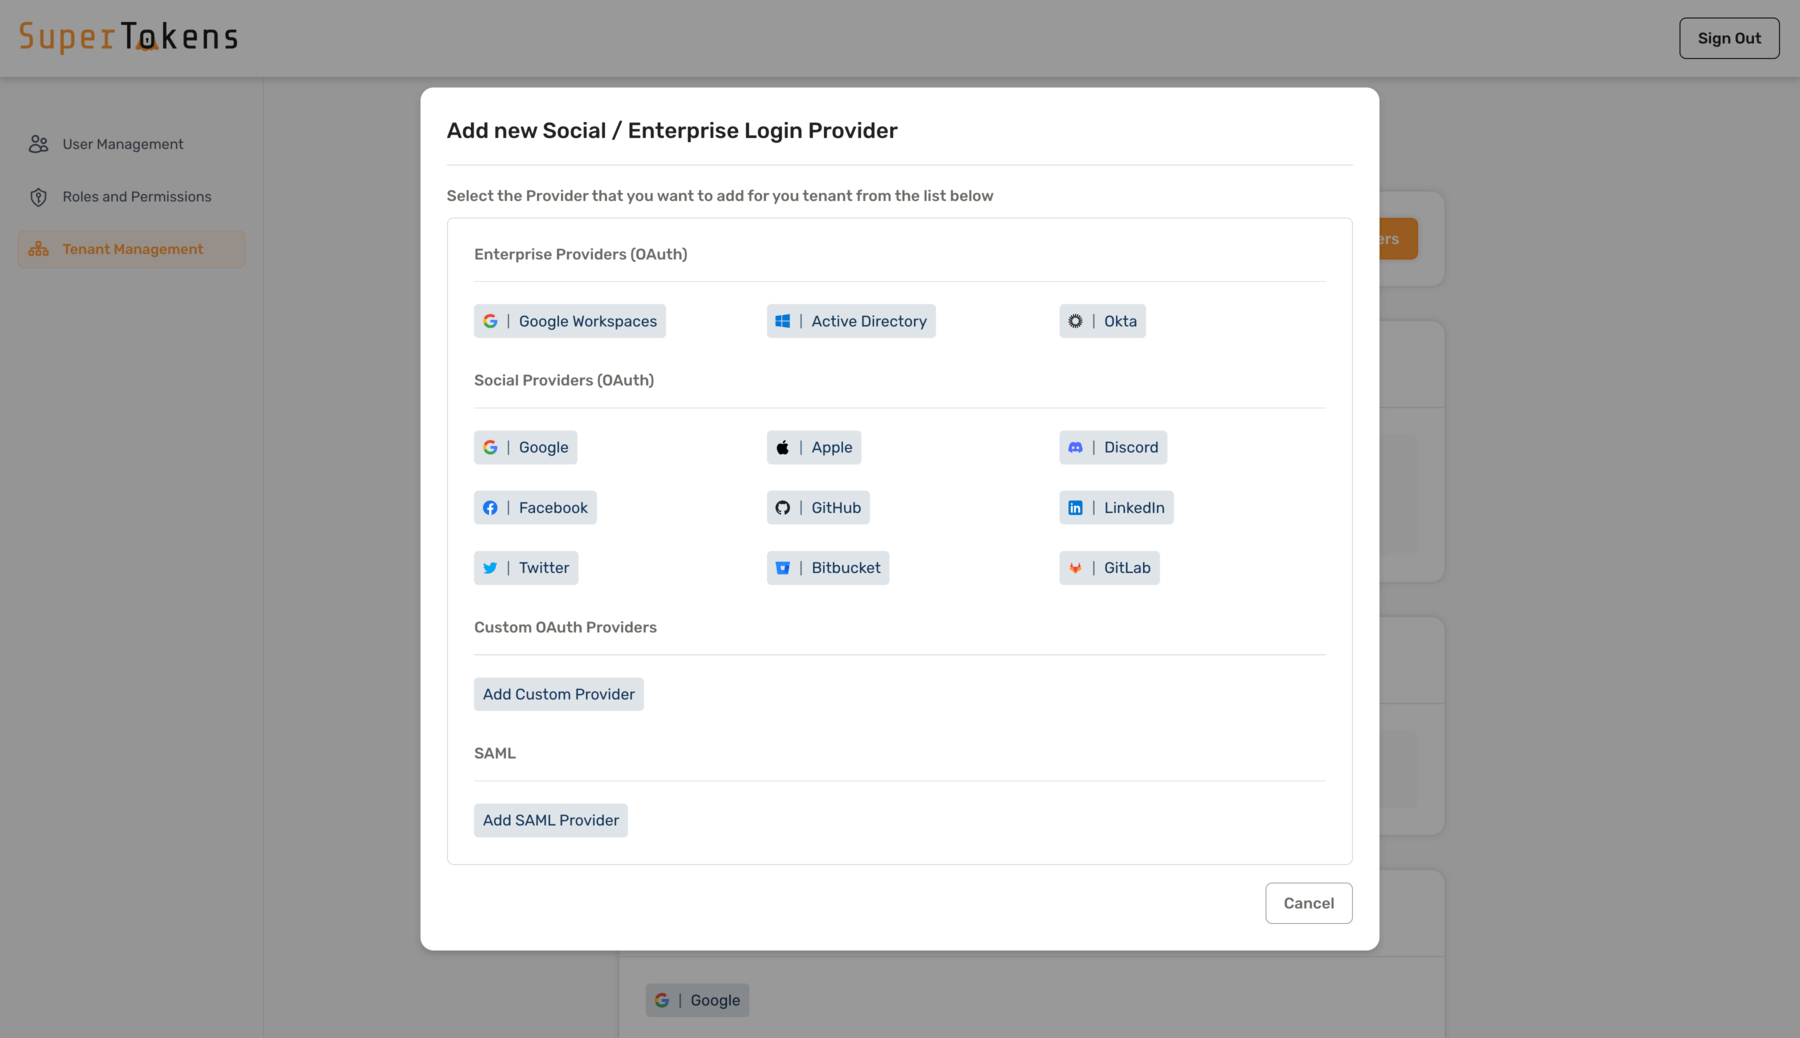 Fill in the details as shown below and click on **Save**
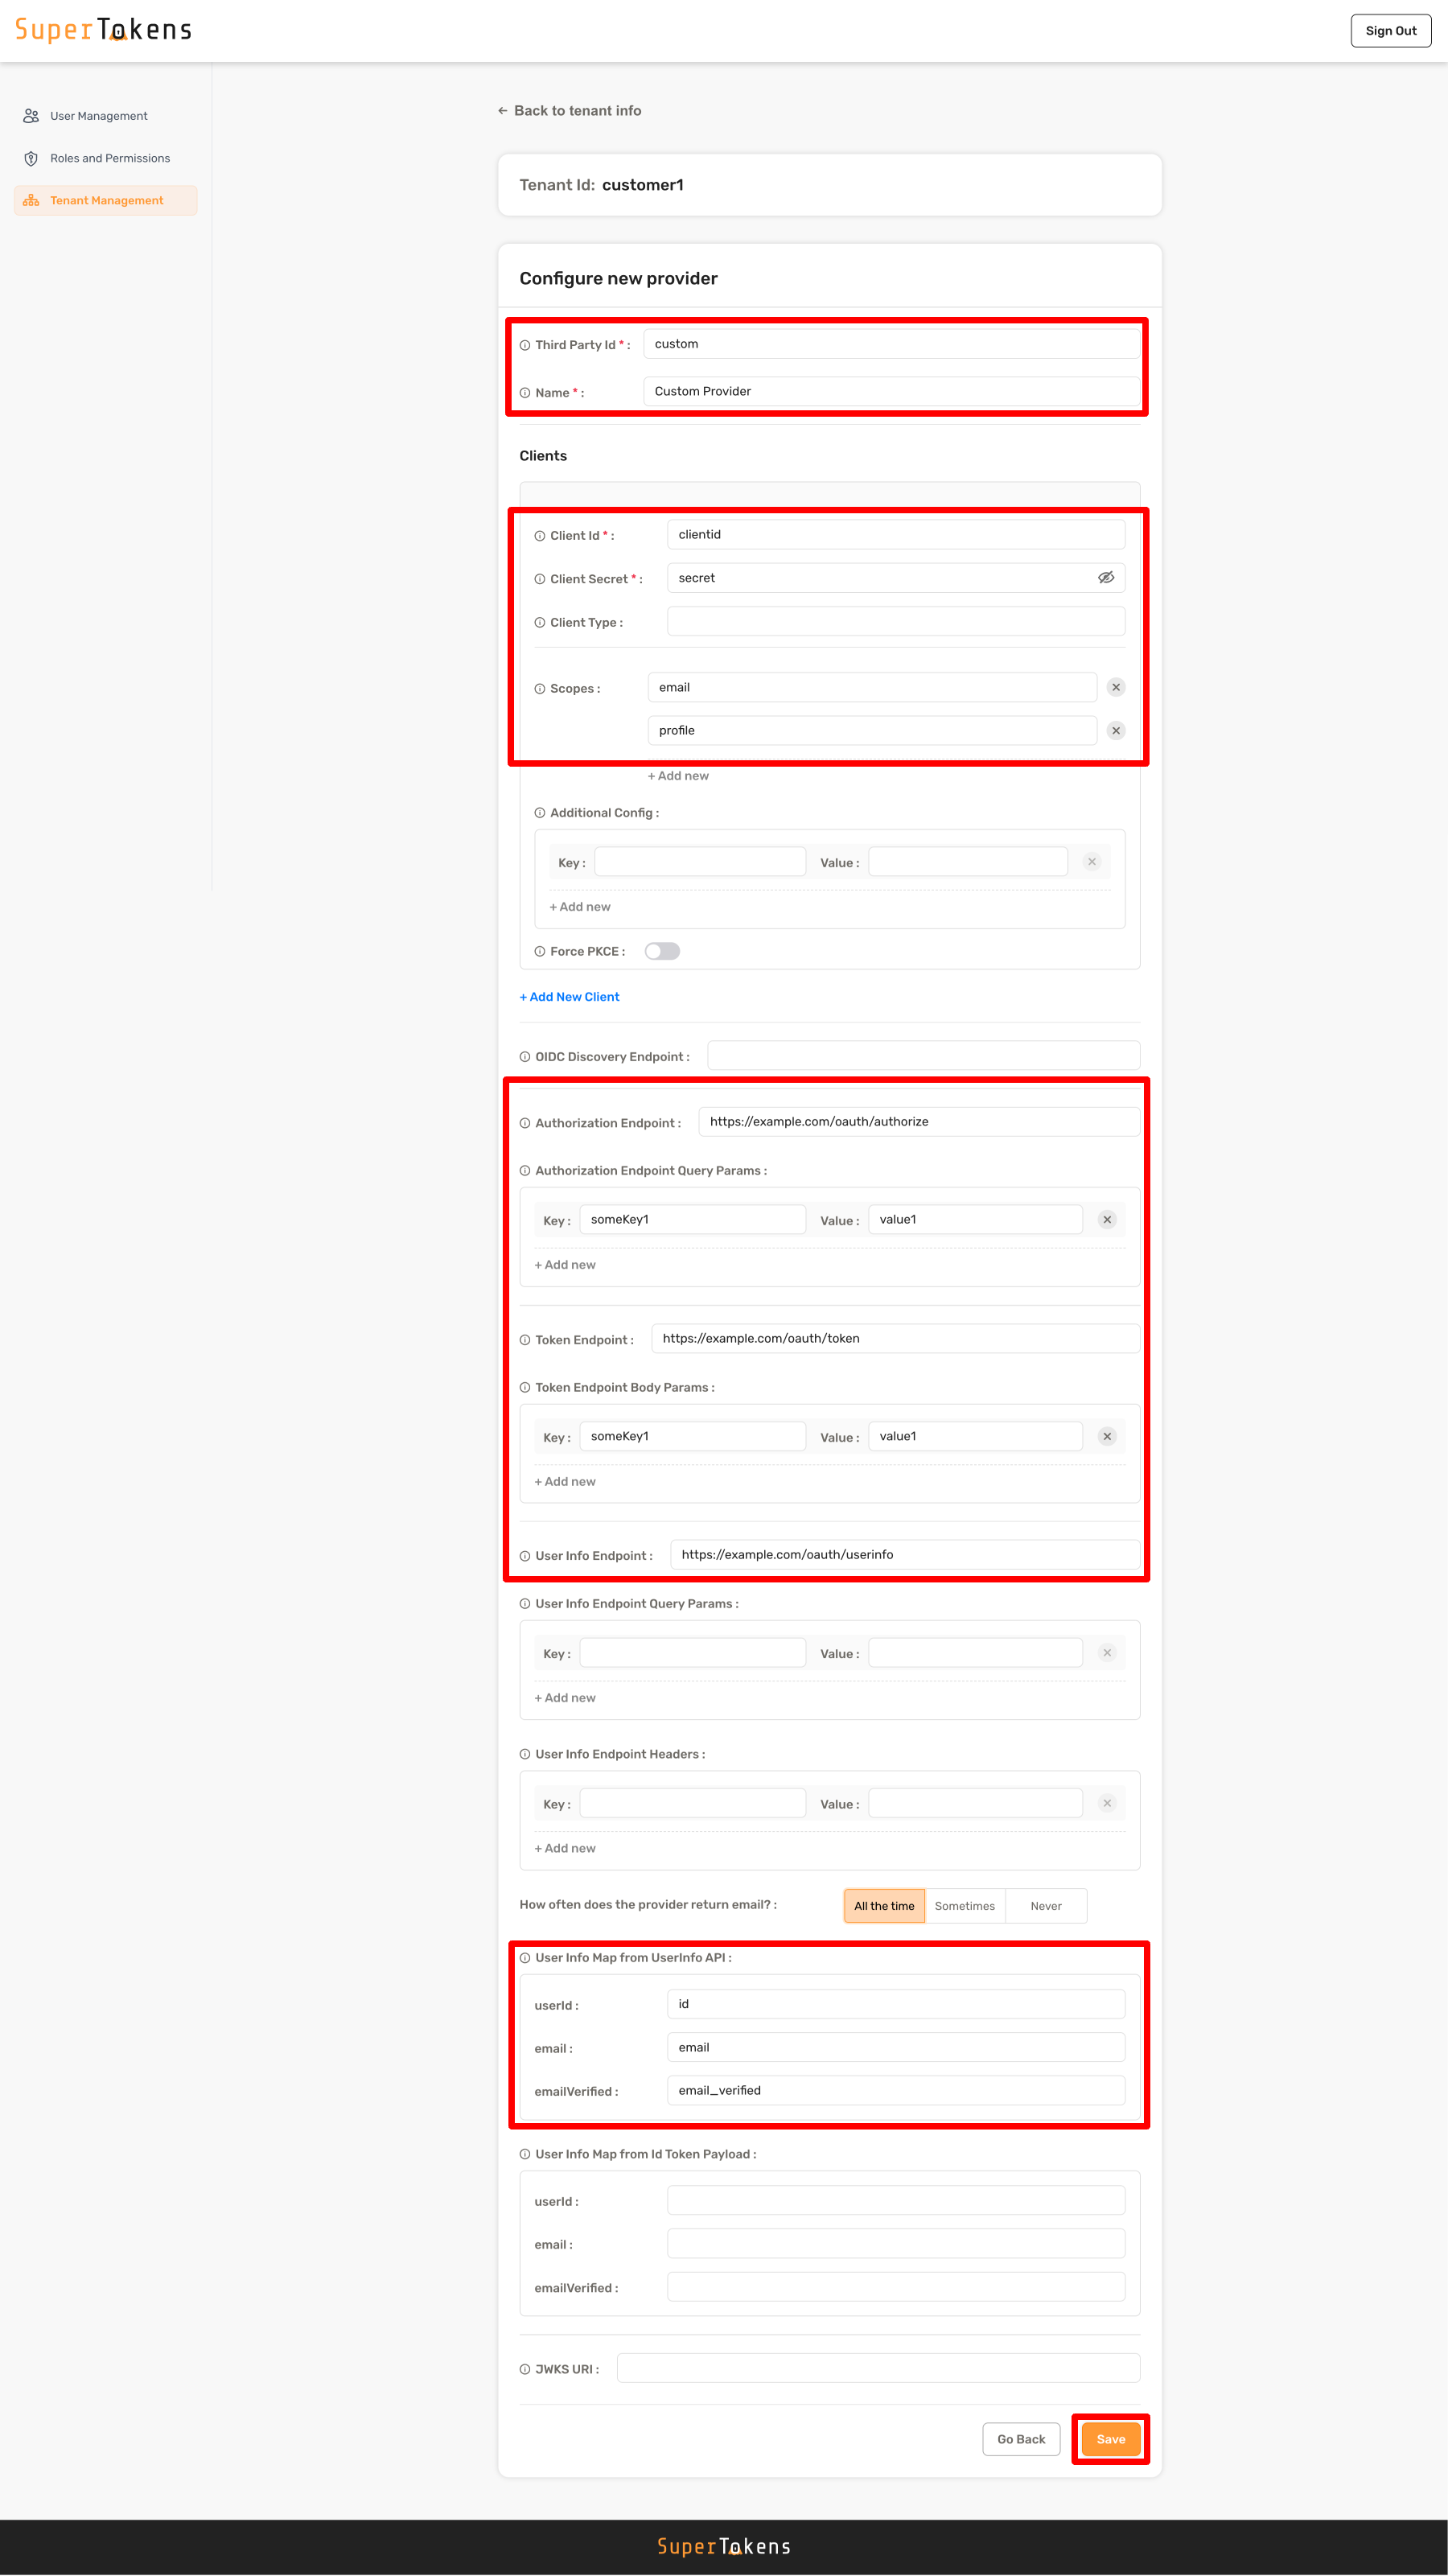
`userId: "id"`
`email: "email"`
`emailVerified: "email_verified"`
For nested values use: `userId: "user.id"` |
Select **Add Custom Provider** option
Fill in the details as shown below and click on **Save**
 In the above example, the system assigns different values for certain configurations for `customer1` tenant.
All other configurations inherit from the base configuration.
You can edit the values by clicking on the pencil icon and then specifying a new value.
:::caution
You cannot edit database connection settings directly from the Dashboard, and you may need to use the SDK or cURL to update them.
:::
In the above example, the system assigns different values for certain configurations for `customer1` tenant.
All other configurations inherit from the base configuration.
You can edit the values by clicking on the pencil icon and then specifying a new value.
:::caution
You cannot edit database connection settings directly from the Dashboard, and you may need to use the SDK or cURL to update them.
:::
Select **Add Custom Provider** option
Fill in the details as shown below and click on **Save**
Select **Add Custom Provider** option
Fill in the details as shown below and click on **Save**
In the above example, the system assigns different values for certain configurations for `customer1` tenant.
All other configurations inherit from the base configuration.
You can edit the values by clicking on the pencil icon and then specifying a new value.
:::caution
You cannot edit database connection settings directly from the Dashboard, and you may need to use the SDK or cURL to update them.
:::
Select **Add Custom Provider** option
Fill in the details as shown below and click on **Save**
Select **Add Custom Provider** option
Fill in the details as shown below and click on **Save**
 ### 4. Configure the SAML provider for the tenant
 To configure SAML login with SuperTokens, ensure that you use the correct provider name in the third-party configuration.
Make sure to specify provider name with one of the following:
- Microsoft Entra ID
To configure SAML login with SuperTokens, ensure that you use the correct provider name in the third-party configuration.
Make sure to specify provider name with one of the following:
- Microsoft Entra ID - Microsoft AD FS
- Okta
- Auth0
- OneLogin
- PingOne
- JumpCloud
- Rippling
- SAML
Make sure to replace `http://localhost:5225` with the correct value for where you have hosted the BoxyHQ server. If you are using the SuperTokens managed service, Boxy HQ hosts the server for you ([contact support](mailto:support@supertokens.com) to activate your instance). :::success You have successfully configured a new tenant in SuperTokens. The next step is to wire up the frontend SDK to show the right login UI for this tenant. The specifics of this step depend on the UX that you want to provide to your users. The "Common UX flows" section documents two common UX flows. ::: ### 5. Adding multiple SAML connections to a single tenant If you have one SAML connection for a tenant, then the `Third Party Id` for that connection can be `boxy-saml`. This displays a single "SAML Login" button on the pre-built UI. If you want to add a second SAML connection for the same tenant, follow the same steps as above, but also use the `Add Suffix` option for the Third Party Id. For example, if a tenant has Active Directory and Okta login (both with SAML), you can create the Active Directory provider using `"boxy-saml"` as the `Third Party Id`. For Okta, you could use `okta` as a suffix to make the `Third Party Id` equal to `"boxy-saml-okta"`. You can also give them different names. Instead of "SAML Login" (that's shown above), you can use "Active Directory" and "Okta" to ensure that the button on the pre-built UI shows the right name. --- ## Using the BoxyHQ API ### 1. Generate the XML metadata file from your SAML provider Your SAML provider allows you to download a `.xml` file that you can upload to SAML Jackson. During this process, you need to provide it: - the SSO URL and; - the Entity ID. You can learn more about these in the [SAML Jackson docs](https://boxyhq.com/docs/jackson/configure-saml-idp). In the example app, [mocksaml.com](https://mocksaml.com/) serves as a free SAML provider for testing. When you navigate to the site, you see a "Download metadata" button which you should click on to get the `.xml` file. ### 2. Convert the `.xml` file to base64 You can use [an online base64 encoder](https://www.base64encode.org/) to do this. First copy the contents of the `.xml` file, and then put it in the encoder tool. The output string is the base64 version of the .xml file. For example, with an input `.xml` file (obtained from mocksaml.com): ```text
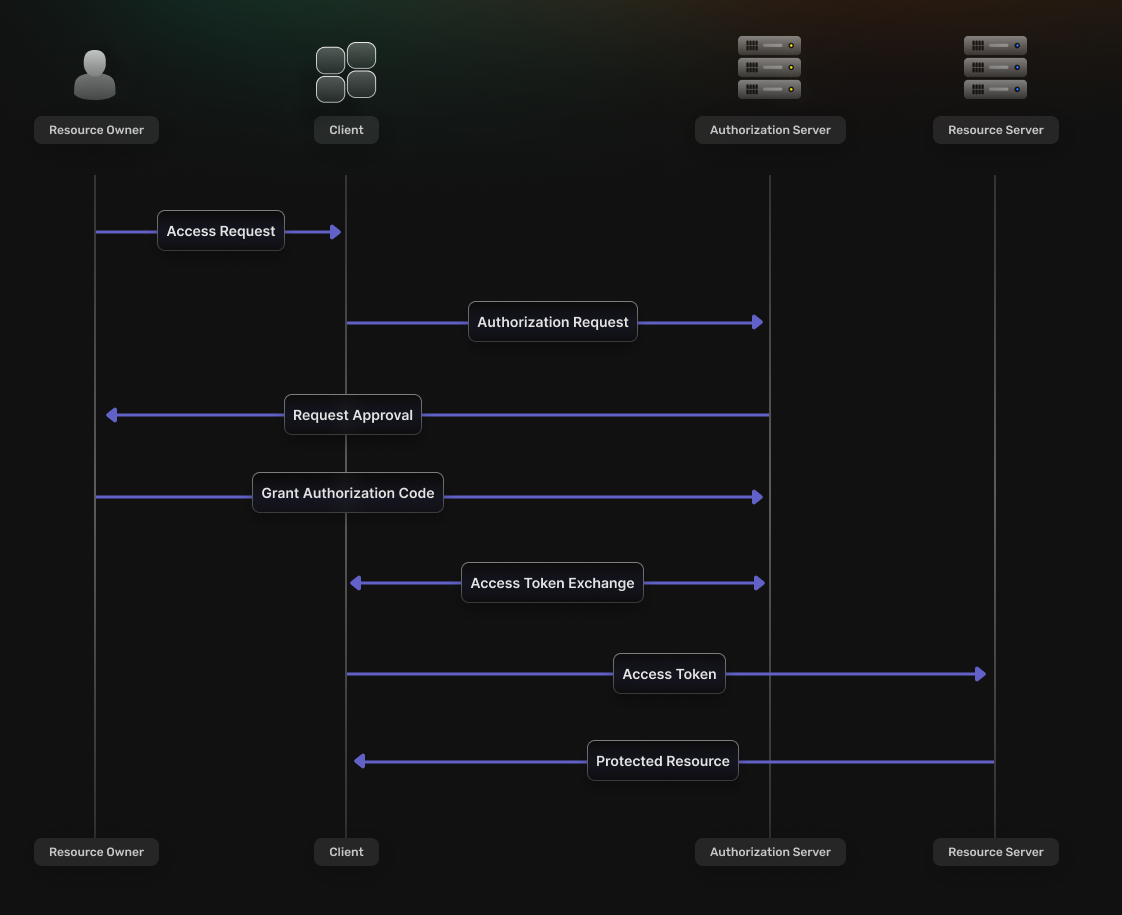 This flow is best suited for scenarios that involve **web applications**.
It consists of the following steps:
1. The **Client** redirects the **Resource Owner** to the **Authorization Server’s** authorization endpoint.
2. If the **Resource Owner** grants permission, the **Authorization Server** redirects their browser back to the specified **Redirect URI** and includes an **Authorization Code** as a query parameter.
3. The **Client** then sends a request to the **Authorization Server**’s token endpoint, including the **Authorization Code**.
4. The **Authorization Server** verifies the information sent by the **Client** and, if valid, issues an **OAuth2 Access Token**.
5. The token can make requests to the **Resource Server** to access the protected resources on behalf of the **Resource Owner**.
##### Authorization code
An **Authorization Code** is a short-lived code that the [**Authorization Server**](#authorization-server) provides to the [**Client**](#client), via a **Redirect URI**, after authorization approval.
This code then gets exchanged for an [**OAuth2 Access Token**](#oauth2-access-token).
The **Authorization Code** flow enhances security by keeping tokens out of the user-agent and letting the [**Client**](#client) manage the backend communication with the [**Authorization Server**](#authorization-server).
##### Proof key for code exchange (PKCE)
To prevent cross-site request forgery (CSRF) and code injection attacks, the **Authorization Code flow** can use [**PKCE**](https://oauth.net/2/pkce/).
At the beginning of the authentication flow the **Client** generates a random string called a *code verifier*.
This ensures that, even if the **Authorization Code** gets intercepted, it cannot be exchanged for a token without also including the initial code.
#### [Client credentials](https://oauth.net/2/grant-types/client-credentials/)
This flow is best suited for scenarios that involve **web applications**.
It consists of the following steps:
1. The **Client** redirects the **Resource Owner** to the **Authorization Server’s** authorization endpoint.
2. If the **Resource Owner** grants permission, the **Authorization Server** redirects their browser back to the specified **Redirect URI** and includes an **Authorization Code** as a query parameter.
3. The **Client** then sends a request to the **Authorization Server**’s token endpoint, including the **Authorization Code**.
4. The **Authorization Server** verifies the information sent by the **Client** and, if valid, issues an **OAuth2 Access Token**.
5. The token can make requests to the **Resource Server** to access the protected resources on behalf of the **Resource Owner**.
##### Authorization code
An **Authorization Code** is a short-lived code that the [**Authorization Server**](#authorization-server) provides to the [**Client**](#client), via a **Redirect URI**, after authorization approval.
This code then gets exchanged for an [**OAuth2 Access Token**](#oauth2-access-token).
The **Authorization Code** flow enhances security by keeping tokens out of the user-agent and letting the [**Client**](#client) manage the backend communication with the [**Authorization Server**](#authorization-server).
##### Proof key for code exchange (PKCE)
To prevent cross-site request forgery (CSRF) and code injection attacks, the **Authorization Code flow** can use [**PKCE**](https://oauth.net/2/pkce/).
At the beginning of the authentication flow the **Client** generates a random string called a *code verifier*.
This ensures that, even if the **Authorization Code** gets intercepted, it cannot be exchanged for a token without also including the initial code.
#### [Client credentials](https://oauth.net/2/grant-types/client-credentials/)
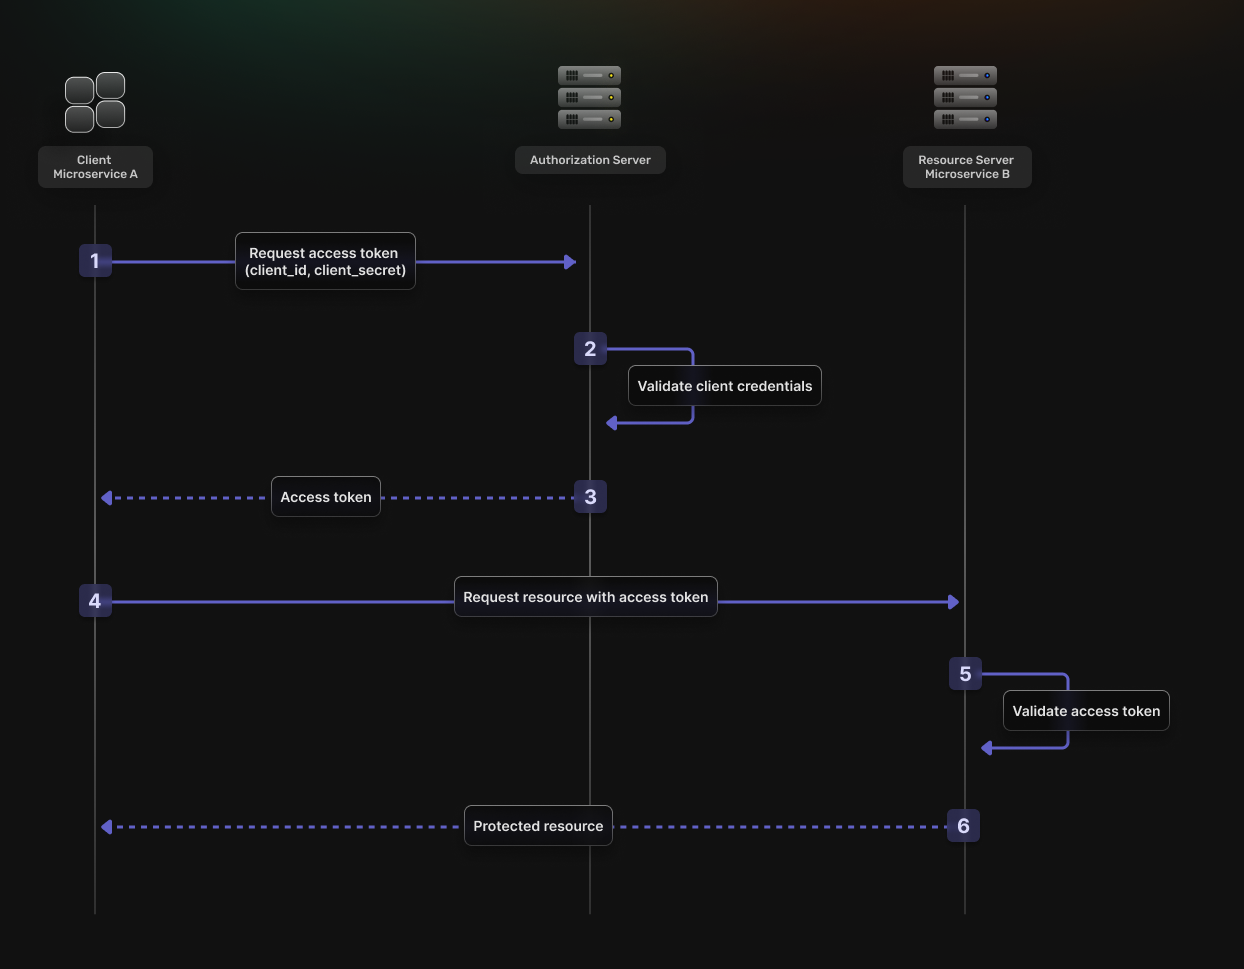 This flow is best suited for **machine-to-machine** (M2M) interactions where there is no end-user.
It consists of the following steps:
1. The **Client** authenticates with the **Authorization Server** using its own credentials.
2. The **Authorization Server** verifies the credentials.
3. The **Authorization Server** returns an **OAuth2 Access Token**.
4. The **Client** uses the **OAuth2 Access Token** to access protected resources.
5. The **Resource Server** validates the **OAuth2 Access Token**.
6. If the validation is successful, the **Resource Server** returns the requested resources.
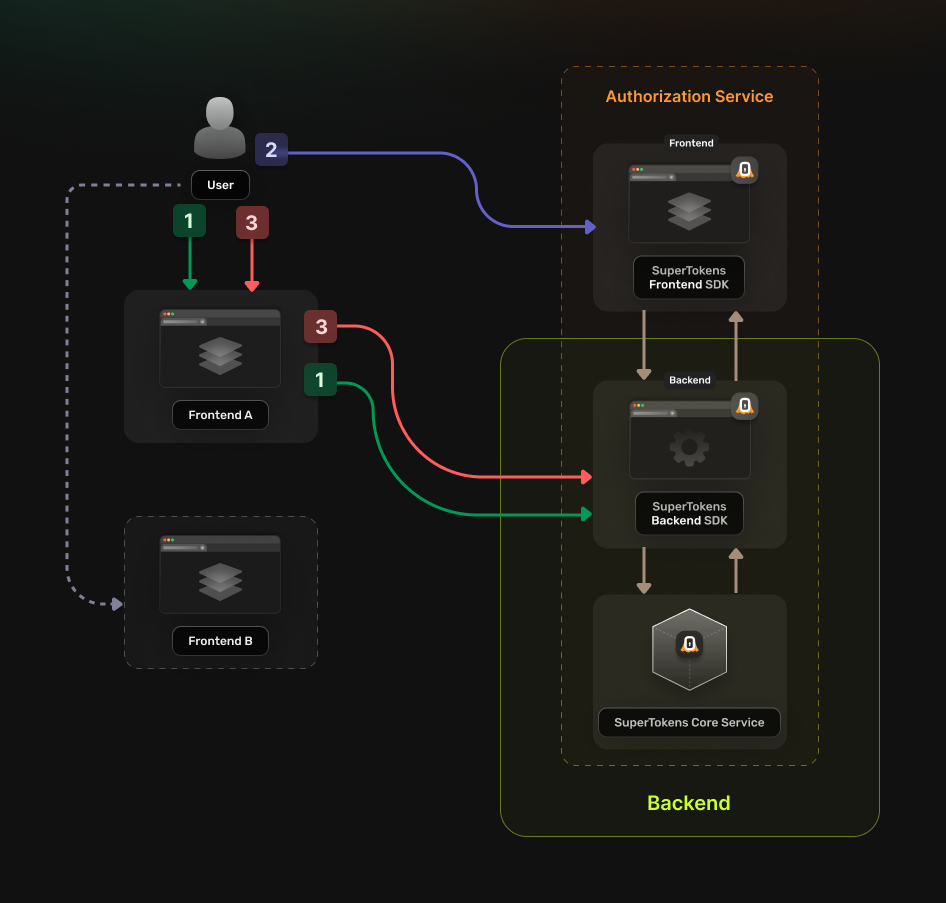
# Authentication - Unified Login - Quickstart Guides - Multiple frontend domains with a common backend
Source: https://supertokens.com/docs/authentication/unified-login/quickstart-guides/multiple-frontends-with-a-single-backend
## Overview
You can implement the following guide if you have multiple **`frontend applications`** that use the same **`backend service`**.
The authentication flow works in the following way:
This flow is best suited for **machine-to-machine** (M2M) interactions where there is no end-user.
It consists of the following steps:
1. The **Client** authenticates with the **Authorization Server** using its own credentials.
2. The **Authorization Server** verifies the credentials.
3. The **Authorization Server** returns an **OAuth2 Access Token**.
4. The **Client** uses the **OAuth2 Access Token** to access protected resources.
5. The **Resource Server** validates the **OAuth2 Access Token**.
6. If the validation is successful, the **Resource Server** returns the requested resources.
# Authentication - Unified Login - Quickstart Guides - Multiple frontend domains with a common backend
Source: https://supertokens.com/docs/authentication/unified-login/quickstart-guides/multiple-frontends-with-a-single-backend
## Overview
You can implement the following guide if you have multiple **`frontend applications`** that use the same **`backend service`**.
The authentication flow works in the following way:
 ## Before you start
These instructions assume that you already have gone through the main [quickstart guide](/docs/quickstart/introduction).
If you have skipped that page, please follow the tutorial and return here once you're done.
:::info
If your frontend applications are on the same **domain**, but on different **sub-domains**, you can use [Session Sharing Across Subdomains](/docs/post-authentication/session-management/share-session-across-sub-domains).
:::
## Steps
### 1. Enable the Unified Login feature
Go to the [**SuperTokens.com SaaS Dashboard**](https://supertokens.com) and follow these instructions:
1. Click on the **Enabled Paid Features** button
2. Click on **Managed Service**
3. Check the **Unified Login / M2M** option
4. Click *Save*
### 2. Create the OAuth2 Clients
For each of your **`frontend`** applications create a separate [**OAuth2 client**](/docs/authentication/unified-login/oauth2-basics#client).
This can occur by directly calling the **SuperTokens Core** API.
## Before you start
These instructions assume that you already have gone through the main [quickstart guide](/docs/quickstart/introduction).
If you have skipped that page, please follow the tutorial and return here once you're done.
:::info
If your frontend applications are on the same **domain**, but on different **sub-domains**, you can use [Session Sharing Across Subdomains](/docs/post-authentication/session-management/share-session-across-sub-domains).
:::
## Steps
### 1. Enable the Unified Login feature
Go to the [**SuperTokens.com SaaS Dashboard**](https://supertokens.com) and follow these instructions:
1. Click on the **Enabled Paid Features** button
2. Click on **Managed Service**
3. Check the **Unified Login / M2M** option
4. Click *Save*
### 2. Create the OAuth2 Clients
For each of your **`frontend`** applications create a separate [**OAuth2 client**](/docs/authentication/unified-login/oauth2-basics#client).
This can occur by directly calling the **SuperTokens Core** API.
 ## Before you start
These instructions assume that you already have gone through the main [quickstart guide](/docs/quickstart/introduction).
If you have skipped that page, please follow the tutorial and return here once you're done.
:::info
Note that, if the *frontends* and *backends* are in different *sub domains*, you don't need to use *OAuth* and can instead use [session sharing across sub domains](/docs/post-authentication/session-management/share-session-across-sub-domains).
:::
## Steps
### 1. Enable the Unified Login feature
Go to the [**SuperTokens.com SaaS Dashboard**](https://supertokens.com) and follow these instructions:
1. Click on the **Enabled Paid Features** button
2. Click on **Managed Service**
3. Check the **Unified Login / M2M** option
4. Click *Save*
### 2. Create the OAuth2 Clients
For each of your applications you need to create a separate [**OAuth2 client**](/docs/authentication/unified-login/oauth2-basics#client).
You can do this by directly calling the **SuperTokens Core** API.
## Before you start
These instructions assume that you already have gone through the main [quickstart guide](/docs/quickstart/introduction).
If you have skipped that page, please follow the tutorial and return here once you're done.
:::info
Note that, if the *frontends* and *backends* are in different *sub domains*, you don't need to use *OAuth* and can instead use [session sharing across sub domains](/docs/post-authentication/session-management/share-session-across-sub-domains).
:::
## Steps
### 1. Enable the Unified Login feature
Go to the [**SuperTokens.com SaaS Dashboard**](https://supertokens.com) and follow these instructions:
1. Click on the **Enabled Paid Features** button
2. Click on **Managed Service**
3. Check the **Unified Login / M2M** option
4. Click *Save*
### 2. Create the OAuth2 Clients
For each of your applications you need to create a separate [**OAuth2 client**](/docs/authentication/unified-login/oauth2-basics#client).
You can do this by directly calling the **SuperTokens Core** API.
 ## Before you start
These instructions assume that you already have gone through the main [quickstart guide](/docs/quickstart/introduction).
If you have skipped that page, please follow the tutorial and return here once you're done.
## Steps
### 1. Enable the Unified Login feature
Go to the [**SuperTokens.com SaaS Dashboard**](https://supertokens.com) and follow these instructions:
1. Click on the **Enabled Paid Features** button
2. Click on **Managed Service**
3. Check the **Unified Login / M2M** option
4. Click *Save*
### 2. Create the OAuth2 Clients
For each of your applications you need to create a separate [**OAuth2 client**](/docs/authentication/unified-login/oauth2-basics#client).
You can do this by directly calling the **SuperTokens Core** API.
## Before you start
These instructions assume that you already have gone through the main [quickstart guide](/docs/quickstart/introduction).
If you have skipped that page, please follow the tutorial and return here once you're done.
## Steps
### 1. Enable the Unified Login feature
Go to the [**SuperTokens.com SaaS Dashboard**](https://supertokens.com) and follow these instructions:
1. Click on the **Enabled Paid Features** button
2. Click on **Managed Service**
3. Check the **Unified Login / M2M** option
4. Click *Save*
### 2. Create the OAuth2 Clients
For each of your applications you need to create a separate [**OAuth2 client**](/docs/authentication/unified-login/oauth2-basics#client).
You can do this by directly calling the **SuperTokens Core** API.
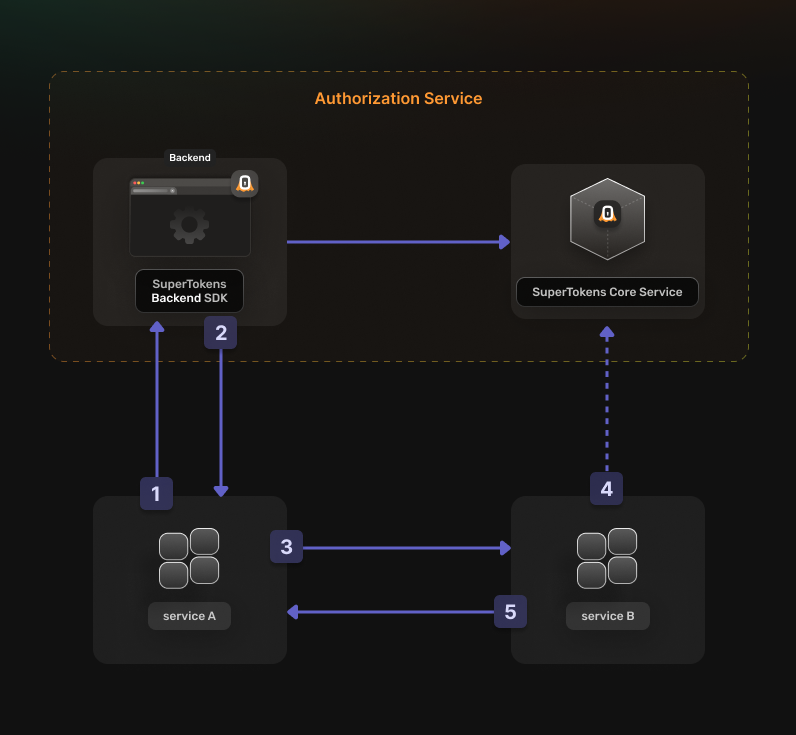 Before going into the actual instructions, start by imagining a real life example that you can reference along the way.
This makes it easier to understand what is happening.
We are going to configure authentication for the following setup:
- A **Calendar Service** that exposes these actions: `event.view`, `event.create`, `event.update` and `event.delete`
- A **File Service** that exposes these actions: `file.view`, `file.create`, `file.update` and `file.delete`
- A **Task Service** that interacts with the **Calendar Service** and the **File Service** in the process of scheduling a task
The aim is to allow the **Task Service** to perform an authenticated action on the **Calendar Service**.
Proceed to the actual steps.
## Before you start
These instructions assume that you already have gone through the main [quickstart guide](/docs/quickstart/introduction).
If you have skipped that page, please follow the tutorial and return here once you're done.
## Steps
### 1. Enable the OAuth2 features from the Dashboard
You first have to enable the **OAuth2** features from the **SuperTokens.com Dashboard**.
1. Open the **SuperTokens.com Dashboard**
2. Click on the **Enabled Paid Features** button
3. Click on **Managed Service**
4. Check the **Unified Login / M2M** option
5. Click *Save*
You should be able to use the OAuth2 recipes in your applications.
### 2. Create the OAuth2 Clients
For each of your **`microservices`** you need to create a separate [**OAuth2 client**](/docs/authentication/unified-login/oauth2-basics#client).
This can occur by directly calling the **SuperTokens Core** API.
Before going into the actual instructions, start by imagining a real life example that you can reference along the way.
This makes it easier to understand what is happening.
We are going to configure authentication for the following setup:
- A **Calendar Service** that exposes these actions: `event.view`, `event.create`, `event.update` and `event.delete`
- A **File Service** that exposes these actions: `file.view`, `file.create`, `file.update` and `file.delete`
- A **Task Service** that interacts with the **Calendar Service** and the **File Service** in the process of scheduling a task
The aim is to allow the **Task Service** to perform an authenticated action on the **Calendar Service**.
Proceed to the actual steps.
## Before you start
These instructions assume that you already have gone through the main [quickstart guide](/docs/quickstart/introduction).
If you have skipped that page, please follow the tutorial and return here once you're done.
## Steps
### 1. Enable the OAuth2 features from the Dashboard
You first have to enable the **OAuth2** features from the **SuperTokens.com Dashboard**.
1. Open the **SuperTokens.com Dashboard**
2. Click on the **Enabled Paid Features** button
3. Click on **Managed Service**
4. Check the **Unified Login / M2M** option
5. Click *Save*
You should be able to use the OAuth2 recipes in your applications.
### 2. Create the OAuth2 Clients
For each of your **`microservices`** you need to create a separate [**OAuth2 client**](/docs/authentication/unified-login/oauth2-basics#client).
This can occur by directly calling the **SuperTokens Core** API.
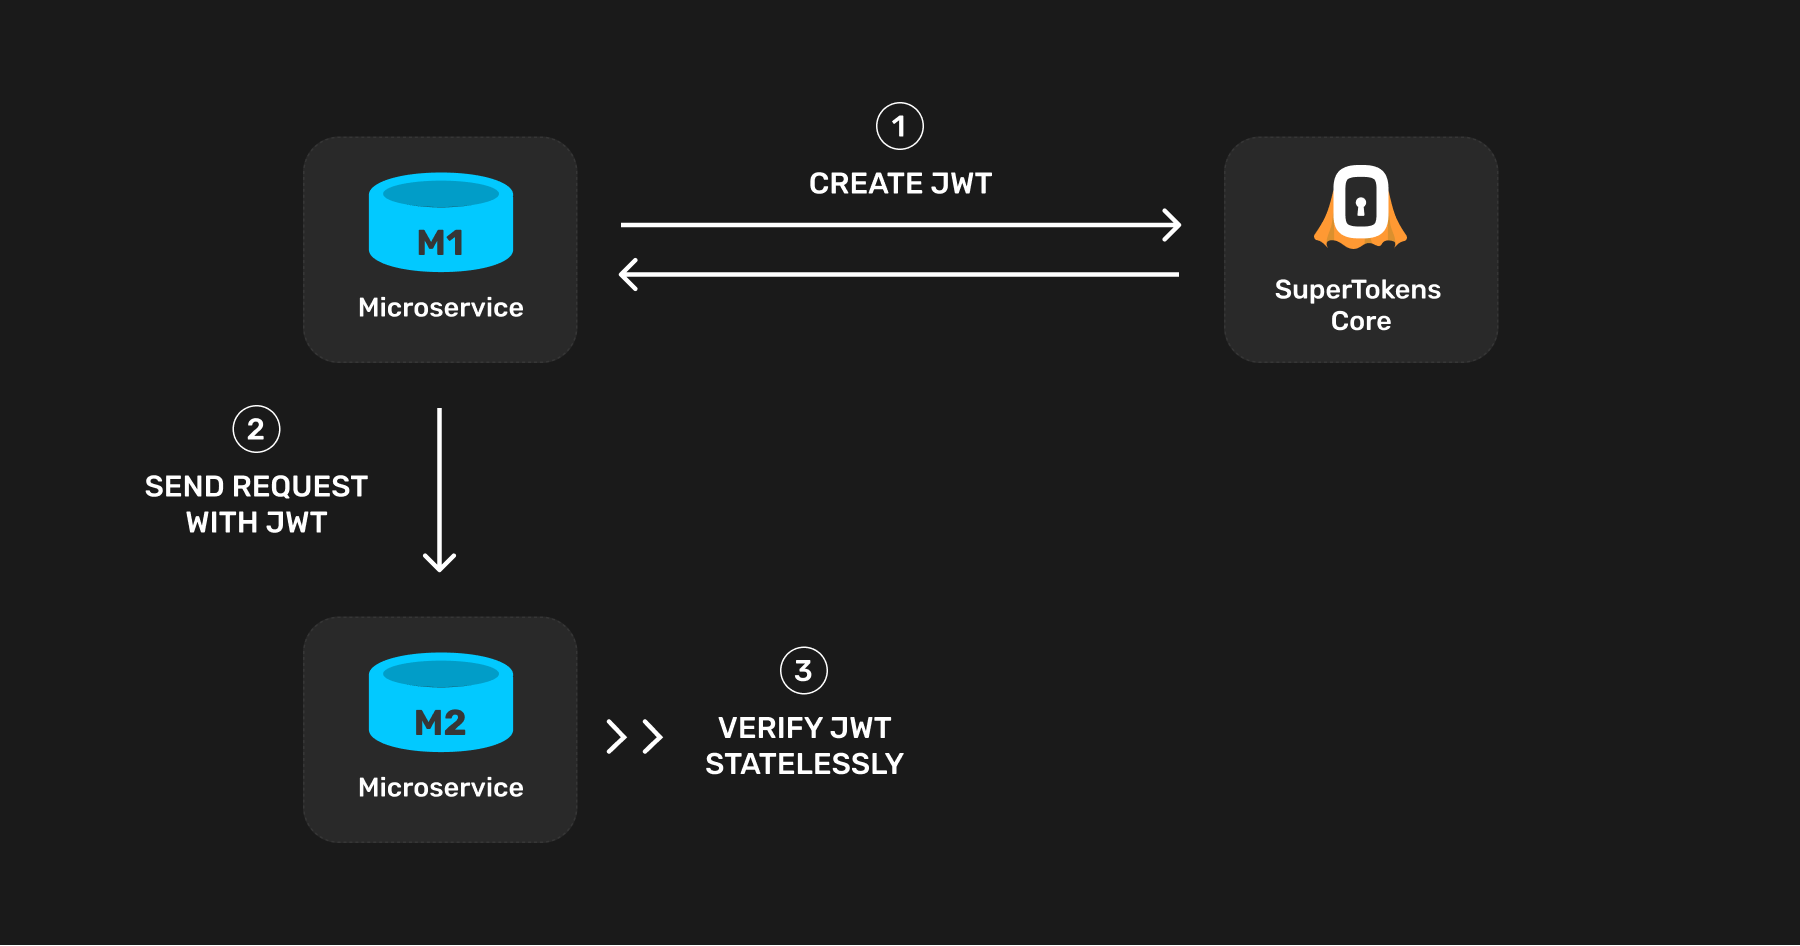 The first step is to create a JWT from the microservice that sends the request (refer to this microservice as `M1`).
Other microservices verify this JWT when `M1` sends them a request.
Since this JWT remains static per microservice, the best time to create this is on process starts - that is when `M1` starts.
The JWT can contain any information you like. At a minimum, it needs to contain information proving that it is a microservice allowed to query other microservices in your infrastructure.
This is necessary since you may issue a JWT to an end user as well, and they should not be able to query any microservice directly.
Add the following claim in the JWT to "mark" the JWT as one meant for microservice auth only:
```json
{..., "source": "microservice", ...}
```
In the receiving microservice (`M2`), verify the JWT and check that this claim is present before serving the request.
### Security considerations
#### Who can query the microservices?
Anyone or any service that has direct access to the SuperTokens core can produce a valid JWT and query your microservices.
If the core is open to the internet, you *must* add an API key to protect it.
Even though end users may receive a JWT for their session (that the core signs), they cannot query a microservice directly. Their JWT *should* not have the `source: "microservice"` claim in it.
#### What happens if someone compromises the core's API key?
Then the attacker can issue their own JWTs to be able to query your microservices. To limit this protection, you may want to add firewall rules to allow access to the core only from services on your backend.
You can also provide multiple API keys to the core and give a unique key to each microservice in your infrastructure. This way, it would be easier to track where a leak came from.
#### What happens if someone compromises the JWT signing key?
In this case, the attacker could fabricate their own JWT to be able to query your microservices.
To limit this risk, a JWT signing key rotation methodology is in place. Until then, you can limit the reachability of your microservices based on the request's IP address.
#### How to limit which microservice can query another one?
If an organisation has multiple teams and microservices, it is common to limit which other services a given microservice can query.
For example, if there exists `M1`, `M2` and `M3` microservices, there may be a situation in which `M1` should only be able to query `M2` and not `M3`.
With one SuperTokens core deployment, having this type of restriction is impossible. All the microservices create and verify their JWTs using the same public/private keys. Therefore `M3` receives a request, it has no way of reliably knowing if the request is from `M1` or `M2` (assuming that IP-based access control is not implemented).
This type of restriction can occur by deploying multiple cores connected to their own databases. In this example, a dedicated SuperTokens core can handle `M3`'s auth, such that only `M3` uses that to verify the incoming JWTs. Then, only other services that have access to that core can create JWTs that `M3` accepts. If `M1` doesn't have access to `M3`'s core's API key, it can be assured that successful requests to `M3` are not from `M1`.
## Steps
### 1. Create a JWT
The first step is to create a JWT from the microservice that sends the request (refer to this microservice as `M1`).
Other microservices verify this JWT when `M1` sends them a request.
Since this JWT remains static per microservice, the best time to create this is on process starts - that is when `M1` starts.
The JWT can contain any information you like. At a minimum, it needs to contain information proving that it is a microservice allowed to query other microservices in your infrastructure.
This is necessary since you may issue a JWT to an end user as well, and they should not be able to query any microservice directly.
Add the following claim in the JWT to "mark" the JWT as one meant for microservice auth only:
```json
{..., "source": "microservice", ...}
```
In the receiving microservice (`M2`), verify the JWT and check that this claim is present before serving the request.
### Security considerations
#### Who can query the microservices?
Anyone or any service that has direct access to the SuperTokens core can produce a valid JWT and query your microservices.
If the core is open to the internet, you *must* add an API key to protect it.
Even though end users may receive a JWT for their session (that the core signs), they cannot query a microservice directly. Their JWT *should* not have the `source: "microservice"` claim in it.
#### What happens if someone compromises the core's API key?
Then the attacker can issue their own JWTs to be able to query your microservices. To limit this protection, you may want to add firewall rules to allow access to the core only from services on your backend.
You can also provide multiple API keys to the core and give a unique key to each microservice in your infrastructure. This way, it would be easier to track where a leak came from.
#### What happens if someone compromises the JWT signing key?
In this case, the attacker could fabricate their own JWT to be able to query your microservices.
To limit this risk, a JWT signing key rotation methodology is in place. Until then, you can limit the reachability of your microservices based on the request's IP address.
#### How to limit which microservice can query another one?
If an organisation has multiple teams and microservices, it is common to limit which other services a given microservice can query.
For example, if there exists `M1`, `M2` and `M3` microservices, there may be a situation in which `M1` should only be able to query `M2` and not `M3`.
With one SuperTokens core deployment, having this type of restriction is impossible. All the microservices create and verify their JWTs using the same public/private keys. Therefore `M3` receives a request, it has no way of reliably knowing if the request is from `M1` or `M2` (assuming that IP-based access control is not implemented).
This type of restriction can occur by deploying multiple cores connected to their own databases. In this example, a dedicated SuperTokens core can handle `M3`'s auth, such that only `M3` uses that to verify the incoming JWTs. Then, only other services that have access to that core can create JWTs that `M3` accepts. If `M1` doesn't have access to `M3`'s core's API key, it can be assured that successful requests to `M3` are not from `M1`.
## Steps
### 1. Create a JWT
## Attestation **Attestation** represents information about the **authenticator device** itself. You can use it to verify the authenticity and the security level of the **authenticator**.
## User verification **User verification** is the method used to verify the user's presence. This can be: - Biometric verification (fingerprint, face scan). - `PIN` entry. - Physical button press on a security key.
#### Input properties | Name | Type | Description | Default Value | |----------|----------|-------------|---------------| | `relyingPartyId` | `string` | The domain name of your application that the system uses for validating the credential. | Uses `getRelyingPartyId` from the recipe configuration which defaults to the `apiDomain` | | `relyingPartyName` | `string` | The human-readable name of your application. | Uses `getRelyingPartyName` from the recipe configuration which defaults to the `apiName` | | `origin` | `string` | The origin URL where the credential is generated. | Uses `getOrigin` from the recipe configuration which defaults to the origin of the request | | `timeout` | `number` | The time in milliseconds that the user has to complete the credential generation process. | `6000` | | `attestation` | `"none" \| "indirect" \| "direct" \| "enterprise"` | The amount of information about the authenticator that gets included in the attestation statement. This controls what authenticators support. | `none` | | `supportedAlgorithms` | `number[]` | The cryptographic algorithms that can generate credentials. Different authenticators support different algorithms. | `[-8, -7, -257]` | | `residentKey` | `"discouraged" \| "preferred" \| "required"` | Whether the credential gest stored on the authenticator device. | `required` | | `userVerification` | `"discouraged" \| "preferred" \| "required"` | Whether user verification (like `PIN` or biometrics) is necessary. | `preferred` | | `displayName` | `string` | The display name of the user. | The user's `email` property |
#### Input properties | Name | Type | Description | Default Value | |----------|----------|-------------|---------------| | `relying_party_id` | `str` | The domain name of your application that the system uses for validating the credential. | Uses `get_relying_party_id` from the recipe configuration which defaults to the `api_domain` | | `relying_party_name` | `str` | The human-readable name of your application. | Uses `get_relying_party_name` from the recipe configuration which defaults to the `app_name` | | `origin` | `str` | The origin URL where the credential is generated. | Uses `get_origin` from the recipe configuration which defaults to the origin of the request | | `timeout` | `int` | The time in milliseconds that the user has to complete the credential generation process. | `6000` | | `attestation` | `"none" \| "indirect" \| "direct" \| "enterprise"` | The amount of information about the authenticator that gets included in the attestation statement. This controls what authenticators support. | `none` | | `supported_algorithms` | `List[int]` | The cryptographic algorithms that can generate credentials. Different authenticators support different algorithms. | `[-8, -7, -257]` | | `resident_key` | `"discouraged" \| "preferred" \| "required"` | Whether the credential gest stored on the authenticator device. | `required` | | `user_verification` | `"discouraged" \| "preferred" \| "required"` | Whether user verification (like `PIN` or biometrics) is necessary. | `preferred` | | `display_name` | `str` | The display name of the user. | The user's `email` property |
```bash curl --location --request GET '
```tsx // This JWK is copied from the result of the above SuperTokens core request let jwk = { "kty": "RSA", "kid": "s-2de612a5-a5ba-413e-9216-4c43e2e78c86", "n": "AMZruthvYz7Ft-Dp0BC_SEEJaWK91s_YA-RR81iLJ6BTT6gJp0CcV4DfBynFU_59dRGOZyVQpAW6Drnc_6LyZpVWHROzqt-Fjh8TAqodayhPJVuZt25eQiYrqcaK_dnuHrm8qwUq-hko6q1o1o9NIIZWNfUBEVWmNhyAJFk5bi3pLwtKPYrUQzVLcTdDUe4SIltvvfpYHbVFnYtxkBVmqO68j7sI8ktmTXM_heals-W6WmozabDkC9_ITCeRat2f7A2l0t4QzO0ZCzZcJfhusF4X1niKgY6yYXpbX6is4HCfhYfdabcE52xYMNl-gw9XDjsIxfBMUDvOFRHWlx0rU8c=", "e": "AQAB", "alg": "RS256", "use": "sig" }; // @ts-ignore let certString = jwkToPem(jwk); ``` The above snippet would generate the following certificate string: ```text -----BEGIN PUBLIC KEY----- MIIBIjANBgkqhkiG9w0BAQEFAAOCAQ8AMIIBCgKCAQEAxmu62G9jPsW34OnQEL9I QQlpYr3Wz9gD5FHzWIsnoFNPqAmnQJxXgN8HKcVT/n11EY5nJVCkBboOudz/ovJm ... (truncated for display) XhfWeIqBjrJheltfqKzgcJ+Fh91ptwTnbFgw2X6DD1cOOwjF8ExQO84VEdaXHStT xwIDAQAB -----END PUBLIC KEY----- ``` Use the generated Privacy-Enhanced Mail (PEM) string in your code as shown below: ```ts // Truncated for display let certificate = "-----BEGIN PUBLIC KEY-----\nMIIBIjANBgkqhkiG9w0BAQEFAAOCAQ8AMIIBCgKCAQEAxmu62G9jPsW34OnQEL9IQQlpYr3Wz9gD5FHzWIsnoFNPqAmnQJxXgN8HKcVT/n11EY5nJVCkBboOudz/ovJm...XhfWeIqBjrJheltfqKzgcJ+Fh91ptwTnbFgw2X6DD1cOOwjF8ExQO84VEdaXHStTxwIDAQAB\n-----END PUBLIC KEY-----"; let jwt = "..."; // fetch the JWT from sAccessToken cookie or Authorization Bearer header JsonWebToken.verify(jwt, certificate, function (err, decoded) { let decodedJWT = decoded; // Use JWT }); ``` ## Tell SuperTokens to always only use the static key when creating a new session. You can accomplish this by setting the below configuration in the backend SDK: ```tsx SuperTokens.init({ supertokens: { connectionURI: "...", }, appInfo: { apiDomain: "...", appName: "...", websiteDomain: "..." }, recipeList: [ Session.init({ //highlight-next-line useDynamicAccessTokenSigningKey: false, }) ] }); ``` :::caution Updating this value causes a spike in the session refresh API, as and when users visit your application. :::
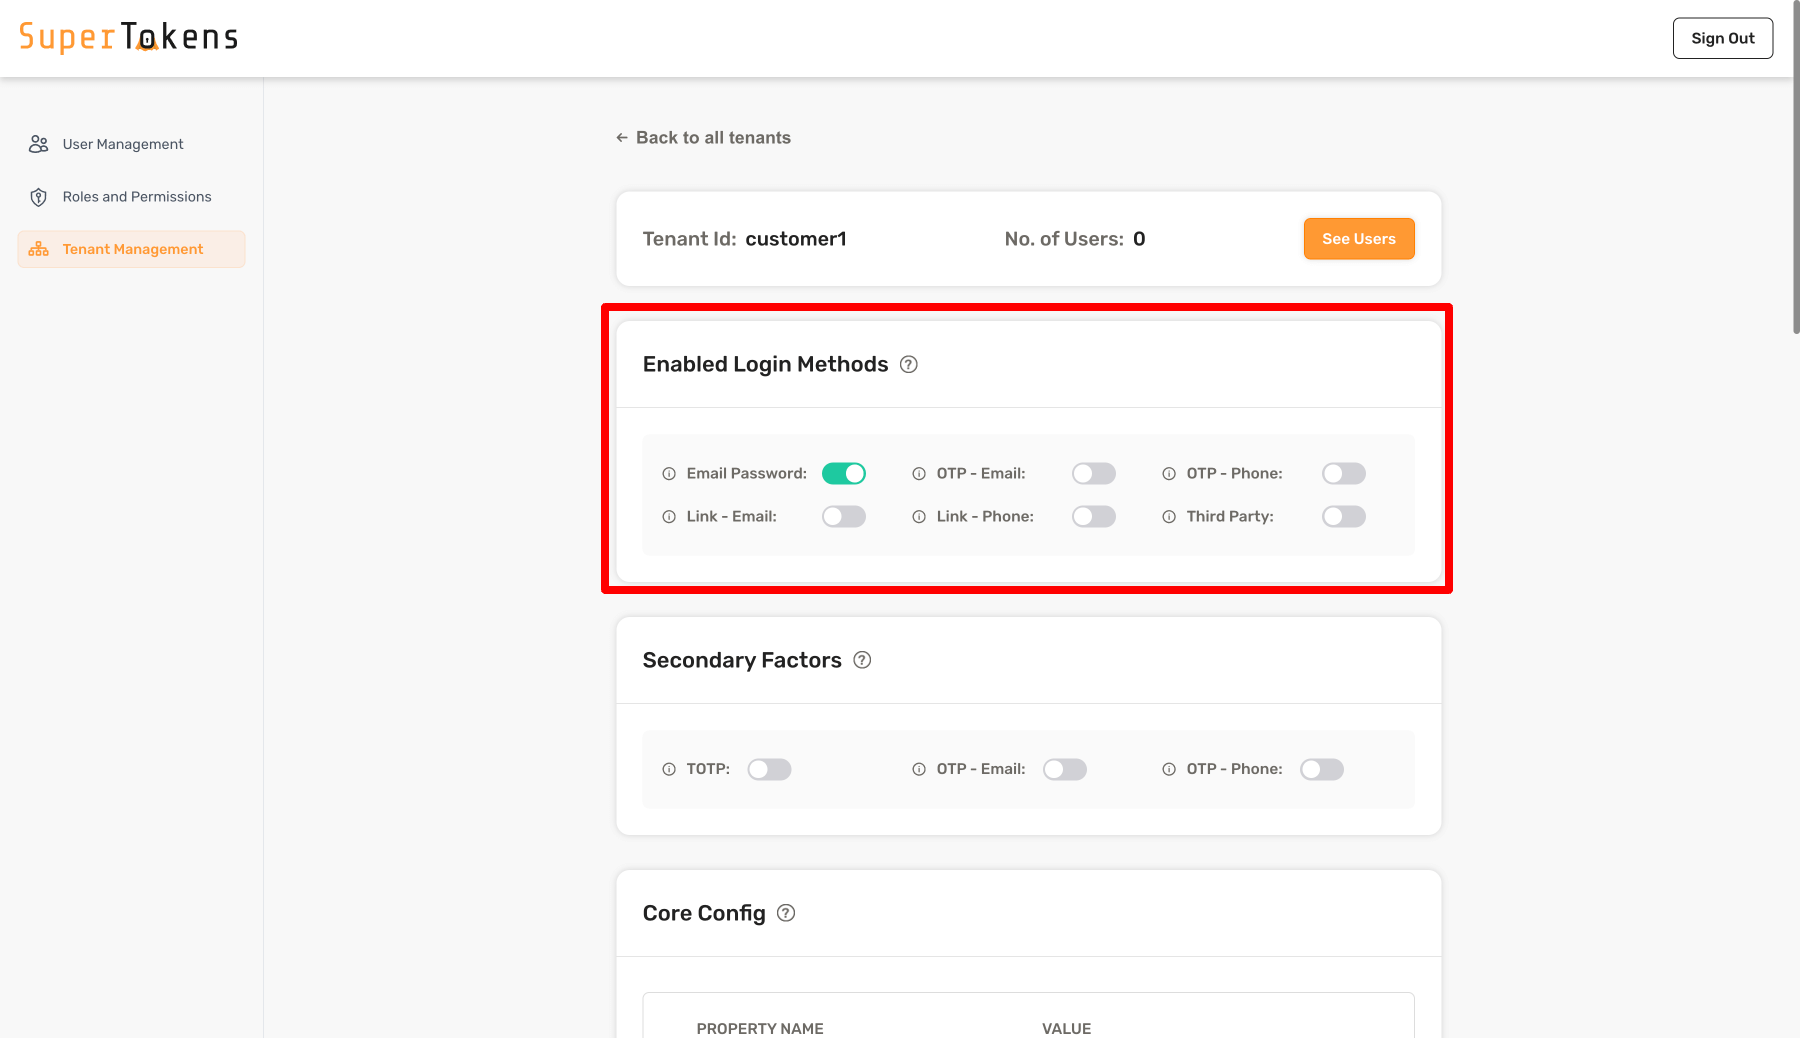 In the above setting, Email Password is active in the **Login Methods** section. This means that users who login to this tenant can only use email password as the first factor. Later on, the configuration for passwordless as a second factor for this tenant appears.
By default, no login methods activate for a tenant.
In the above setting, Email Password is active in the **Login Methods** section. This means that users who login to this tenant can only use email password as the first factor. Later on, the configuration for passwordless as a second factor for this tenant appears.
By default, no login methods activate for a tenant.
:::note no-title You can return an empty array from `getMFARequirementsForAuth` if you don't want any further MFA done for the current user. :::
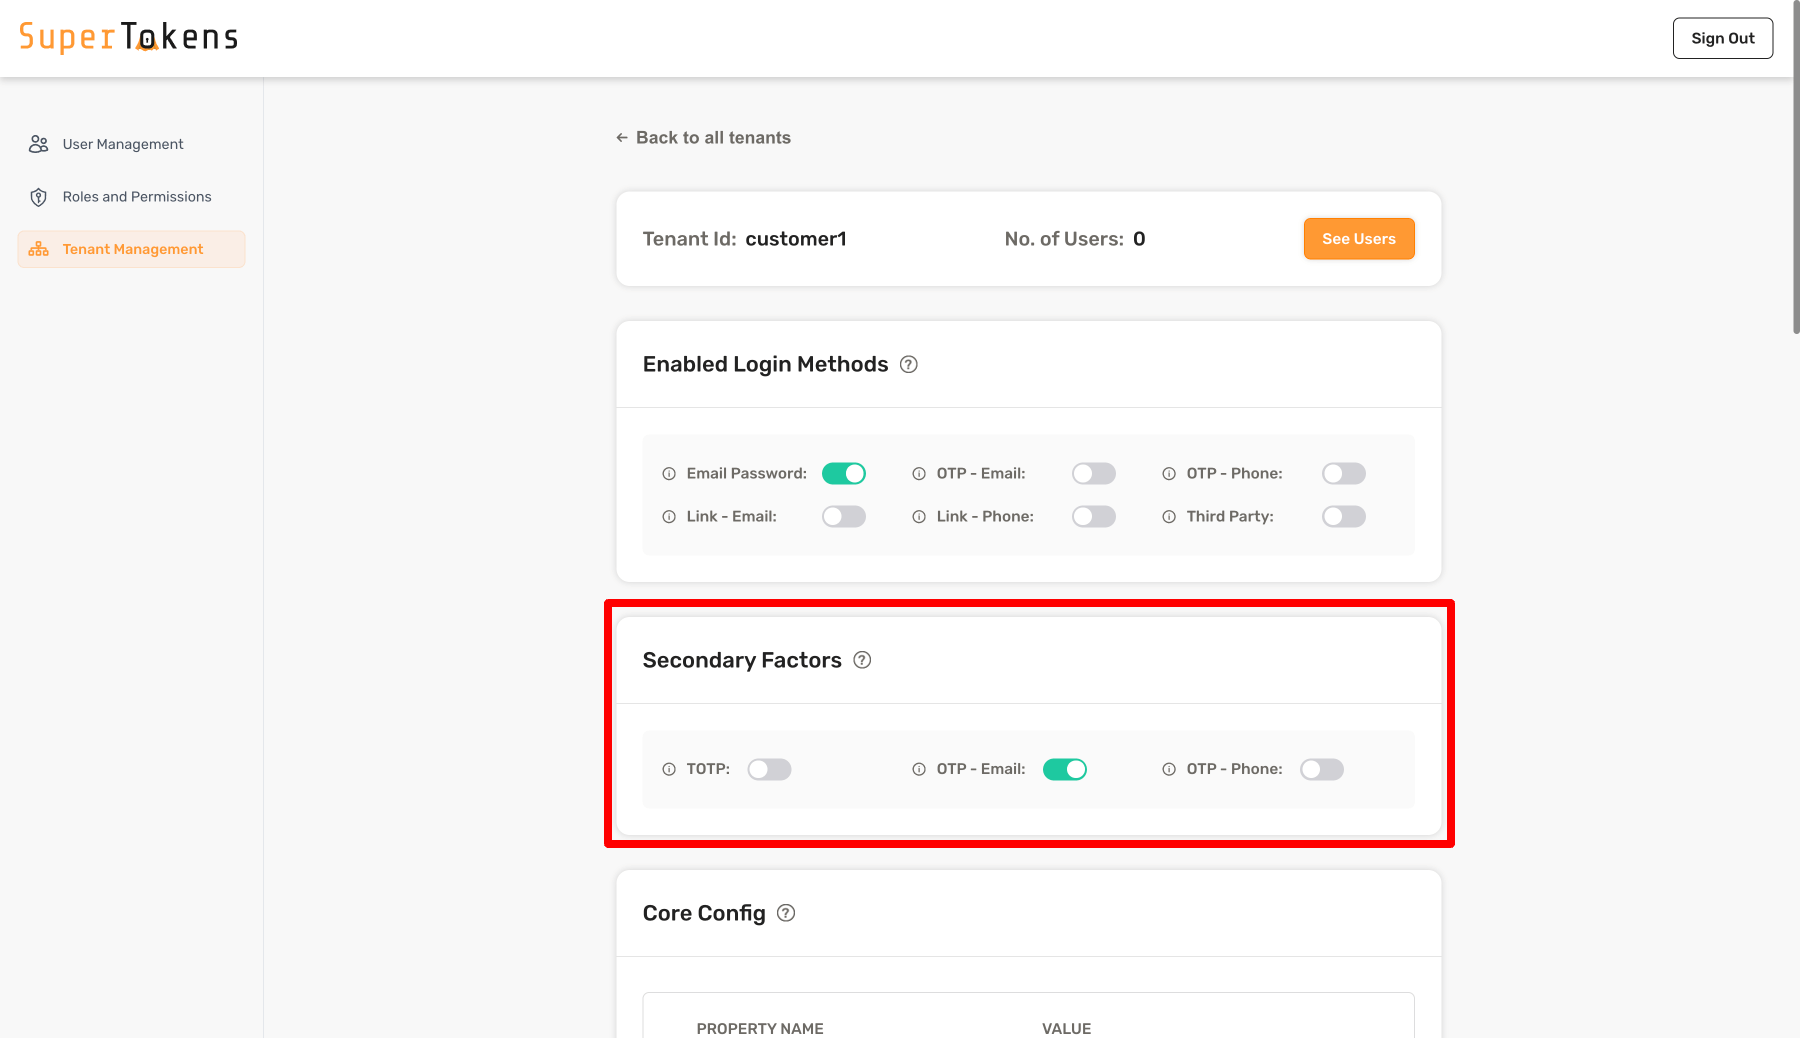 As shown above, you turn on `OTP - Email` in the **Secondary Factors** section which means that all users who log into that tenant must complete `otp-email` as a second factor.
You can also turn off all factors to have no secondary factors required for the tenant.
If you turn on more than one factor, it means that the user must complete any one of factors that are active. If you want to have a different behavior for the tenant, you can achieve that by overriding the `getMFARequirementsForAuth` function as shown below:
As shown above, you turn on `OTP - Email` in the **Secondary Factors** section which means that all users who log into that tenant must complete `otp-email` as a second factor.
You can also turn off all factors to have no secondary factors required for the tenant.
If you turn on more than one factor, it means that the user must complete any one of factors that are active. If you want to have a different behavior for the tenant, you can achieve that by overriding the `getMFARequirementsForAuth` function as shown below:
Access denied!
{props.error === undefined ? null : props.error}
);
},
}}>
{/* Rest of the JSX */}
Access denied!
{props.error === undefined ? null : props.error}
);
},
}}>
{getRoutingComponent([/*...*/])}
 As shown above, enable **Email Password** and **Third Party** in the Login methods section and enable **OTP - Email** in the Secondary Factors Section.
You need to complete TOTP before seeing this page. Please click here to finish to proceed.
}
// the user has finished TOTP, so we can render the children
return {props.children}
;
}
```
- Check if the user has completed TOTP within the last 5 minutes or not. If not, show a message to the user, and ask them to complete TOTP.
- Notice that the `DateProviderReference` class exported by SuperTokens replaces `Date.now()`. This accounts for any clock skew that may exist between the frontend and the backend server.
{
}
{/* highlight-next-line */}
);
}
```
You are logged In!
UserId: {sessionContext.userId}
{
}
{/* highlight-next-line */}
);
}
```
You are logged In!
UserId: {sessionContext.userId}
{
}
{/* highlight-next-line */}
);
}
```
You are logged In!
UserId: {sessionContext.userId}
You do not have access to this page because you have not completed TOTP. Please click here to finish to proceed.
}
// the user has finished TOTP, so we can render the children
return {props.children}
;
}
```
- In the snippet above, we remove the default claim validator that is added to `SessionAuth`, and add out own logic that reads from the session's payload.
- Finally, we check if the user has completed TOTP or not. If not, we show a message to the user, and ask them to complete TOTP. Of course, if this is all you want to do, then the default validator already does that. But the above has the boilerplate for how you can do more complex checks.
Second factor auth
;
}
return 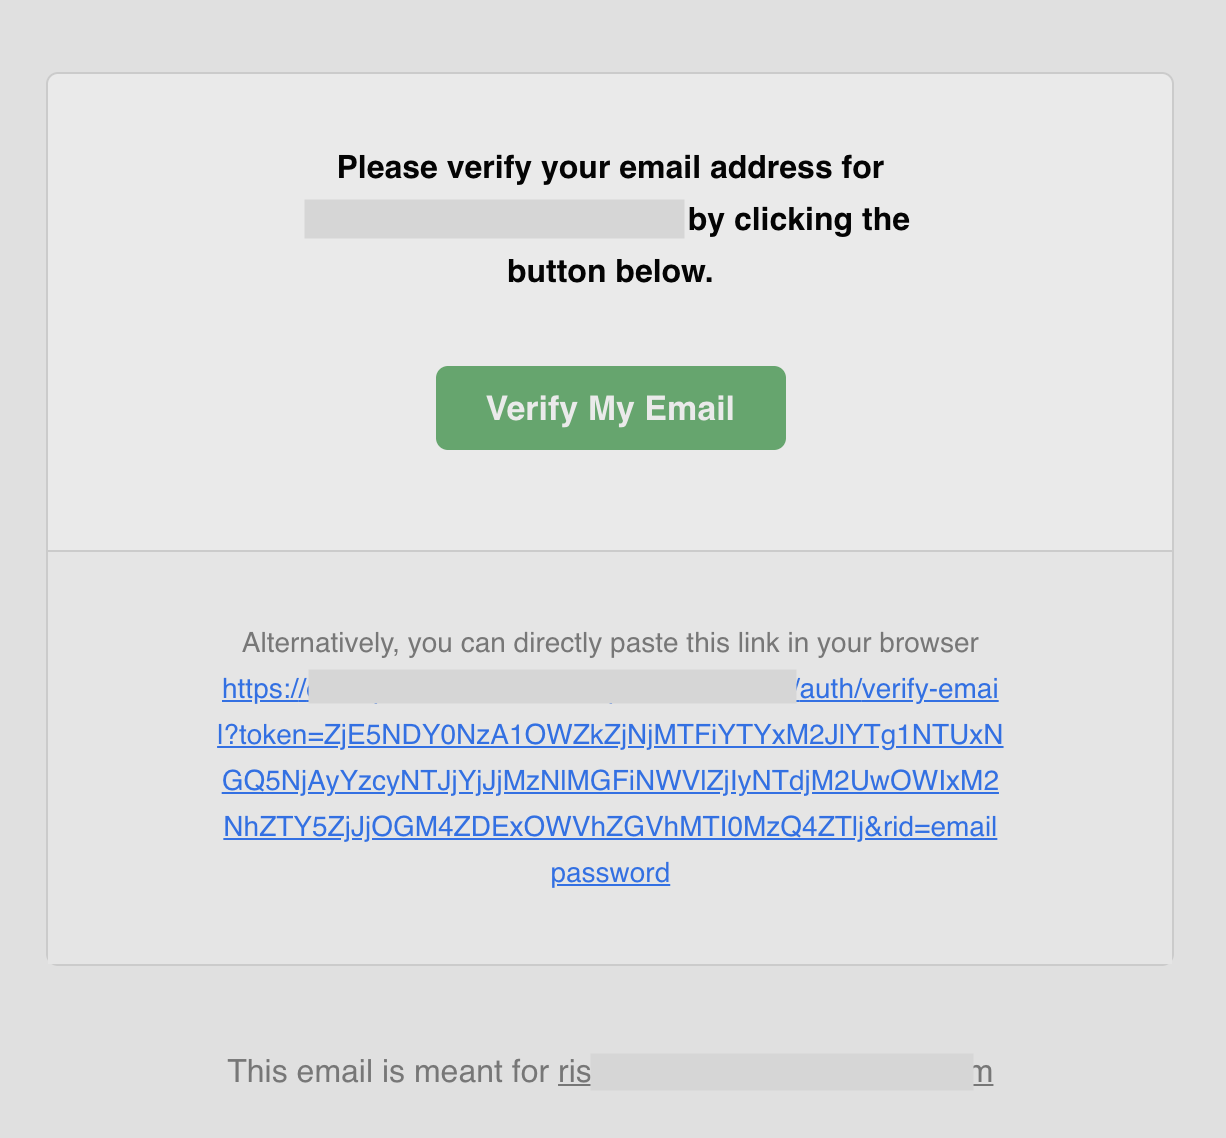 You can find the [source code of this template on GitHub](https://github.com/supertokens/email-sms-templates/blob/master/email-html/email-verification.html)
To understand more about how you can customize the check the [email delivery](/docs/platform-configuration/email-delivery) section.
### Verification link lifetime
By default, the email verification link's lifetime is **1 day**.
This can change via a core's configuration (time in milliseconds):
You can find the [source code of this template on GitHub](https://github.com/supertokens/email-sms-templates/blob/master/email-html/email-verification.html)
To understand more about how you can customize the check the [email delivery](/docs/platform-configuration/email-delivery) section.
### Verification link lifetime
By default, the email verification link's lifetime is **1 day**.
This can change via a core's configuration (time in milliseconds):
You cannot access this page because your email address is not verified.
}
// We show the protected route since all claims validators have
// passed implying that the user has verified their email.
return {props.children}
;
}
```
In the `VerifiedRoute` component, use the `SessionAuth` wrapper to ensure that the session exists.
The `
// highlight-next-line
)
}
}
```
- Home // highlight-next-line
- Login
- Home // highlight-next-line
- Login
- Home // highlight-next-line
- Login
- Home // highlight-next-line
- Logout
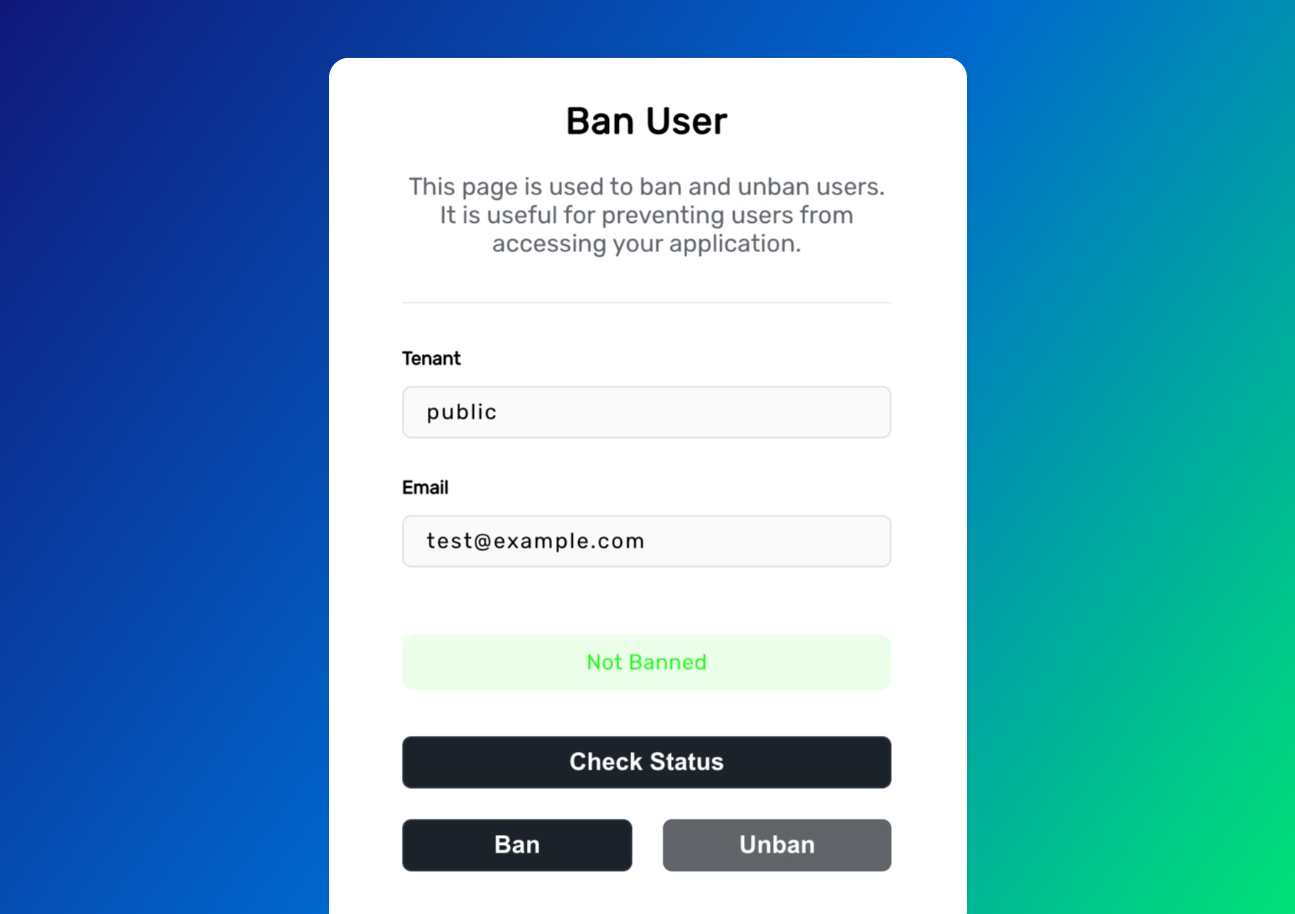 From the interface you can check the banning status of a user.
Based on that status, you can either ban or remove the ban for that account.
#### 3.2 Using direct API calls
You can also manage user bans programmatically using the exposed API endpoints.
##### Ban/unban user
```javascript
// Ban a user
const banResponse = await fetch("/plugin/supertokens-plugin-user-banning/ban?tenantId=public", {
method: "POST",
credentials: "include", // Include session cookies
headers: {
"Content-Type": "application/json",
},
body: JSON.stringify({
email: "user@example.com",
// You can also pass the userId instead of the email
// userId: "user123",
isBanned: true, // true to ban, false to remove ban
}),
});
const banResult = await banResponse.json();
if (banResult.status === "OK") {
console.log("User banned successfully");
} else {
console.error("Failed to ban user:", banResult.message);
}
// Remove ban from a user
const unbanResponse = await fetch("/plugin/supertokens-plugin-user-banning/ban?tenantId=public", {
method: "POST",
credentials: "include",
headers: {
"Content-Type": "application/json",
},
body: JSON.stringify({
email: "user@example.com",
isBanned: false,
}),
});
```
##### Check ban status
```javascript
// Check if a user is banned
const statusResponse = await fetch(
"/plugin/supertokens-plugin-user-banning/ban?tenantId=public&email=user@example.com",
{
method: "GET",
credentials: "include",
}
);
const status = await statusResponse.json();
if (status.status === "OK") {
console.log("User is banned:", status.banned);
} else {
console.error("Error checking ban status:", status.message);
}
```
## Customization
### Implement a custom user interface
To create a custom user interface you can use the `usePluginContext` hook.
It allows you to access the plugin's API methods and configuration in custom React components:
```typescript
function MyCustomAdminComponent() {
const { api, pluginConfig, t } = usePluginContext();
const handleBanUser = async (email: string) => {
try {
const result = await api.updateBanStatus("public", email, true);
if (result.status === "OK") {
console.log("User banned successfully");
} else {
console.error("Failed to ban user:", result.message);
}
} catch (error) {
console.error("Error:", error);
}
};
const handleCheckBanStatus = async (email: string) => {
try {
const result = await api.getBanStatus("public", email);
if (result.status === "OK") {
console.log("User has ban:", result.banned);
} else {
console.error("Error:", result.message);
}
} catch (error) {
console.error("Error:", error);
}
};
return (
From the interface you can check the banning status of a user.
Based on that status, you can either ban or remove the ban for that account.
#### 3.2 Using direct API calls
You can also manage user bans programmatically using the exposed API endpoints.
##### Ban/unban user
```javascript
// Ban a user
const banResponse = await fetch("/plugin/supertokens-plugin-user-banning/ban?tenantId=public", {
method: "POST",
credentials: "include", // Include session cookies
headers: {
"Content-Type": "application/json",
},
body: JSON.stringify({
email: "user@example.com",
// You can also pass the userId instead of the email
// userId: "user123",
isBanned: true, // true to ban, false to remove ban
}),
});
const banResult = await banResponse.json();
if (banResult.status === "OK") {
console.log("User banned successfully");
} else {
console.error("Failed to ban user:", banResult.message);
}
// Remove ban from a user
const unbanResponse = await fetch("/plugin/supertokens-plugin-user-banning/ban?tenantId=public", {
method: "POST",
credentials: "include",
headers: {
"Content-Type": "application/json",
},
body: JSON.stringify({
email: "user@example.com",
isBanned: false,
}),
});
```
##### Check ban status
```javascript
// Check if a user is banned
const statusResponse = await fetch(
"/plugin/supertokens-plugin-user-banning/ban?tenantId=public&email=user@example.com",
{
method: "GET",
credentials: "include",
}
);
const status = await statusResponse.json();
if (status.status === "OK") {
console.log("User is banned:", status.banned);
} else {
console.error("Error checking ban status:", status.message);
}
```
## Customization
### Implement a custom user interface
To create a custom user interface you can use the `usePluginContext` hook.
It allows you to access the plugin's API methods and configuration in custom React components:
```typescript
function MyCustomAdminComponent() {
const { api, pluginConfig, t } = usePluginContext();
const handleBanUser = async (email: string) => {
try {
const result = await api.updateBanStatus("public", email, true);
if (result.status === "OK") {
console.log("User banned successfully");
} else {
console.error("Failed to ban user:", result.message);
}
} catch (error) {
console.error("Error:", error);
}
};
const handleCheckBanStatus = async (email: string) => {
try {
const result = await api.getBanStatus("public", email);
if (result.status === "OK") {
console.log("User has ban:", result.banned);
} else {
console.error("Error:", result.message);
}
} catch (error) {
console.error("Error:", error);
}
};
return (
{t("PL_UB_BAN_PAGE_TITLE")}
:::important If you are returning `shouldRequireVerification` as `true`, then you need to also [enable the email verification recipe](/docs/additional-verification/email-verification/initial-setup) in `REQUIRED` mode. This means that if the login method does not inherently verify the email (like for email password login), SuperTokens requires the user to go through the email verification flow first. Then, it attempts auto linking of the account. For other login methods like sign in with Google, the email is already verified during login. The user does not need to verify the email again, and account linking occurs immediately. If you enable email verification in `OPTIONAL` mode, the user can access the account after email password login. However, account linking only occurs after they verify their email later on. This is risky because while the user had access to their email password account after sign up, they could lose access after verification and account linking completes due to the change in the primary user ID. A callback is available to help migrate data from one user ID to another. ::: You can use the input of the function to dynamically decide if you want to do account linking for a particular user and / or login method or not. ## References ### Automatic account linking scenarios #### During sign up If there exists another account with the same email or phone number within the current tenant, the new account links to the existing account if: - The existing account is a primary user - If `shouldRequireVerification` is `true`, the new account needs creation via a method that has the email as verified (for example via passwordless or google login). If the new method doesn't inherently verify the email (like in email password login), the accounts link post email verification. - Your implementation for `shouldDoAutomaticAccountLinking` returns `true` for the `shouldAutomaticallyLink` boolean. #### During sign in If the current user is not already linked and if there exists another user with the same email or phone number within the current tenant, the accounts link if: - The user signing into is not a primary user, and the other user with the same email / phone number is a primary user - If `shouldRequireVerification` is `true`, the current account (that's signing into) has its email as verified. - Your implementation for `shouldDoAutomaticAccountLinking` returns `true` for the `shouldAutomaticallyLink` boolean. #### After email verification If the current user whose email got verified is not a primary user, and there exists another primary user in the same tenant with the same email, then the two accounts link if: - Your implementation for `shouldDoAutomaticAccountLinking` returns `true` for the `shouldAutomaticallyLink` boolean. :::info no-title For a primary user, if two login methods (L1 & L2) share the same email, but L1's email verifies and L2's does not, SuperTokens automatically verifies L2's email under these conditions: - The user logs in with L2. - The `updateEmailOrPassword` (email password recipe) or `updateUser` (passwordless recipe) function calls to update L2's email to match L1's. ::: #### During the password reset flow If there already exists a user with the same email in a non email password recipe (social login for example), and the user is doing a password reset flow, a new email password user creates and links to the existing account if: - The non email password user is a primary user. - Your implementation for `shouldDoAutomaticAccountLinking` returns `true` for the `shouldAutomaticallyLink` boolean. :::info Email update implications When updating a user's login email, SuperTokens ensures account linking conditions remain valid. A primary user's email cannot update to match another primary user's email. User A has login methods `AL1` (email `e1`) and `AL2` (email `e1`). User B has login methods `BL1` (email `e2`) and `BL2` (email `e3`). Updating `AL1`'s email to `e2` or `e3` is not allowed, as it would create two primary users with the same email. **Email updates occur in these scenarios:** * `updateEmailOrPassword` function (email password recipe) * `updateUser` function (passwordless recipe) * Social login (if email from provider has changed) If the update violates account linking rules, the operation fails: * Function calls return a status indicating the update was impossible. * Social login API calls return a status prompting the user to contact support. ::: ### User data changes during account linking When two accounts link, the primary user ID of the non primary user changes. For example, if User A has a primary user ID `p1` and user B, which is a non primary user, has a user ID of `p2`, and they link, then the primary user ID of User B changes to `p1`. This has an effect that if the user logs in with login method from User B, the `session.getUserId()` returns `p1`. If there was any older data associated with User B (against user ID `p2`), in your database, that data essentially becomes "lost". To prevent this scenario, you should: - Make sure that you return `false` for `shouldAutomaticallyLink` boolean in the `shouldDoAutomaticAccountLinking` function implementation if there exists a `recipeUserId` in the `newAccountInfo` object, and if you have some information related to that user ID in your own database. This appears in the [code snippet above](#enabling-automatic-account-linking). - If you do not want to return `false` in this case, and want the accounts to link, then make sure to implement the `onAccountLinked` callback:
```tsx supertokens.init({ supertokens: { connectionURI: "...", apiKey: "..." }, appInfo: { apiDomain: "...", appName: "...", websiteDomain: "..." }, recipeList: [ AccountLinking.init({ shouldDoAutomaticAccountLinking: async (newAccountInfo: AccountInfoWithRecipeId & { recipeUserId?: RecipeUserId }, user: User | undefined, session: SessionContainerInterface | undefined, tenantId: string, userContext: any) => { return { shouldAutomaticallyLink: true, shouldRequireVerification: true } }, // highlight-start onAccountLinked: async (user: User, newAccountInfo: RecipeLevelUser, userContext: any) => { let olderUserId = newAccountInfo.recipeUserId.getAsString() let newUserId = user.id; // TODO: migrate data from olderUserId to newUserId in your database... } // highlight-end }) ] }); ``` :::caution If your logic in `onAccountLinked` throws an error, then it is not called again, and still results in linking the accounts. However, the end user would see an error on the UI as the API returns a `500` status code. They can retry the login action and log into the primary user's account as expected. ::: ### Error status codes The following is a list of error status codes that the end user might see during their interaction with the login UI (as a general error message in the pre-built UI).
 - Below is the scenario for when this status returns:
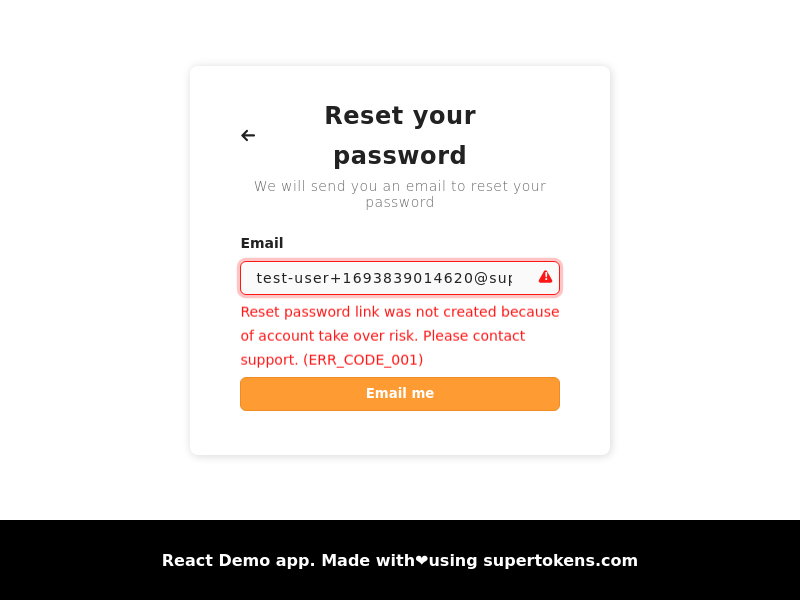
A malicious user, User A, which is a primary user, has login methods with email `e1` (social login) and email `e1` (`emailpassword` login). If user A changes their `emailpassword` email to `e2` (which is in unverified state), and the real user of `e2` (the victim) tries to sign up via email password, they see a message saying that the email already exists. The victim may then try to do a password reset (thinking they had previously signed up). If this happens, and the victim resets the password (since they are the real owner of the email), then they can login to the account, and the attacker can spy on what the user is doing via their third party login method.
To prevent this scenario, enforcement ensures that the password link is only generated if the primary user has at least one login method that has the input email ID and verifies it, or if not, checks that the primary user has no other login method with a different email, or phone number. If these cases are not satisfied, then the system returns the error code `ERR_CODE_001`.
- To resolve this, you would have to manually verify the user's identity and check that they own each of the emails / phone numbers associated with the primary user. Once verified, you can manually mark the email from the email password account as verified, and then ask them to go through the password reset flow once again. If they do not own each of the emails / phone numbers associated with the account, you can manually unlink the login methods which they do not own, and then ask them to go through the password reset flow once again. **You can do these actions using the user management dashboard.**
## `ERR_CODE_002`
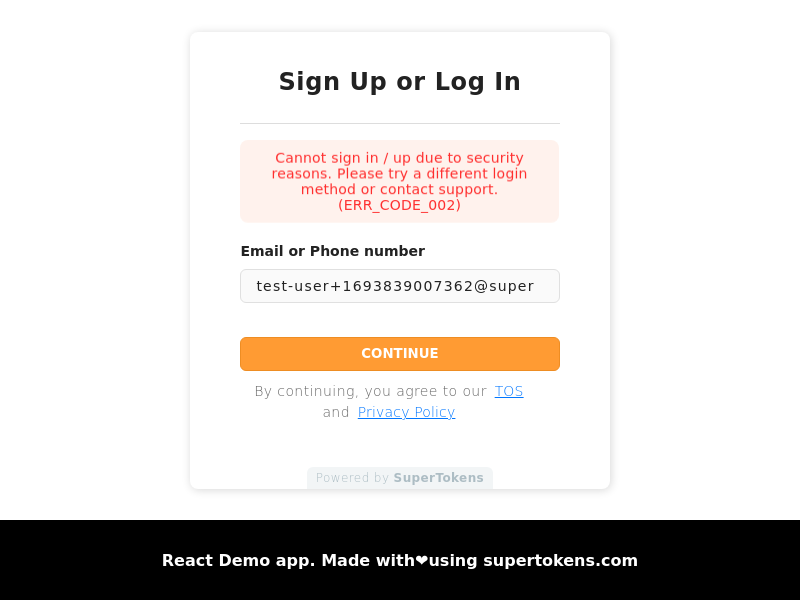
- This can happen during the passwordless recipe's create or consume code API (during sign up):
- API path and method: `/signinup/code POST` or `/signinup/code/consume POST`
- Output JSON:
```json
{
"status": "SIGN_IN_UP_NOT_ALLOWED",
"reason": "Cannot sign in / up due to security reasons. Please try a different login method or contact support. (ERR_CODE_002)"
}
```
- The pre-built UI on the frontend displays this error in the following way:
- Below is the scenario for when this status returns:
A malicious user, User A, which is a primary user, has login methods with email `e1` (social login) and email `e1` (`emailpassword` login). If user A changes their `emailpassword` email to `e2` (which is in unverified state), and the real user of `e2` (the victim) tries to sign up via email password, they see a message saying that the email already exists. The victim may then try to do a password reset (thinking they had previously signed up). If this happens, and the victim resets the password (since they are the real owner of the email), then they can login to the account, and the attacker can spy on what the user is doing via their third party login method.
To prevent this scenario, enforcement ensures that the password link is only generated if the primary user has at least one login method that has the input email ID and verifies it, or if not, checks that the primary user has no other login method with a different email, or phone number. If these cases are not satisfied, then the system returns the error code `ERR_CODE_001`.
- To resolve this, you would have to manually verify the user's identity and check that they own each of the emails / phone numbers associated with the primary user. Once verified, you can manually mark the email from the email password account as verified, and then ask them to go through the password reset flow once again. If they do not own each of the emails / phone numbers associated with the account, you can manually unlink the login methods which they do not own, and then ask them to go through the password reset flow once again. **You can do these actions using the user management dashboard.**
## `ERR_CODE_002`
- This can happen during the passwordless recipe's create or consume code API (during sign up):
- API path and method: `/signinup/code POST` or `/signinup/code/consume POST`
- Output JSON:
```json
{
"status": "SIGN_IN_UP_NOT_ALLOWED",
"reason": "Cannot sign in / up due to security reasons. Please try a different login method or contact support. (ERR_CODE_002)"
}
```
- The pre-built UI on the frontend displays this error in the following way:
 - Below is an example scenario for when this status returns (one amongst many):
A user is trying to sign up using passwordless login method with email `e1`. There exists an email password login method with `e1`, which remains unverified (owned by an attacker). If this scenario occurs, and then the attacker initiates the email verification flow for the email password method, the real user might click on the verification email (since they signed up, they do not get suspicious), and then the attacker's login method links to the passwordless login method. This way, the attacker gains access to the user's account.
To prevent this, sign up with passwordless login is not allowed in case there exists another account with the same email and remains unverified.
- To resolve this issue, you should ask the user to try another login method (which already has their email), or then mark their email as verified in the other account that has the same email, before asking them to retry passwordless login. **You can do these actions using the user management dashboard.**
## `ERR_CODE_003`
This used to be an error code which is no longer valid and you can ignore it.
## `ERR_CODE_004`
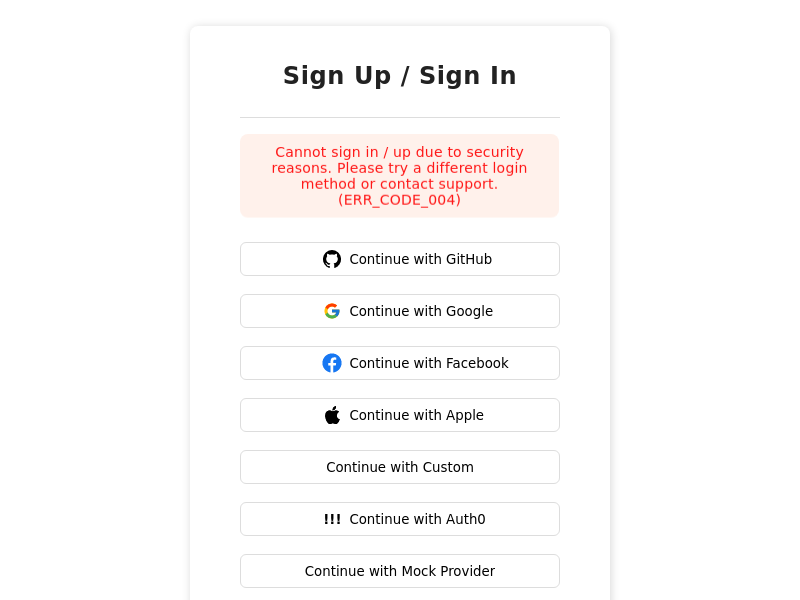
- This can happen during the third party recipe's `/signinup` API (during sign in):
- API path and method: `/signinup POST`
- Output JSON:
```json
{
"status": "SIGN_IN_UP_NOT_ALLOWED",
"reason": "Cannot sign in / up due to security reasons. Please try a different login method or contact support. (ERR_CODE_004)"
}
```
- The pre-built UI on the frontend displays this error in the following way:
- Below is an example scenario for when this status returns (one amongst many):
A user is trying to sign up using passwordless login method with email `e1`. There exists an email password login method with `e1`, which remains unverified (owned by an attacker). If this scenario occurs, and then the attacker initiates the email verification flow for the email password method, the real user might click on the verification email (since they signed up, they do not get suspicious), and then the attacker's login method links to the passwordless login method. This way, the attacker gains access to the user's account.
To prevent this, sign up with passwordless login is not allowed in case there exists another account with the same email and remains unverified.
- To resolve this issue, you should ask the user to try another login method (which already has their email), or then mark their email as verified in the other account that has the same email, before asking them to retry passwordless login. **You can do these actions using the user management dashboard.**
## `ERR_CODE_003`
This used to be an error code which is no longer valid and you can ignore it.
## `ERR_CODE_004`
- This can happen during the third party recipe's `/signinup` API (during sign in):
- API path and method: `/signinup POST`
- Output JSON:
```json
{
"status": "SIGN_IN_UP_NOT_ALLOWED",
"reason": "Cannot sign in / up due to security reasons. Please try a different login method or contact support. (ERR_CODE_004)"
}
```
- The pre-built UI on the frontend displays this error in the following way:
 - Below is an example scenario for when this status returns (one amongst many):
There exists a `thirdparty` user with email `e1`, sign in with Google (owned by the victim, and the email is verified). There exists another `thirdparty` login method with email, `e2` (owned by an attacker), such as login with GitHub. The attacker then goes to their GitHub and changes their email to `e1` (which is in unverified state). The next time the attacker tries to login, via GitHub, they see this error code. Login is prevented, because if it wasn't, then the attacker might send an email verification link to `e1`, and if the victim clicks on it, then the attacker's account will link to the victim's account.
- To resolve this issue, you can delete the login method that has the unverified email, or if manually mark the unverified account as verified (if you confirm the identity of its owner). **You can do these actions using the user management dashboard.**
## `ERR_CODE_005`
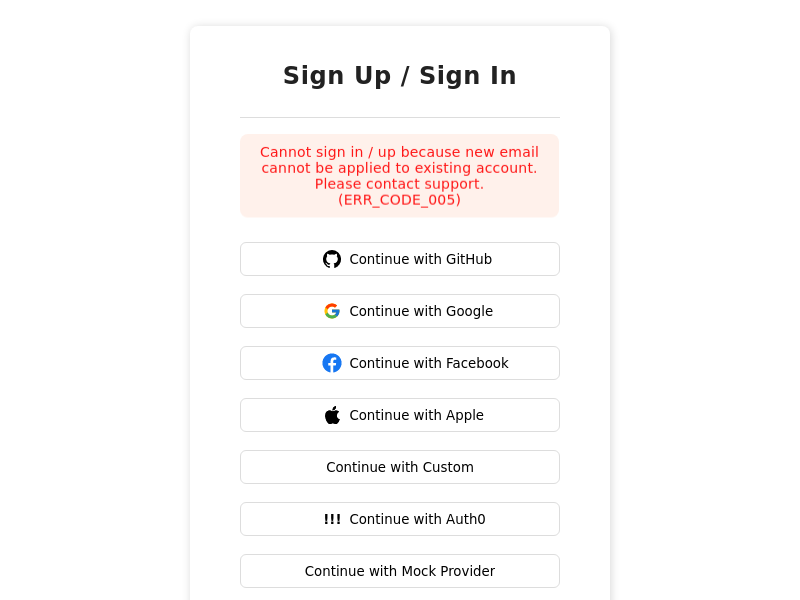
- This can happen during the third party recipe's `signinup` API (during sign in):
- API path and method: `/signinup POST`
- Output JSON:
```json
{
"status": "SIGN_IN_UP_NOT_ALLOWED",
"reason": "Cannot sign in / up because new email cannot be applied to existing account. Please contact support. (ERR_CODE_005)"
}
```
- The pre-built UI on the frontend displays this error in the following way:
- Below is an example scenario for when this status returns (one amongst many):
There exists a `thirdparty` user with email `e1`, sign in with Google (owned by the victim, and the email is verified). There exists another `thirdparty` login method with email, `e2` (owned by an attacker), such as login with GitHub. The attacker then goes to their GitHub and changes their email to `e1` (which is in unverified state). The next time the attacker tries to login, via GitHub, they see this error code. Login is prevented, because if it wasn't, then the attacker might send an email verification link to `e1`, and if the victim clicks on it, then the attacker's account will link to the victim's account.
- To resolve this issue, you can delete the login method that has the unverified email, or if manually mark the unverified account as verified (if you confirm the identity of its owner). **You can do these actions using the user management dashboard.**
## `ERR_CODE_005`
- This can happen during the third party recipe's `signinup` API (during sign in):
- API path and method: `/signinup POST`
- Output JSON:
```json
{
"status": "SIGN_IN_UP_NOT_ALLOWED",
"reason": "Cannot sign in / up because new email cannot be applied to existing account. Please contact support. (ERR_CODE_005)"
}
```
- The pre-built UI on the frontend displays this error in the following way:
 - Below is as example scenario for when this status returns (one amongst many):
There exists a primary, third party user with email `e1`, sign in with Google. There exists another email password user with email `e2`, which is a primary user. If the user changes their email on Google to `e2`, and then try logging in via Google, they see this error code. This occurs because if it wasn't, then it would result in two primary users having the same email, which violates one of the account linking rules.
- To resolve this issue, you can make one of the primary users as non primary (use the unlink button against the login method on the user management dashboard). Once the user is not a primary user, you can ask the user to re-login with that method, and it should auto link that account with the existing primary user.
## `ERR_CODE_006`
- This can happen during the third party recipe's `signinup` API (during sign up):
- API path and method: `/signinup POST`
- Output JSON:
```json
{
"status": "SIGN_IN_UP_NOT_ALLOWED",
"reason": "Cannot sign in / up because new email cannot be applied to existing account. Please contact support. (ERR_CODE_006)"
}
```
- The pre-built UI on the frontend displays this error in the following way:
- Below is as example scenario for when this status returns (one amongst many):
There exists a primary, third party user with email `e1`, sign in with Google. There exists another email password user with email `e2`, which is a primary user. If the user changes their email on Google to `e2`, and then try logging in via Google, they see this error code. This occurs because if it wasn't, then it would result in two primary users having the same email, which violates one of the account linking rules.
- To resolve this issue, you can make one of the primary users as non primary (use the unlink button against the login method on the user management dashboard). Once the user is not a primary user, you can ask the user to re-login with that method, and it should auto link that account with the existing primary user.
## `ERR_CODE_006`
- This can happen during the third party recipe's `signinup` API (during sign up):
- API path and method: `/signinup POST`
- Output JSON:
```json
{
"status": "SIGN_IN_UP_NOT_ALLOWED",
"reason": "Cannot sign in / up because new email cannot be applied to existing account. Please contact support. (ERR_CODE_006)"
}
```
- The pre-built UI on the frontend displays this error in the following way:
 - Below is as example scenario for when this status returns (one amongst many):
A user is trying to sign up using third party login method with email `e1`. There exists an email password login method with `e1`, which remains unverified (owned by an attacker). If the third party sign up is allowed, and then the attacker initiates the email verification flow for the email password method, the real user might click on the verification email (since they signed up, they do not get suspicious), and then the attacker's login method links to the third party login method. This way, the attacker has access to the user's account.
To prevent this, sign up with third party login is not allowed in case there exists another account with the same email and remains unverified.
- To resolve this issue, you should ask the user to try another login method (which already has their email), or then manually mark their email as verified in the other account that has the same email, before asking them to retry third party login. **You can do these actions using the user management dashboard.**
## `ERR_CODE_007`
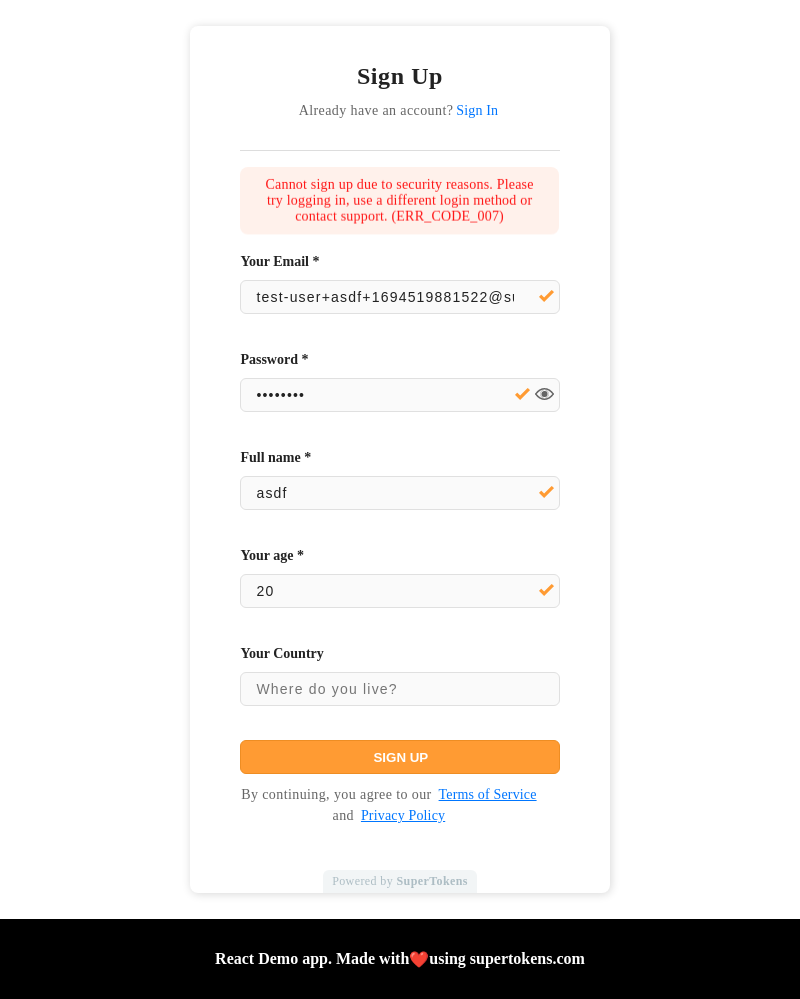
- This can happen during the email password sign up API:
- API path and method: `/signup POST`
- Output JSON:
```json
{
"status": "SIGN_UP_NOT_ALLOWED",
"reason": "Cannot sign up due to security reasons. Please try logging in, use a different login method or contact support. (ERR_CODE_007)"
}
```
- The pre-built UI on the frontend displays this error in the following way:
- Below is as example scenario for when this status returns (one amongst many):
A user is trying to sign up using third party login method with email `e1`. There exists an email password login method with `e1`, which remains unverified (owned by an attacker). If the third party sign up is allowed, and then the attacker initiates the email verification flow for the email password method, the real user might click on the verification email (since they signed up, they do not get suspicious), and then the attacker's login method links to the third party login method. This way, the attacker has access to the user's account.
To prevent this, sign up with third party login is not allowed in case there exists another account with the same email and remains unverified.
- To resolve this issue, you should ask the user to try another login method (which already has their email), or then manually mark their email as verified in the other account that has the same email, before asking them to retry third party login. **You can do these actions using the user management dashboard.**
## `ERR_CODE_007`
- This can happen during the email password sign up API:
- API path and method: `/signup POST`
- Output JSON:
```json
{
"status": "SIGN_UP_NOT_ALLOWED",
"reason": "Cannot sign up due to security reasons. Please try logging in, use a different login method or contact support. (ERR_CODE_007)"
}
```
- The pre-built UI on the frontend displays this error in the following way:
 - Below is as example scenario for when this status returns (one amongst many):
There exists a primary, social login account with email `e1`, sign in with Google. If an attacker tries to sign up with email password with email `e1`, the system sends an email verification email to the victim, and they may click it since they had previously signed up with Google. This links the attacker's account to the victim's account.
- To resolve this issue, you can ask the user to try and login, or go through the reset password flow.
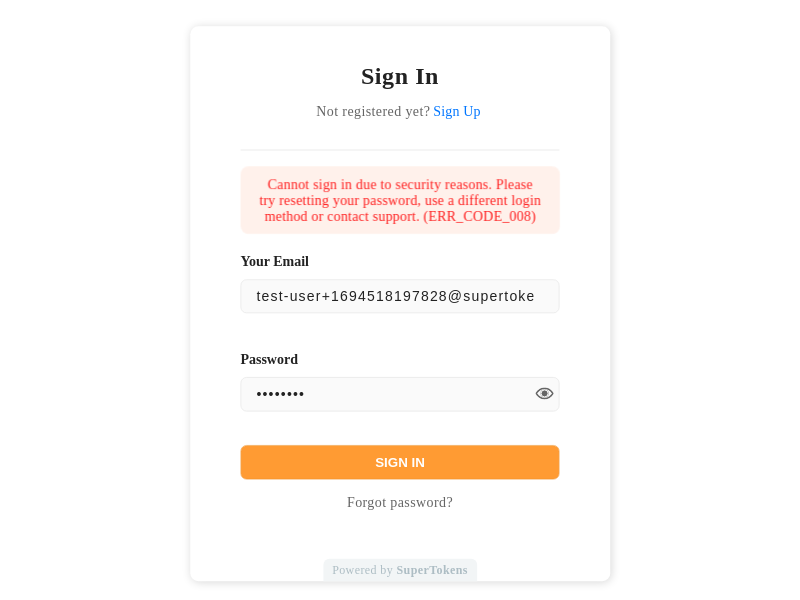
## `ERR_CODE_008`
- This can happen during the email password sign in API:
- API path and method: `/signin POST`
- Output JSON:
```json
{
"status": "SIGN_IN_NOT_ALLOWED",
"reason": "Cannot sign in due to security reasons. Please try resetting your password, use a different login method or contact support. (ERR_CODE_008)"
}
```
- The pre-built UI on the frontend displays this error in the following way:
- Below is as example scenario for when this status returns (one amongst many):
There exists a primary, social login account with email `e1`, sign in with Google. If an attacker tries to sign up with email password with email `e1`, the system sends an email verification email to the victim, and they may click it since they had previously signed up with Google. This links the attacker's account to the victim's account.
- To resolve this issue, you can ask the user to try and login, or go through the reset password flow.
## `ERR_CODE_008`
- This can happen during the email password sign in API:
- API path and method: `/signin POST`
- Output JSON:
```json
{
"status": "SIGN_IN_NOT_ALLOWED",
"reason": "Cannot sign in due to security reasons. Please try resetting your password, use a different login method or contact support. (ERR_CODE_008)"
}
```
- The pre-built UI on the frontend displays this error in the following way:
 - Below is as example scenario for when this status returns (one amongst many):
There exists a primary, social login account with email `e1`, sign in with Google. There also exists an email password account (owned by the attacker) that remains unverified with the same email `e1` (this is not a primary user). If the attacker tries to sign in with email password, they see this error. This occurs because if it wasn't, then the attacker might send an email verification email on sign in, and the actual user may click on it (since they had previously signed up). Upon verifying that account, the system links the attacker's account to the victim's account.
- To resolve this issue, you can ask the user to try the reset password flow.
## `ERR_CODE_014`
- This can happen when adding a password to an existing session user:
- API Path is `/signup POST`.
- Output JSON:
```json
{
"status": "SIGN_UP_NOT_ALLOWED",
"reason": "Cannot sign up due to security reasons. Please contact support. (ERR_CODE_014)"
}
```
- An example scenario of when in the following scenario:
- Let's say that the app configures to not have automatic account linking during the first factor.
- A user creates an email password account with email `e1`, verifies it, and links social login account to it with email `e2`.
- The user logs out, and then creates a social login account with email `e1`. Then, they receive a request to add a password to this account. Since an email password account with `e1` already exists, SuperTokens tries and links that to this new account, but fails, since the email password account with `e1` is already a primary user.
- To resolve this, it is recommended to manually link the `e1` social login account with the `e1` email password account. Alternatively, enable automatic account linking for first factor to prevent the above scenario.
## `ERR_CODE_015`
- This can happen when adding a password to an existing session user:
- API Path is `/signup POST`.
- Output JSON:
```json
{
"status": "SIGN_UP_NOT_ALLOWED",
"reason": "Cannot sign up due to security reasons. Please contact support. (ERR_CODE_015)"
}
```
- An example scenario of when in the following scenario:
- A user creates a social login account with email `e1` which becomes a primary user.
- The user logs out, and creates another social login account with email `e2`, which also becomes a primary user.
- The user receives a request to add a password for the new account with an option to also specify an email with it (this is strange, but theoretically possible). They enter the email `e1` for the email password account.
- This causes this type of error since the linking of the new social login and email account fails since there already exists another primary user with the same (`e1`) email.
- To resolve this, it is recommended not allowing users to specify an email when asking them to add a password for their account.
## `ERR_CODE_016`
- This can happen when adding a password to an existing session user:
- API Path is `/signup POST`.
- Output JSON:
```json
{
"status": "SIGN_UP_NOT_ALLOWED",
"reason": "Cannot sign up due to security reasons. Please contact support. (ERR_CODE_016)"
}
```
- An example scenario of when in the following scenario:
- Let's say that the app is configured to not have automatic account linking during the first factor.
- A user signs up with a social login account using Google with email `e1`, and they add another social account, with Facebook, with the same email.
- The user logs out and creates another social login account with email `e1` (say GitHub), and then tries and adds a password to this account with email `e1`. Here, SuperTokens tries and makes the GitHub login a primary user, but fails, since the email `e1` is already a primary user (with Google login).
- To resolve this, it is recommended that you manually link the `e1` GitHub social login account with the `e1` Google social login account. Or you can enable automatic account linking for first factor and this way, the above scenario will not happen.
## `ERR_CODE_020`
- This can happen during association of a third party login to an existing session's account.
- API Path is `/signinup POST`.
- Output JSON:
```json
{
"status": "SIGN_IN_UP_NOT_ALLOWED",
"reason": "Cannot sign in / up due to security reasons. Please contact support. (ERR_CODE_020)"
}
```
- This can happen when the third party account that is trying to link to the session's account is not verified. It could happen when you are trying to associate a social login account to a user, but that social account's email is not verified (and if the email of that account is not the same as the current session's account's email).
- To resolve this, you can return `shouldRequireVerification` as `false` in the `shouldDoAutomaticAccountLinking` function implementation, or you can only allow users to link social login accounts that give verified accounts.
## `ERR_CODE_021`
- This can happen during association of a third party login to an existing session's account.
- API Path is `/signinup POST`.
- Output JSON:
```json
{
"status": "SIGN_IN_UP_NOT_ALLOWED",
"reason": "Cannot sign in / up due to security reasons. Please contact support. (ERR_CODE_021)"
}
```
- This can happen when the third party account that is trying to link to the session's account is already linked with another primary user.
## `ERR_CODE_022`
- This can happen during association of a third party login to an existing session's account.
- API Path is `/signinup POST`.
- Output JSON:
```json
{
"status": "SIGN_IN_UP_NOT_ALLOWED",
"reason": "Cannot sign in / up due to security reasons. Please contact support. (ERR_CODE_022)"
}
```
- This can happen when the third party account that is trying to link to the session's account has the same email as another primary user.
## `ERR_CODE_023`
- This can happen during association of a third party login to an existing session's account.
- API Path is `/signinup POST`.
- Output JSON:
```json
{
"status": "SIGN_IN_UP_NOT_ALLOWED",
"reason": "Cannot sign in / up due to security reasons. Please contact support. (ERR_CODE_023)"
}
```
- To link the third party user with the session user, we need to make sure that the session user is a primary user. However, that can fail if there exists another primary user with the same email as the session user, and in this case, this error returns to the frontend.
## `ERR_CODE_024`
- This happens during third party sign in, when the user is trying to sign in with a non-primary user, and the third party provider does not verify their email, and their exists a primary user with the same email. This can also happen the other way around wherein the user is trying to sign in with the primary user (unverified email), and there exists a non-primary user with the same email.
- API Path is `/signinup POST`.
- Output JSON:
```json
{
"status": "SIGN_IN_UP_NOT_ALLOWED",
"reason": "Cannot sign in / up due to security reasons. Please contact support. (ERR_CODE_024)"
}
```
- You can resolve this by deleting the (non primary) user that has the same email ID, or by manually marking the email of the user as verified for the login method that they are trying to sign in with.
- Below is as example scenario for when this status returns (one amongst many):
There exists a primary, social login account with email `e1`, sign in with Google. There also exists an email password account (owned by the attacker) that remains unverified with the same email `e1` (this is not a primary user). If the attacker tries to sign in with email password, they see this error. This occurs because if it wasn't, then the attacker might send an email verification email on sign in, and the actual user may click on it (since they had previously signed up). Upon verifying that account, the system links the attacker's account to the victim's account.
- To resolve this issue, you can ask the user to try the reset password flow.
## `ERR_CODE_014`
- This can happen when adding a password to an existing session user:
- API Path is `/signup POST`.
- Output JSON:
```json
{
"status": "SIGN_UP_NOT_ALLOWED",
"reason": "Cannot sign up due to security reasons. Please contact support. (ERR_CODE_014)"
}
```
- An example scenario of when in the following scenario:
- Let's say that the app configures to not have automatic account linking during the first factor.
- A user creates an email password account with email `e1`, verifies it, and links social login account to it with email `e2`.
- The user logs out, and then creates a social login account with email `e1`. Then, they receive a request to add a password to this account. Since an email password account with `e1` already exists, SuperTokens tries and links that to this new account, but fails, since the email password account with `e1` is already a primary user.
- To resolve this, it is recommended to manually link the `e1` social login account with the `e1` email password account. Alternatively, enable automatic account linking for first factor to prevent the above scenario.
## `ERR_CODE_015`
- This can happen when adding a password to an existing session user:
- API Path is `/signup POST`.
- Output JSON:
```json
{
"status": "SIGN_UP_NOT_ALLOWED",
"reason": "Cannot sign up due to security reasons. Please contact support. (ERR_CODE_015)"
}
```
- An example scenario of when in the following scenario:
- A user creates a social login account with email `e1` which becomes a primary user.
- The user logs out, and creates another social login account with email `e2`, which also becomes a primary user.
- The user receives a request to add a password for the new account with an option to also specify an email with it (this is strange, but theoretically possible). They enter the email `e1` for the email password account.
- This causes this type of error since the linking of the new social login and email account fails since there already exists another primary user with the same (`e1`) email.
- To resolve this, it is recommended not allowing users to specify an email when asking them to add a password for their account.
## `ERR_CODE_016`
- This can happen when adding a password to an existing session user:
- API Path is `/signup POST`.
- Output JSON:
```json
{
"status": "SIGN_UP_NOT_ALLOWED",
"reason": "Cannot sign up due to security reasons. Please contact support. (ERR_CODE_016)"
}
```
- An example scenario of when in the following scenario:
- Let's say that the app is configured to not have automatic account linking during the first factor.
- A user signs up with a social login account using Google with email `e1`, and they add another social account, with Facebook, with the same email.
- The user logs out and creates another social login account with email `e1` (say GitHub), and then tries and adds a password to this account with email `e1`. Here, SuperTokens tries and makes the GitHub login a primary user, but fails, since the email `e1` is already a primary user (with Google login).
- To resolve this, it is recommended that you manually link the `e1` GitHub social login account with the `e1` Google social login account. Or you can enable automatic account linking for first factor and this way, the above scenario will not happen.
## `ERR_CODE_020`
- This can happen during association of a third party login to an existing session's account.
- API Path is `/signinup POST`.
- Output JSON:
```json
{
"status": "SIGN_IN_UP_NOT_ALLOWED",
"reason": "Cannot sign in / up due to security reasons. Please contact support. (ERR_CODE_020)"
}
```
- This can happen when the third party account that is trying to link to the session's account is not verified. It could happen when you are trying to associate a social login account to a user, but that social account's email is not verified (and if the email of that account is not the same as the current session's account's email).
- To resolve this, you can return `shouldRequireVerification` as `false` in the `shouldDoAutomaticAccountLinking` function implementation, or you can only allow users to link social login accounts that give verified accounts.
## `ERR_CODE_021`
- This can happen during association of a third party login to an existing session's account.
- API Path is `/signinup POST`.
- Output JSON:
```json
{
"status": "SIGN_IN_UP_NOT_ALLOWED",
"reason": "Cannot sign in / up due to security reasons. Please contact support. (ERR_CODE_021)"
}
```
- This can happen when the third party account that is trying to link to the session's account is already linked with another primary user.
## `ERR_CODE_022`
- This can happen during association of a third party login to an existing session's account.
- API Path is `/signinup POST`.
- Output JSON:
```json
{
"status": "SIGN_IN_UP_NOT_ALLOWED",
"reason": "Cannot sign in / up due to security reasons. Please contact support. (ERR_CODE_022)"
}
```
- This can happen when the third party account that is trying to link to the session's account has the same email as another primary user.
## `ERR_CODE_023`
- This can happen during association of a third party login to an existing session's account.
- API Path is `/signinup POST`.
- Output JSON:
```json
{
"status": "SIGN_IN_UP_NOT_ALLOWED",
"reason": "Cannot sign in / up due to security reasons. Please contact support. (ERR_CODE_023)"
}
```
- To link the third party user with the session user, we need to make sure that the session user is a primary user. However, that can fail if there exists another primary user with the same email as the session user, and in this case, this error returns to the frontend.
## `ERR_CODE_024`
- This happens during third party sign in, when the user is trying to sign in with a non-primary user, and the third party provider does not verify their email, and their exists a primary user with the same email. This can also happen the other way around wherein the user is trying to sign in with the primary user (unverified email), and there exists a non-primary user with the same email.
- API Path is `/signinup POST`.
- Output JSON:
```json
{
"status": "SIGN_IN_UP_NOT_ALLOWED",
"reason": "Cannot sign in / up due to security reasons. Please contact support. (ERR_CODE_024)"
}
```
- You can resolve this by deleting the (non primary) user that has the same email ID, or by manually marking the email of the user as verified for the login method that they are trying to sign in with.
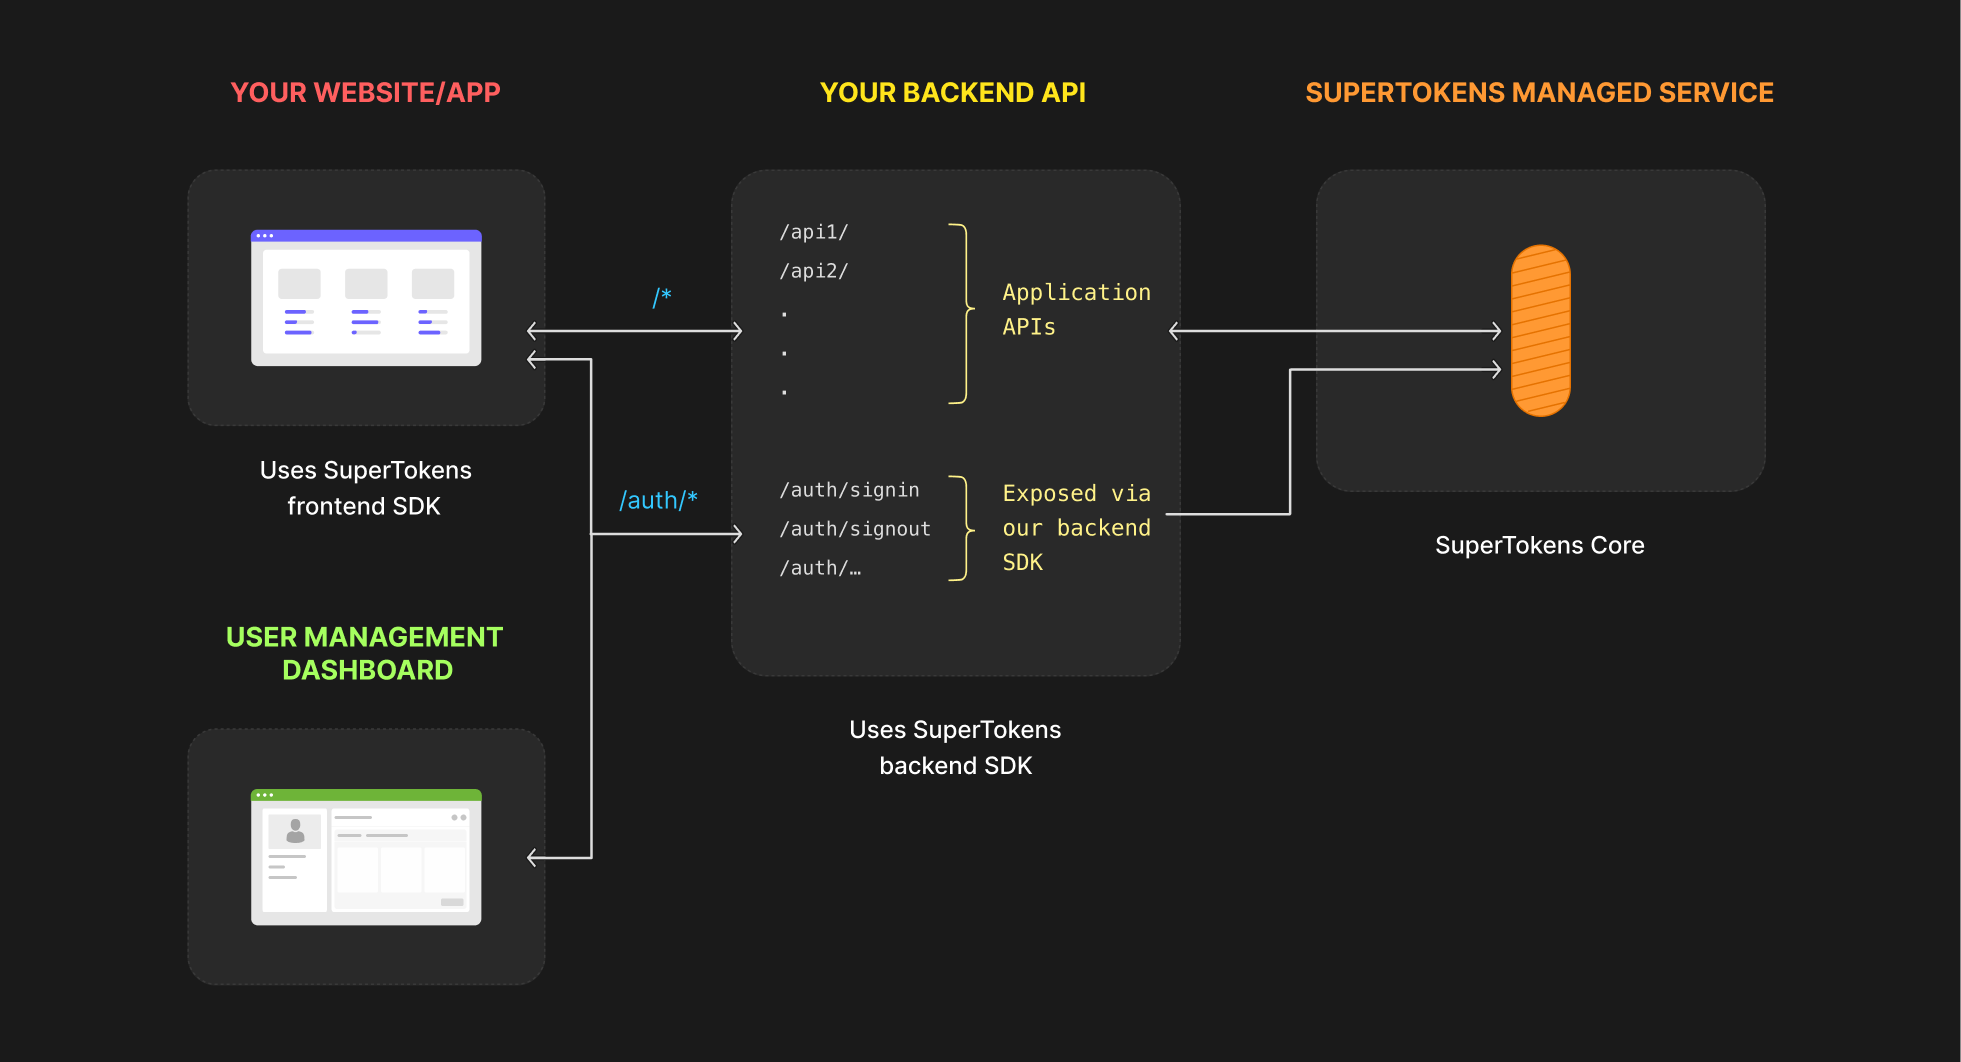
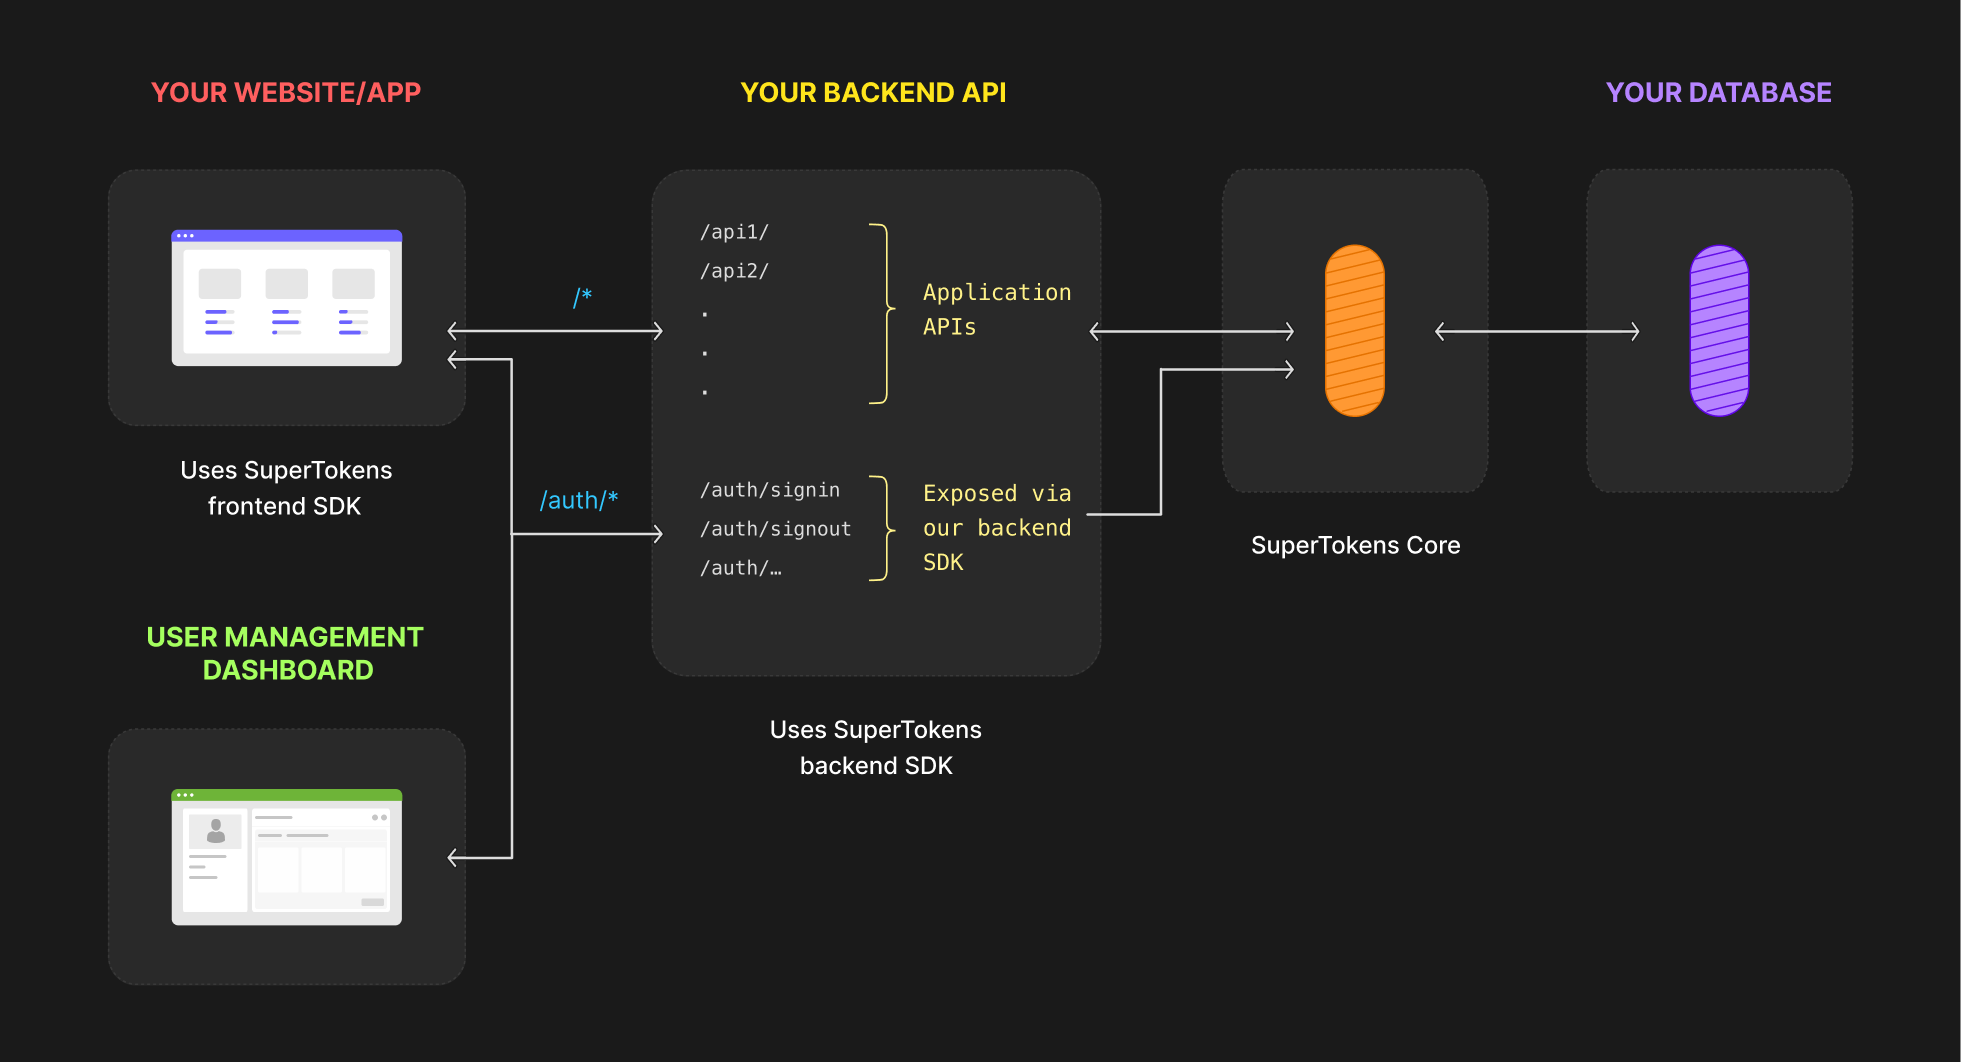
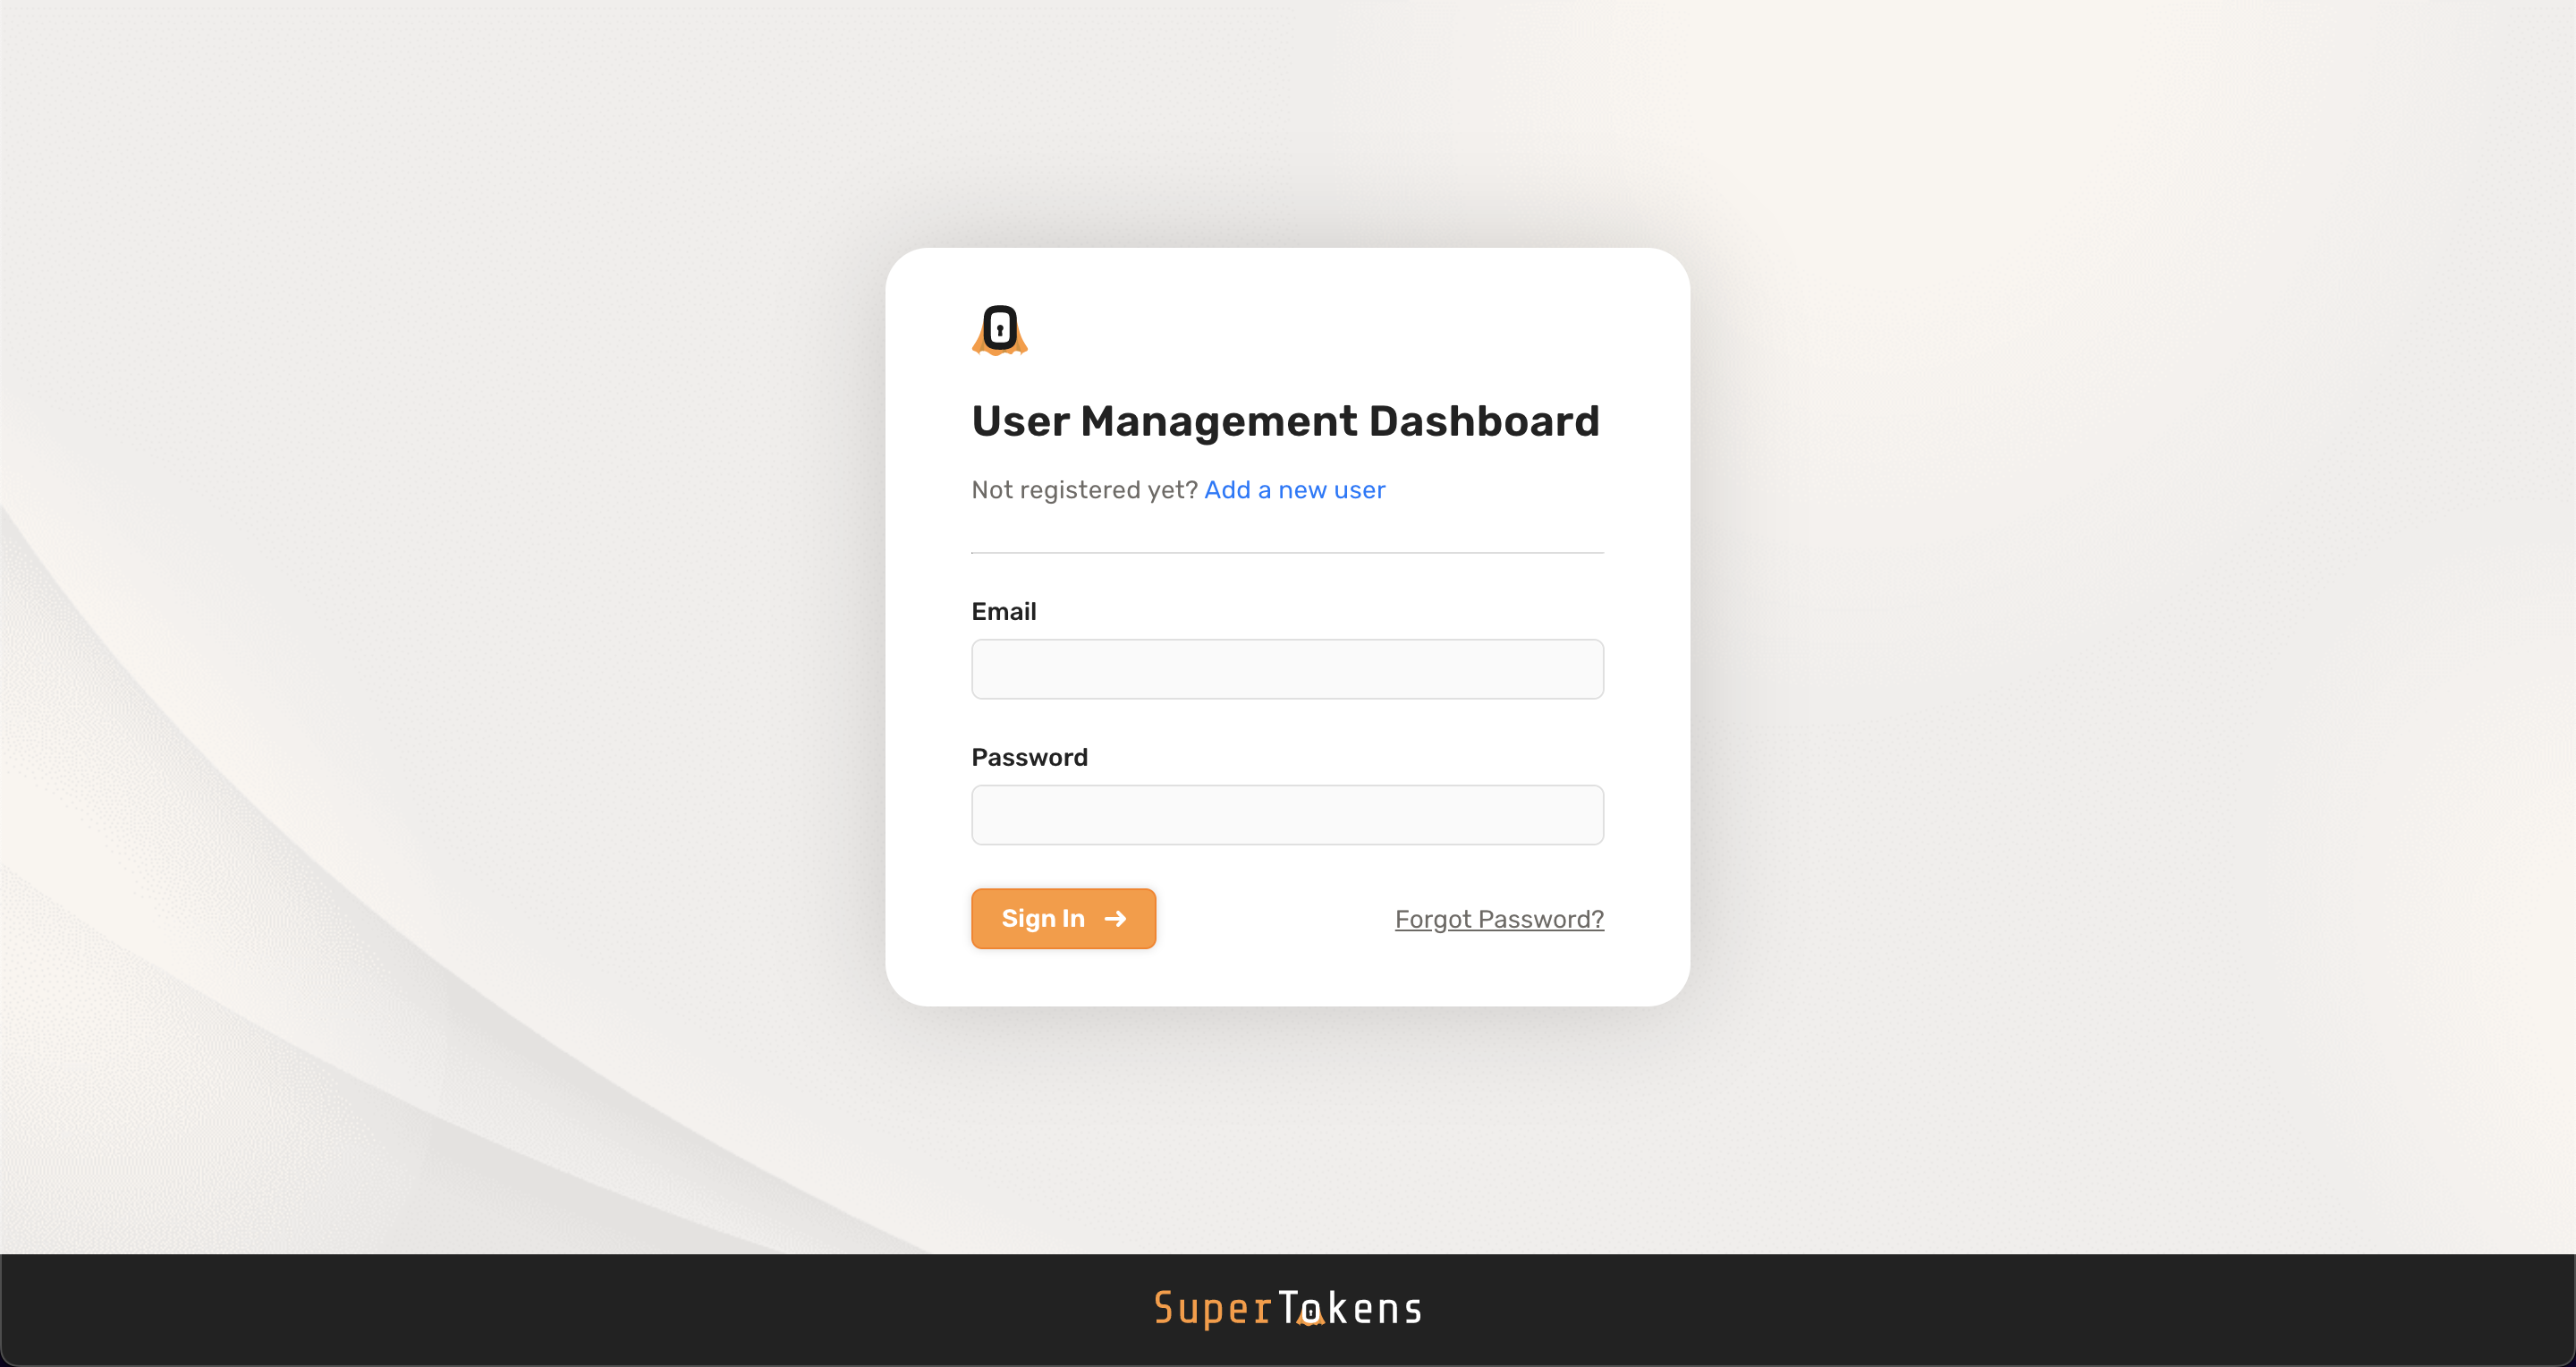 ### 3. Create dashboard credentials
:::info Paid Feature
You can create 3 dashboard users* for free.
If you need to create additional users:
- For self hosted users, please [sign up](https://supertokens.com/auth) to generate a license key and follow the instructions sent to you by email.
- For managed service users, you can click on the "enable paid features" button on [the dashboard](https://supertokens.com/dashboard-saas), and follow the steps from there on.
*: A dashboard user is a user that can log into and view the user management dashboard. These users are independent to the users of your application
:::
When you first set up SuperTokens, there are no credentials created for the dashboard. If you click the "Add a new user" button in the dashboard login screen you can see the command you need to execute to create credentials.
### 3. Create dashboard credentials
:::info Paid Feature
You can create 3 dashboard users* for free.
If you need to create additional users:
- For self hosted users, please [sign up](https://supertokens.com/auth) to generate a license key and follow the instructions sent to you by email.
- For managed service users, you can click on the "enable paid features" button on [the dashboard](https://supertokens.com/dashboard-saas), and follow the steps from there on.
*: A dashboard user is a user that can log into and view the user management dashboard. These users are independent to the users of your application
:::
When you first set up SuperTokens, there are no credentials created for the dashboard. If you click the "Add a new user" button in the dashboard login screen you can see the command you need to execute to create credentials.
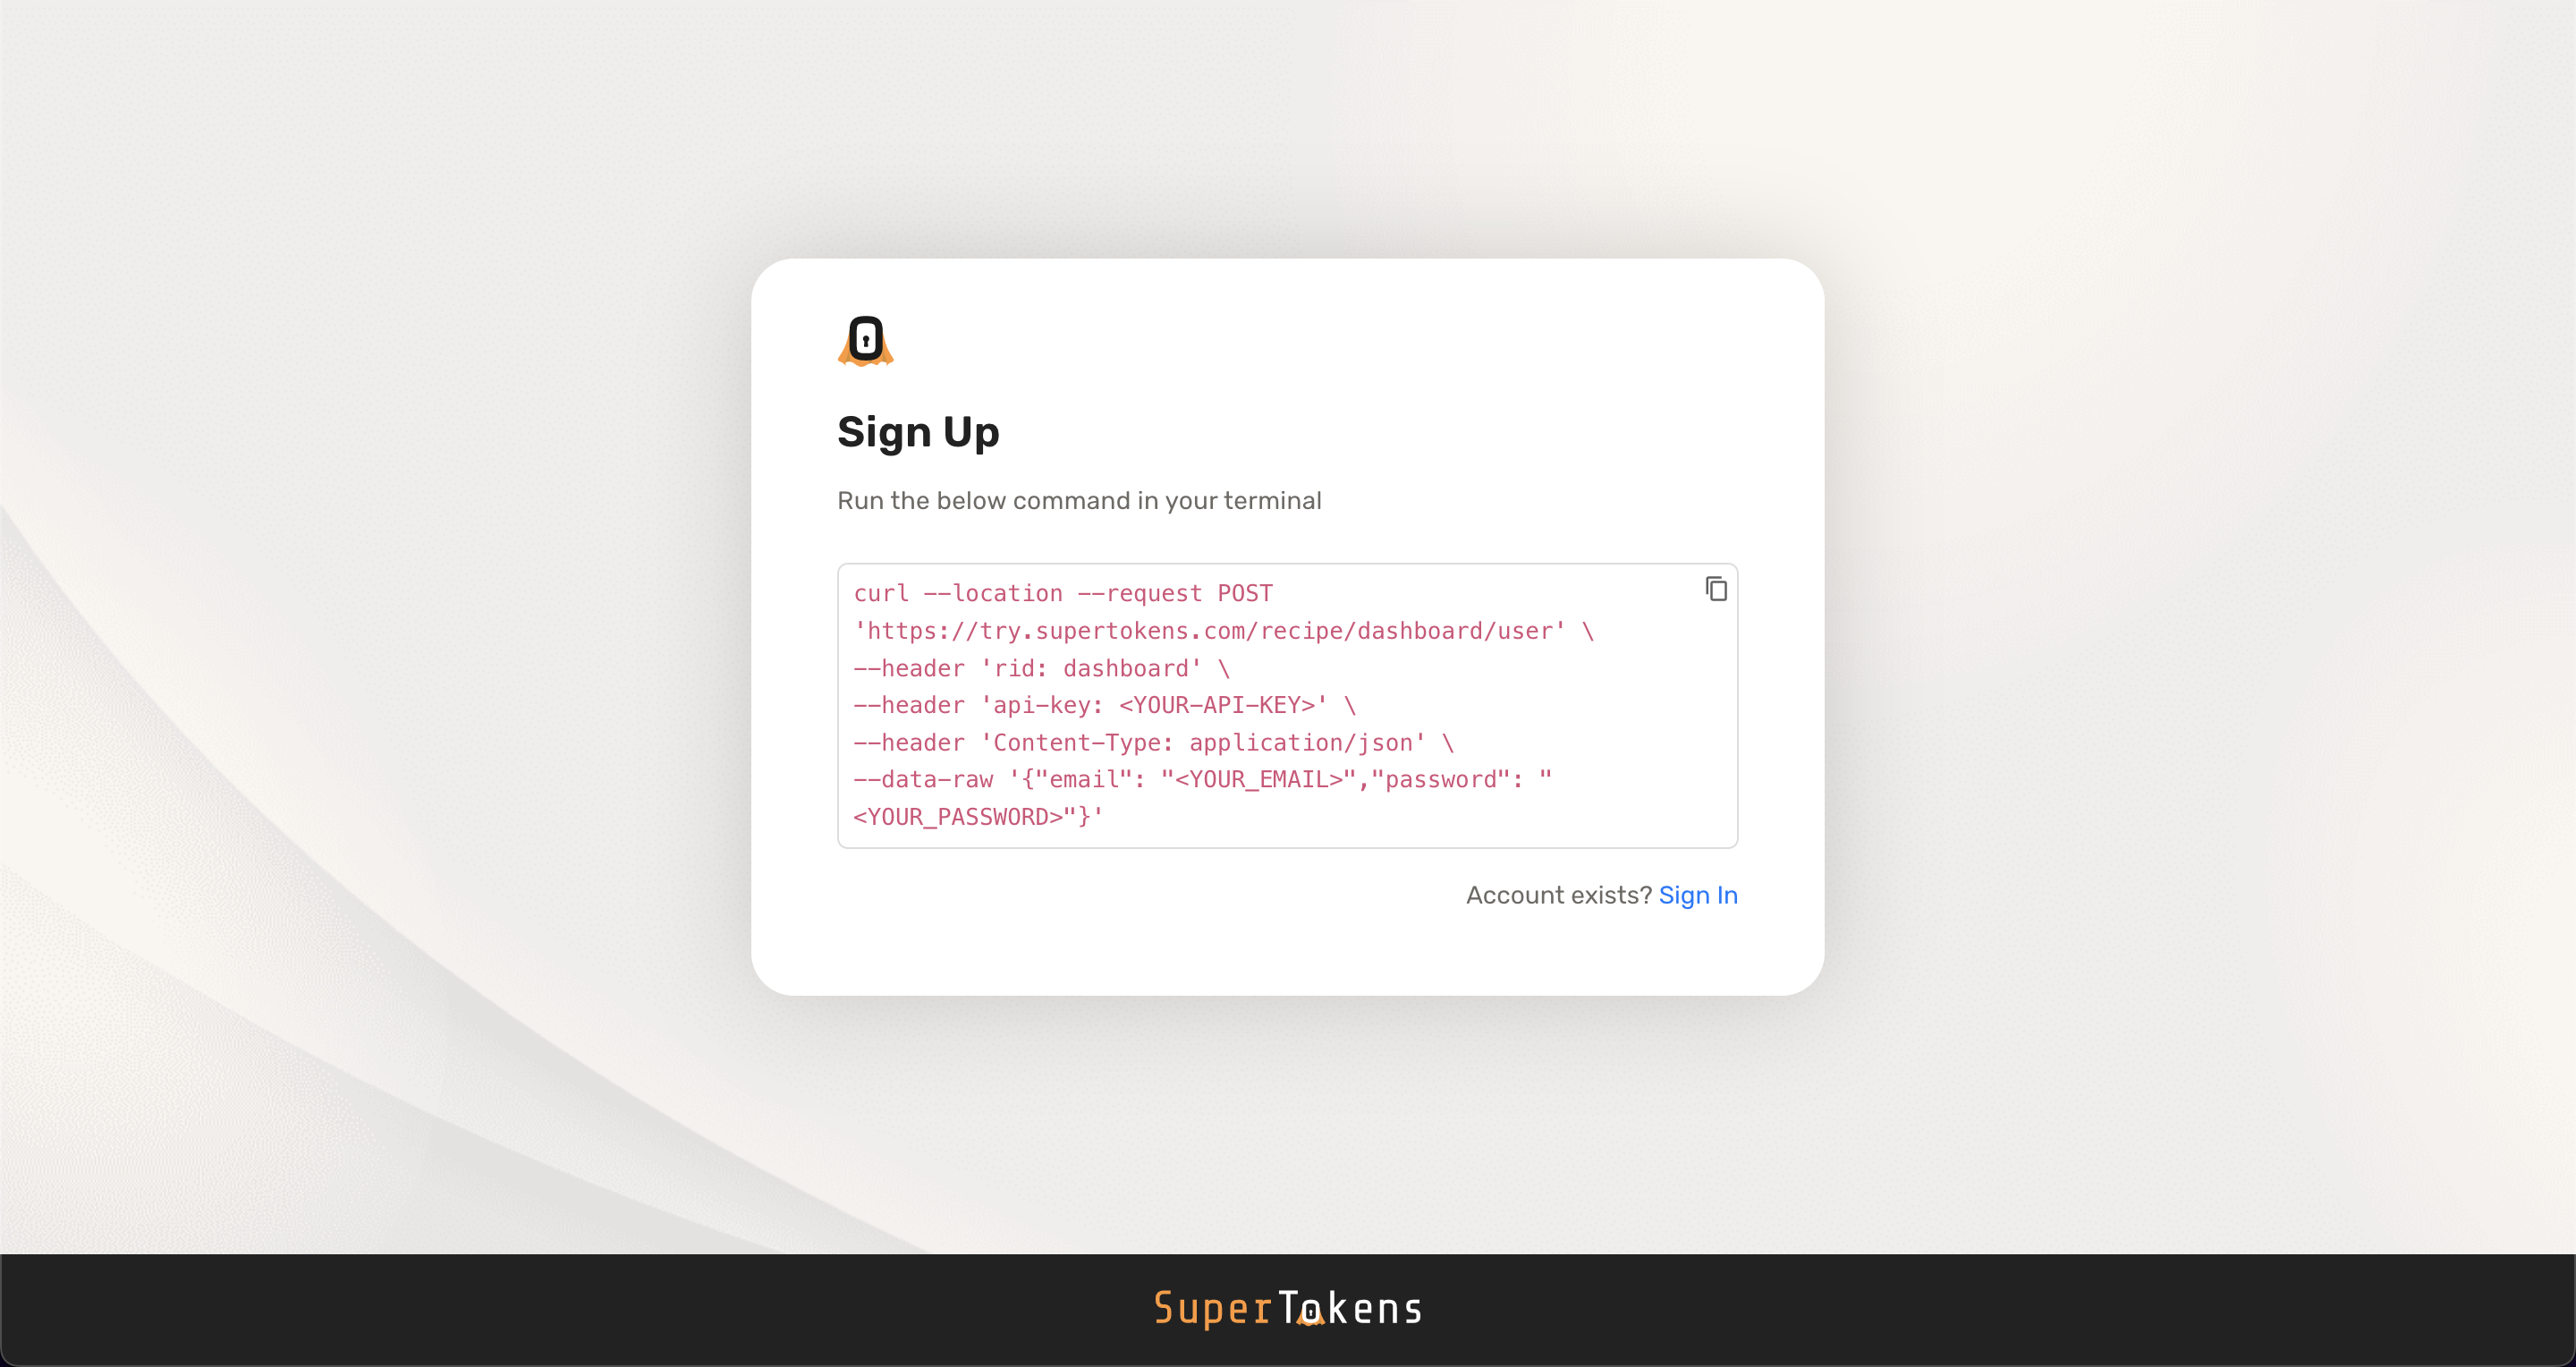 To create credentials you need to make a request to SuperTokens core.
- The example above uses the demo core `https://try.supertokens.com`, replace this with the connection URI you pass to the backend SDK when initialising SuperTokens.
- Replace `
To create credentials you need to make a request to SuperTokens core.
- The example above uses the demo core `https://try.supertokens.com`, replace this with the connection URI you pass to the backend SDK when initialising SuperTokens.
- Replace `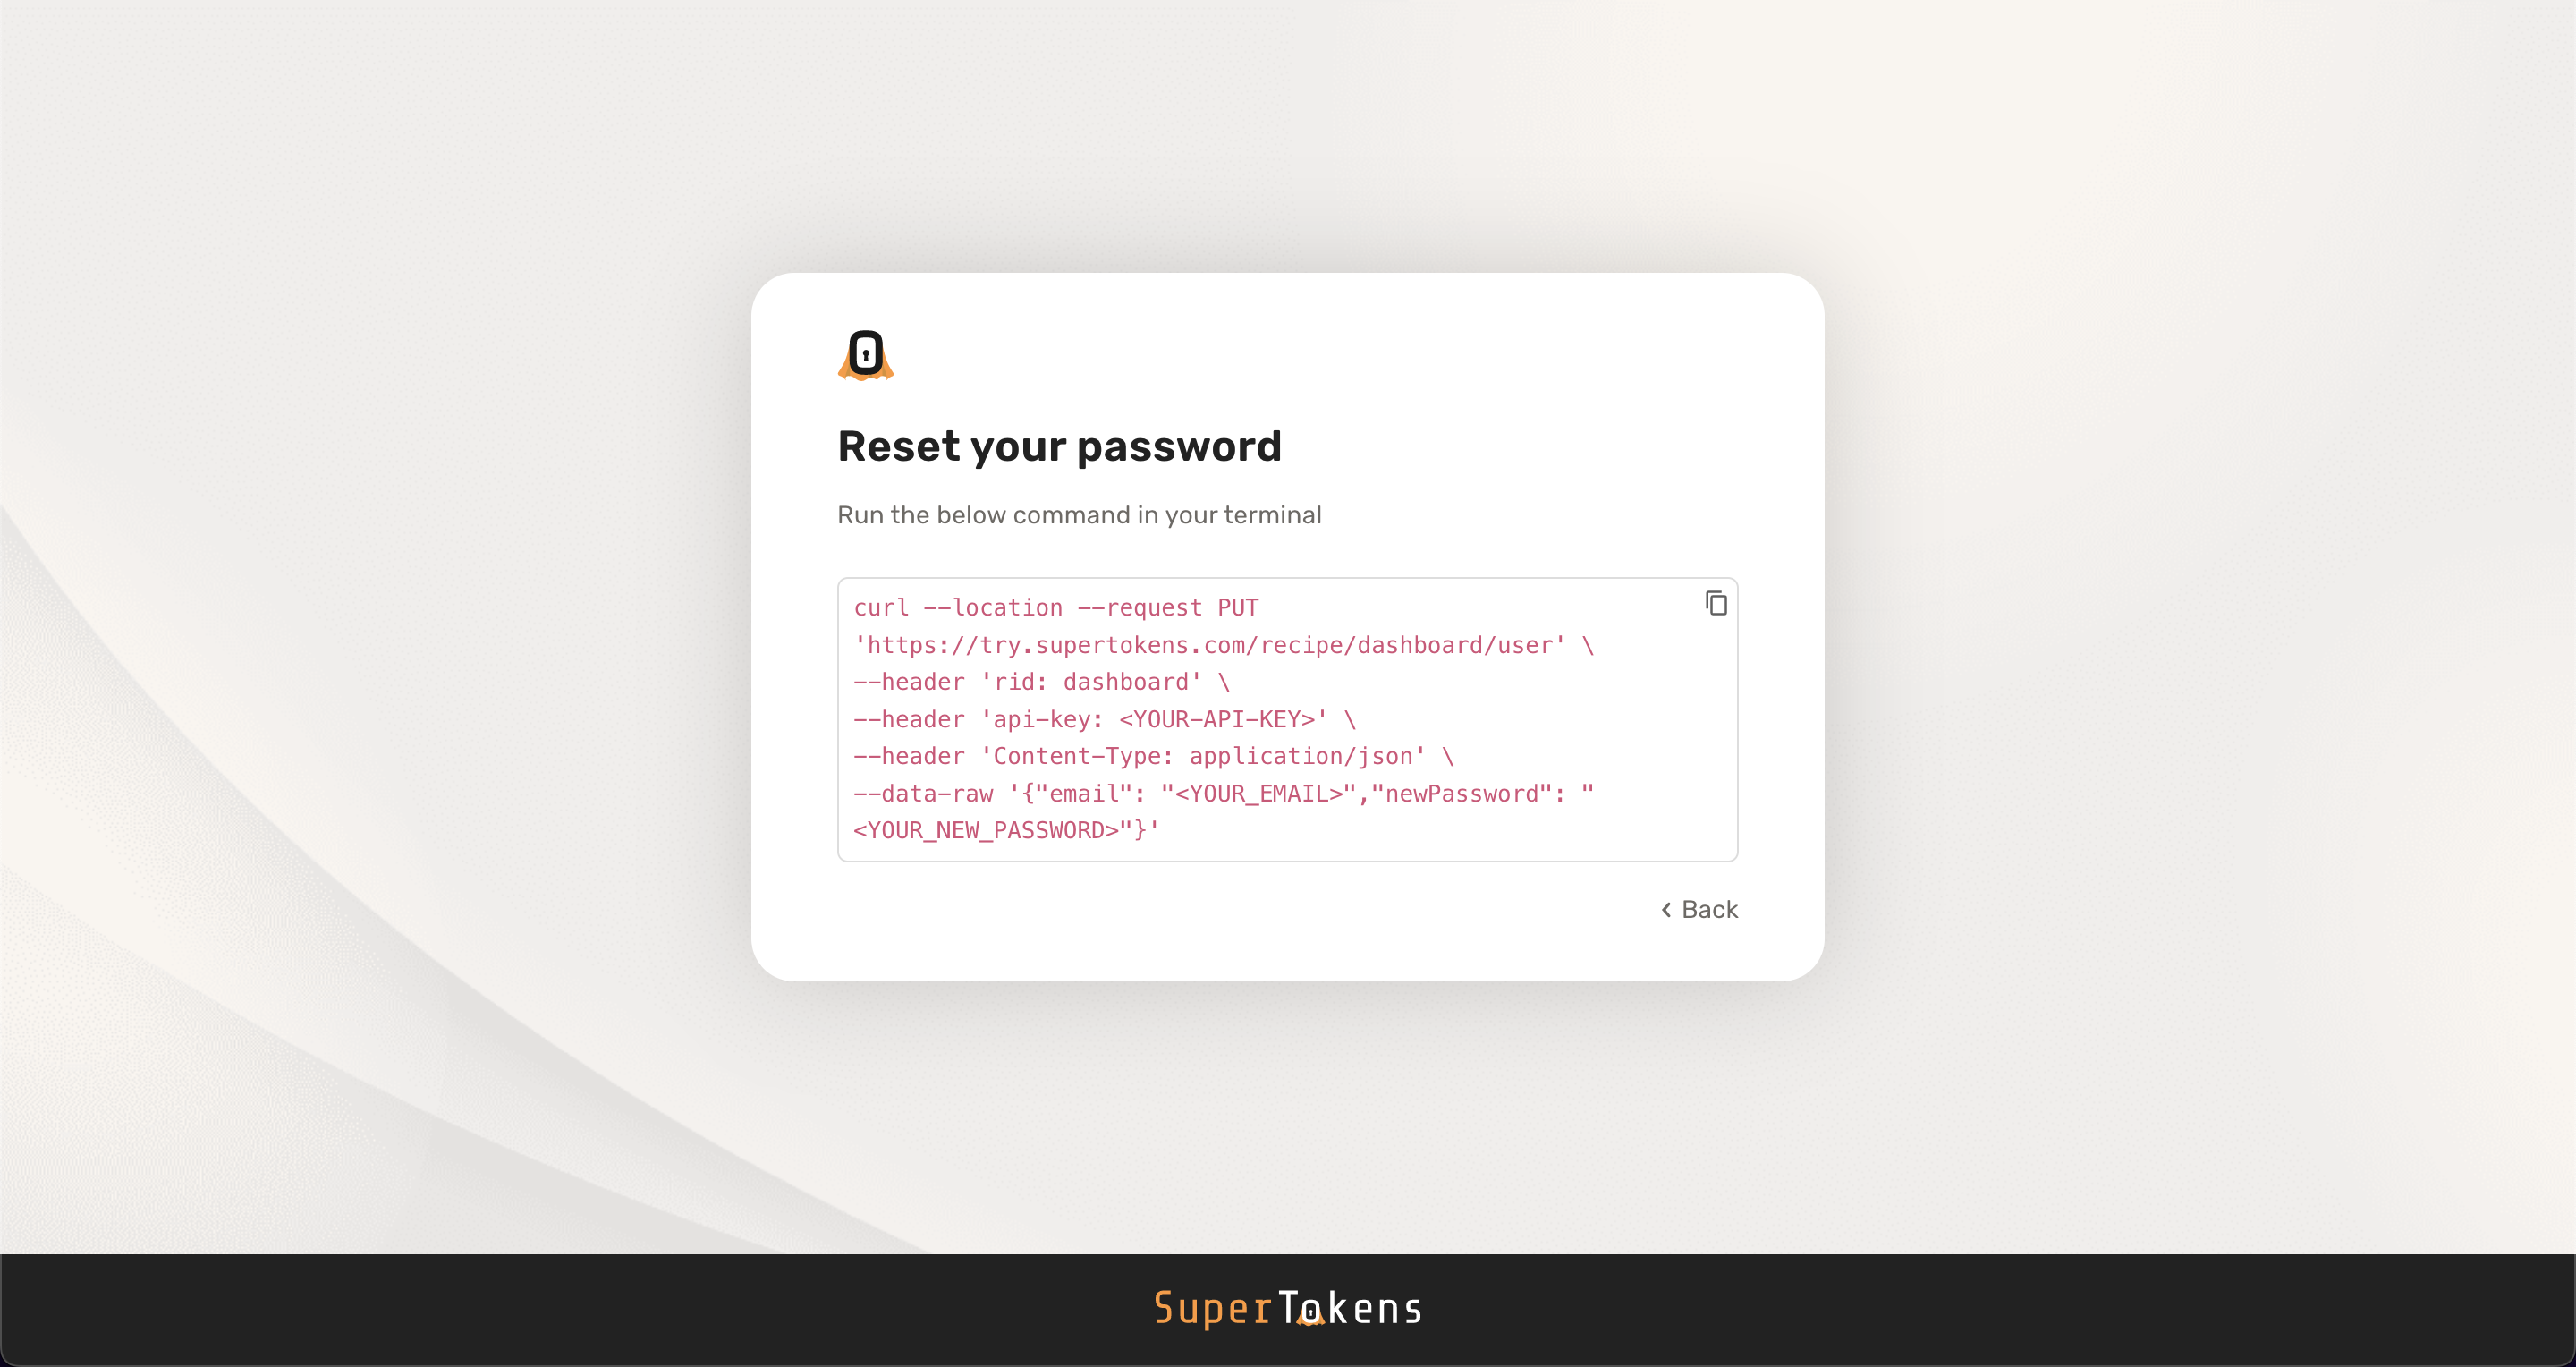 To update credentials you need to make a request to SuperTokens core.
- The example above uses the demo core `https://try.supertokens.com`, replace this with the connection URI you pass to the backend SDK when initialising SuperTokens.
- Replace `
To update credentials you need to make a request to SuperTokens core.
- The example above uses the demo core `https://try.supertokens.com`, replace this with the connection URI you pass to the backend SDK when initialising SuperTokens.
- Replace `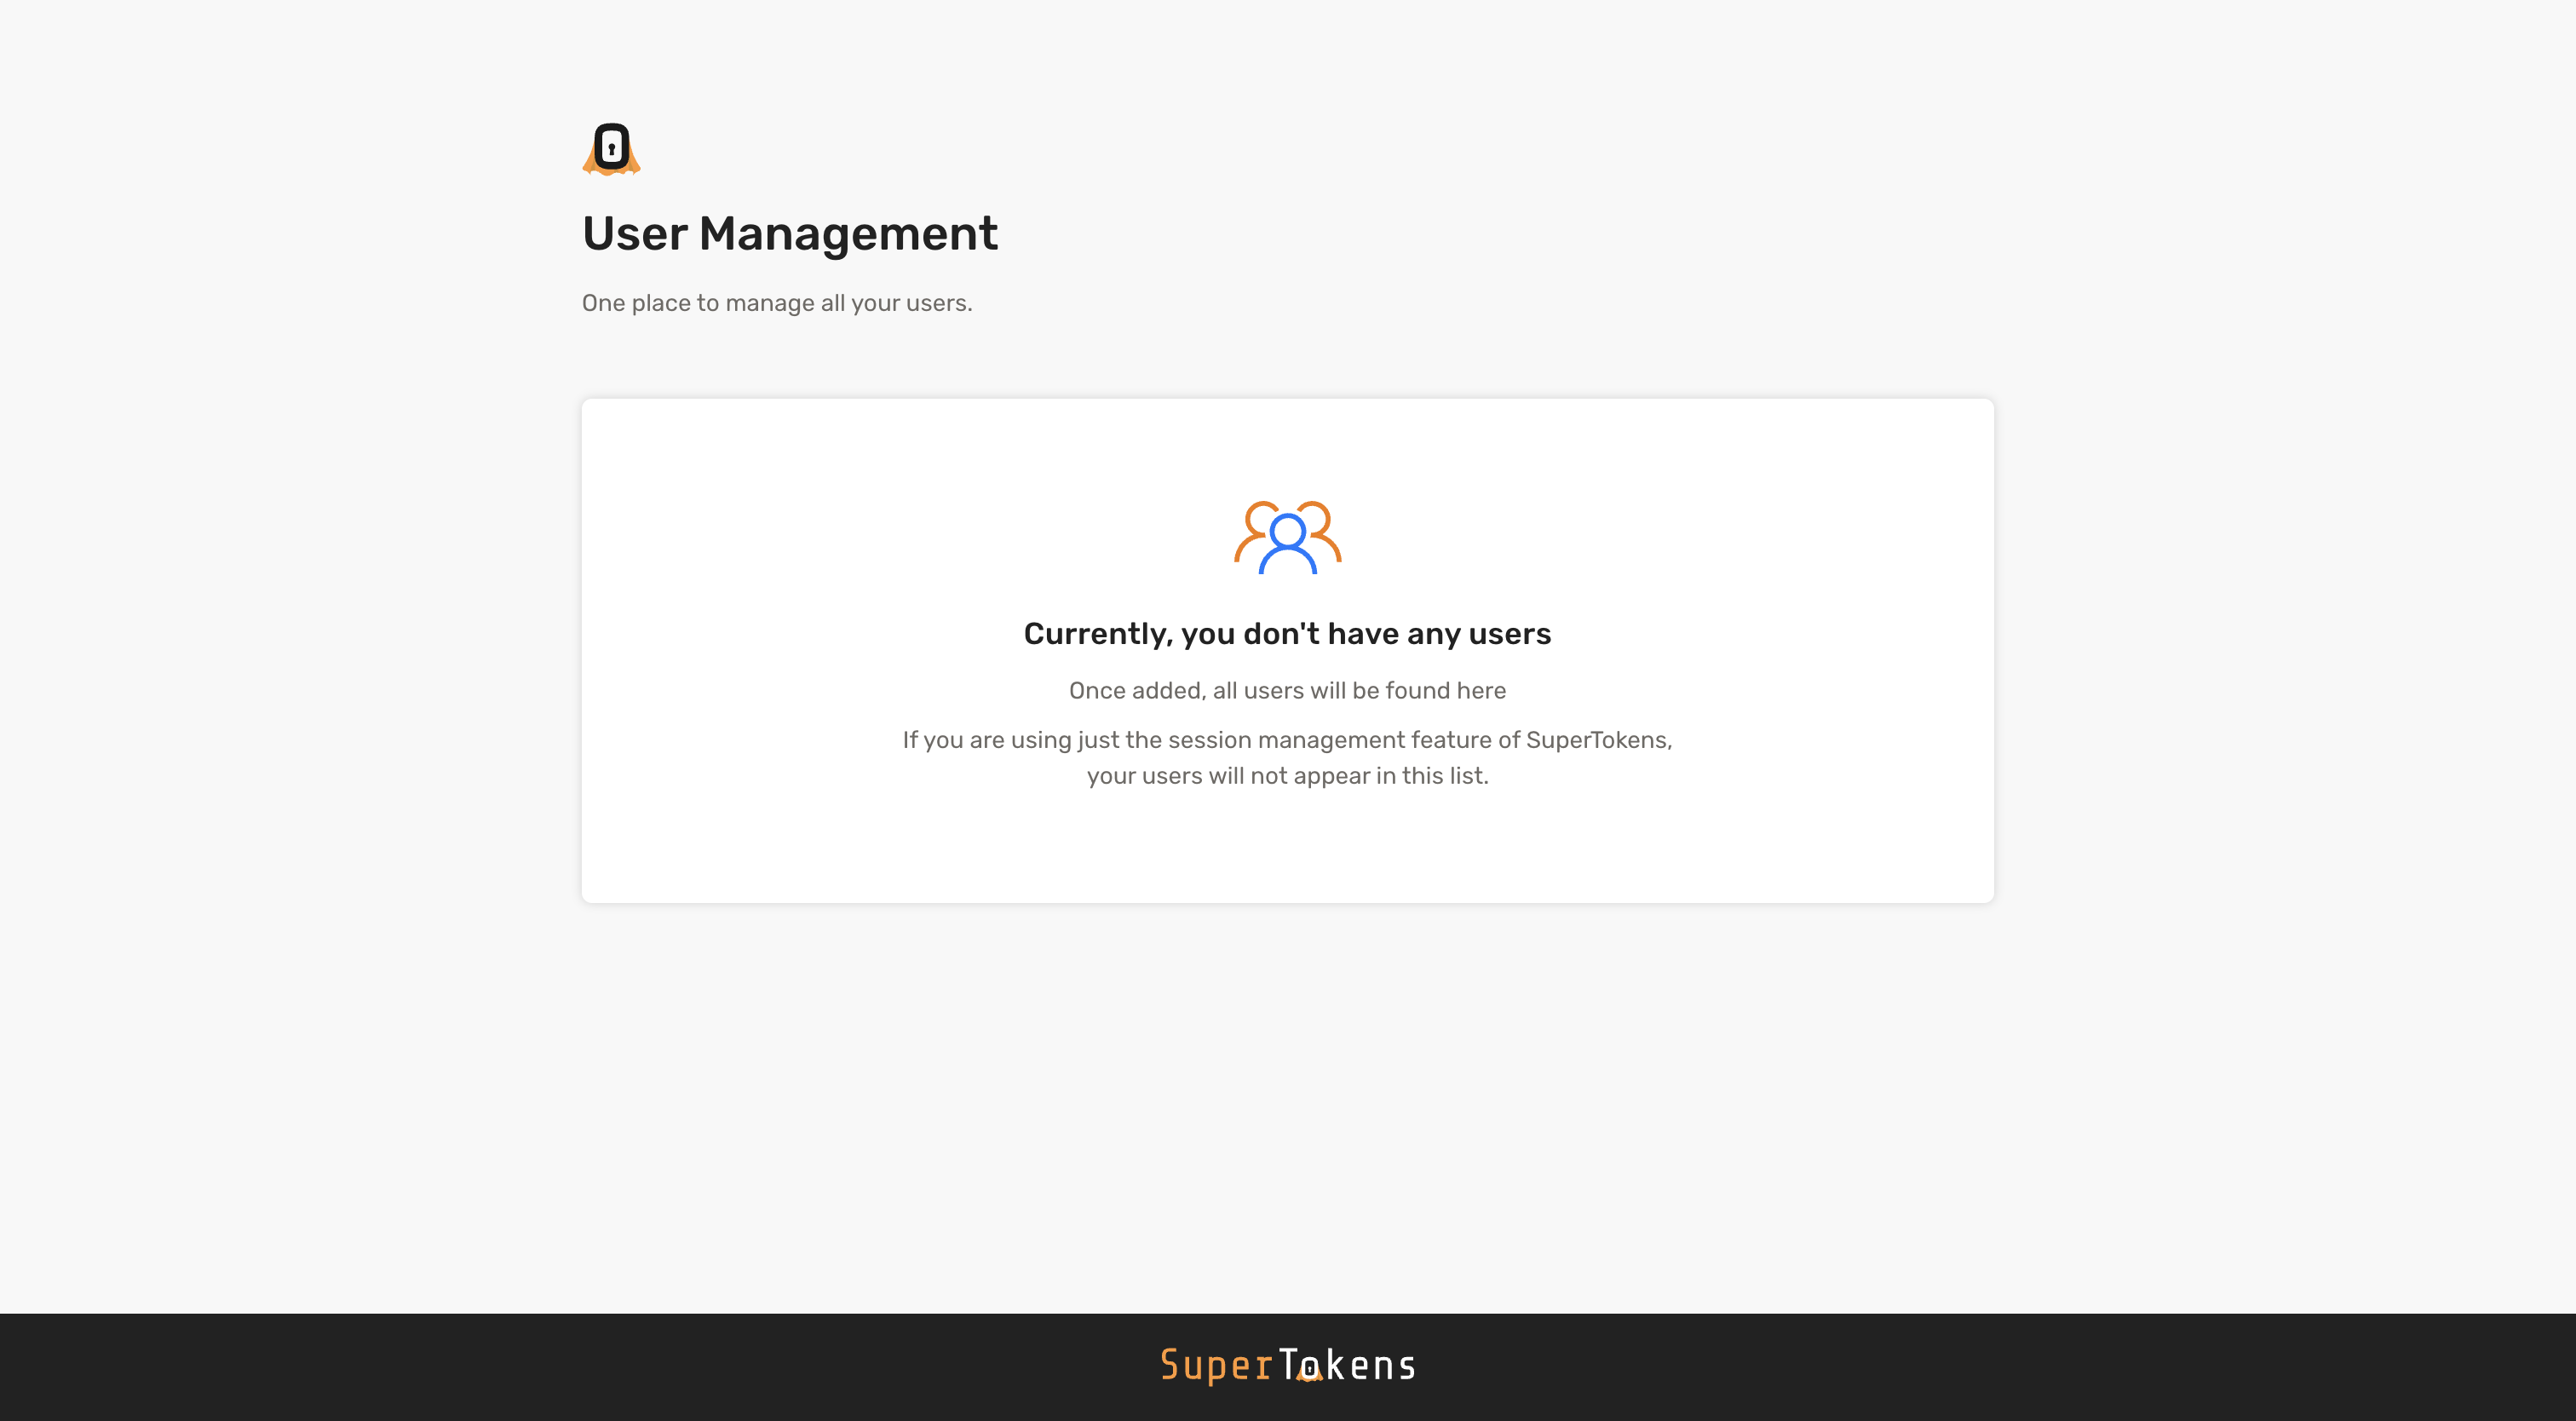 ## List users
Navigate to your frontend app and create a user (via the sign-up flow). On creation, if you head back to the dashboard and refresh the page, you see that user:
## List users
Navigate to your frontend app and create a user (via the sign-up flow). On creation, if you head back to the dashboard and refresh the page, you see that user:
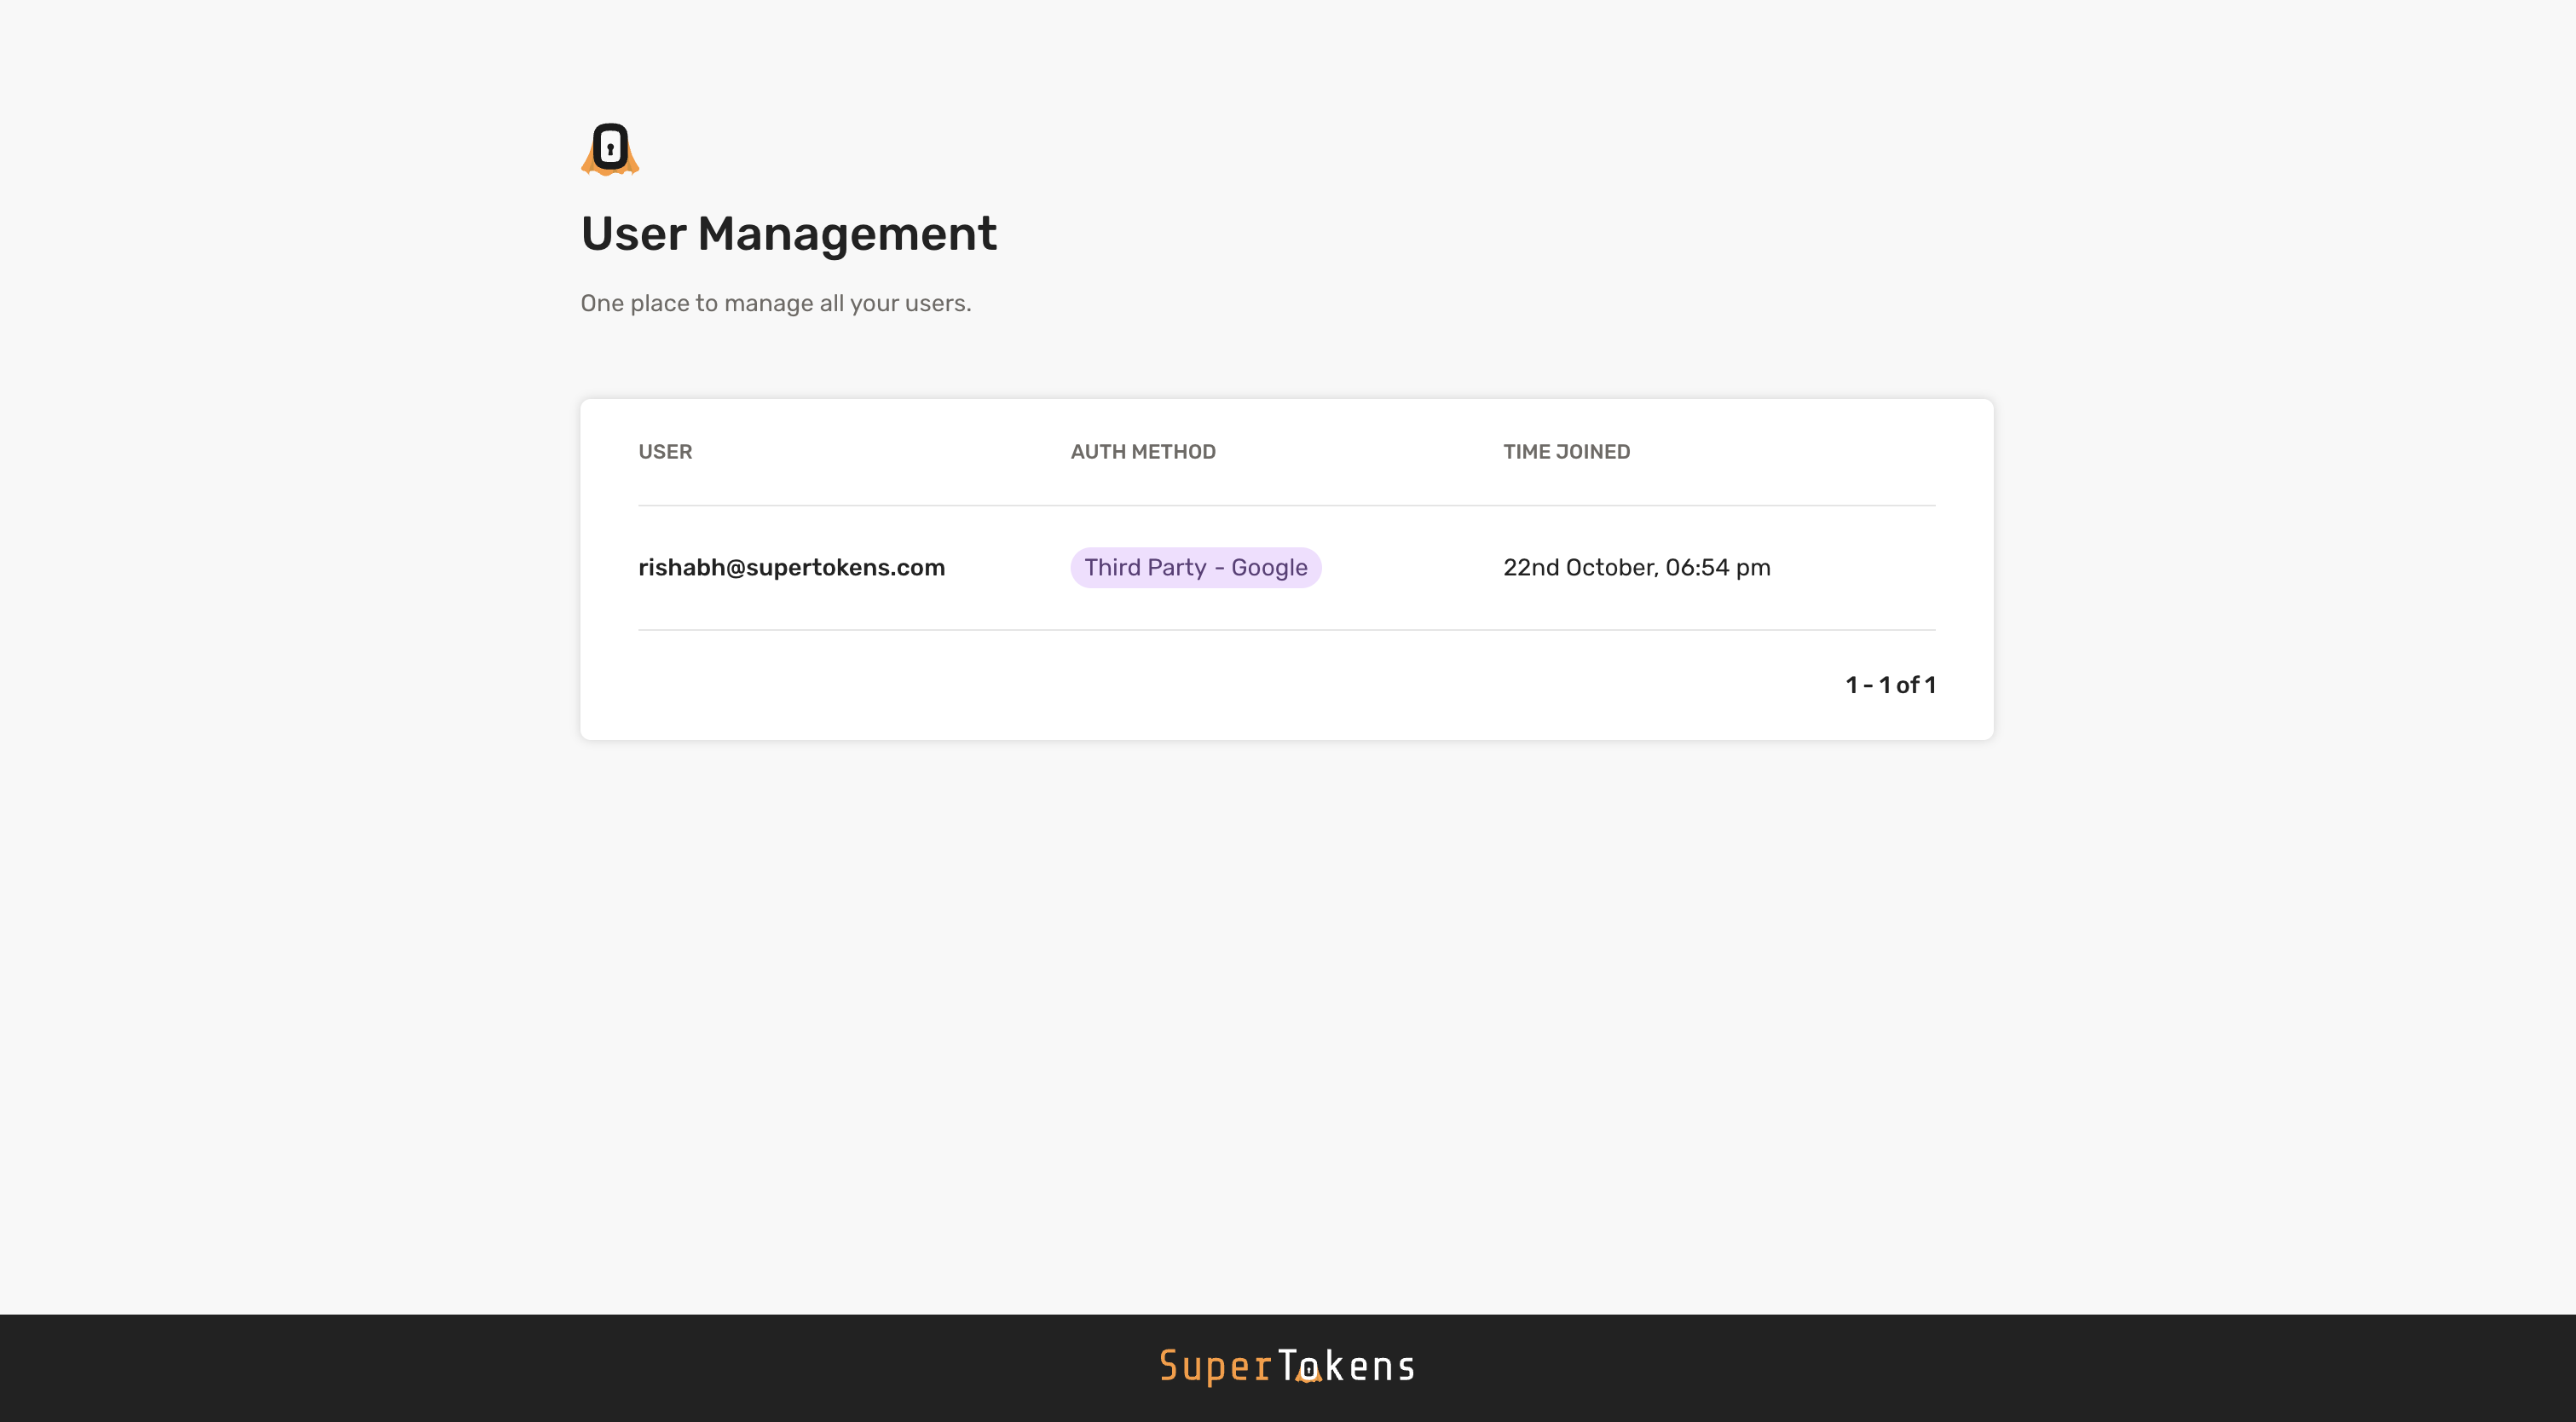 ---
## View user details
When you select a user you can view detailed information about the user such as email, phone number, user metadata, etc.
---
## View user details
When you select a user you can view detailed information about the user such as email, phone number, user metadata, etc.
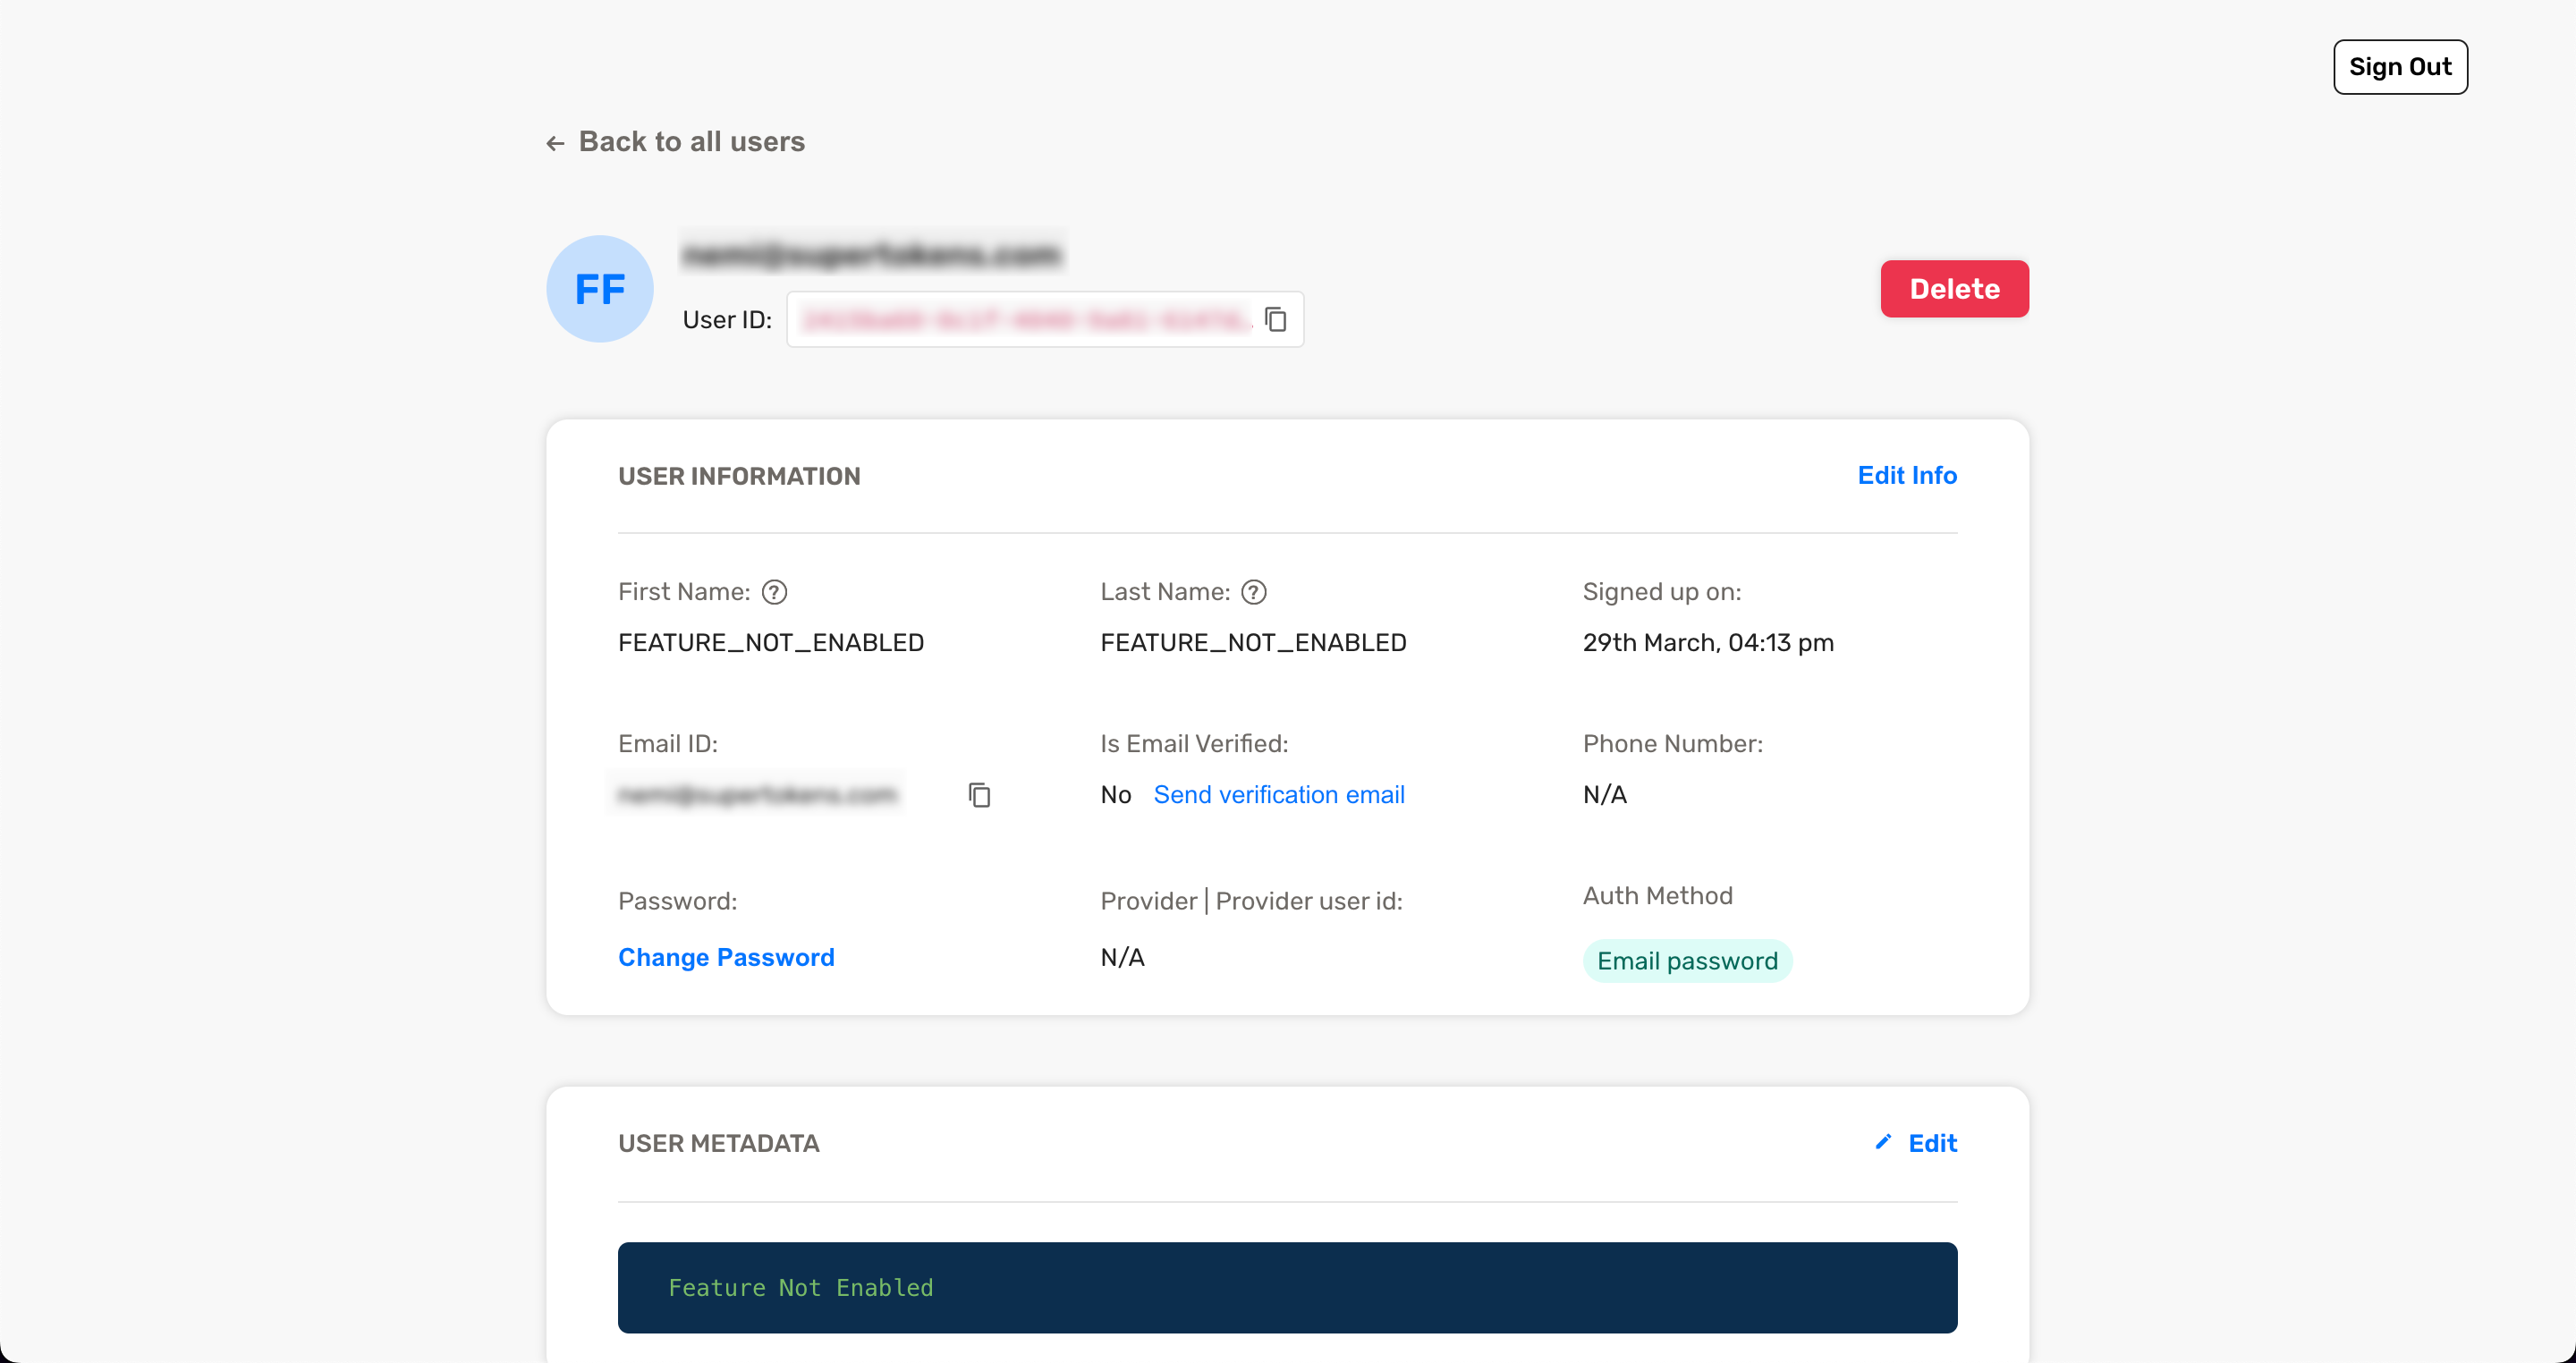
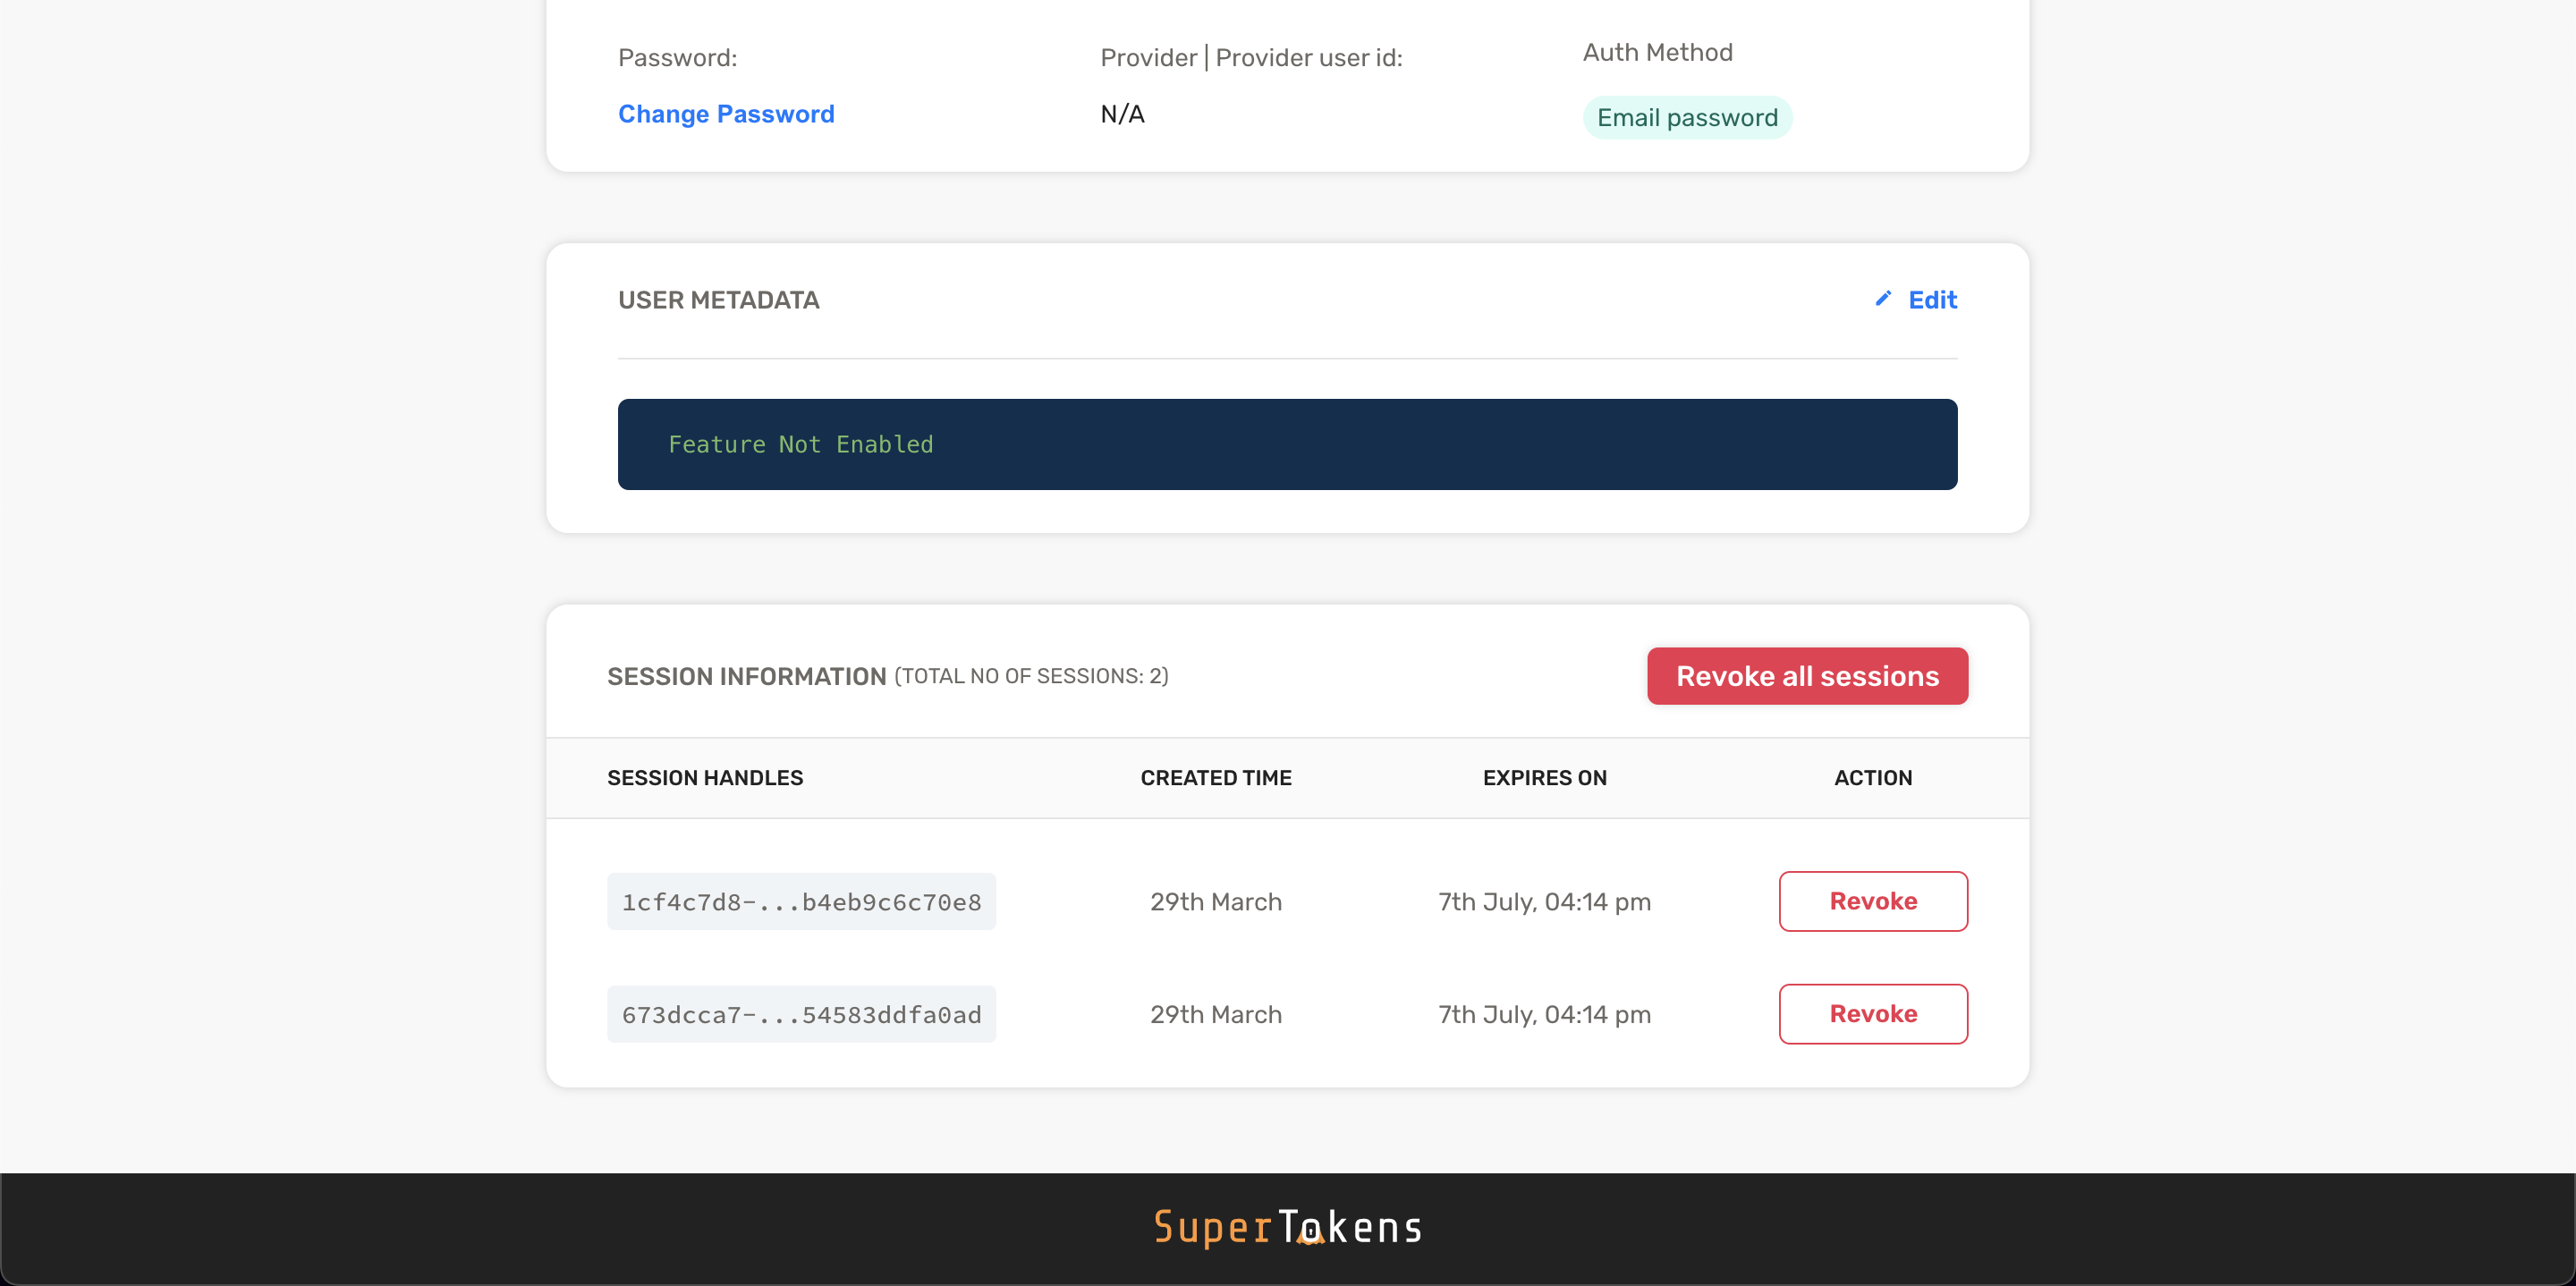 ---
## Edit user details
You can edit user information and perform actions such as resetting a user's password or revoking sessions for a user.
---
## Edit user details
You can edit user information and perform actions such as resetting a user's password or revoking sessions for a user.
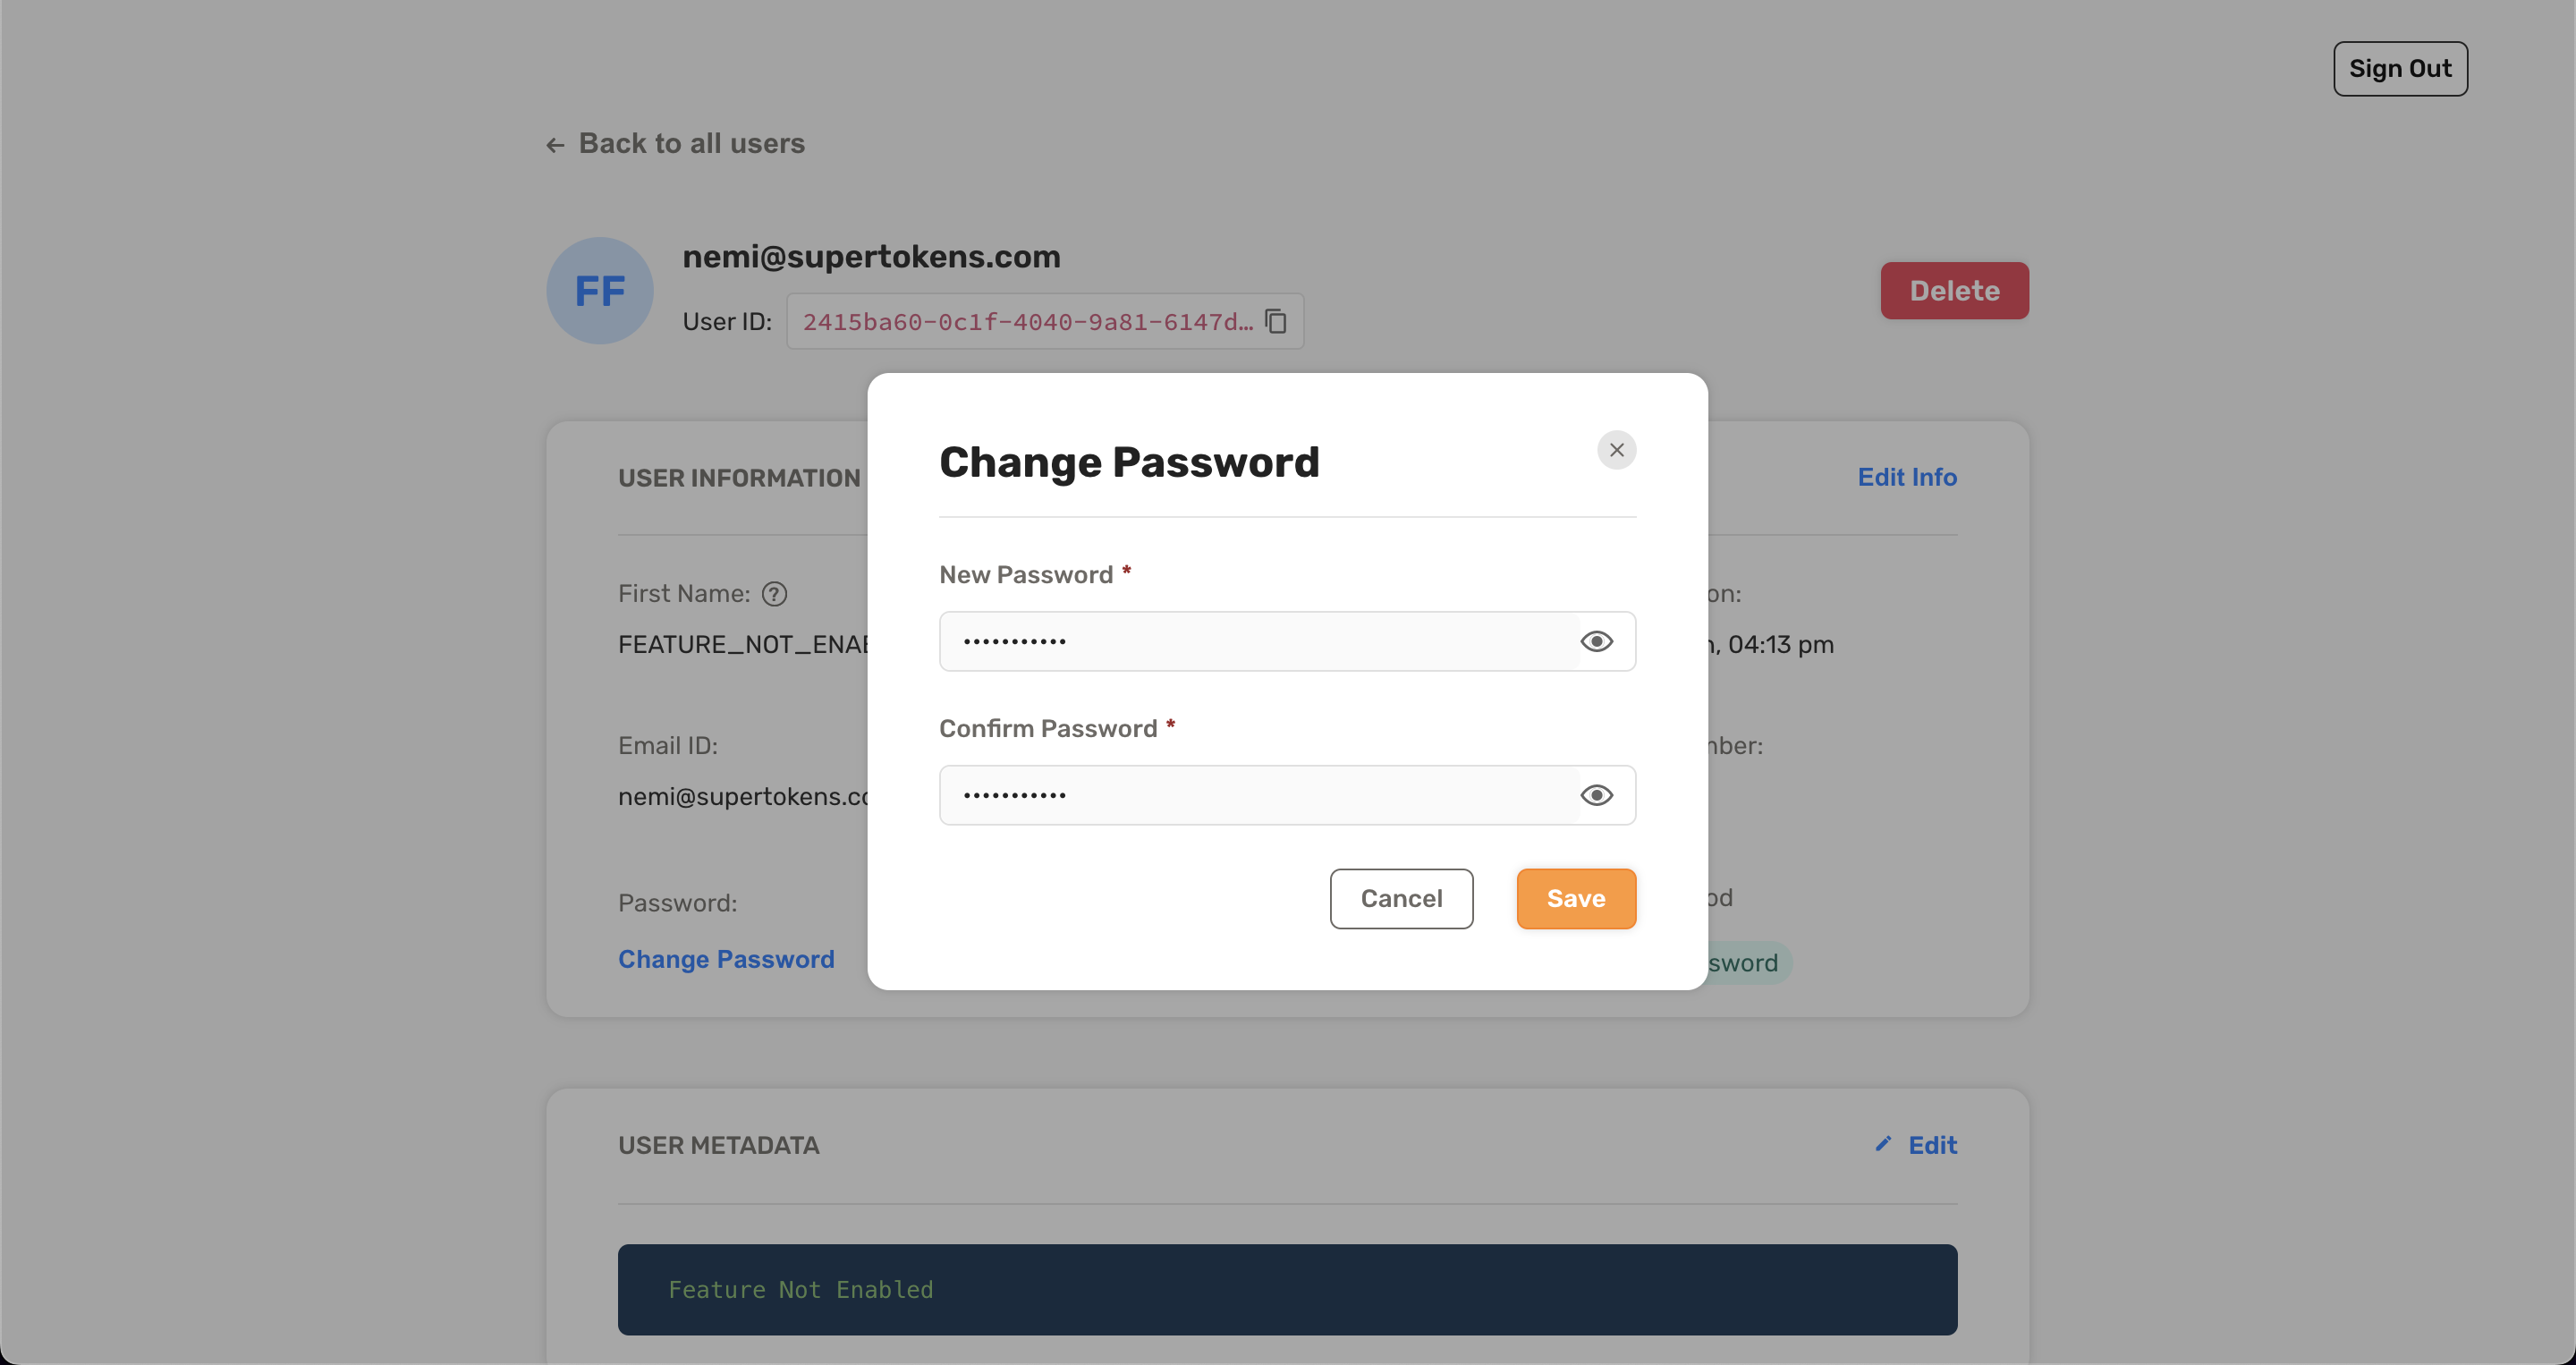 :::info Note
Enable some features such as user metadata and email verification in your backend before you can use them in the user management dashboard.
:::
---
## Create user roles and permissions
:::caution no-title
This feature is only available through the Node.js SDK.
:::
When you first use the `UserRoles` recipe, the list of roles is empty. To create roles, click on the "Add Role" button.
:::info Note
Enable some features such as user metadata and email verification in your backend before you can use them in the user management dashboard.
:::
---
## Create user roles and permissions
:::caution no-title
This feature is only available through the Node.js SDK.
:::
When you first use the `UserRoles` recipe, the list of roles is empty. To create roles, click on the "Add Role" button.
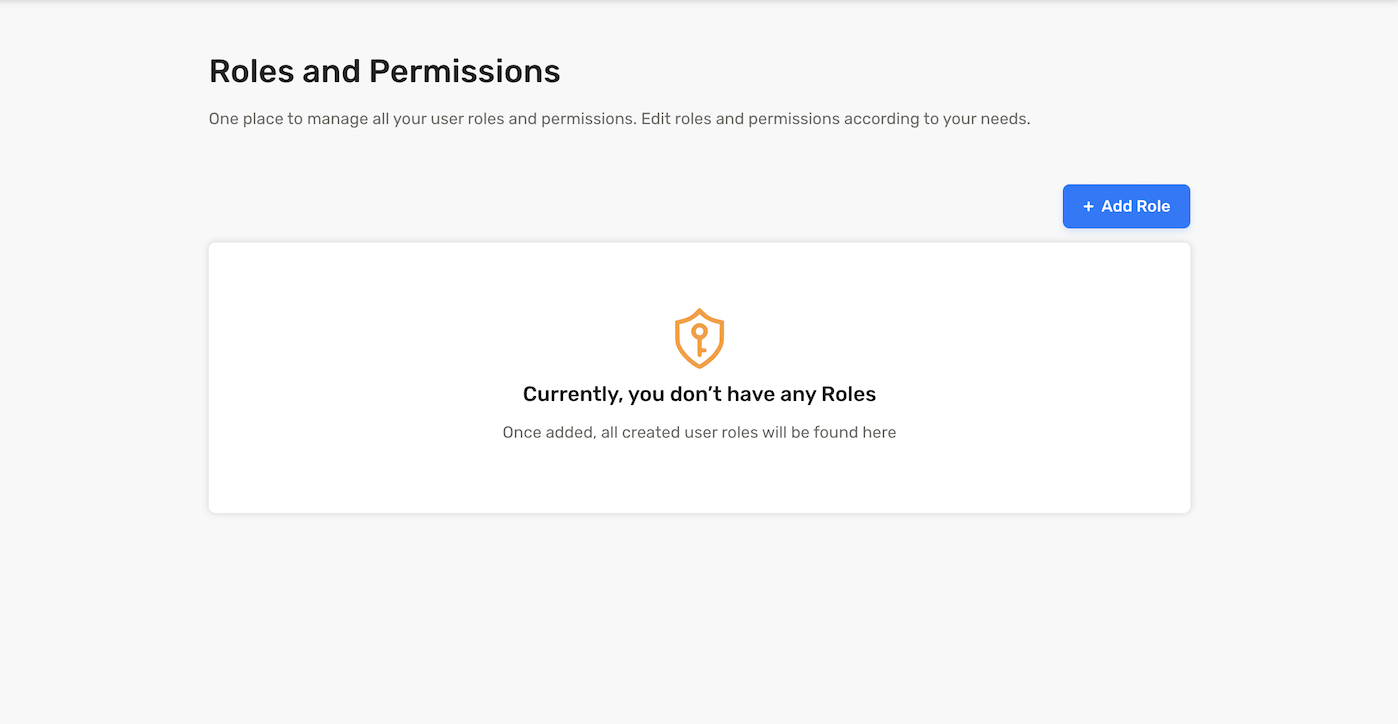 This action opens a modal, enabling you to create a role along with its associated permissions. Permissions are essentially a list of strings assigned to a specific role.
---
## List user roles
:::caution no-title
This feature is only available through the Node.js SDK.
:::
This action opens a modal, enabling you to create a role along with its associated permissions. Permissions are essentially a list of strings assigned to a specific role.
---
## List user roles
:::caution no-title
This feature is only available through the Node.js SDK.
:::
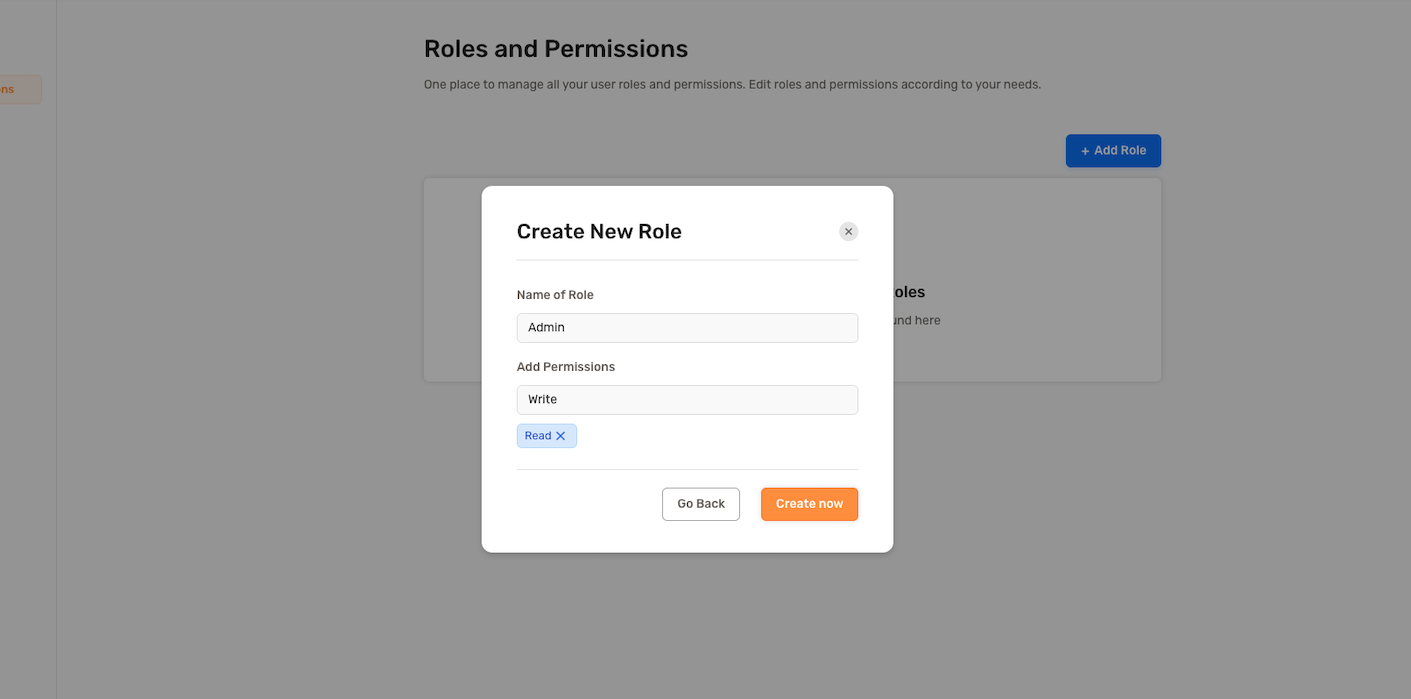 After creating a role, the UI should display a list of all roles in your app.
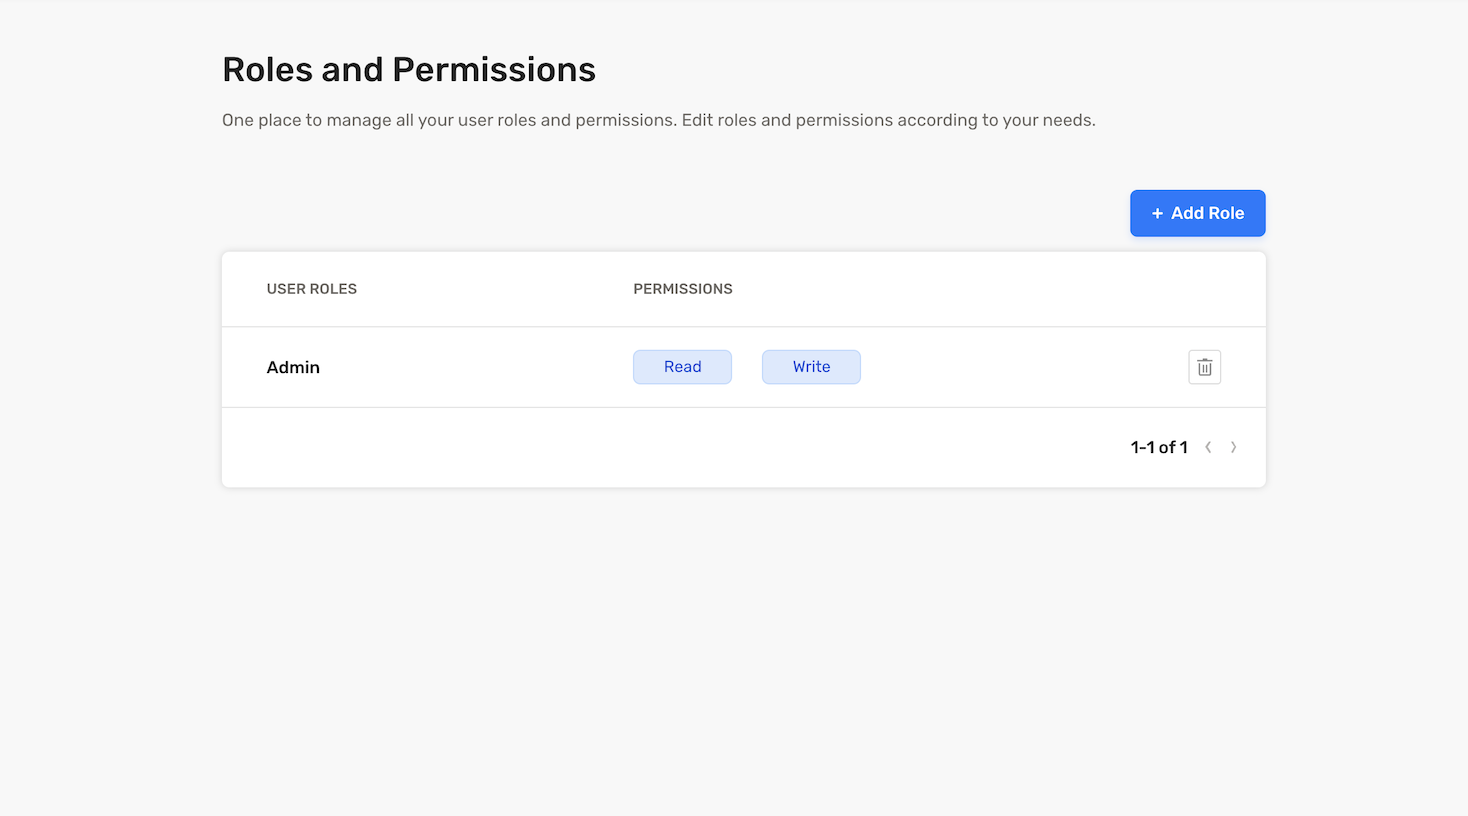 You can preview the role you created by clicking on the role row. The modal provides options to edit or delete the role.
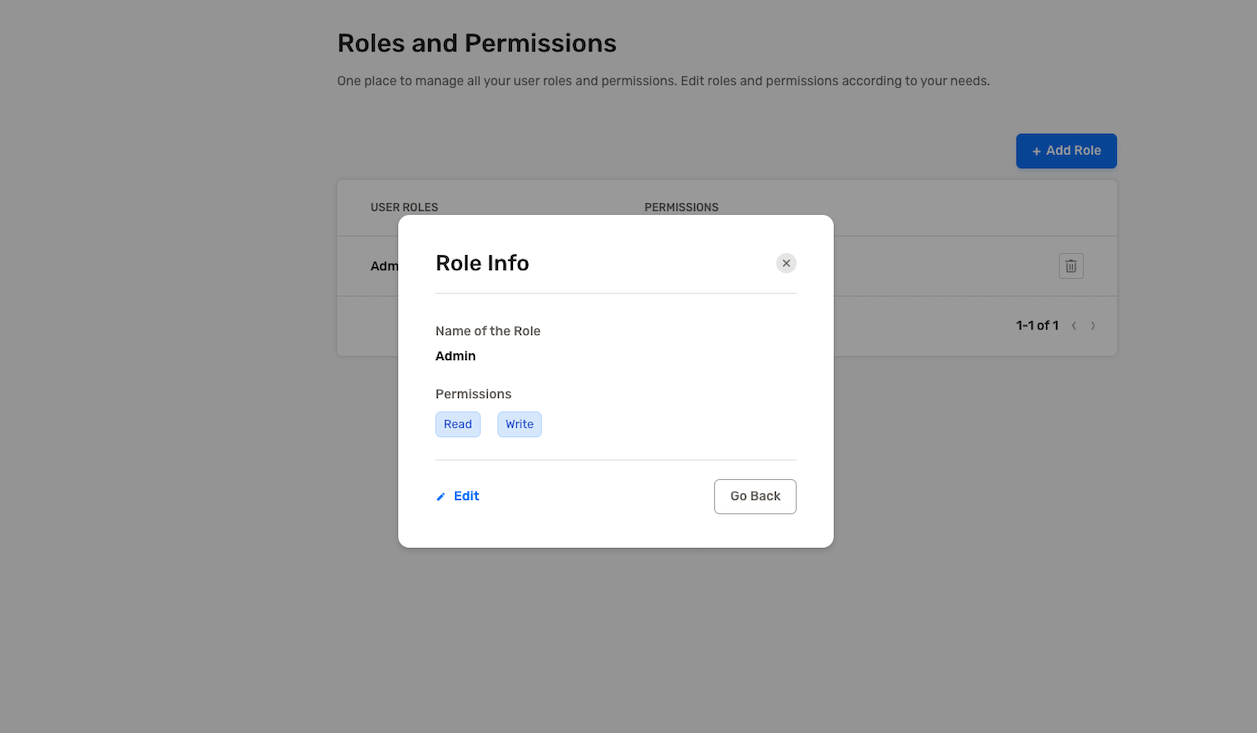 ---
## Assign user roles
:::caution no-title
This feature is only available through the Node.js SDK.
:::
To assign a specific role to a user, start by finding the user in the dashboard. Upon clicking the user, navigate to the user details page where you find a section for user roles.
If the selected user has associations with multiple tenants, you can choose a `tenantId` from the dropdown menu to specify the tenant for which you'd like to assign roles.
---
## Assign user roles
:::caution no-title
This feature is only available through the Node.js SDK.
:::
To assign a specific role to a user, start by finding the user in the dashboard. Upon clicking the user, navigate to the user details page where you find a section for user roles.
If the selected user has associations with multiple tenants, you can choose a `tenantId` from the dropdown menu to specify the tenant for which you'd like to assign roles.
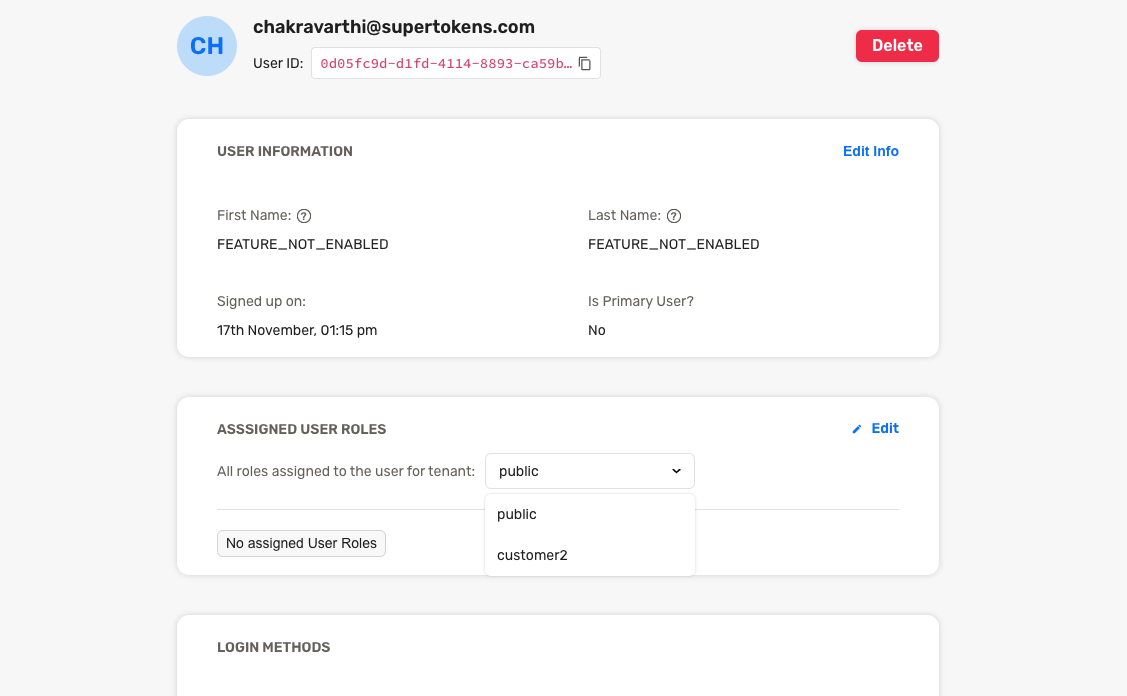 Click the edit button to start assigning roles. Then, select the "Assign Role" button, and a modal appears with a list of available roles for assignment to this user.
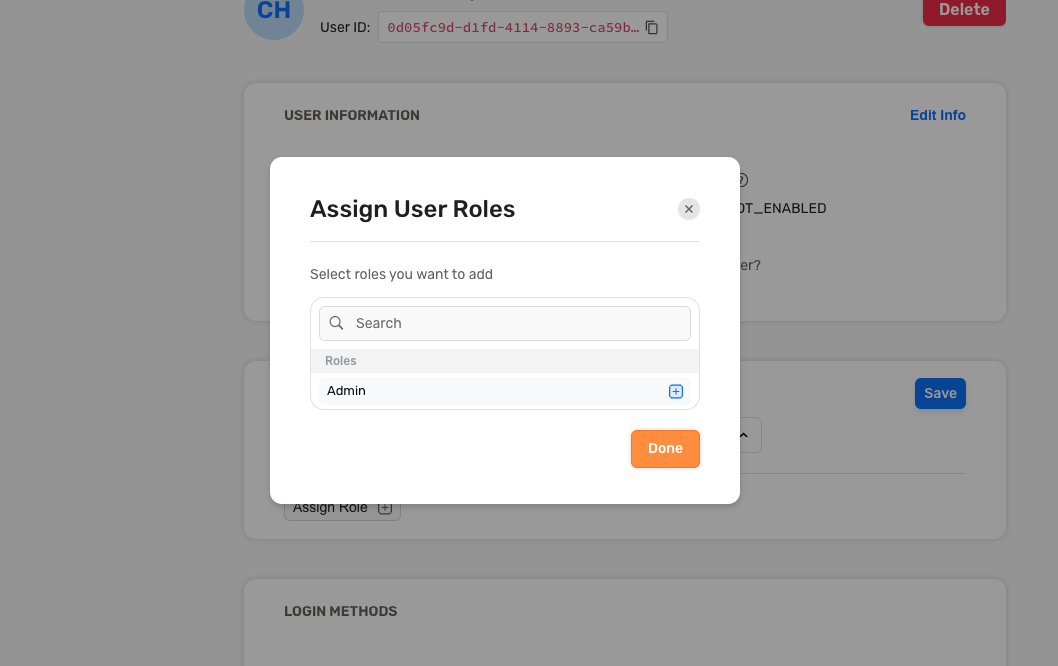 ---
## Remove user roles
:::caution no-title
This feature is only available through the Node.js SDK.
:::
To remove a role assigned to a user, click on the "X" icon next to that specific role.
---
## Remove user roles
:::caution no-title
This feature is only available through the Node.js SDK.
:::
To remove a role assigned to a user, click on the "X" icon next to that specific role.
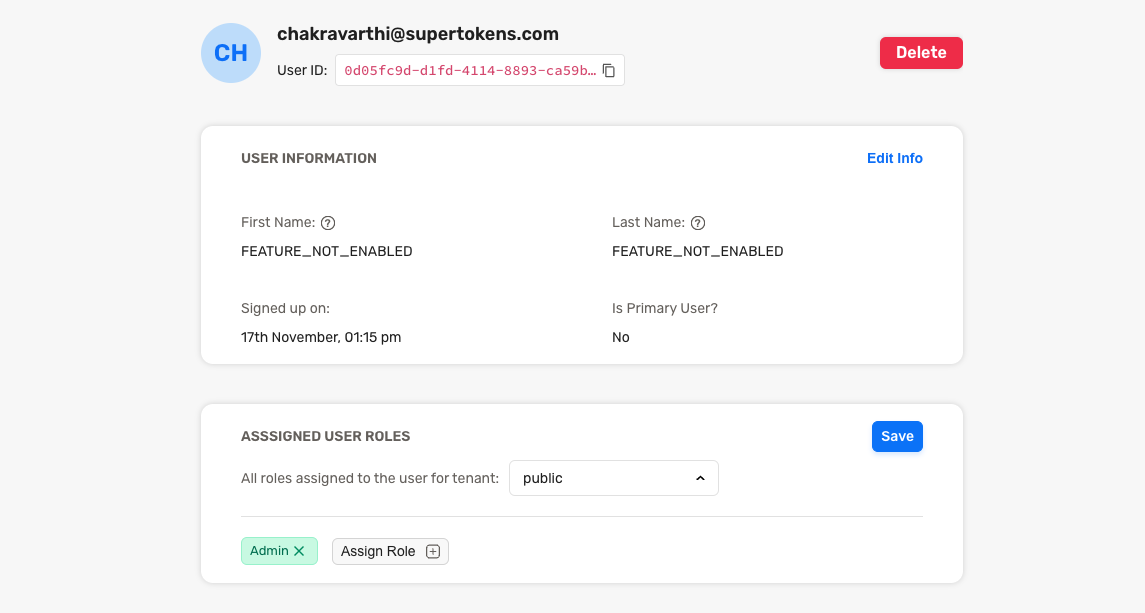 # Post Authentication - Dashboard - Tenant management
Source: https://supertokens.com/docs/post-authentication/dashboard/tenant-management
## Overview
This page shows you what actions you can perform on tenants through the dashboard.
:::info Caution
This is only available with Node and Python SDKs.
:::
# Post Authentication - Dashboard - Tenant management
Source: https://supertokens.com/docs/post-authentication/dashboard/tenant-management
## Overview
This page shows you what actions you can perform on tenants through the dashboard.
:::info Caution
This is only available with Node and Python SDKs.
:::
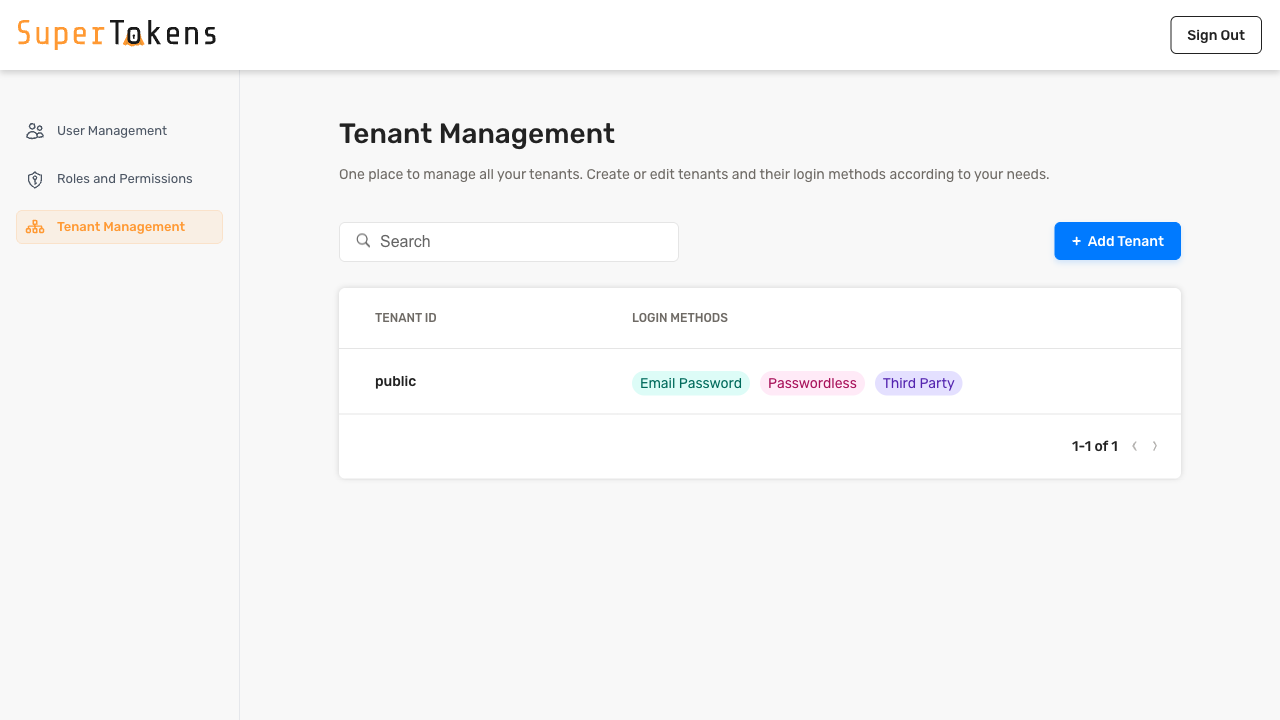 ---
## Create a new tenant
Clicking on `Add Tenant` prompts you to enter the tenant id. Once you enter the tenant id, click on `Create Now` to create the tenant. You then proceed to the Tenant Details page where you can further manage the newly created tenant.
---
## Create a new tenant
Clicking on `Add Tenant` prompts you to enter the tenant id. Once you enter the tenant id, click on `Create Now` to create the tenant. You then proceed to the Tenant Details page where you can further manage the newly created tenant.
 ## View tenant details
Upon selection or creation of a tenant, the Tenant Details page appears. The sections appear below.
## View tenant details
Upon selection or creation of a tenant, the Tenant Details page appears. The sections appear below.
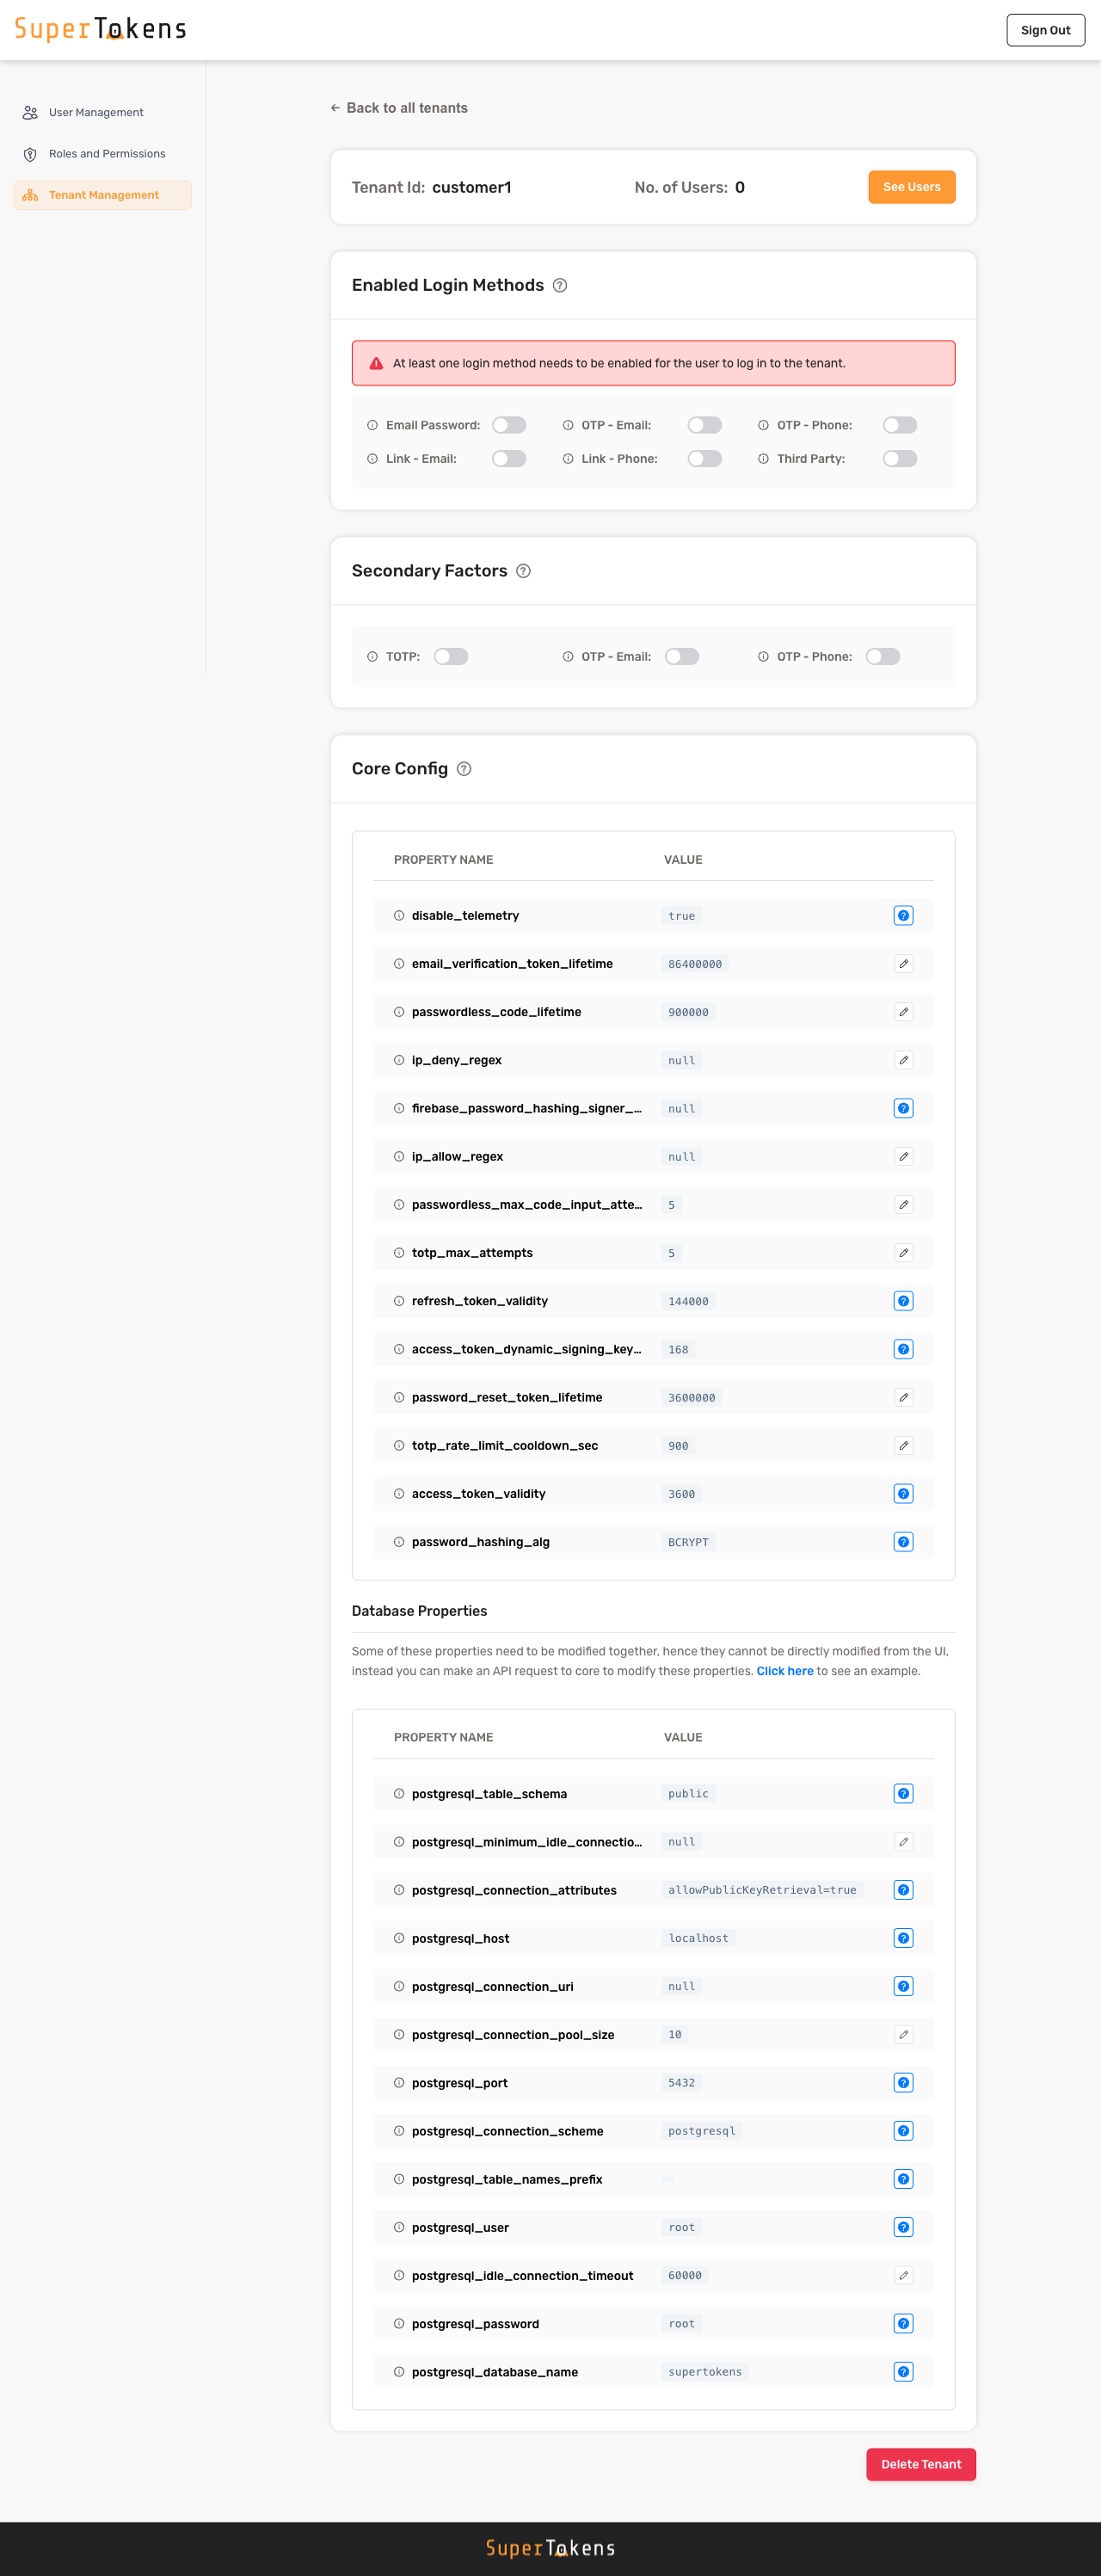 ### Tenant ID and users
The first section shows the tenant ID and the number of users in that tenant. Clicking on `See Users` takes you to the [user management page](/docs/post-authentication/dashboard/user-management) where you can view and manage the users for the selected tenant.
### Tenant ID and users
The first section shows the tenant ID and the number of users in that tenant. Clicking on `See Users` takes you to the [user management page](/docs/post-authentication/dashboard/user-management) where you can view and manage the users for the selected tenant.
 ### Enabled login methods
This section displays the login methods available for the tenant. By enabling these toggles, you can make the corresponding login methods accessible to the users within the tenant.
Appropriate recipes must be active to turn on the login methods. For example,
- to turn on `emailpassword`, initialize the EmailPassword recipe in the backend.
- to turn on `OTP Phone`, initialize the Passwordless recipe with `flowType` `USER_INPUT_CODE` and contactMethod `PHONE`
:::info
If you are using the Auth React SDK, make sure to enable [usesDynamicLoginMethods](/docs/authentication/enterprise/common-domain-login#3-tell-supertokens-about-the-saved-tenantid-from-the-previous-step) to ensure the frontend automatically shows the login methods based on the selection here.
:::
### Enabled login methods
This section displays the login methods available for the tenant. By enabling these toggles, you can make the corresponding login methods accessible to the users within the tenant.
Appropriate recipes must be active to turn on the login methods. For example,
- to turn on `emailpassword`, initialize the EmailPassword recipe in the backend.
- to turn on `OTP Phone`, initialize the Passwordless recipe with `flowType` `USER_INPUT_CODE` and contactMethod `PHONE`
:::info
If you are using the Auth React SDK, make sure to enable [usesDynamicLoginMethods](/docs/authentication/enterprise/common-domain-login#3-tell-supertokens-about-the-saved-tenantid-from-the-previous-step) to ensure the frontend automatically shows the login methods based on the selection here.
:::
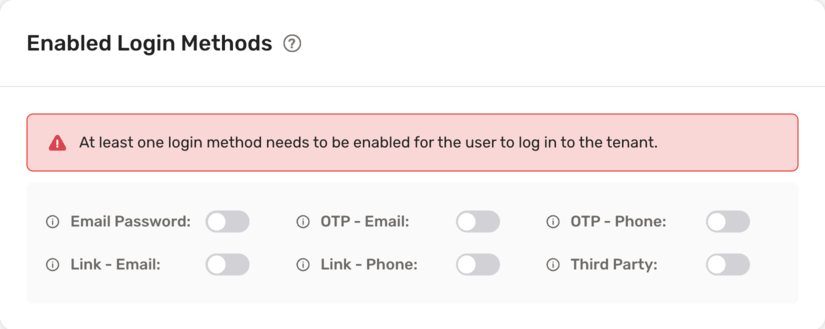 ### Secondary factors
This section displays the secondary factors available for the tenant. By enabling these toggles, the corresponding factor becomes active for all users of the tenant. Refer to [MultiFactor Authentication docs](/docs/additional-verification/mfa/introduction) for more information.
[MultiFactorAuth](/docs/additional-verification/mfa/initial-setup) recipe must initialize to enable Secondary Factors.
Also, initialize appropriate recipes in the backend SDK to use a secondary factor. For example,
- to turn on TOTP, initialize the TOTP recipe in the backend.
- to turn on `OTP Phone`, initialize the Passwordless recipe with `flowType` `USER_INPUT_CODE` and contactMethod `PHONE`
### Secondary factors
This section displays the secondary factors available for the tenant. By enabling these toggles, the corresponding factor becomes active for all users of the tenant. Refer to [MultiFactor Authentication docs](/docs/additional-verification/mfa/introduction) for more information.
[MultiFactorAuth](/docs/additional-verification/mfa/initial-setup) recipe must initialize to enable Secondary Factors.
Also, initialize appropriate recipes in the backend SDK to use a secondary factor. For example,
- to turn on TOTP, initialize the TOTP recipe in the backend.
- to turn on `OTP Phone`, initialize the Passwordless recipe with `flowType` `USER_INPUT_CODE` and contactMethod `PHONE`
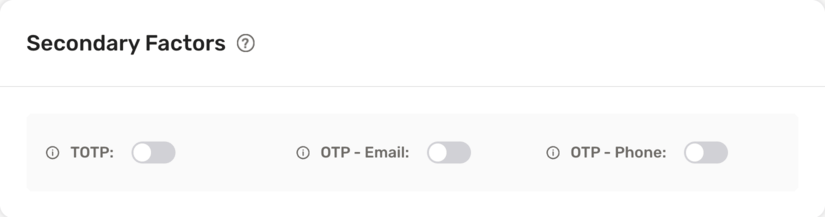 ### Core configuration
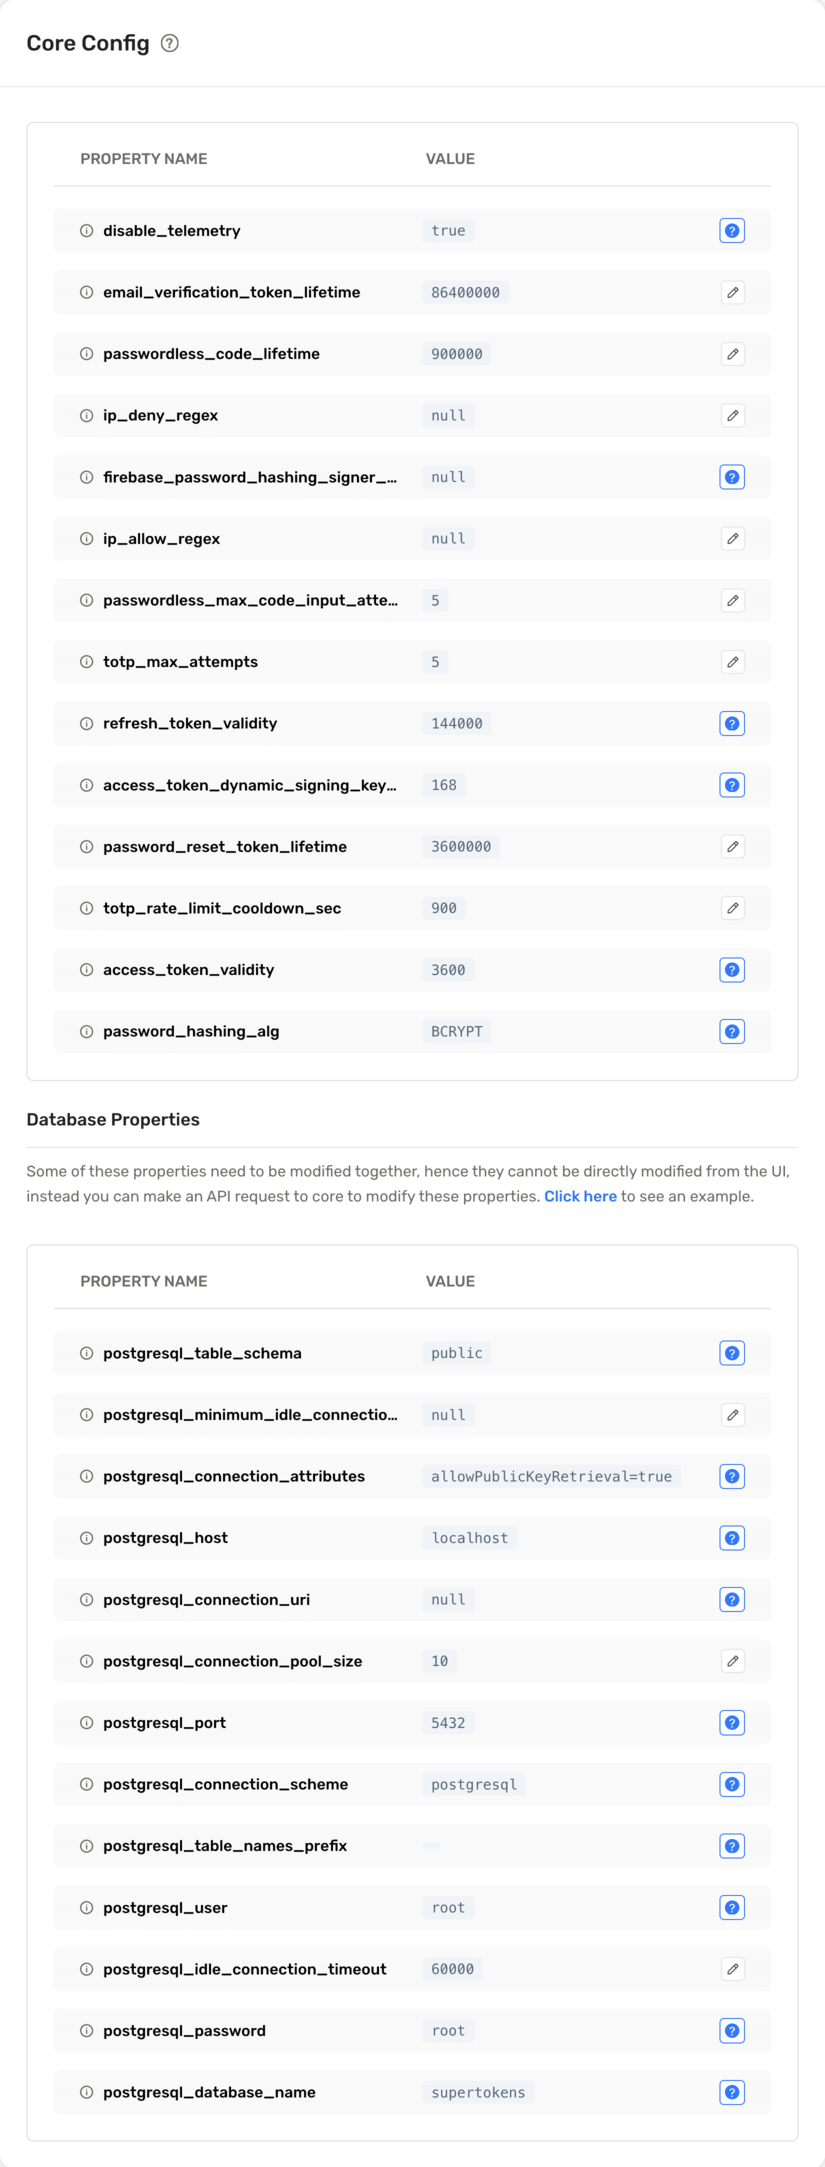 This section shows the current configuration values in core for the tenant. You can edit some of these settings by clicking the `pencil` icon next to the property.
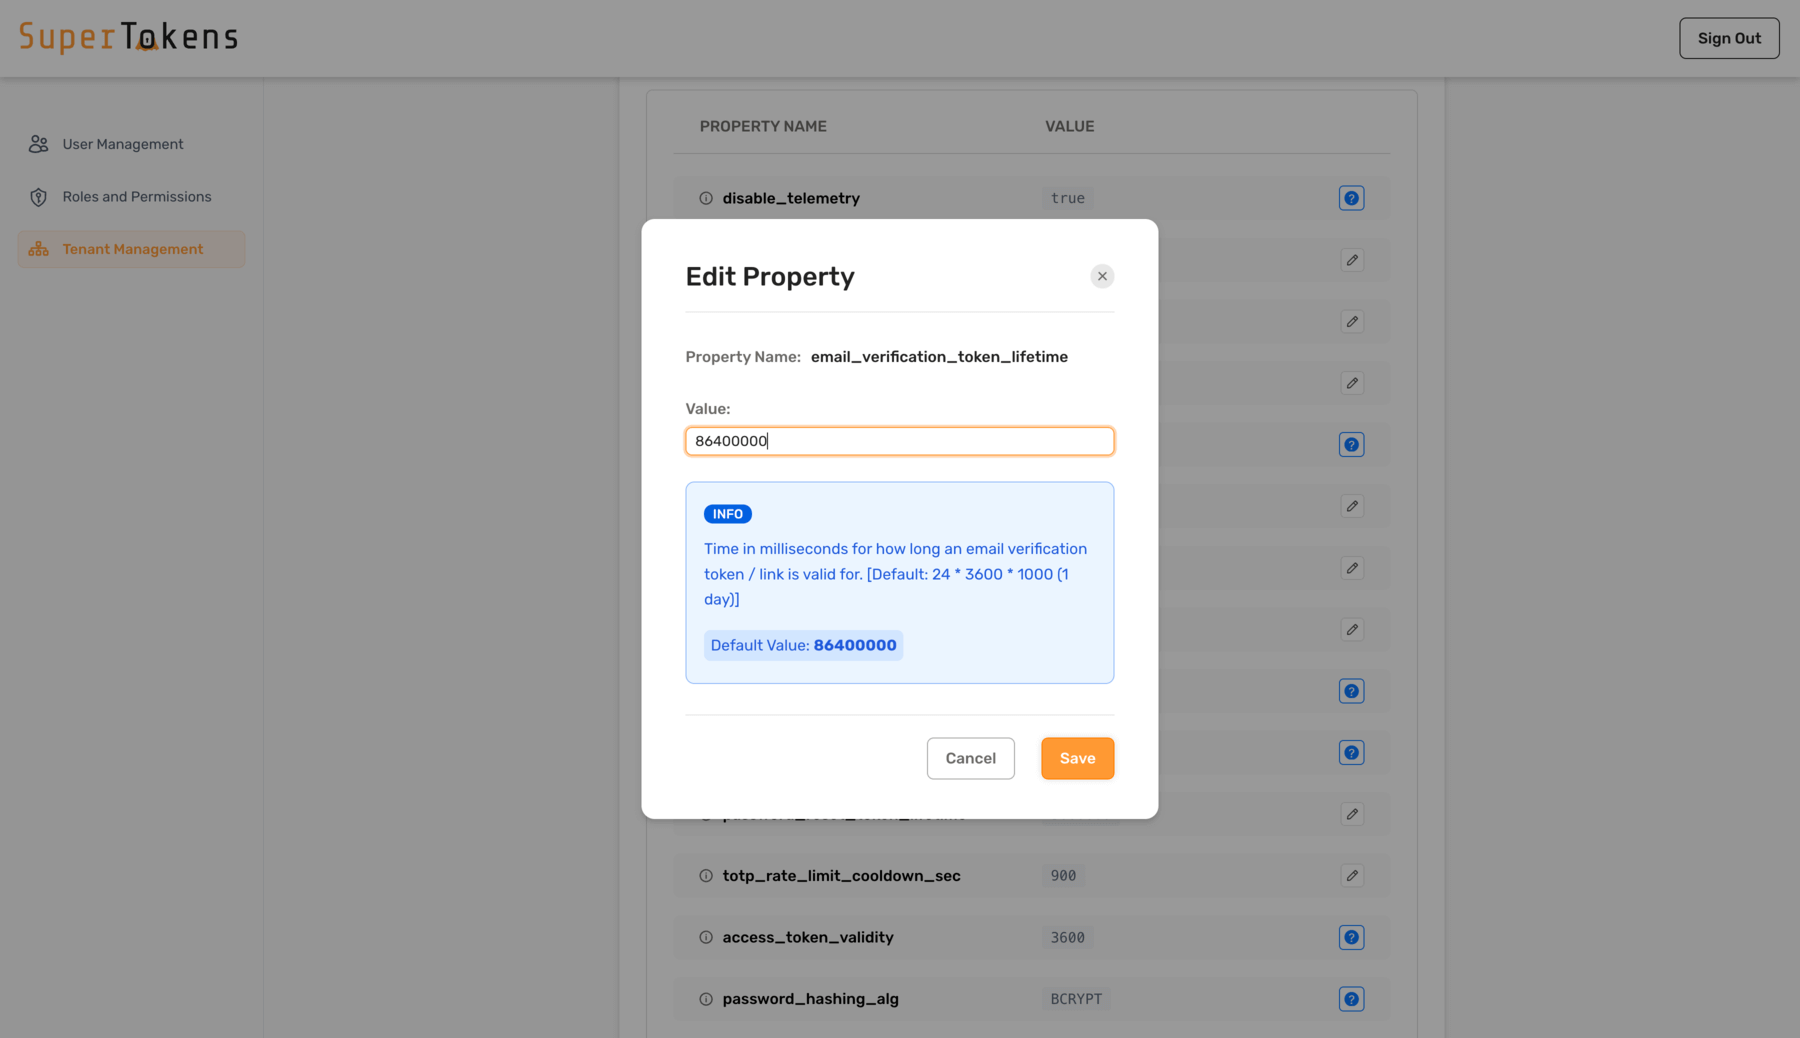 :::caution
Some configuration values may not be editable since they inherit from the App. If using SuperTokens managed hosting, you can modify them in the SaaS Dashboard. Else, if you are self-hosting the SuperTokens core, edit them via Docker environment variables or the `configuration.yaml` file.
:::
---
## Manage `ThirdParty` providers
The Social/Enterprise providers section becomes available once `Third Party` login method is active for the tenant.
Initially, configure a new provider.
:::caution
Some configuration values may not be editable since they inherit from the App. If using SuperTokens managed hosting, you can modify them in the SaaS Dashboard. Else, if you are self-hosting the SuperTokens core, edit them via Docker environment variables or the `configuration.yaml` file.
:::
---
## Manage `ThirdParty` providers
The Social/Enterprise providers section becomes available once `Third Party` login method is active for the tenant.
Initially, configure a new provider.
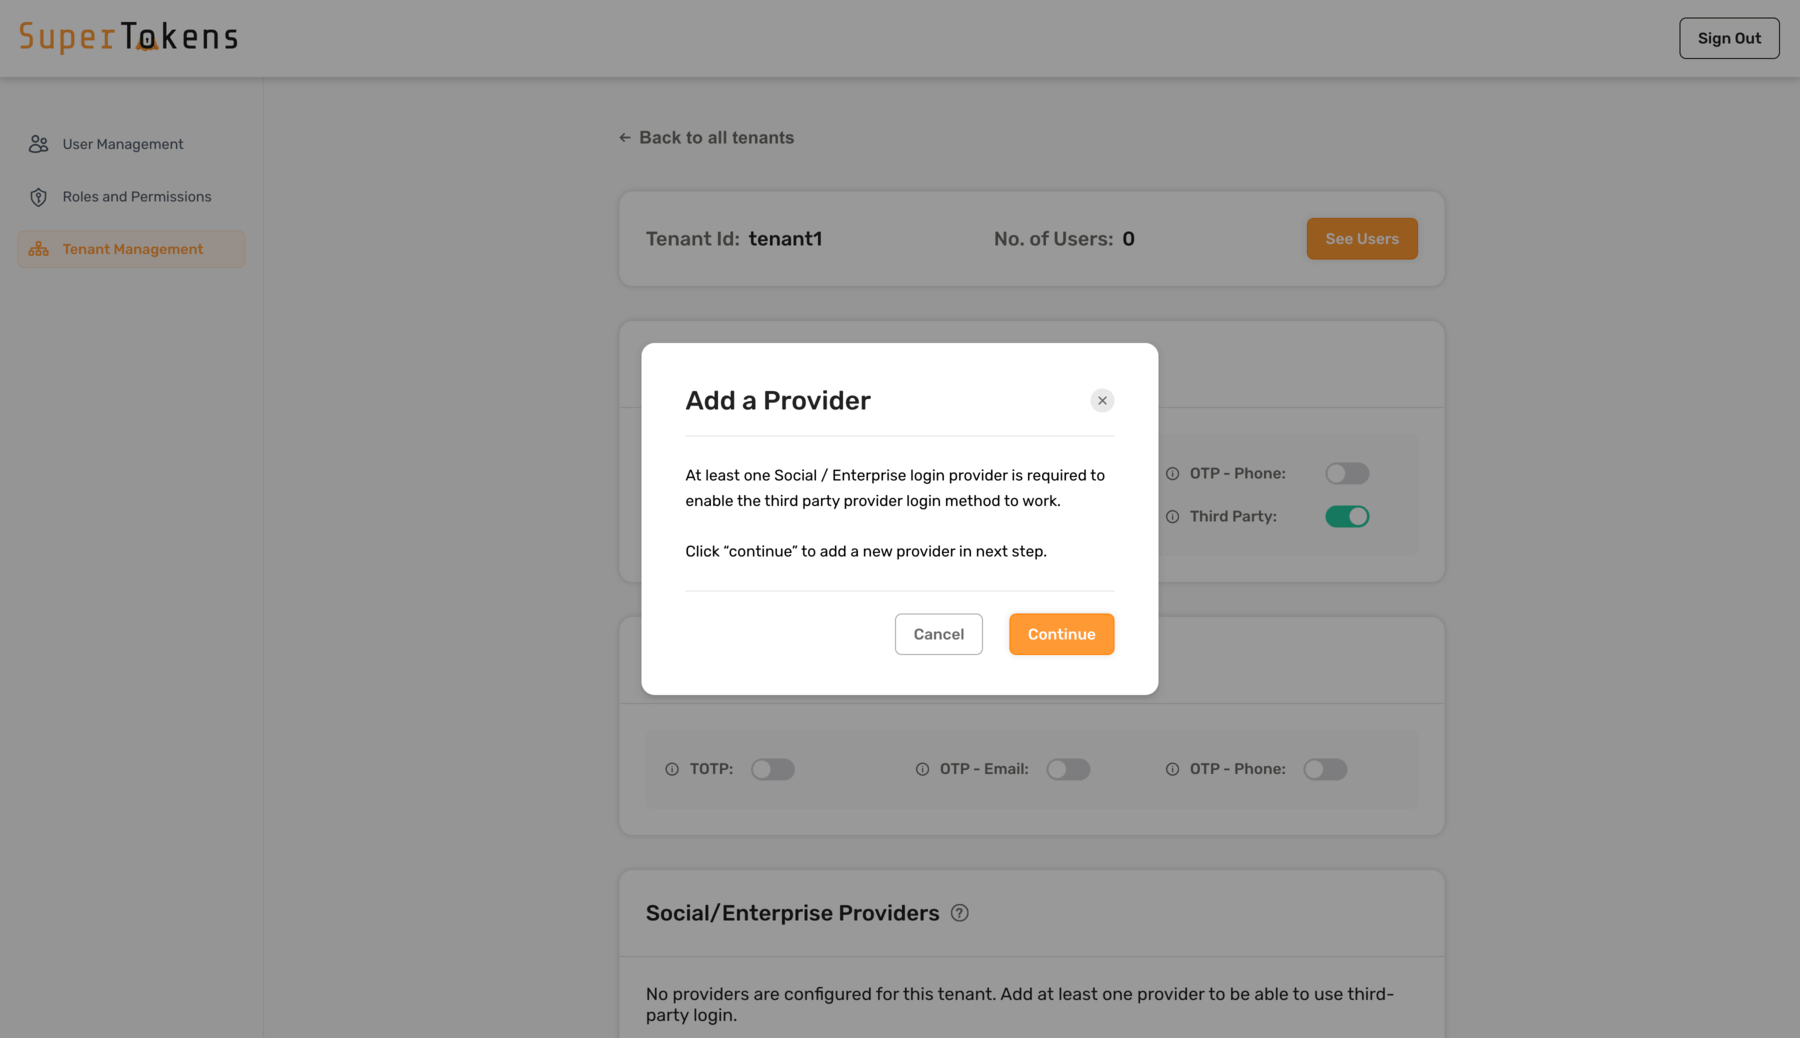 Later on, you can configure new or existing third-party providers from the **Social/Enterprise providers** section.
### Configure a new provider
When adding a new third-party provider, you receive a list of available options, including built-in enterprise and social providers, custom, and SAML.
Upon selection of the desired provider, provide further details such as `Client ID`, `Client Secret`, etc.
Later on, you can configure new or existing third-party providers from the **Social/Enterprise providers** section.
### Configure a new provider
When adding a new third-party provider, you receive a list of available options, including built-in enterprise and social providers, custom, and SAML.
Upon selection of the desired provider, provide further details such as `Client ID`, `Client Secret`, etc.
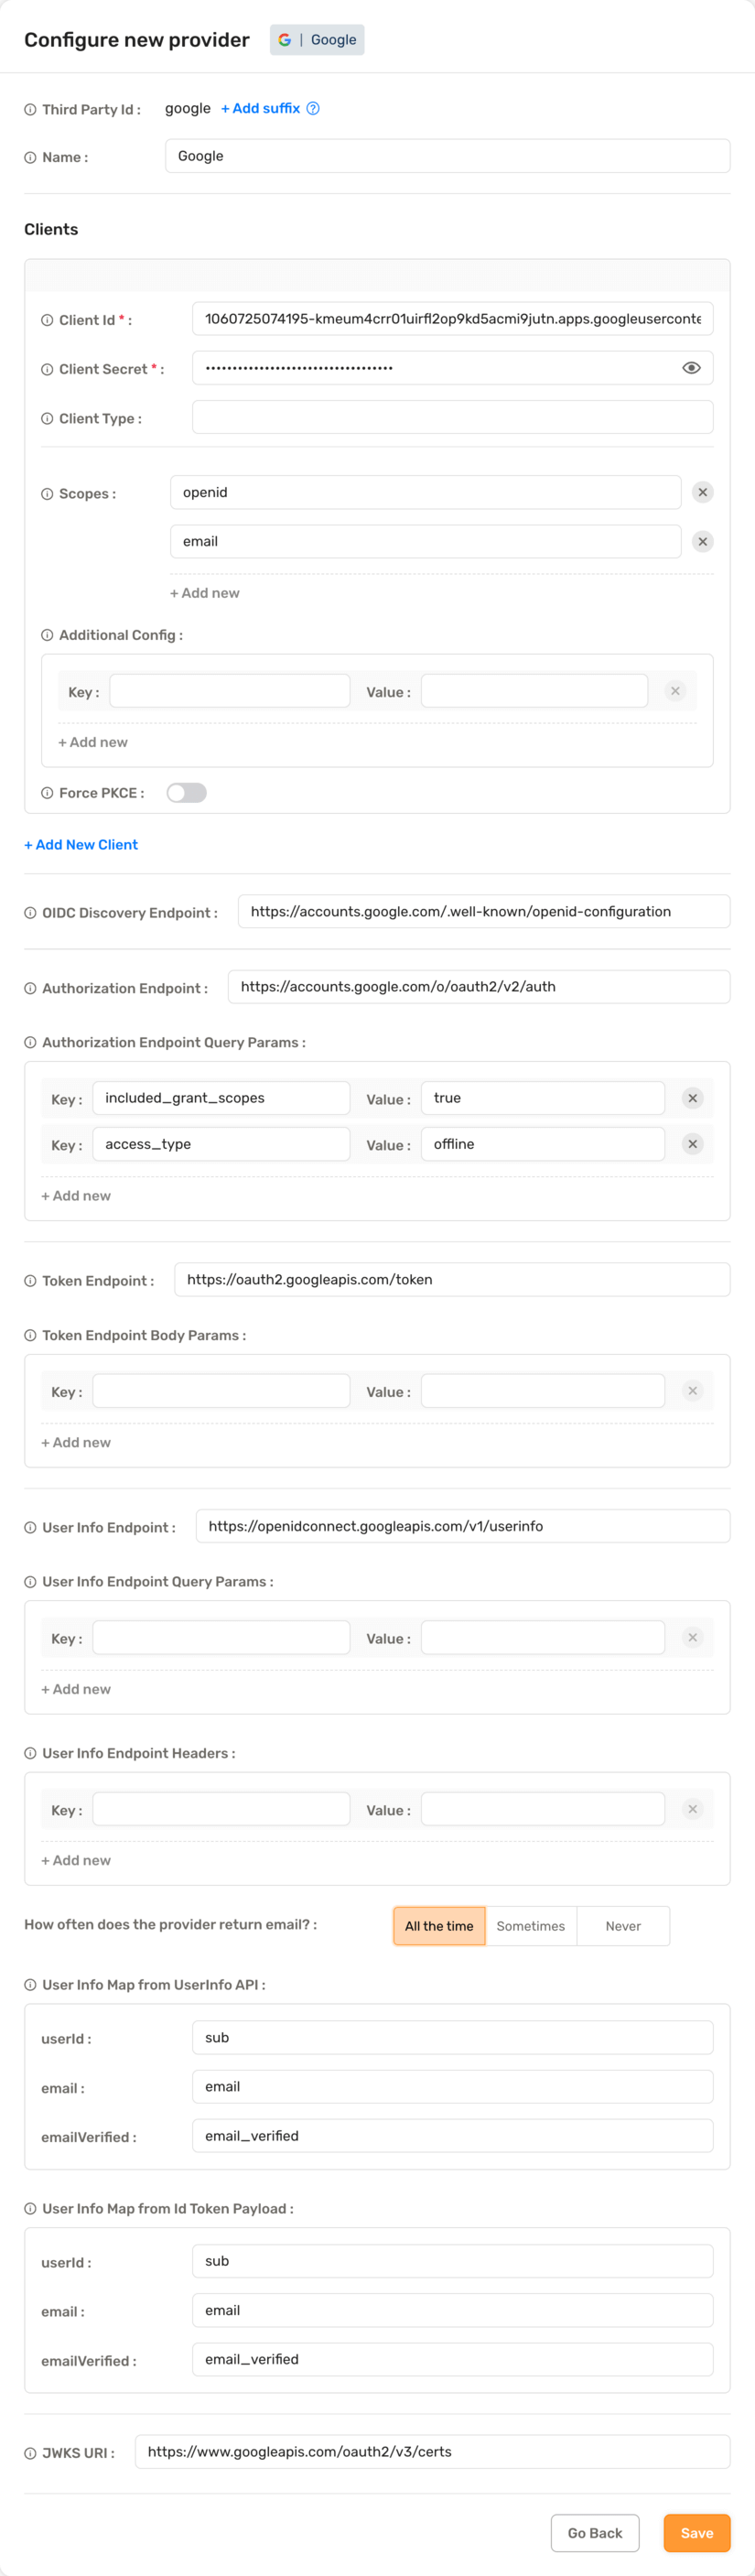 #### Enterprise providers
For the Enterprise providers, provide certain extra information before proceeding to the Provider details. For example, Active Directory provider requires a `Directory ID` before editing further details.
#### Enterprise providers
For the Enterprise providers, provide certain extra information before proceeding to the Provider details. For example, Active Directory provider requires a `Directory ID` before editing further details.
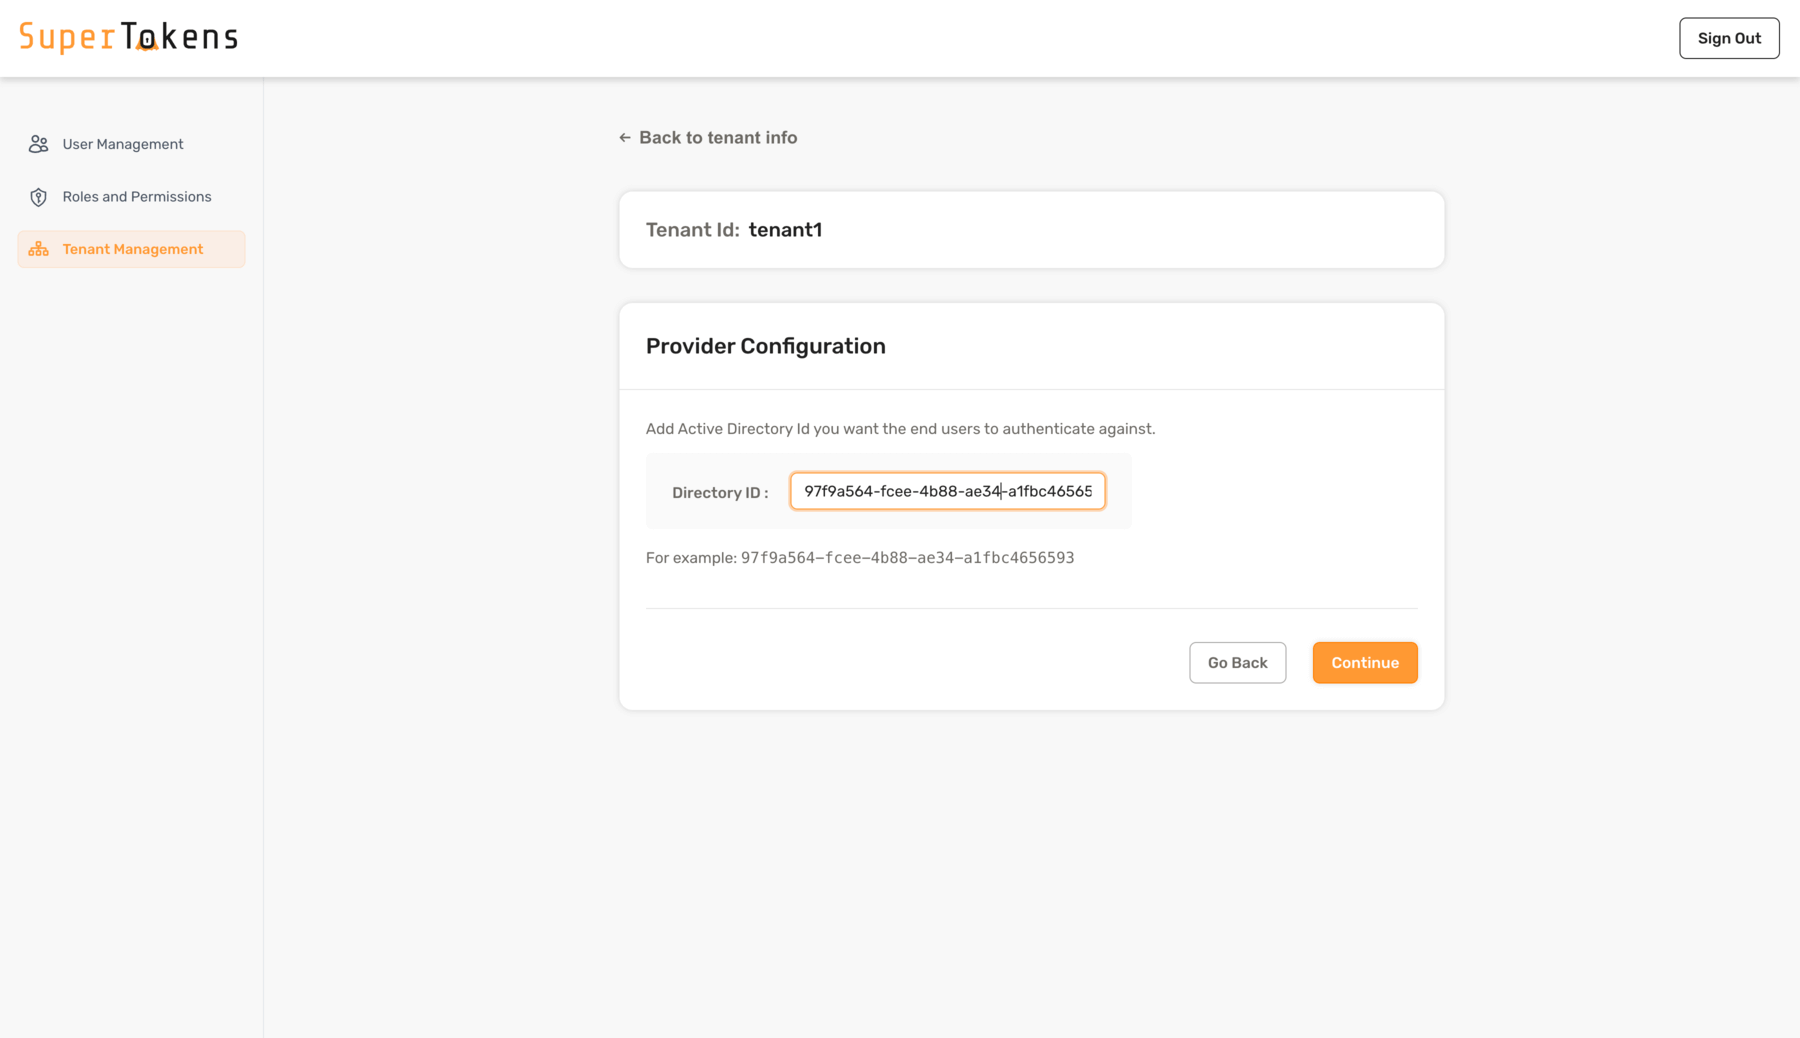 #### Custom providers
If a Social/Enterprise provider is not available in the list of built-in providers, you can still use them by selecting the `Add Custom Provider` option.
Start off by providing `ThirdParty ID`, `Name` and Client details such as `Client ID`, `Secret`, `Scope`, etc.
#### Custom providers
If a Social/Enterprise provider is not available in the list of built-in providers, you can still use them by selecting the `Add Custom Provider` option.
Start off by providing `ThirdParty ID`, `Name` and Client details such as `Client ID`, `Secret`, `Scope`, etc.
 If using an OpenID compliant provider, you could add the `OIDC Discovery Endpoint`. Otherwise, configure the provider by manually providing `Authorization Endpoint`, `Token Endpoint`, `User Info Endpoint`, etc.
 Finally, clicking on `Save` adds the Social/enterprise provider for the tenant.
#### SAML providers
To add a SAML provider, use the `Add SAML Provider` option. For more information on what is SAML and how it works with SuperTokens, refer [SAML docs](/docs/authentication/enterprise/saml/what-is-saml).
Upon selection, provide the `Boxy URL` and the `Boxy API Key`.
:::important
To use SAML providers, an additional Boxy HQ service is necessary. You can either self-host yourself or email for a managed instance. Details for them are also available on this page.
:::
Finally, clicking on `Save` adds the Social/enterprise provider for the tenant.
#### SAML providers
To add a SAML provider, use the `Add SAML Provider` option. For more information on what is SAML and how it works with SuperTokens, refer [SAML docs](/docs/authentication/enterprise/saml/what-is-saml).
Upon selection, provide the `Boxy URL` and the `Boxy API Key`.
:::important
To use SAML providers, an additional Boxy HQ service is necessary. You can either self-host yourself or email for a managed instance. Details for them are also available on this page.
:::
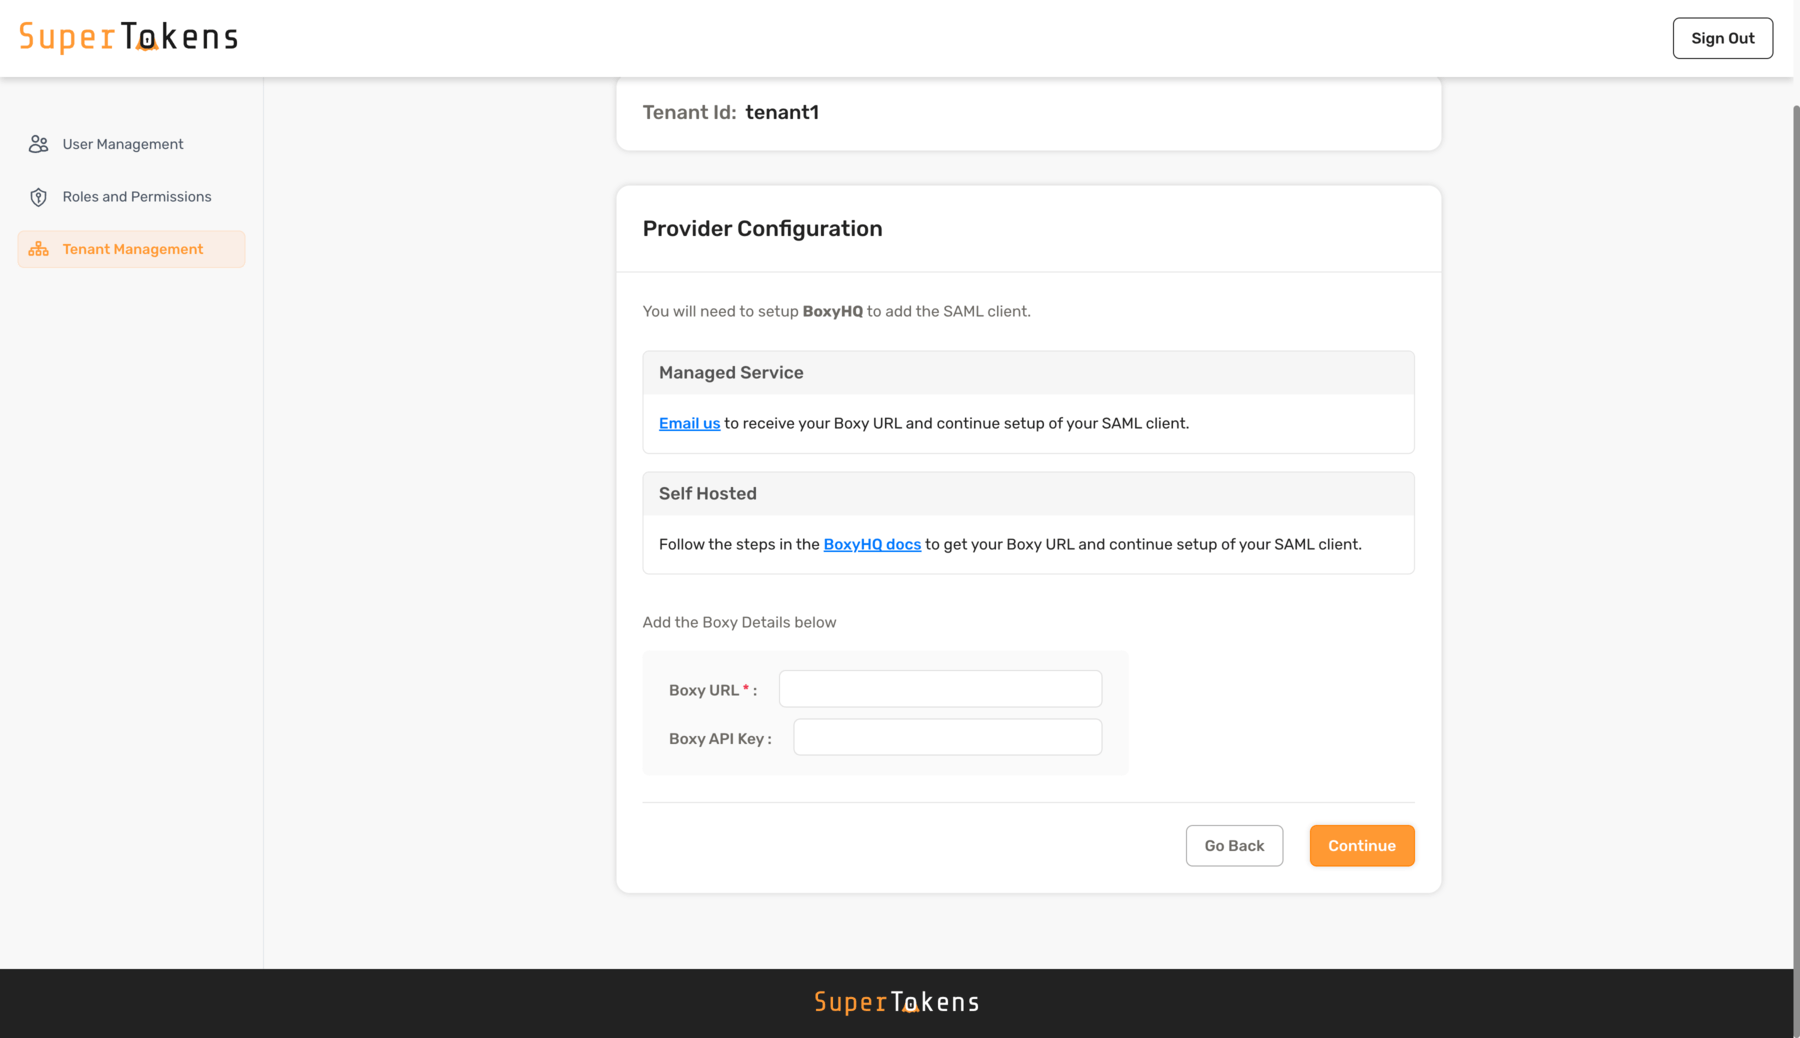 On continuing, you are further asked for the SAML configuration. You have an option to either provide SAML XML directly or via the Metadata URL from the Provider. Also, fill in other details such as `Suffix`, `Name`, `Redirect URLs` and click on `Save` to add the SAML provider.
:::caution
Adding ThirdParty suffix is not compulsory, however if you wish to add multiple SAML providers for a tenant, you need to add unique suffixes for each of them.
:::
On continuing, you are further asked for the SAML configuration. You have an option to either provide SAML XML directly or via the Metadata URL from the Provider. Also, fill in other details such as `Suffix`, `Name`, `Redirect URLs` and click on `Save` to add the SAML provider.
:::caution
Adding ThirdParty suffix is not compulsory, however if you wish to add multiple SAML providers for a tenant, you need to add unique suffixes for each of them.
:::
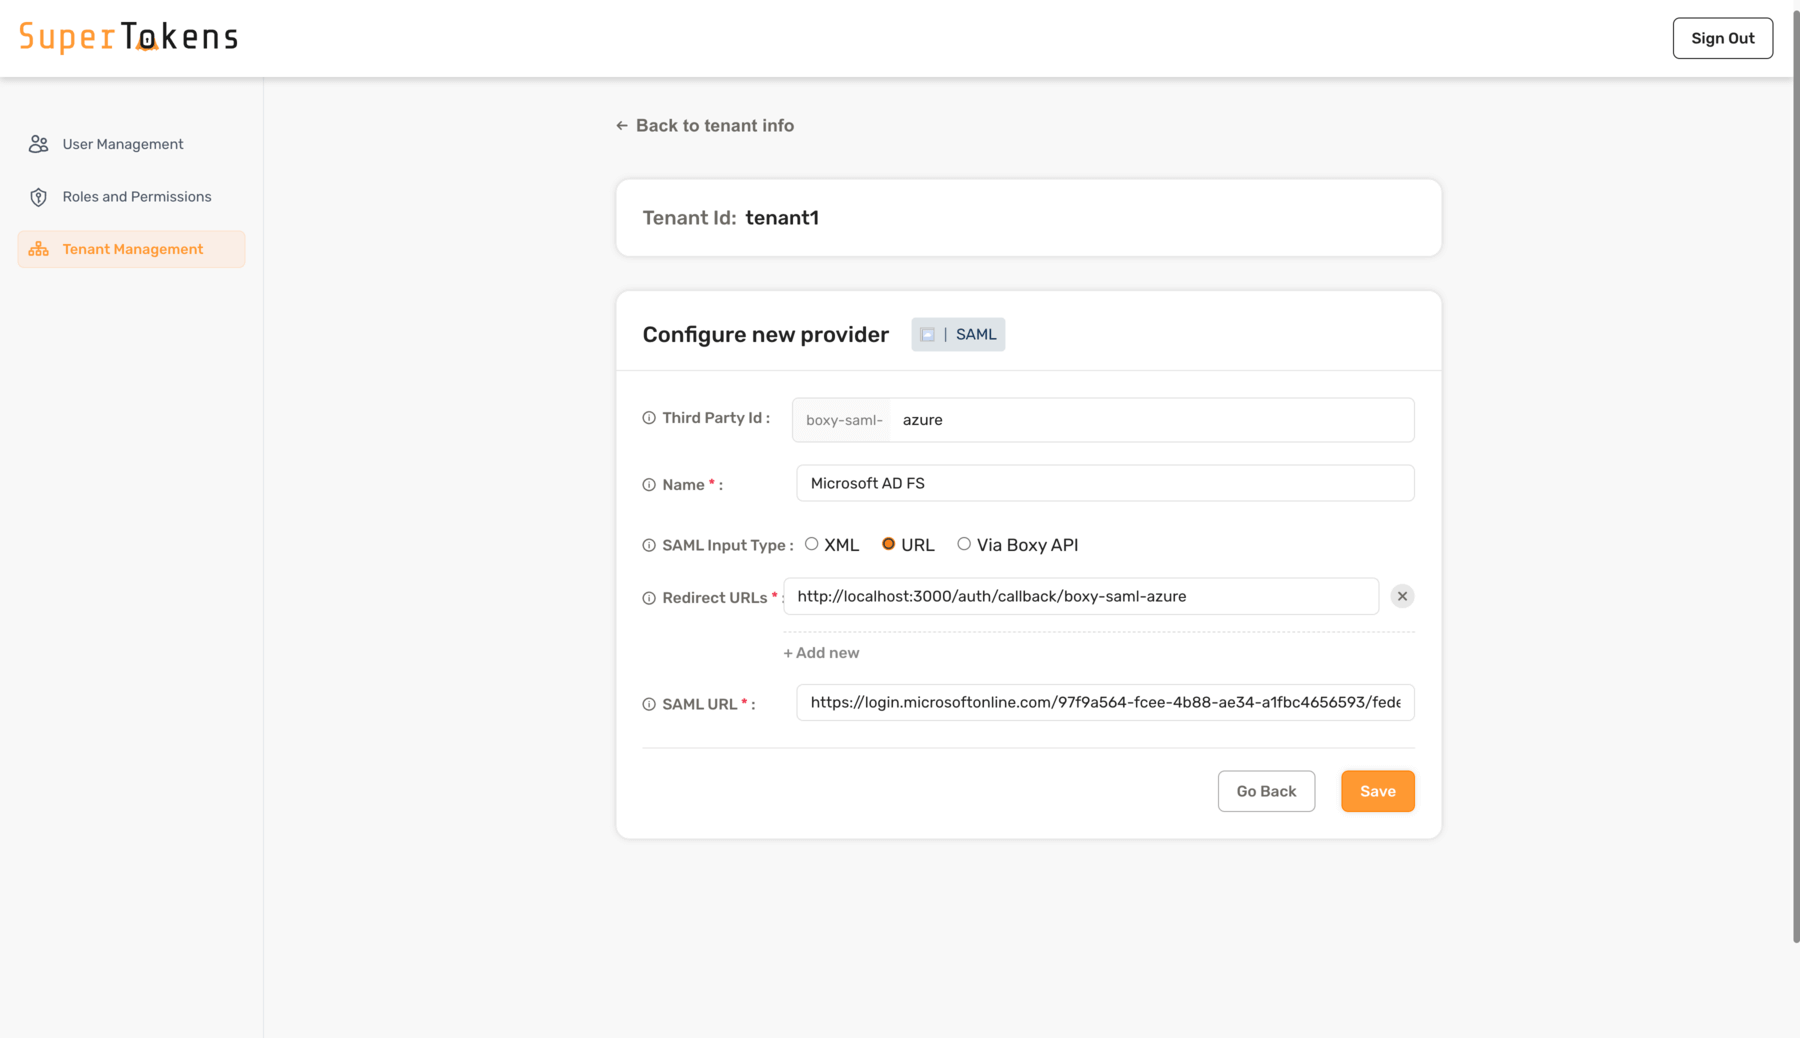 If you did not provide the `Boxy API Key`, you need to add the `Client ID` and `Secret` obtained by calling the Boxy APIs manually. More details are [available here](/docs/authentication/enterprise/saml/boxy-hq-guide#4-upload-the-base64-xml-string-to-saml-jackson).
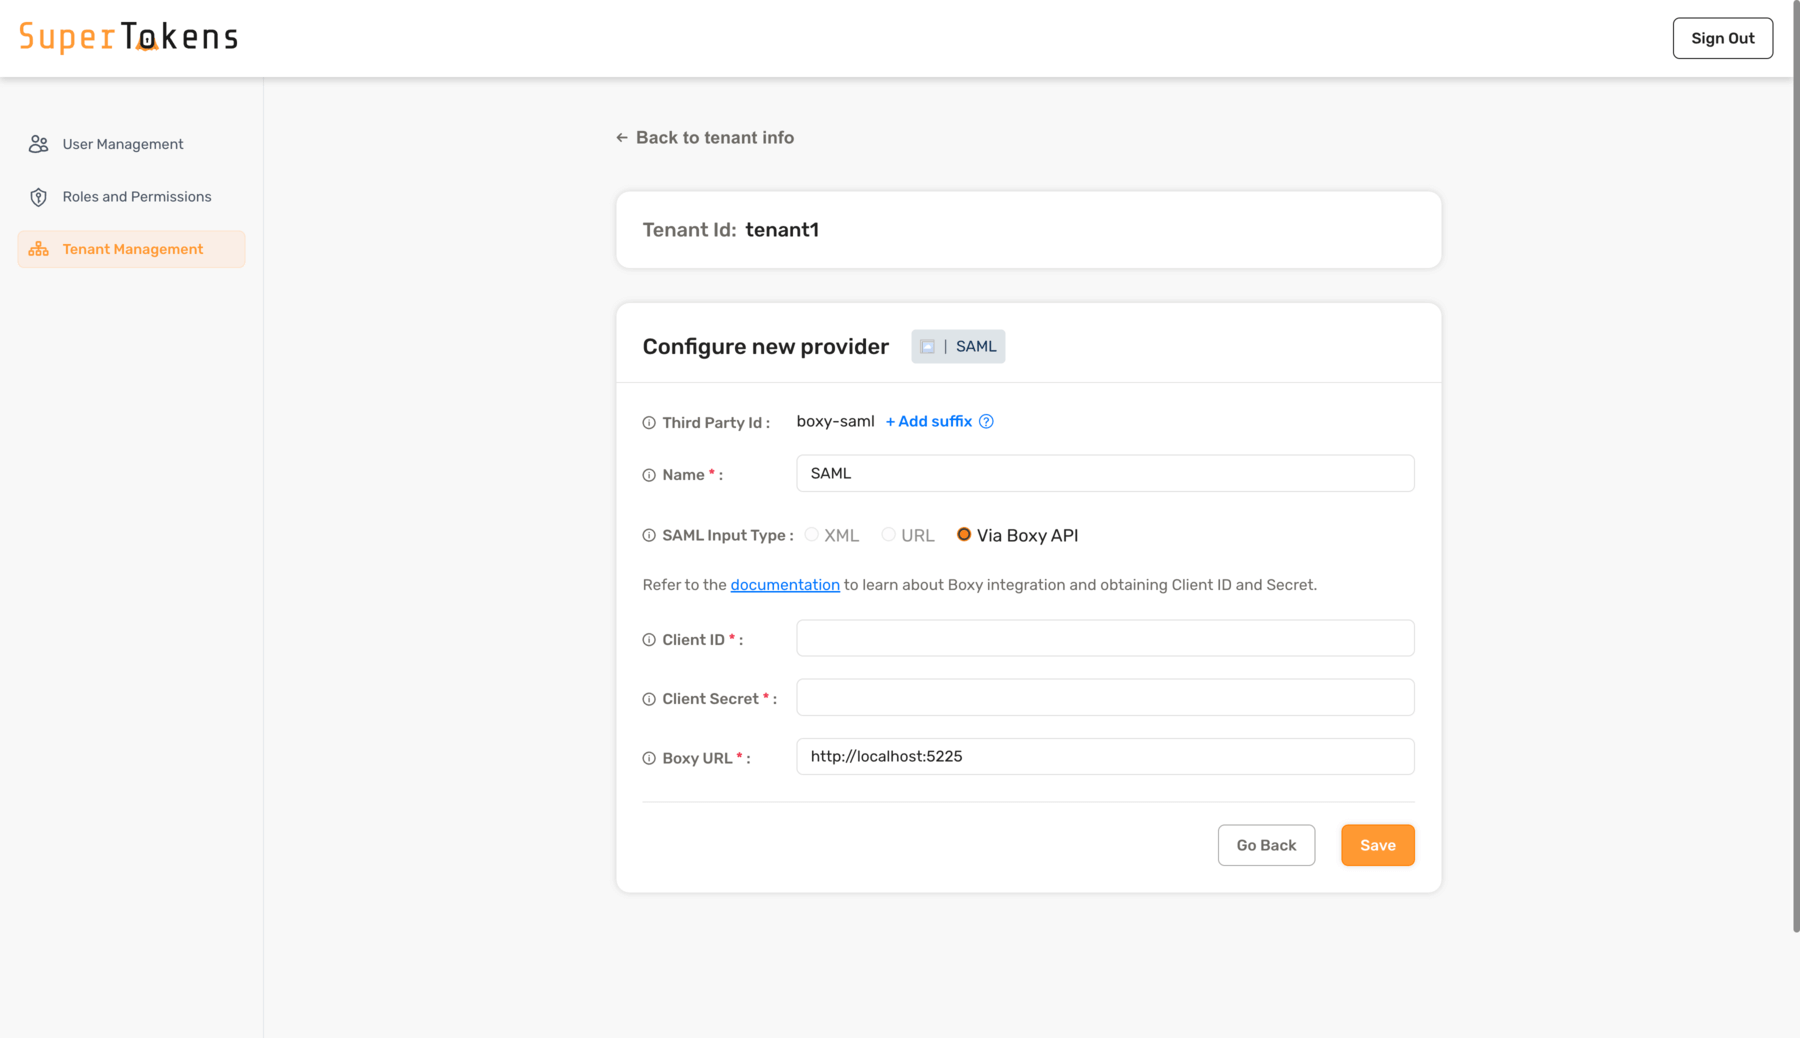 # Deployment - Migrate from MySQL to PostgreSQL
Source: https://supertokens.com/docs/deployment/migrate-from-mysql
## Overview
This tutorial shows you how to migrate your **SuperTokens** database from **MySQL** to **PostgreSQL**.
The migration involves exporting data from MySQL, setting up a PostgreSQL database with the same schema version, and importing the data with proper format conversions.
## Before you start
The tutorial assumes the following:
- You have access to both your `MySQL` and `PostgreSQL` databases
- Both databases are running on the same version of **SuperTokens Core**
- You have administrative privileges on both databases
## Steps
### 1. Create a backup of your MySQL database
Create a final backup of your MySQL database.
The instructions for this step are specific to your database management system.
### 2. Prepare the PostgreSQL database
Start the same version of [`supertokens-postgresql`](https://hub.docker.com/r/supertokens/supertokens-postgresql) to initialize the schema in the database.
:::warning
Make sure to use the same version as the `supertokens-mysql` instance that you are currently running.
:::
### 3. Export data from MySQL
#### 3.1 Export standard tables
Run the following command to export most of your data:
```bash
mysqldump supertokens --fields-terminated-by ',' --fields-enclosed-by '"' --fields-escaped-by '\' --no-create-info --tab /var/lib/mysql-files/
```
This creates CSV files for all tables in the `/var/lib/mysql-files/` directory.
#### 3.2 Export the WebAuthn credentials table
The `webauthn_credentials` table requires special handling because of the data type used to store the `public_key` field.
```sql
SELECT id, app_id, rp_id, user_id, counter, HEX(public_key) AS public_key, transports, created_at, updated_at
FROM webauthn_credentials
INTO OUTFILE '/var/lib/mysql-files/webauthn_credentials_hex.txt'
FIELDS TERMINATED BY ','
OPTIONALLY ENCLOSED BY '"'
ESCAPED BY '\\'
LINES TERMINATED BY '\n';
```
This exports the `public_key` field as hexadecimal text for proper conversion to PostgreSQL's Binary Data (BYTEA) format.
### 4. Transfer data files
If necessary, copy the exported CSV files to a location where the `PostgreSQL` database can access them.
### 5. Import data into the PostgreSQL database
Next, you need to import the data into your PostgreSQL database.
#### 5.1. Disable triggers
Connect to your PostgreSQL database and disable triggers to prevent constraint violations during import.
```sql
SET session_replication_role = 'replica';
```
#### 5.2 Import the standard tables
For most tables, you can import the data directly.
# Deployment - Migrate from MySQL to PostgreSQL
Source: https://supertokens.com/docs/deployment/migrate-from-mysql
## Overview
This tutorial shows you how to migrate your **SuperTokens** database from **MySQL** to **PostgreSQL**.
The migration involves exporting data from MySQL, setting up a PostgreSQL database with the same schema version, and importing the data with proper format conversions.
## Before you start
The tutorial assumes the following:
- You have access to both your `MySQL` and `PostgreSQL` databases
- Both databases are running on the same version of **SuperTokens Core**
- You have administrative privileges on both databases
## Steps
### 1. Create a backup of your MySQL database
Create a final backup of your MySQL database.
The instructions for this step are specific to your database management system.
### 2. Prepare the PostgreSQL database
Start the same version of [`supertokens-postgresql`](https://hub.docker.com/r/supertokens/supertokens-postgresql) to initialize the schema in the database.
:::warning
Make sure to use the same version as the `supertokens-mysql` instance that you are currently running.
:::
### 3. Export data from MySQL
#### 3.1 Export standard tables
Run the following command to export most of your data:
```bash
mysqldump supertokens --fields-terminated-by ',' --fields-enclosed-by '"' --fields-escaped-by '\' --no-create-info --tab /var/lib/mysql-files/
```
This creates CSV files for all tables in the `/var/lib/mysql-files/` directory.
#### 3.2 Export the WebAuthn credentials table
The `webauthn_credentials` table requires special handling because of the data type used to store the `public_key` field.
```sql
SELECT id, app_id, rp_id, user_id, counter, HEX(public_key) AS public_key, transports, created_at, updated_at
FROM webauthn_credentials
INTO OUTFILE '/var/lib/mysql-files/webauthn_credentials_hex.txt'
FIELDS TERMINATED BY ','
OPTIONALLY ENCLOSED BY '"'
ESCAPED BY '\\'
LINES TERMINATED BY '\n';
```
This exports the `public_key` field as hexadecimal text for proper conversion to PostgreSQL's Binary Data (BYTEA) format.
### 4. Transfer data files
If necessary, copy the exported CSV files to a location where the `PostgreSQL` database can access them.
### 5. Import data into the PostgreSQL database
Next, you need to import the data into your PostgreSQL database.
#### 5.1. Disable triggers
Connect to your PostgreSQL database and disable triggers to prevent constraint violations during import.
```sql
SET session_replication_role = 'replica';
```
#### 5.2 Import the standard tables
For most tables, you can import the data directly.
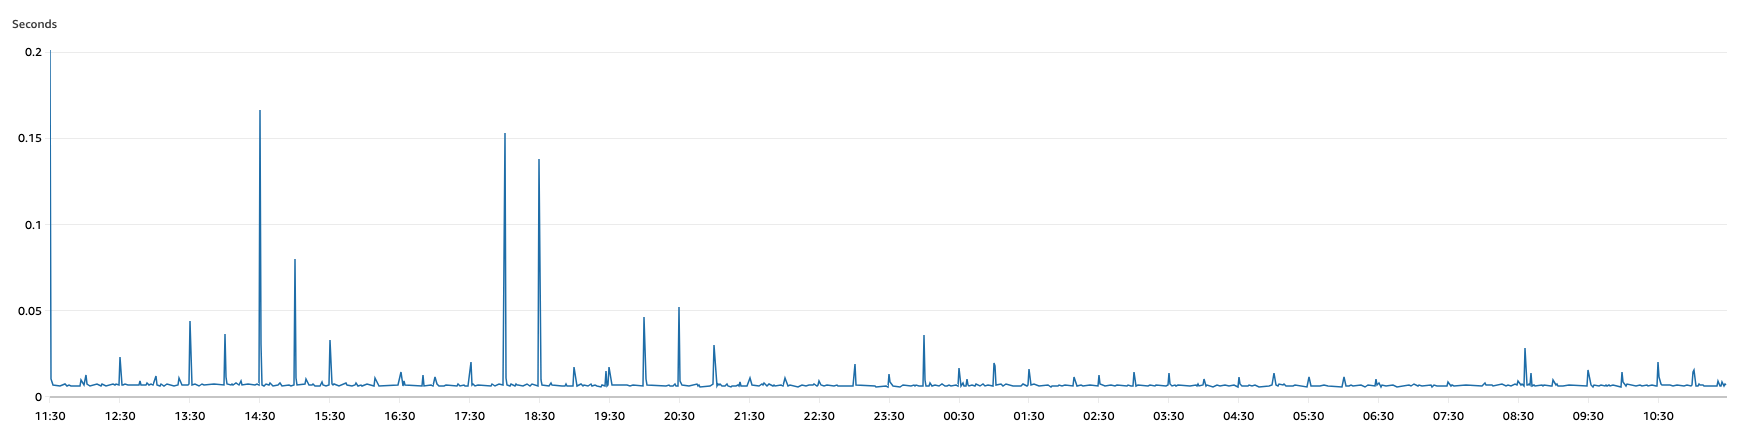 ### Number of requests per minute over 1 day
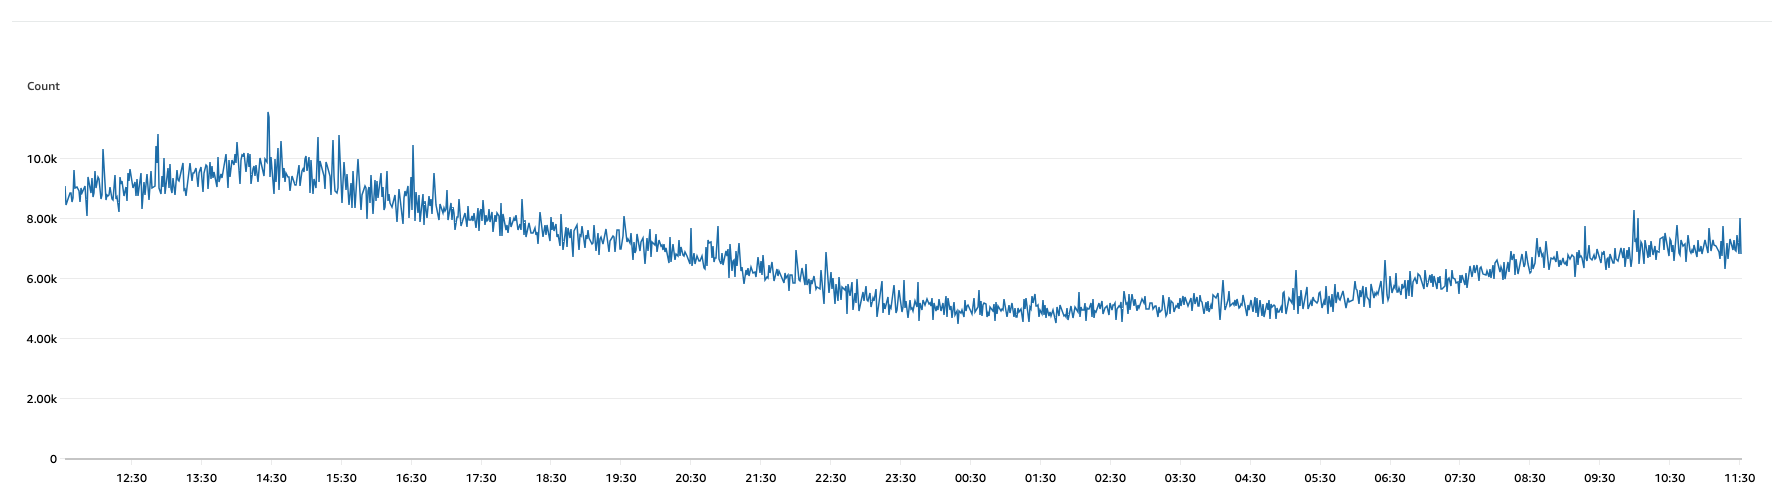 ### Performance tuning
If you are facing performance issues, here are some tips to help you tune the performance of your SuperTokens setup:
- If you are self-hosting the SuperTokens core, know that it is stateless and can scale horizontally. You can add more instances of the core service to handle more requests (behind a load balancer).
- Check which part of the request cycle is slow. Is it the SuperTokens core responding, or is it the backend SDK APIs responding? The performance of the backend SDK API depends mainly on how you have set up your API layer (that integrates with the backend SDK) to perform. You can check which is slow by enabling debug logs in the backend SDK, and then inspecting the timestamps around the core requests. If they sum up to be much less than the total time taken for the request (from the `frontend`'s point of view), then the bottleneck is likely in the backend SDK.
- If you are self-hosting the SuperTokens core, check if there are any database queries that are too slow. You can do this using debugging tools provided by the PostgreSQL database. If you find a query that's causing issues, please reach out to support.
- Check that the compute used to run the backend SDK, the SuperTokens core (in case you are self-hosting it), and the database is sufficient. Using a t3.micro EC2 instance for the core should work well for even 100,000 MAUs. You can check the `CPU` and memory usage of the instances to see if they have maxed out, or if you have run out of `CPU` credits. If they are, you can consider upgrading the instances to more powerful ones.
- In case you are self-hosting the SuperTokens core, you can tune its performance by setting different values for the following configurations in the configuration.yaml file, or docker `env`:
- `max_server_pool_size`: Sets the max thread pool size for incoming `http` server requests. Default value is 10.
- `postgresql_connection_pool_size` (if using psql): Defines the connection pool size to PostgreSQL. Default value is 10.
- `postgresql_minimum_idle_connections` (if using psql): Minimum number of idle connections to remain active. If not set, minimum idle connections are the same as the connection pool size. By default, this is not set.
- `postgresql_idle_connection_timeout`: (if using psql): Timeout in milliseconds for the idle connections to close. Default is 60000 MS.
- Check if you have access token blacklisting enabled in the backend SDK. The default is `false`, but if you have it enabled, then it means that every session verification attempt queries the SuperTokens core to check the database. This adds latency to the session verification process and increases the load on the core. If you want to keep this to `true`, consider making it only for non `GET` APIs for your application.
- You can increase the value of `access_token_validity` in the SuperTokens core. It sets the validity of the access token. Default value is 3,600 seconds (1 hour). The lower this value, the more often the refresh API calls the core, increasing the load on the core.
---
## Database
SuperTokens works with PostgreSQL databases, and one instance of the database is enough to handle tens of millions of MAUs.
For example, a database with 1 million users would occupy ~ 1.5 GB of disk space (assuming you add minimal custom metadata to the user object).
---
## Backend SDK
The backend SDK does not store any information on its own.
It's a "big middleware" between the frontend requests and the SuperTokens core.
As such, its scalability depends entirely on the scalability of your API layer into which the backend SDK integrates.
---
## Session verification
The access token is a JWT, and the backend SDK verifies them without any network requests, making them fast and scalable.
The core service verifies the refresh token, and the scalability of session refresh requests depends on the core service's scalability. However, session refreshes are rare compared to access token verification.
# Migration - Account Migration
Source: https://supertokens.com/docs/migration/account-migration
### Performance tuning
If you are facing performance issues, here are some tips to help you tune the performance of your SuperTokens setup:
- If you are self-hosting the SuperTokens core, know that it is stateless and can scale horizontally. You can add more instances of the core service to handle more requests (behind a load balancer).
- Check which part of the request cycle is slow. Is it the SuperTokens core responding, or is it the backend SDK APIs responding? The performance of the backend SDK API depends mainly on how you have set up your API layer (that integrates with the backend SDK) to perform. You can check which is slow by enabling debug logs in the backend SDK, and then inspecting the timestamps around the core requests. If they sum up to be much less than the total time taken for the request (from the `frontend`'s point of view), then the bottleneck is likely in the backend SDK.
- If you are self-hosting the SuperTokens core, check if there are any database queries that are too slow. You can do this using debugging tools provided by the PostgreSQL database. If you find a query that's causing issues, please reach out to support.
- Check that the compute used to run the backend SDK, the SuperTokens core (in case you are self-hosting it), and the database is sufficient. Using a t3.micro EC2 instance for the core should work well for even 100,000 MAUs. You can check the `CPU` and memory usage of the instances to see if they have maxed out, or if you have run out of `CPU` credits. If they are, you can consider upgrading the instances to more powerful ones.
- In case you are self-hosting the SuperTokens core, you can tune its performance by setting different values for the following configurations in the configuration.yaml file, or docker `env`:
- `max_server_pool_size`: Sets the max thread pool size for incoming `http` server requests. Default value is 10.
- `postgresql_connection_pool_size` (if using psql): Defines the connection pool size to PostgreSQL. Default value is 10.
- `postgresql_minimum_idle_connections` (if using psql): Minimum number of idle connections to remain active. If not set, minimum idle connections are the same as the connection pool size. By default, this is not set.
- `postgresql_idle_connection_timeout`: (if using psql): Timeout in milliseconds for the idle connections to close. Default is 60000 MS.
- Check if you have access token blacklisting enabled in the backend SDK. The default is `false`, but if you have it enabled, then it means that every session verification attempt queries the SuperTokens core to check the database. This adds latency to the session verification process and increases the load on the core. If you want to keep this to `true`, consider making it only for non `GET` APIs for your application.
- You can increase the value of `access_token_validity` in the SuperTokens core. It sets the validity of the access token. Default value is 3,600 seconds (1 hour). The lower this value, the more often the refresh API calls the core, increasing the load on the core.
---
## Database
SuperTokens works with PostgreSQL databases, and one instance of the database is enough to handle tens of millions of MAUs.
For example, a database with 1 million users would occupy ~ 1.5 GB of disk space (assuming you add minimal custom metadata to the user object).
---
## Backend SDK
The backend SDK does not store any information on its own.
It's a "big middleware" between the frontend requests and the SuperTokens core.
As such, its scalability depends entirely on the scalability of your API layer into which the backend SDK integrates.
---
## Session verification
The access token is a JWT, and the backend SDK verifies them without any network requests, making them fast and scalable.
The core service verifies the refresh token, and the scalability of session refresh requests depends on the core service's scalability. However, session refreshes are rare compared to access token verification.
# Migration - Account Migration
Source: https://supertokens.com/docs/migration/account-migration
Request
Body Schema
| Name | Type | Description | Required | |----------------|------------------------|-------------------------------------------------------------------------------------------------|----------| | externalUserId | `string` | ID that can be used to reference the users from your previous provider | No | | `userMetadata` | `object` | An object with custom user information that can be used later on | No | | `userRoles` | `array` of `UserRole` | The roles that will be used for authorization | No | | `totpDevices` | `array` of `TotpDevice` | Time-based One-time Password device (TOTP) used for Multi-Factor Authentication | Yes | | `loginMethods` | `array` of `LoginMethod` | The actual authentication methods and credentials | Yes |TotpDevice
| Name | Type | Description | Required | |------------|---------------------|-----------------------------------------------------------------------------|----------| | `secretKey` | `string` | The secret key used to generate the TOTP codes. | Yes | | period | `number` | The time period in seconds for which a TOTP code is valid. | Yes | | skew | `number` | The allowable time skew to account for clock differences between the server and device. | Yes | | `deviceName` | `string` | The name assigned to the TOTP device for identification purposes. | No |UserRole
| Name | Type | Description | Required | |------------|---------------------|-----------------------------------------------------------------------------|----------| | role | `string` | The actual role name | Yes | | tenantIds | Array of `string` | The tenants that use this role. If you are not using the `multi-tenancy` just pass an empty array. | Yes |LoginMethod
`LoginMethod` is a polymorphic type with multiple variants based on the `recipeId`. Each variant includes shared and specific fields. ##### EmailPassword ###### With Encrypted Password | Name | Type | Description | Required | |-------------------------|-----------------------|-------------------------------------------------------------------------------------------------|----------| | email | `string` | User's email address | Yes | | `passwordHash` | `string` | Hashed password | Yes | | `hashingAlgorithm` | `enum` (`"bcrypt"`, `"argon2"`, `"firebase_scrypt"`) | Hashing algorithm used. | Yes | | `recipeId` | `string` | Must be `emailpassword` | Yes | | `isVerified` | `boolean` | Indicates whether the user's email has been verified | No | | `isPrimary` | `boolean` | Indicates whether this is the user's primary authentication method | No | | tenantIds | Array of `string` | The tenant IDs that the user belongs to (if you are using the `multi-tenancy` feature) | No | | externalUserId | `string` | ID that can be used to reference the users from your previous provider only for this authentication method | No | | timeJoinedInMSSinceEpoch| `number` | Timestamp representing when the user joined, in milliseconds since the Unix epoch | No | ###### With Plain Password | Name | Type | Description | Required | |-------------------------|-----------------------|-------------------------------------------------------------------------------------------------|----------| | email | `string` | User's email address | Yes | | `plaintextPassword` | `string` | A plain text password that will be hashed based on the configured hashing algorithm | Yes | | `recipeId` | `string` | Must be `emailpassword` | Yes | | `isVerified` | `boolean` | Indicates whether the user's email has been verified | No | | `isPrimary` | `boolean` | Indicates whether this is the user's primary authentication method | No | | tenantIds | Array of `string` | The tenant IDs that the user belongs to (if you are using the `multi-tenancy` feature) | No | | externalUserId | `string` | ID that can be used to reference the users from your previous provider only for this authentication method | No | | timeJoinedInMSSinceEpoch| `number` | Timestamp representing when the user joined, in milliseconds since the Unix epoch | No | ##### ThirdParty | Name | Type | Description | Required | |------------------|--------|-------------------------------|----------| | `recipeId` | `string` | Must be `"thirdparty"` | Yes | | email | `string` | User's email address | Yes | | thirdPartyId | `string` | Identifier for the third party provider | Yes | | thirdPartyUserId | `string` | User identifier from the third party provider | Yes | | tenantIds | Array of `string` | The tenant IDs that the user belongs to (if you are using the `multi-tenancy` feature) | No | | externalUserId | `string` | ID that can be used to reference the users from your previous provider only for this authentication method | No | | `isVerified` | `boolean` | Indicates whether the user's email has been verified | No | | `isPrimary` | `boolean` | Indicates whether this is the user's primary authentication method | No | | timeJoinedInMSSinceEpoch| `number` | Timestamp representing when the user joined, in milliseconds since the Unix epoch | No | ##### Passwordless | Name | Type | Description | Required | |----------|--------|-----------------------|----------| | `recipeId` | `string` | Must be `"passwordless"` | Yes | | email | `string` | User's email address | One of `email` or `phoneNumber` must be provided | | `phoneNumber` | `string` | User's phone number | One of `email` or `phoneNumber` must be provided | | tenantIds | Array of `string` | The tenant IDs that the user belongs to (if you are using the `multi-tenancy` feature) | No | | externalUserId | `string` | ID that can be used to reference the users from your previous provider only for this authentication method | No | | `isVerified` | `boolean` | Indicates whether the user's email has been verified | No | | `isPrimary` | `boolean` | Indicates whether this is the user's primary authentication method | No | | timeJoinedInMSSinceEpoch| `number` | Timestamp representing when the user joined, in milliseconds since the Unix epoch | No |Example
```bash curl --location --request POST 'Response
200
The user has been successfully created.Example
```json { "status": "OK", "user": { /* User Object */ } } ```400
The request body was invalid.Example
```json { "errors": ["No two loginMethods can have isPrimary as true.", "email is required for recipeId emailpassword", "hashingAlgorithm must be one of 'bcrypt', 'argon2', or 'firebase_scrypt'."]} } ```500
An internal server error occurred.Request
Body Schema
| Name | Type | Description | Required | |----------------|---------------------|-----------------------------------|----------| | users | `Array` of `User` objects | The users that you want to import. The array has a limit of 10000 items. | Yes |User
| Name | Type | Description | Required | |----------------|------------------------|-------------------------------------------------------------------------------------------------|----------| | externalUserId | `string` | ID that can be used to reference the users from your previous provider | No | | `userMetadata` | `object` | An object with custom user information that can be used later on | No | | `userRoles` | `array` of `UserRole` | The roles that will be used for authorization | No | | `totpDevices` | `array` of `TotpDevice` | Time-based One-time Password device (TOTP) used for Multi-Factor Authentication | Yes | | `loginMethods` | `array` of `LoginMethod` | The actual authentication methods and credentials | Yes | ##### TotpDevice | Name | Type | Description | Required | |------------|---------------------|-----------------------------------------------------------------------------|----------| | `secretKey` | `string` | The secret key used to generate the TOTP codes. | Yes | | period | `number` | The time period in seconds for which a TOTP code is valid. | Yes | | skew | `number` | The allowable time skew to account for clock differences between the server and device. | Yes | | `deviceName` | `string` | The name assigned to the TOTP device for identification purposes. | No |UserRole
| Name | Type | Description | Required | |------------|---------------------|-----------------------------------------------------------------------------|----------| | role | `string` | The actual role name | Yes | | tenantIds | Array of `string` | The tenants that use this role. If you are not using the `multi-tenancy` just pass an empty array. | Yes | ##### LoginMethod `LoginMethod` is a polymorphic type with multiple variants based on the `recipeId`. Each variant includes shared and specific fields. ###### EmailPassword ###### With Encrypted Password | Name | Type | Description | Required | |-------------------------|-----------------------|-------------------------------------------------------------------------------------------------|----------| | email | `string` | User's email address | Yes | | `passwordHash` | `string` | Hashed password | Yes | | `hashingAlgorithm` | `enum` (`"bcrypt"`, `"argon2"`, `"firebase_scrypt"`) | Hashing algorithm used. | Yes | | `recipeId` | `string` | Must be `emailpassword` | Yes | | `isVerified` | `boolean` | Indicates whether the user's email has been verified | No | | `isPrimary` | `boolean` | Indicates whether this is the user's primary authentication method | No | | tenantIds | Array of `string` | The tenant IDs that the user belongs to (if you are using the `multi-tenancy` feature) | No | | externalUserId | `string` | ID that can be used to reference the users from your previous provider only for this authentication method | No | | timeJoinedInMSSinceEpoch| `number` | Timestamp representing when the user joined, in milliseconds since the Unix epoch | No | ###### With Plain Password | Name | Type | Description | Required | |-------------------------|-----------------------|-------------------------------------------------------------------------------------------------|----------| | email | `string` | User's email address | Yes | | `plaintextPassword` | `string` | A plain text password that will be hashed based on the configured hashing algorithm | Yes | | `recipeId` | `string` | Must be `emailpassword` | Yes | | `isVerified` | `boolean` | Indicates whether the user's email has been verified | No | | `isPrimary` | `boolean` | Indicates whether this is the user's primary authentication method | No | | tenantIds | Array of `string` | The tenant IDs that the user belongs to (if you are using the `multi-tenancy` feature) | No | | externalUserId | `string` | ID that can be used to reference the users from your previous provider only for this authentication method | No | | timeJoinedInMSSinceEpoch| `number` | Timestamp representing when the user joined, in milliseconds since the Unix epoch | No | ##### ThirdParty | Name | Type | Description | Required | |------------------|--------|-------------------------------|----------| | `recipeId` | `string` | Must be `"thirdparty"` | Yes | | email | `string` | User's email address | Yes | | thirdPartyId | `string` | Identifier for the third party provider | Yes | | thirdPartyUserId | `string` | User identifier from the third party provider | Yes | | tenantIds | Array of `string` | The tenant IDs that the user belongs to (if you are using the `multi-tenancy` feature) | No | | externalUserId | `string` | ID that can be used to reference the users from your previous provider only for this authentication method | No | | `isVerified` | `boolean` | Indicates whether the user's email has been verified | No | | `isPrimary` | `boolean` | Indicates whether this is the user's primary authentication method | No | | timeJoinedInMSSinceEpoch| `number` | Timestamp representing when the user joined, in milliseconds since the Unix epoch | No | ##### Passwordless | Name | Type | Description | Required | |----------|--------|-----------------------|----------| | `recipeId` | `string` | Must be `"passwordless"` | Yes | | email | `string` | User's email address | One of `email` or `phoneNumber` must be provided | | `phoneNumber` | `string` | User's phone number | One of `email` or `phoneNumber` must be provided | | tenantIds | Array of `string` | The tenant IDs that the user belongs to (if you are using the `multi-tenancy` feature) | No | | externalUserId | `string` | ID that can be used to reference the users from your previous provider only for this authentication method | No | | `isVerified` | `boolean` | Indicates whether the user's email has been verified | No | | `isPrimary` | `boolean` | Indicates whether this is the user's primary authentication method | No | | timeJoinedInMSSinceEpoch| `number` | Timestamp representing when the user joined, in milliseconds since the Unix epoch | No |Example
```bash curl --location --request POST 'Response
200
All the users have been added to the `bulk_import_users` table.Example
```json { "status": "OK", } ```400
The request body was invalid.Example
```json ```json { error: "Failed to add users for the bulk import. Please fix the error in the following users", users: [ { index: 11, errors: ["No two loginMethods can have isPrimary as true."] }, { index: 15, errors: ["email is required for recipeId emailpassword", "hashingAlgorithm must be one of 'bcrypt', 'argon2', or 'firebase_scrypt'."] } ] } ``` ##### Errors - Account linking must be enabled if more than one login method is provided for a user. - Multitenancy must be enabled if a `tenantId` is other than `public.` - No two `loginMethods` can have `isPrimary` as `true`. - Invalid `appId` or `tenantId`. - A valid `email` is required. - A valid `passwordHash` is required. - `hashingAlgorithm` must be one of 'bcrypt', 'argon2', or `firebase_scrypt`. - A valid `email` is required. - `thirdPartyUserId` is required. - A valid `email` or `phoneNumber` is required.500
An internal server error occurred.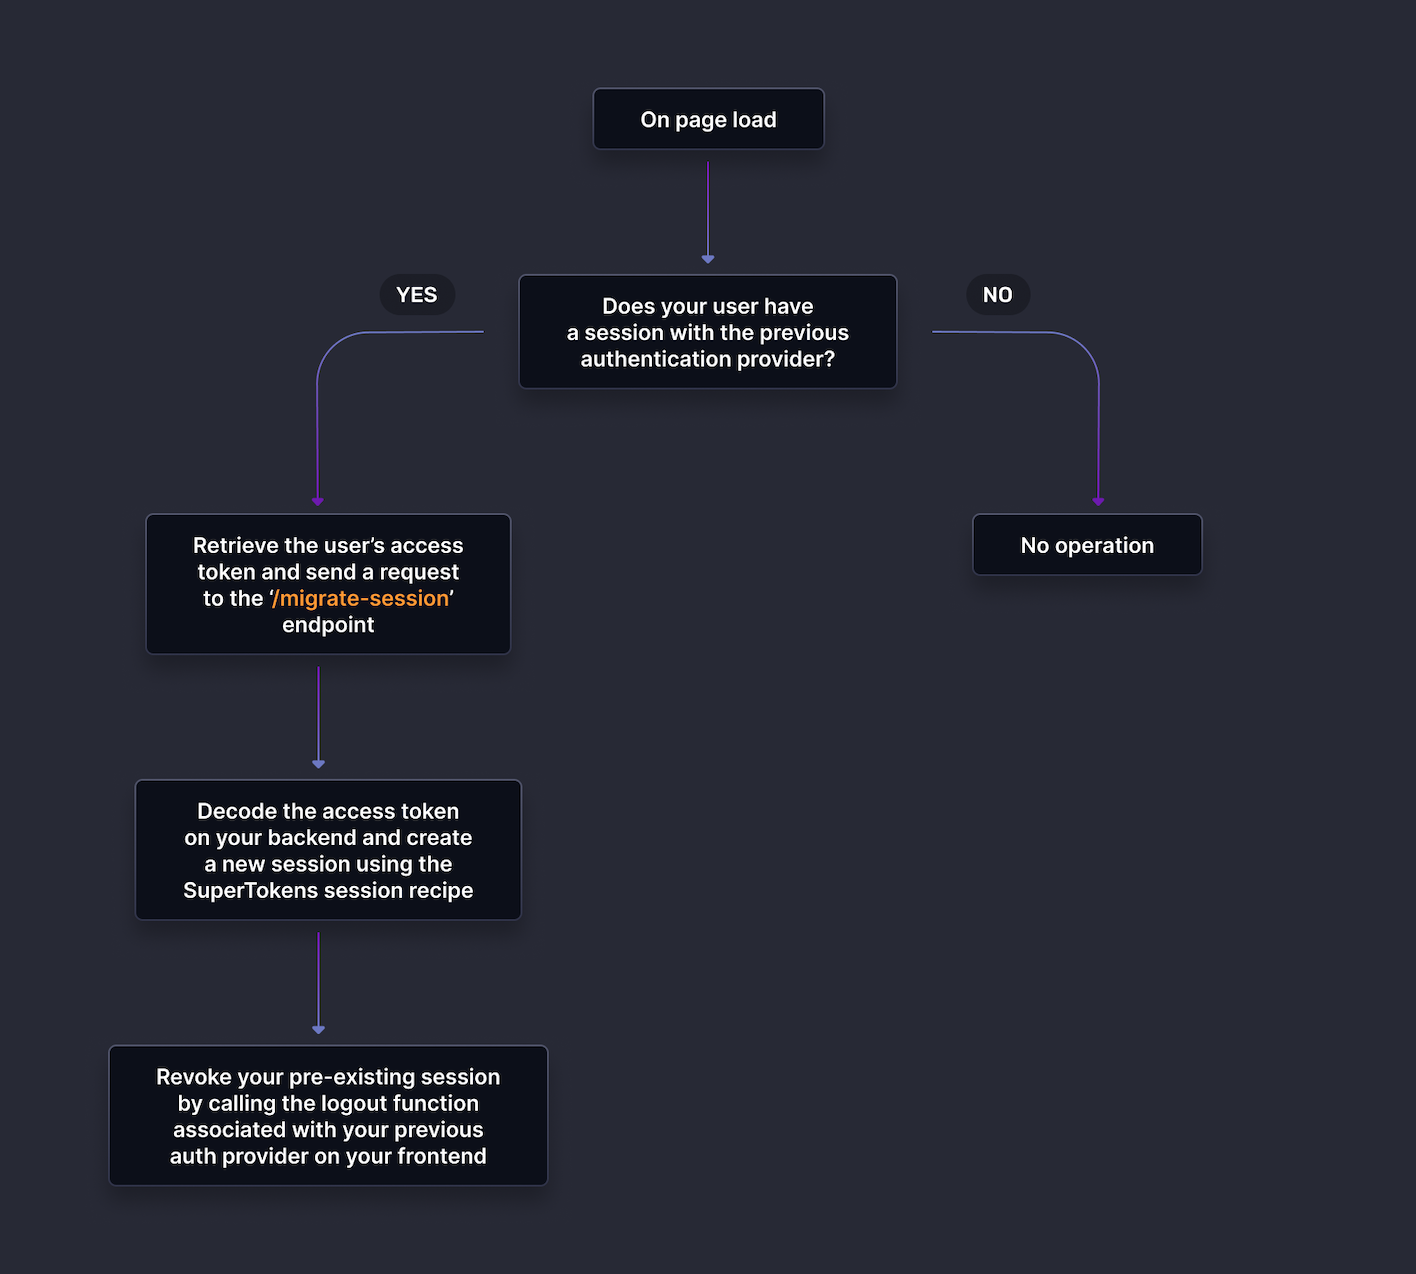 ## Steps
### 1. Add the session migration endpoint
Create a new endpoint on your backend that will generate a new **SuperTokens Session** based on the current authentication token.
This will be called by the frontend if a user is still logged in through your previous authentication provider.
```tsx title="Backend changes"
let app = express();
app.post("/migrate-session", async (req, res) => {
// extract the access token from the request object
if(req.headers.authorization !== undefined){
let access_token = req.headers.authorization.split("Bearer ")[1];
// verify the access token and retrieve the old userId
let customUserId = await verifyAccessTokenAndRetriveUserId(access_token);
// create a new SuperTokens session using the customUserId
// the createNewSession function will attach the SuperTokens session tokens to the response object.
// @ts-ignore
await Session.createNewSession(req, res, customUserId)
res.send({
status: "OK"
})
}
// handle access_token not present in request
})
async function verifyAccessTokenAndRetriveUserId(access_token: string): Promise
## Steps
### 1. Add the session migration endpoint
Create a new endpoint on your backend that will generate a new **SuperTokens Session** based on the current authentication token.
This will be called by the frontend if a user is still logged in through your previous authentication provider.
```tsx title="Backend changes"
let app = express();
app.post("/migrate-session", async (req, res) => {
// extract the access token from the request object
if(req.headers.authorization !== undefined){
let access_token = req.headers.authorization.split("Bearer ")[1];
// verify the access token and retrieve the old userId
let customUserId = await verifyAccessTokenAndRetriveUserId(access_token);
// create a new SuperTokens session using the customUserId
// the createNewSession function will attach the SuperTokens session tokens to the response object.
// @ts-ignore
await Session.createNewSession(req, res, customUserId)
res.send({
status: "OK"
})
}
// handle access_token not present in request
})
async function verifyAccessTokenAndRetriveUserId(access_token: string): Promise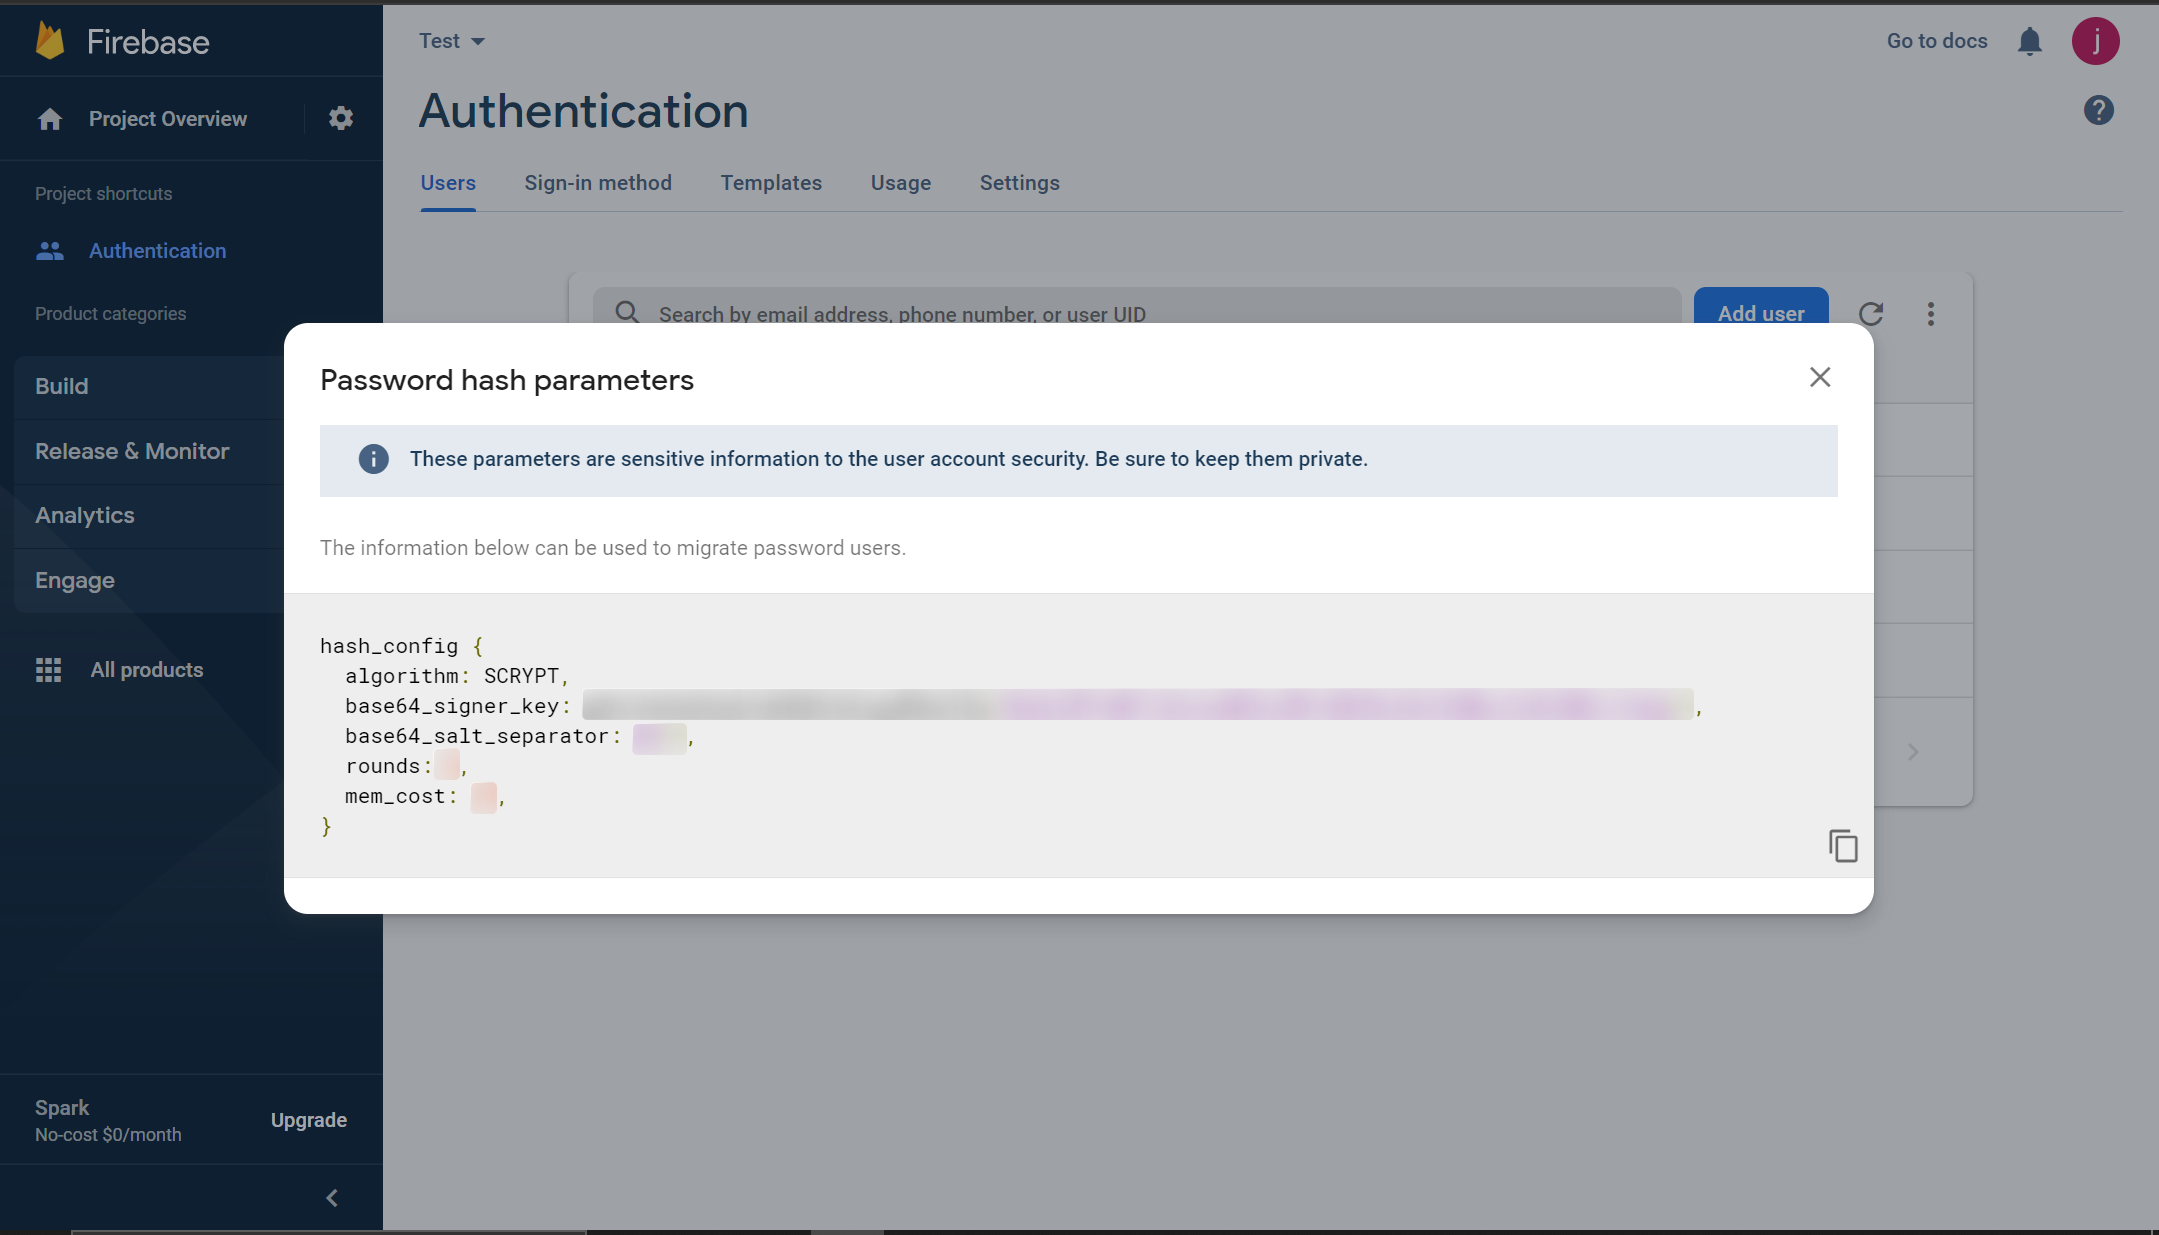 #### Step 2: Update the SuperTokens core to use the `base64_signer_key`
- ** For Managed Service **
- Edit the core configuration in the SuperTokens Managed Service Dashboard.
- Set the `firebase_password_hashing_signer_key` field in the config to the `base64_signer_key` retrieved from your firebase hashing parameters.
### Backend Changes:
- Create an API on your backend, this will be called by the frontend to migrate a user's existing session to a SuperTokens session:
```tsx title="Backend changes"
let app = express();
app.post("/migrate-session", async (req, res) => {
// extract the access token from the request object
if(req.headers.authorization !== undefined){
let access_token = req.headers.authorization.split("Bearer ")[1];
// verify the access token and retrieve the old userId
let customUserId = await verifyAccessTokenAndRetriveUserId(access_token);
// create a new SuperTokens session using the customUserId
// the createNewSession function will attach the SuperTokens session tokens to the response object.
// @ts-ignore
await Session.createNewSession(req, res, customUserId)
res.send({
status: "OK"
})
}
// handle access_token not present in request
})
async function verifyAccessTokenAndRetriveUserId(access_token: string): Promise
#### Step 2: Update the SuperTokens core to use the `base64_signer_key`
- ** For Managed Service **
- Edit the core configuration in the SuperTokens Managed Service Dashboard.
- Set the `firebase_password_hashing_signer_key` field in the config to the `base64_signer_key` retrieved from your firebase hashing parameters.
### Backend Changes:
- Create an API on your backend, this will be called by the frontend to migrate a user's existing session to a SuperTokens session:
```tsx title="Backend changes"
let app = express();
app.post("/migrate-session", async (req, res) => {
// extract the access token from the request object
if(req.headers.authorization !== undefined){
let access_token = req.headers.authorization.split("Bearer ")[1];
// verify the access token and retrieve the old userId
let customUserId = await verifyAccessTokenAndRetriveUserId(access_token);
// create a new SuperTokens session using the customUserId
// the createNewSession function will attach the SuperTokens session tokens to the response object.
// @ts-ignore
await Session.createNewSession(req, res, customUserId)
res.send({
status: "OK"
})
}
// handle access_token not present in request
})
async function verifyAccessTokenAndRetriveUserId(access_token: string): Promise
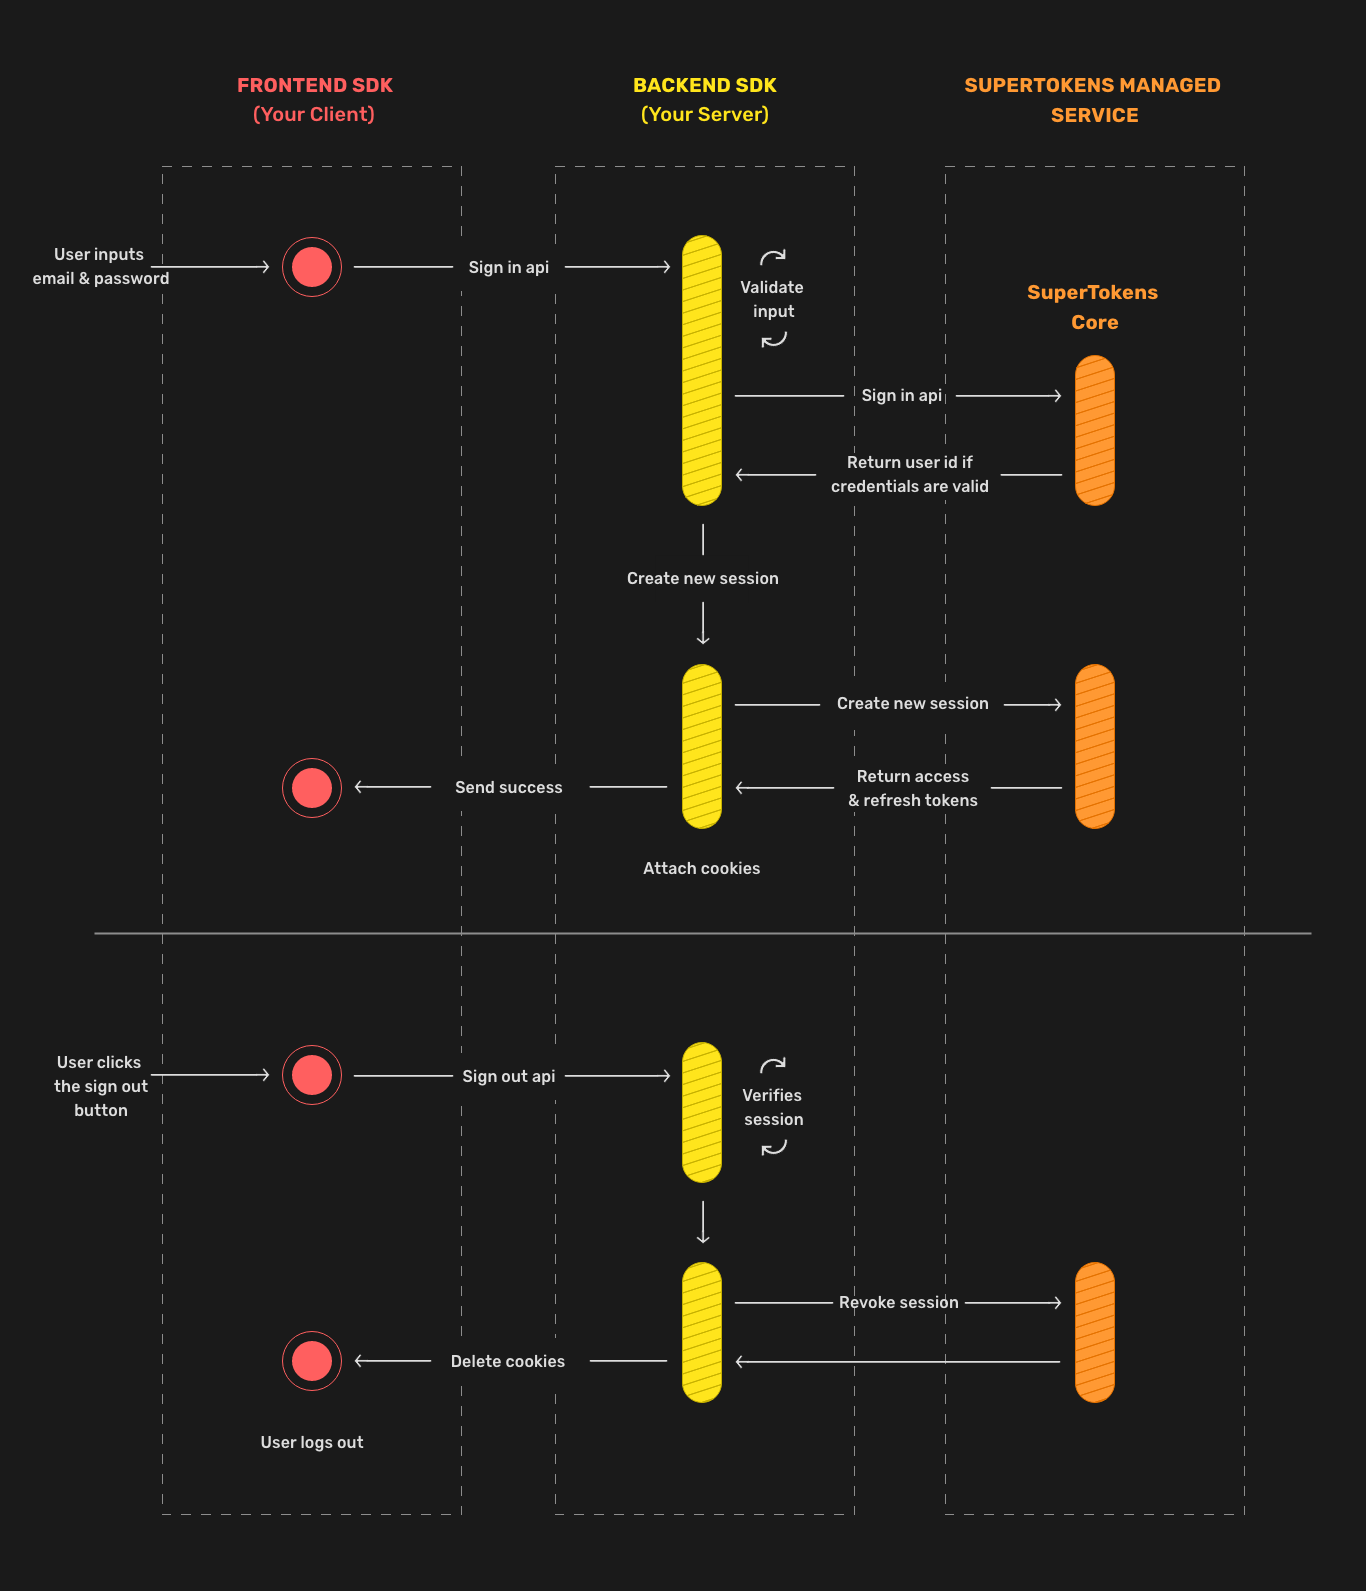
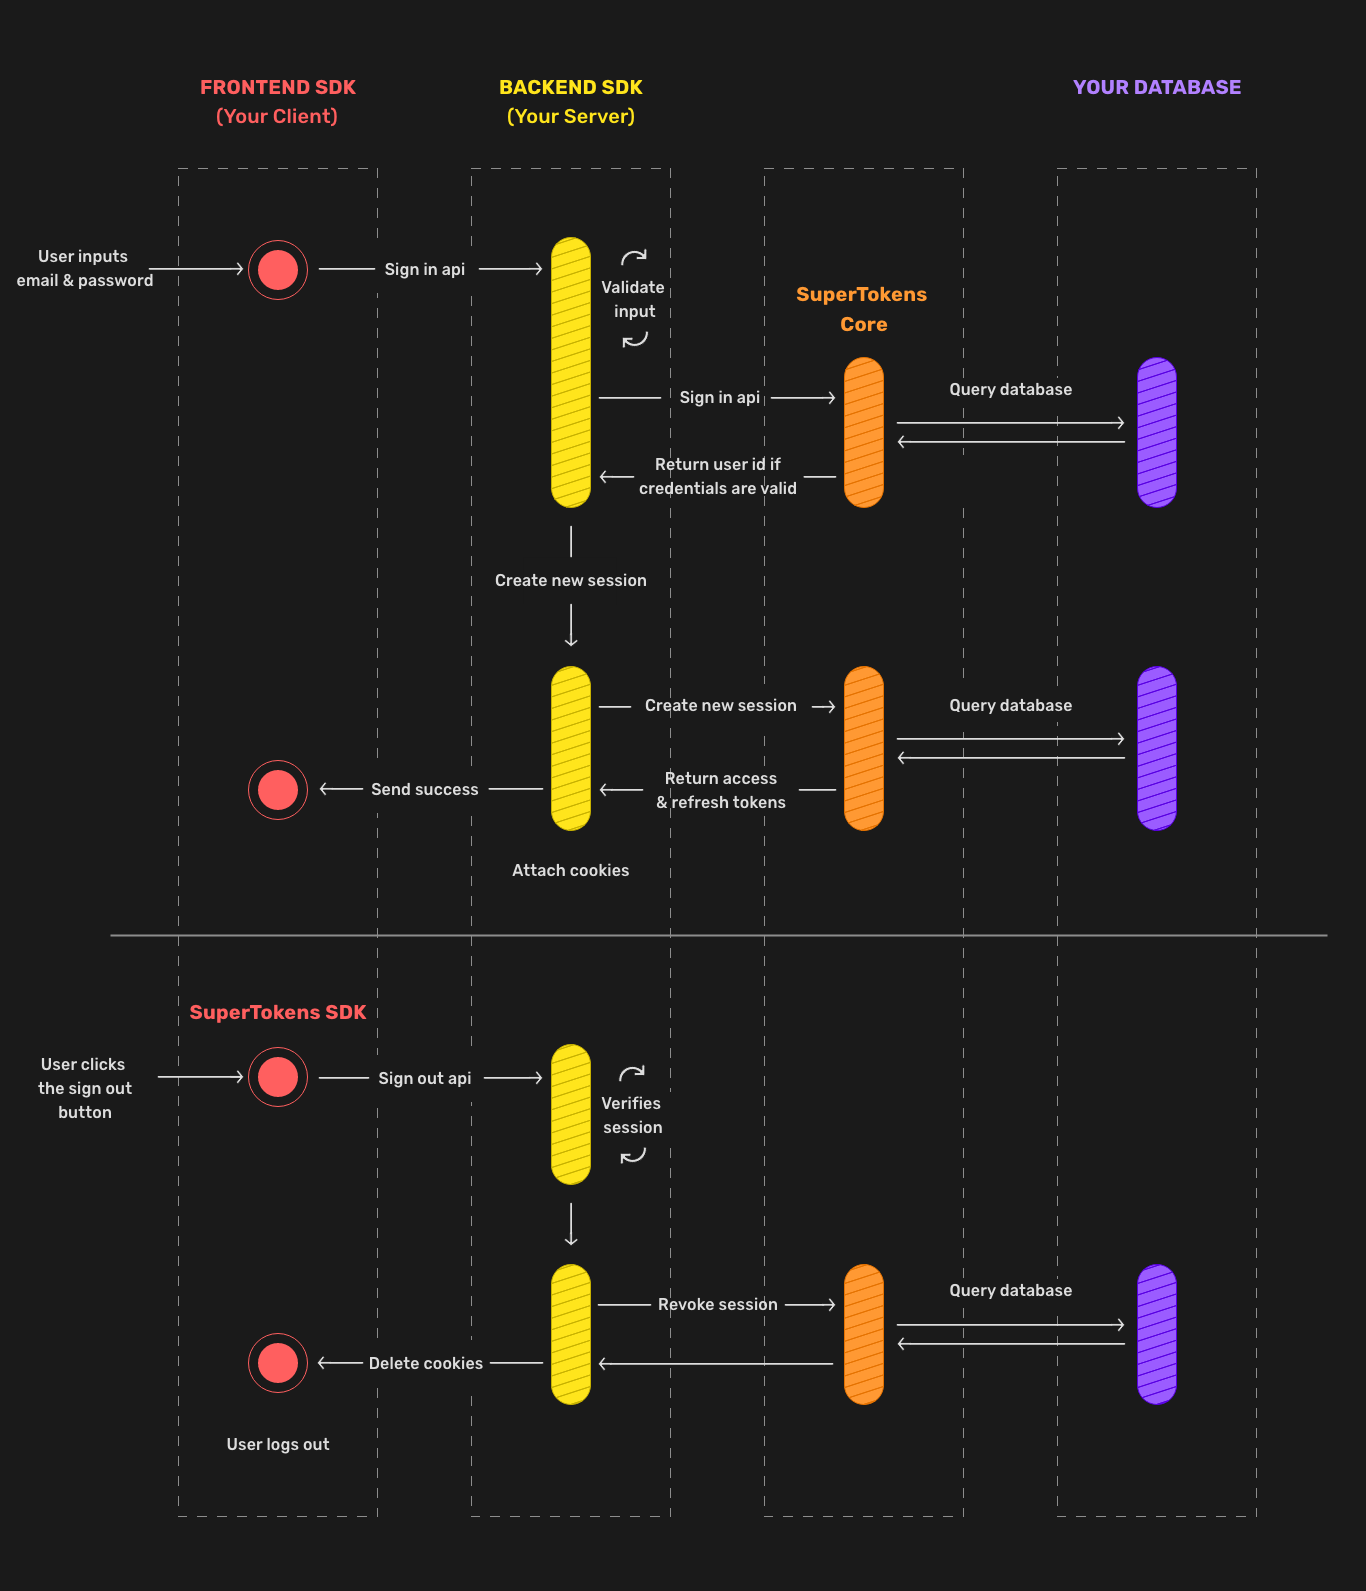
## [`@supertokens-plugins/captcha-nodejs`](https://github.com/supertokens/supertokens-plugins/tree/main/packages/captcha-nodejs) {#captcha-nodejs-init}
## `websiteDomain` This is the domain part of your website. This is where the login UI appears. For example: - For local development, you are likely using `localhost` with some port (ex `8080`). Then the value of this should be `"http://localhost:8080"`. - If your website is `https://www.example.com`, then the value of this should be `"https://www.example.com"`. - If your website is `https://example.com`, then the value of this should be `"https://example.com"`. - If you have multiple sub domains, and your users login via `https://auth.example.com`, then the value of this should be `"https://auth.example.com"`. By default, the login UI appears on `{websiteDomain}/auth/*`. This configuration can change by using the `websiteBasePath` configuration. On the frontend, the domain serves routing purposes, and on the backend, it generates correct email verification and password reset links.
## `apiDomain` This is the domain part of your API endpoint that the frontend talks to. For example: - For local development, you are likely using `localhost` with some port (ex `9000`). Then the value of this should be `"http://localhost:9000"`. - If your frontend queries `https://api.example.com/*`, then the value of this should be `"https://api.example.com"` - If your API endpoint reaches `/api/*`, then the value of this is the same as the `websiteDomain` - since `/api/*` is equal to querying `{websiteDomain}/api/*`. By default, the login widgets query `{apiDomain}/auth/*`. This configuration can change by using the `apiBasePath` configuration.
## `websiteBasePath` By default, the login UI appears on `{websiteDomain}/auth`. Other authentication-related user interfaces appear on `{websiteDomain}/auth/*`. If you want to change the `/auth` to something else, then you must set this value. For example: - If you want the login UI to show on `{websiteDomain}/user/*`, then the value of this should be `"/user"`. - If you are using a dedicated sub domain for auth, like `https://auth.example.com`, then you probably want the login UI to show up on `https://auth.example.com`. In this case, set this value to `"/"`. :::important Remember to set the same value for this parameter on the backend and the frontend. :::
## `apiBasePath` By default, the frontend SDK queries `{apiDomain}/auth/*`. If you want to change the `/auth` to something else, then you must set this value. For example: - If you have versioning in your API path and want to query `{apiDomain}/v0/auth/*`, then the value of this should be `"/v0/auth"`. - If you want to scope the APIs not via `/auth` but via some other string like `/supertokens`, then you can set the value of this to `"/supertokens"`. This means, the APIs appear on `{apiDomain}/supertokens/*`. - If you do not want to scope the APIs at all, then you can set the values of this to be `"/"`. This means the APIs are available on `{apiDomain}/*` :::important Remember to set the same value for this parameter on the backend and the frontend. ::: :::caution Note that setting a custom `apiBasePath` updates the refresh API path, this can cause an issue where previously issued refresh tokens no longer get sent to the new API endpoint and the user logs out. For example, the default `apiBasePath` value is `/auth`, if it changes to `/supertokens`, then your refresh endpoint updates from `/auth/session/refresh` to `/supertokens/session/refresh`. Previously issued refresh tokens do not get sent to the new API endpoint and the user logs out. :::
## `apiGatewayPath` :::note Most relevant if you are using an API gateway or reverse proxy ::: If you are using an API gateway (like the one provided by AWS) or a reverse proxy (like Nginx), it may add a path to your API endpoints to scope them for different development environments. For example, your APIs for development appear via `{apiDomain}/dev/*`, and for production, they may appear via `{apiDomain}/prod/*`. Whilst the frontend would need to use the `/dev/` and `/prod/`, your backend code does not see that sub path (the gateway removes `/dev/` and `/prod/`). For these situations, you should set the `apiGatewayPath` to `/dev` or `/prod`. For example: - If your API gateway is using `/development` for scoping, and you want to expose the SuperTokens APIs on `/supertokens/*`, then set `apiGatewayPath: "/development"` & `apiBasePath: "/supertokens"`. This means that the frontend SDK queries `{apiDomain}/development/supertokens/*` to reach the endpoints exposed by SuperTokens. - If you set this and not `apiBasePath`, then the frontend SDK queries `{apiDomain}{apiGatewayPath}/auth/*` to reach the endpoints exposed by SuperTokens. The reason for this distinction between `apiGatewayPath` and `apiBasePath` is that when routing, the backend SDK does not see the `apiGatewayPath` path from the request as the gateway removes them. Taking the above example, whilst the frontend queries `{apiDomain}/development/supertokens/*`, the backend SDK sees `{apiDomain}/supertokens/*`.
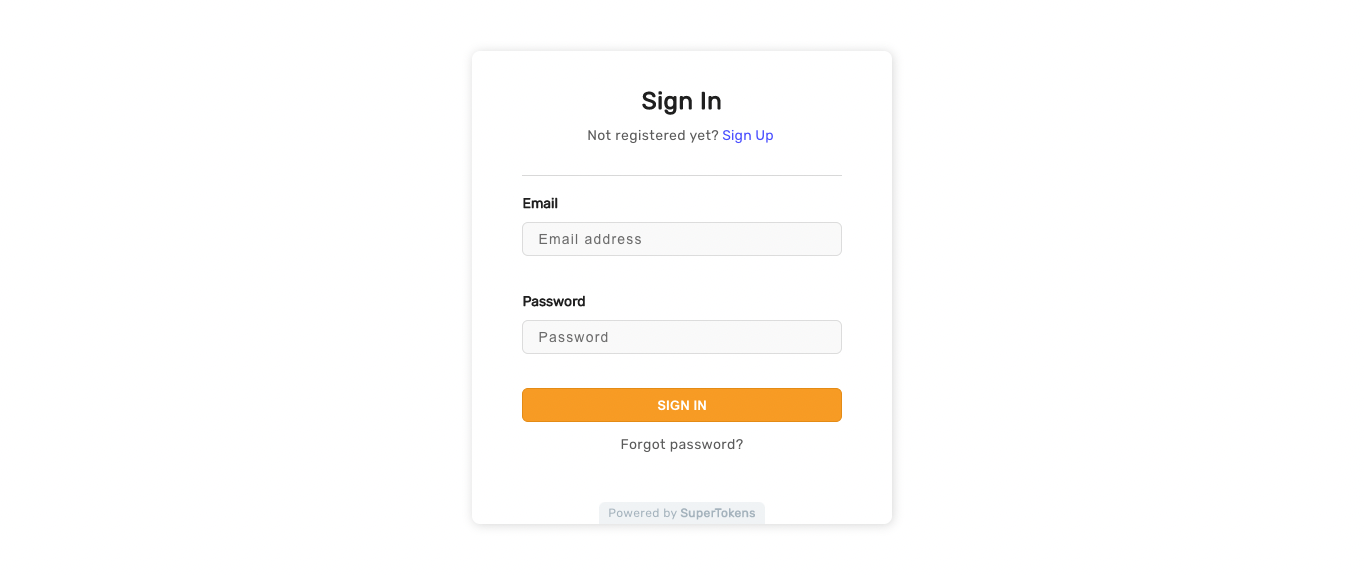 ## Default sign up form
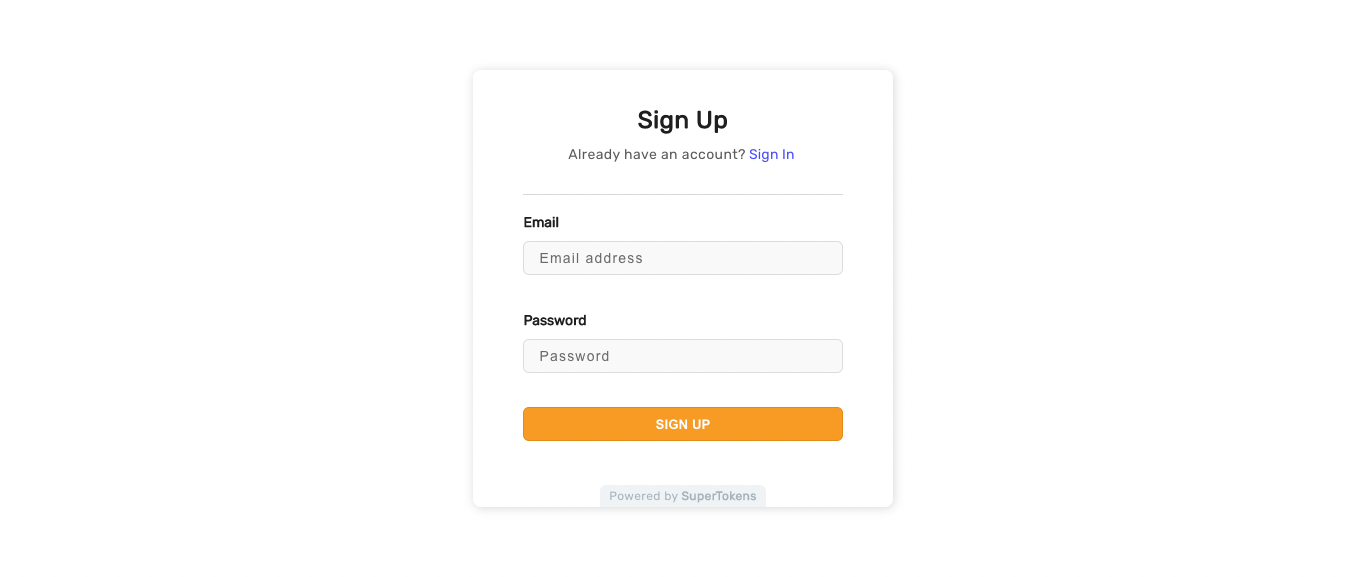 ## Field validation error UI
The sign up form checks if the email is unique and if not, shows an error to the user saying that the email already exists. Likewise, if any of the form field's validation fails, the user sees an error like below.
## Field validation error UI
The sign up form checks if the email is unique and if not, shows an error to the user saying that the email already exists. Likewise, if any of the form field's validation fails, the user sees an error like below.
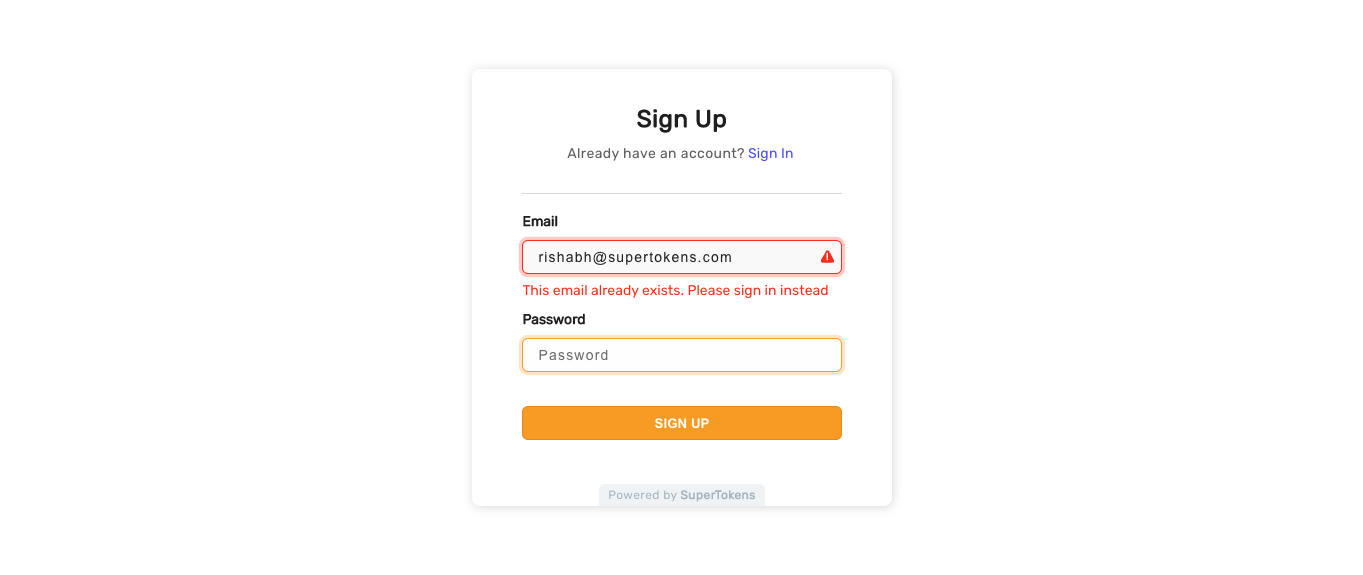 ## Incorrect email / password UI
In the sign in form, if the user enters an email that doesn't exist, or is an incorrect email & password combination, they see the following error.
## Incorrect email / password UI
In the sign in form, if the user enters an email that doesn't exist, or is an incorrect email & password combination, they see the following error.
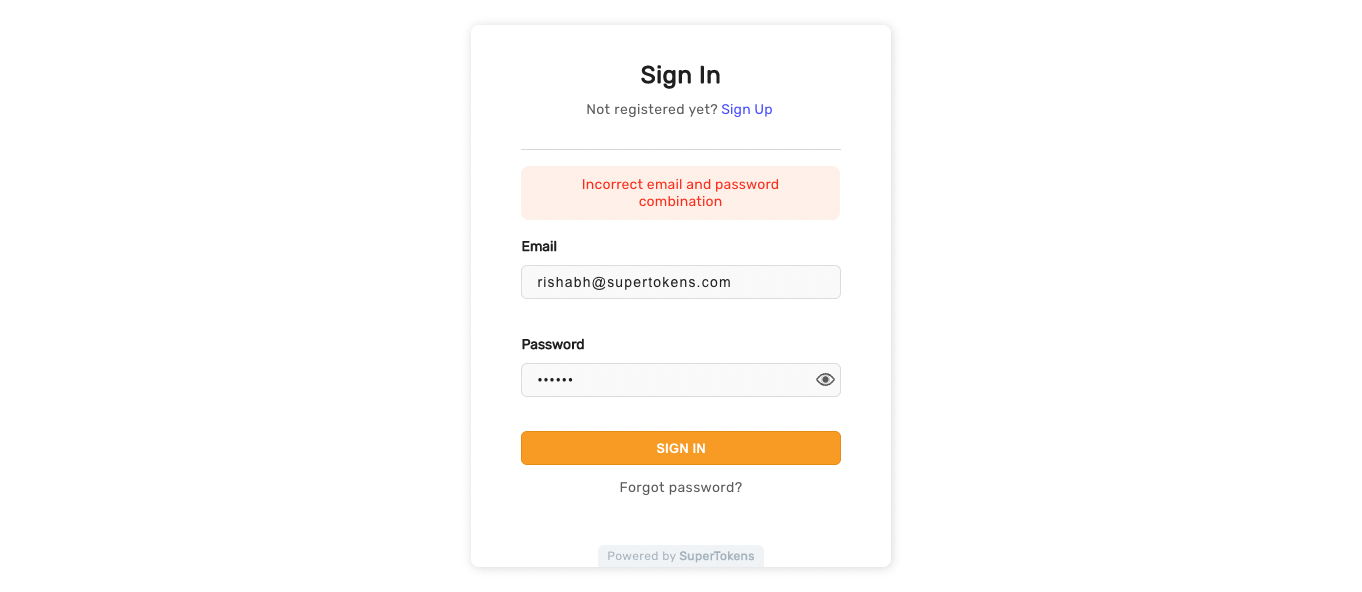 ## General error UI
If there are network related errors, or the backend sends a status code >= 300, then the following UI appears.
## General error UI
If there are network related errors, or the backend sends a status code >= 300, then the following UI appears.
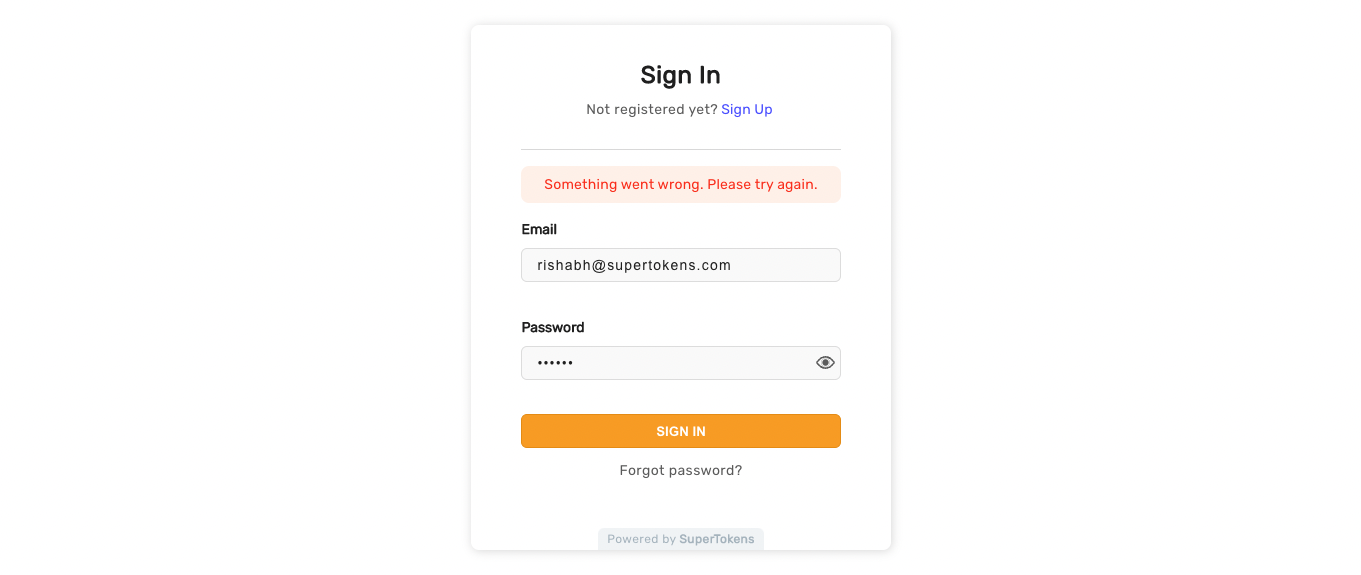
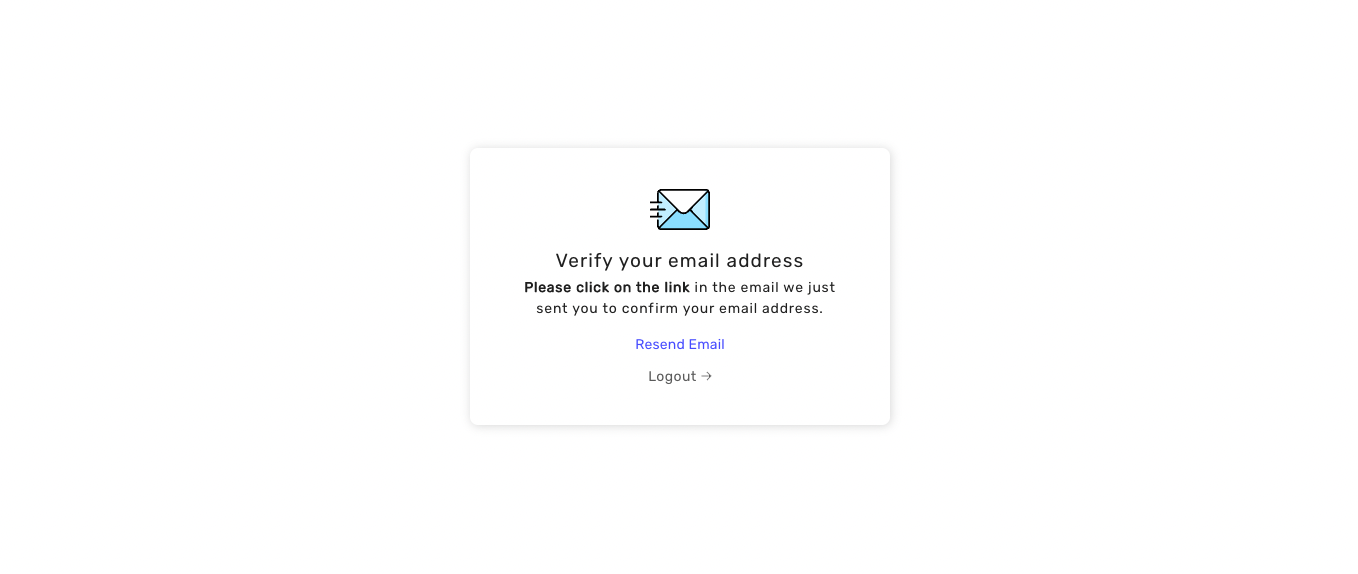 On screen load, SuperTokens automatically sends an email to the user. This way, the user doesn't have to do any interaction before they get an email. Customizing this behavior is possible via the overrides feature.
The email verification link is of the format: `
On screen load, SuperTokens automatically sends an email to the user. This way, the user doesn't have to do any interaction before they get an email. Customizing this behavior is possible via the overrides feature.
The email verification link is of the format: ` Clicking on the continue button takes the user to the post sign in / up page (`/` by default).
### If a session does not exist
In this case, the user must do an interaction before calling the API to consume the token. This prevents email clients from automatically verifying the email since many of them may crawl the link in the email.
The user first sees this screen
Clicking on the continue button takes the user to the post sign in / up page (`/` by default).
### If a session does not exist
In this case, the user must do an interaction before calling the API to consume the token. This prevents email clients from automatically verifying the email since many of them may crawl the link in the email.
The user first sees this screen
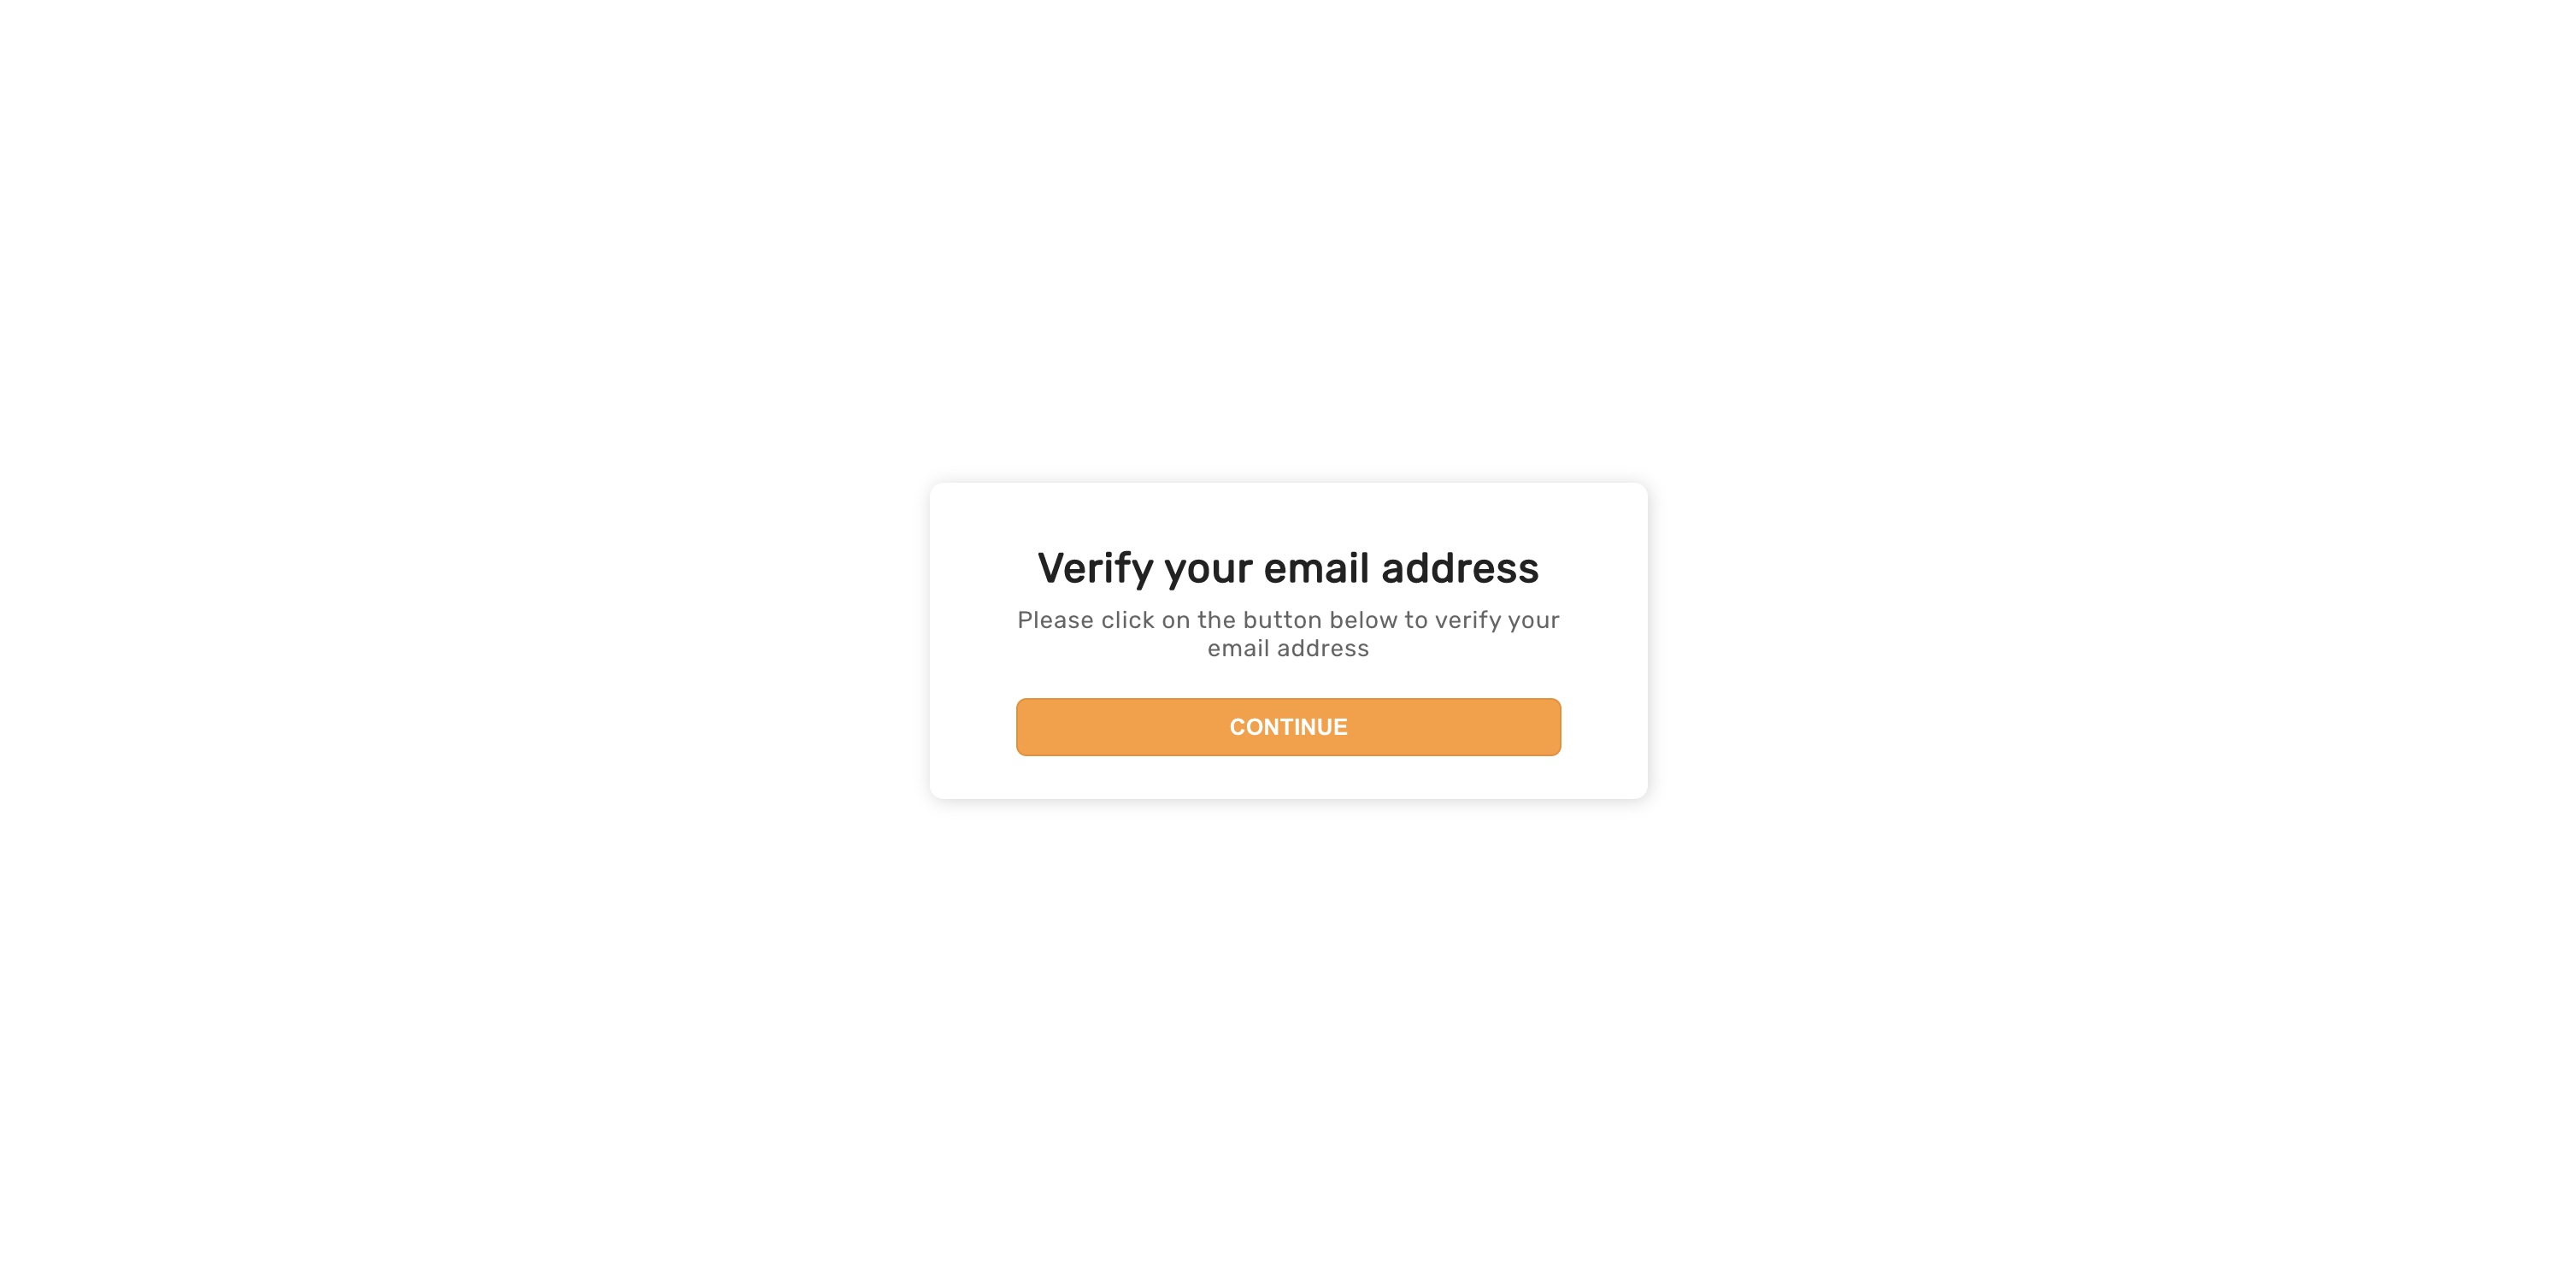 And then after they click on continue, they see the same screen as when a session did exist.
### Expired link UI
If the user clicks on an email link that has expired, they see the following UI.
And then after they click on continue, they see the same screen as when a session did exist.
### Expired link UI
If the user clicks on an email link that has expired, they see the following UI.
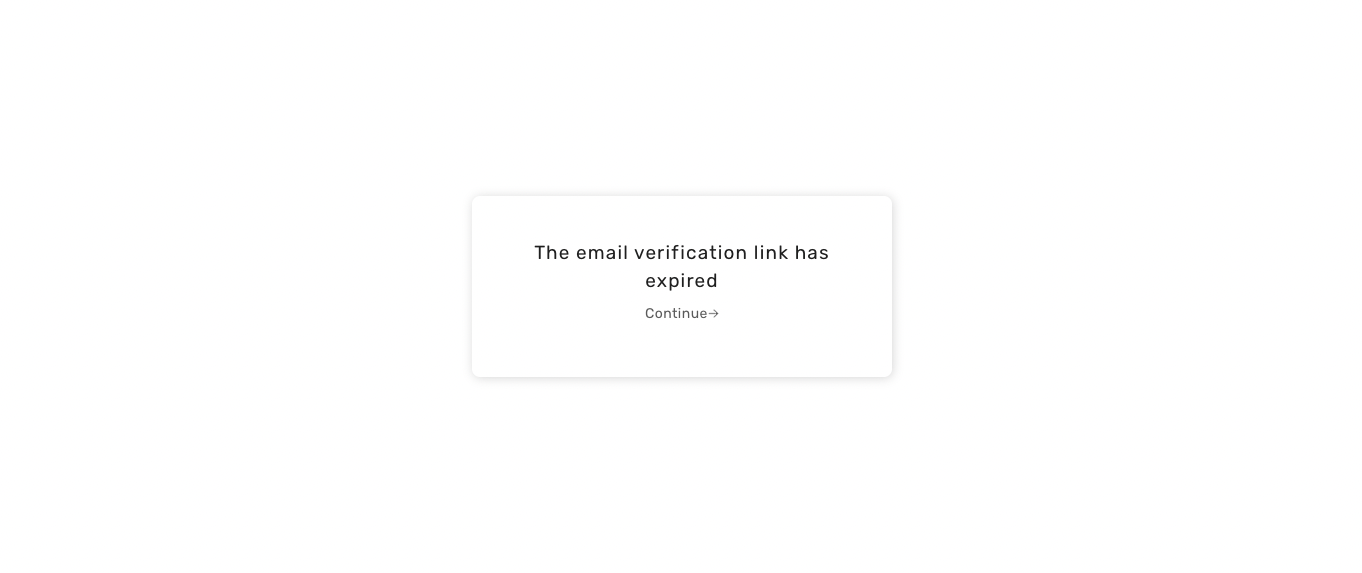 After clicking continue, they return to the email sent screen (if a session exists), or to the sign in page (if a session doesn't exist).
## General error UI
If there are network related errors, or the backend sends a status code >= 300, then the following UI appears.
After clicking continue, they return to the email sent screen (if a session exists), or to the sign in page (if a session doesn't exist).
## General error UI
If there are network related errors, or the backend sends a status code >= 300, then the following UI appears.
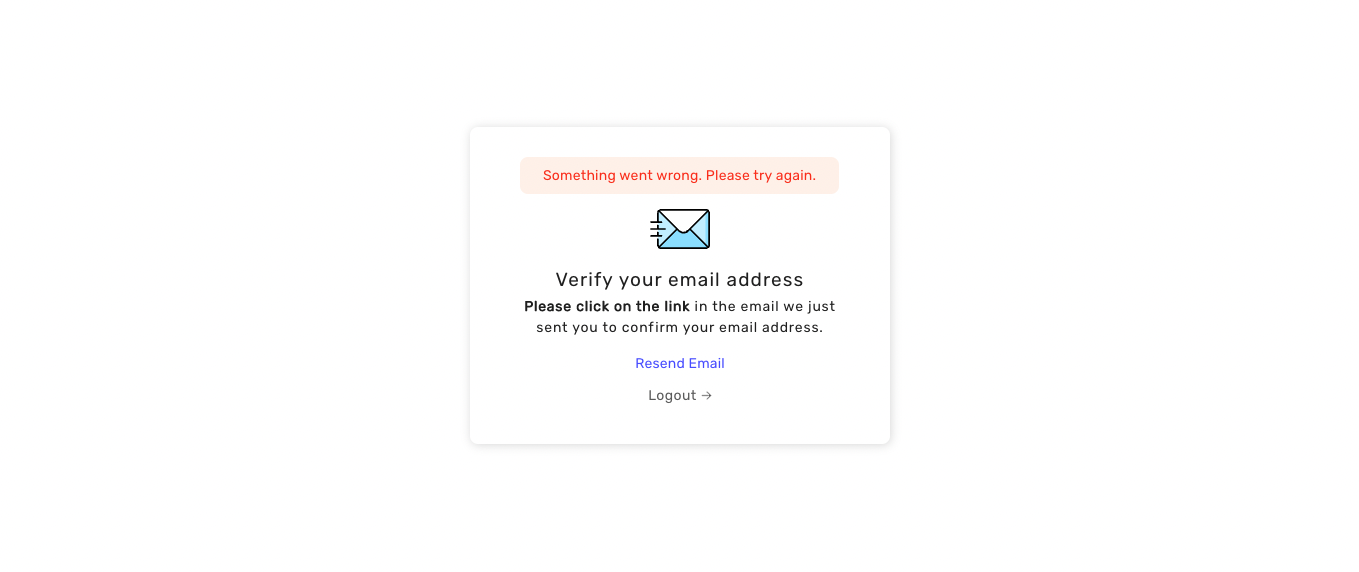 The below appears if something went wrong when the user clicked on the email verification link. To try again, they have to reload the page.
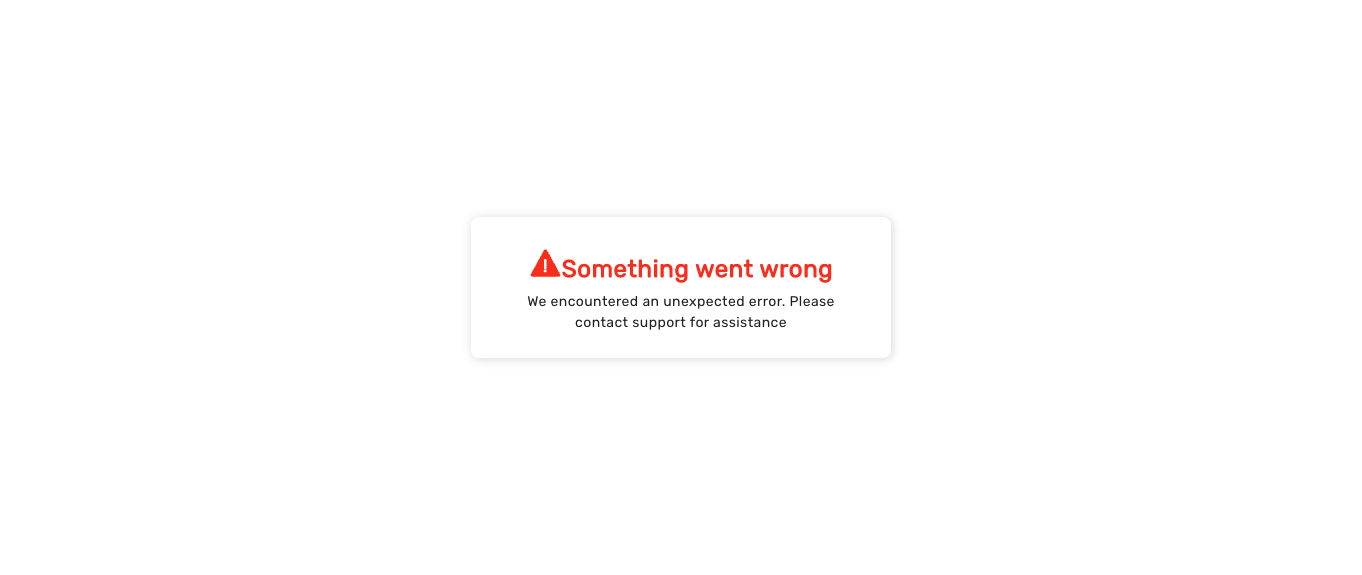 ## Default email UI
The default email sent for email verification appears below. The backend SDK sends it, which calls `https://api.supertokens.com` (the API infrastructure). Follow the link at the end of this page to see how you can change the email content or delivery method.
## Default email UI
The default email sent for email verification appears below. The backend SDK sends it, which calls `https://api.supertokens.com` (the API infrastructure). Follow the link at the end of this page to see how you can change the email content or delivery method.
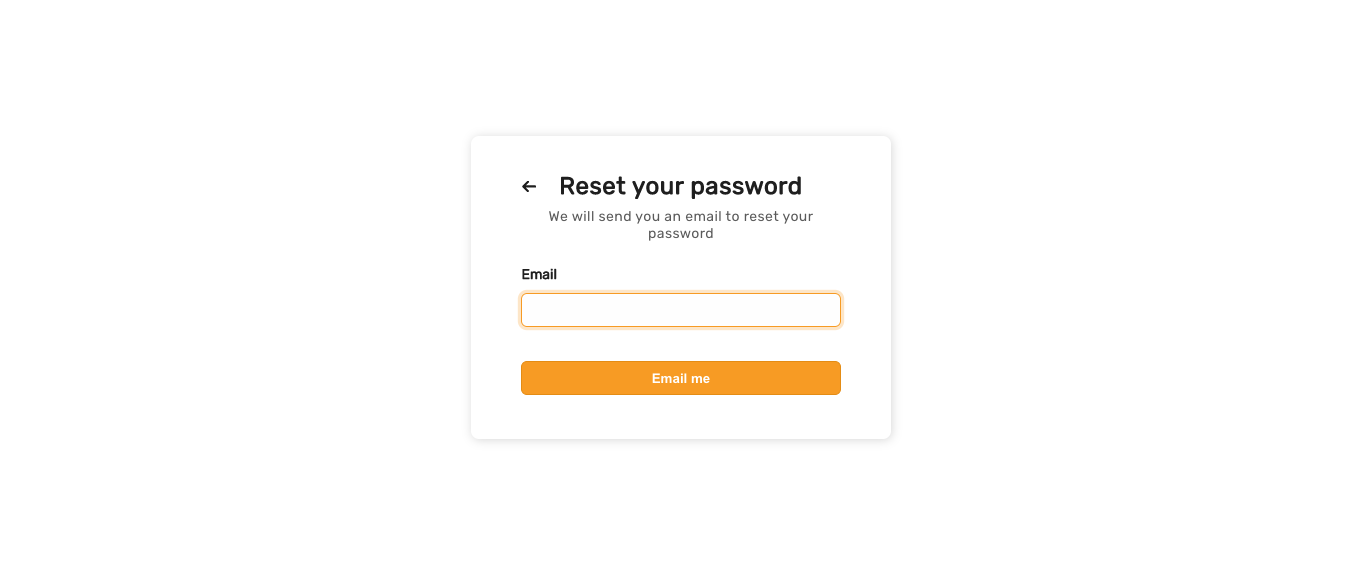 Once the user enters their email and clicks on the "Email" button, SuperTokens sends them an email only if that email belongs to an account. Regardless, the user always sees a success state:
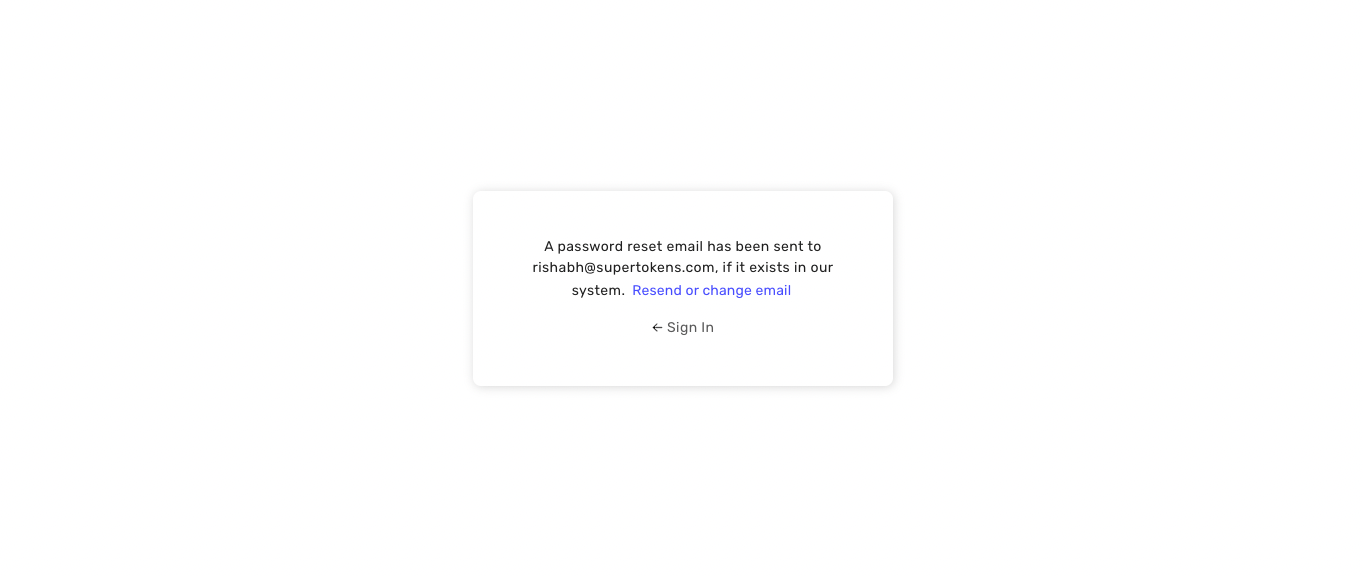 ## Enter new password form
This form appears when the user clicks on the password reset link sent to their email. To view this form, you can navigate to `/${websiteBasePath}/reset-password?token=test` path of your website (default is `/auth/reset-password?token=test`).
Notice that the URL path is the same as that of the enter email form. However, there is an extra query parameter `token` which tells SuperTokens to show the enter new password form. If you try and submit a new password with the `test` token value, it fails since it's not a valid password reset token.
## Enter new password form
This form appears when the user clicks on the password reset link sent to their email. To view this form, you can navigate to `/${websiteBasePath}/reset-password?token=test` path of your website (default is `/auth/reset-password?token=test`).
Notice that the URL path is the same as that of the enter email form. However, there is an extra query parameter `token` which tells SuperTokens to show the enter new password form. If you try and submit a new password with the `test` token value, it fails since it's not a valid password reset token.
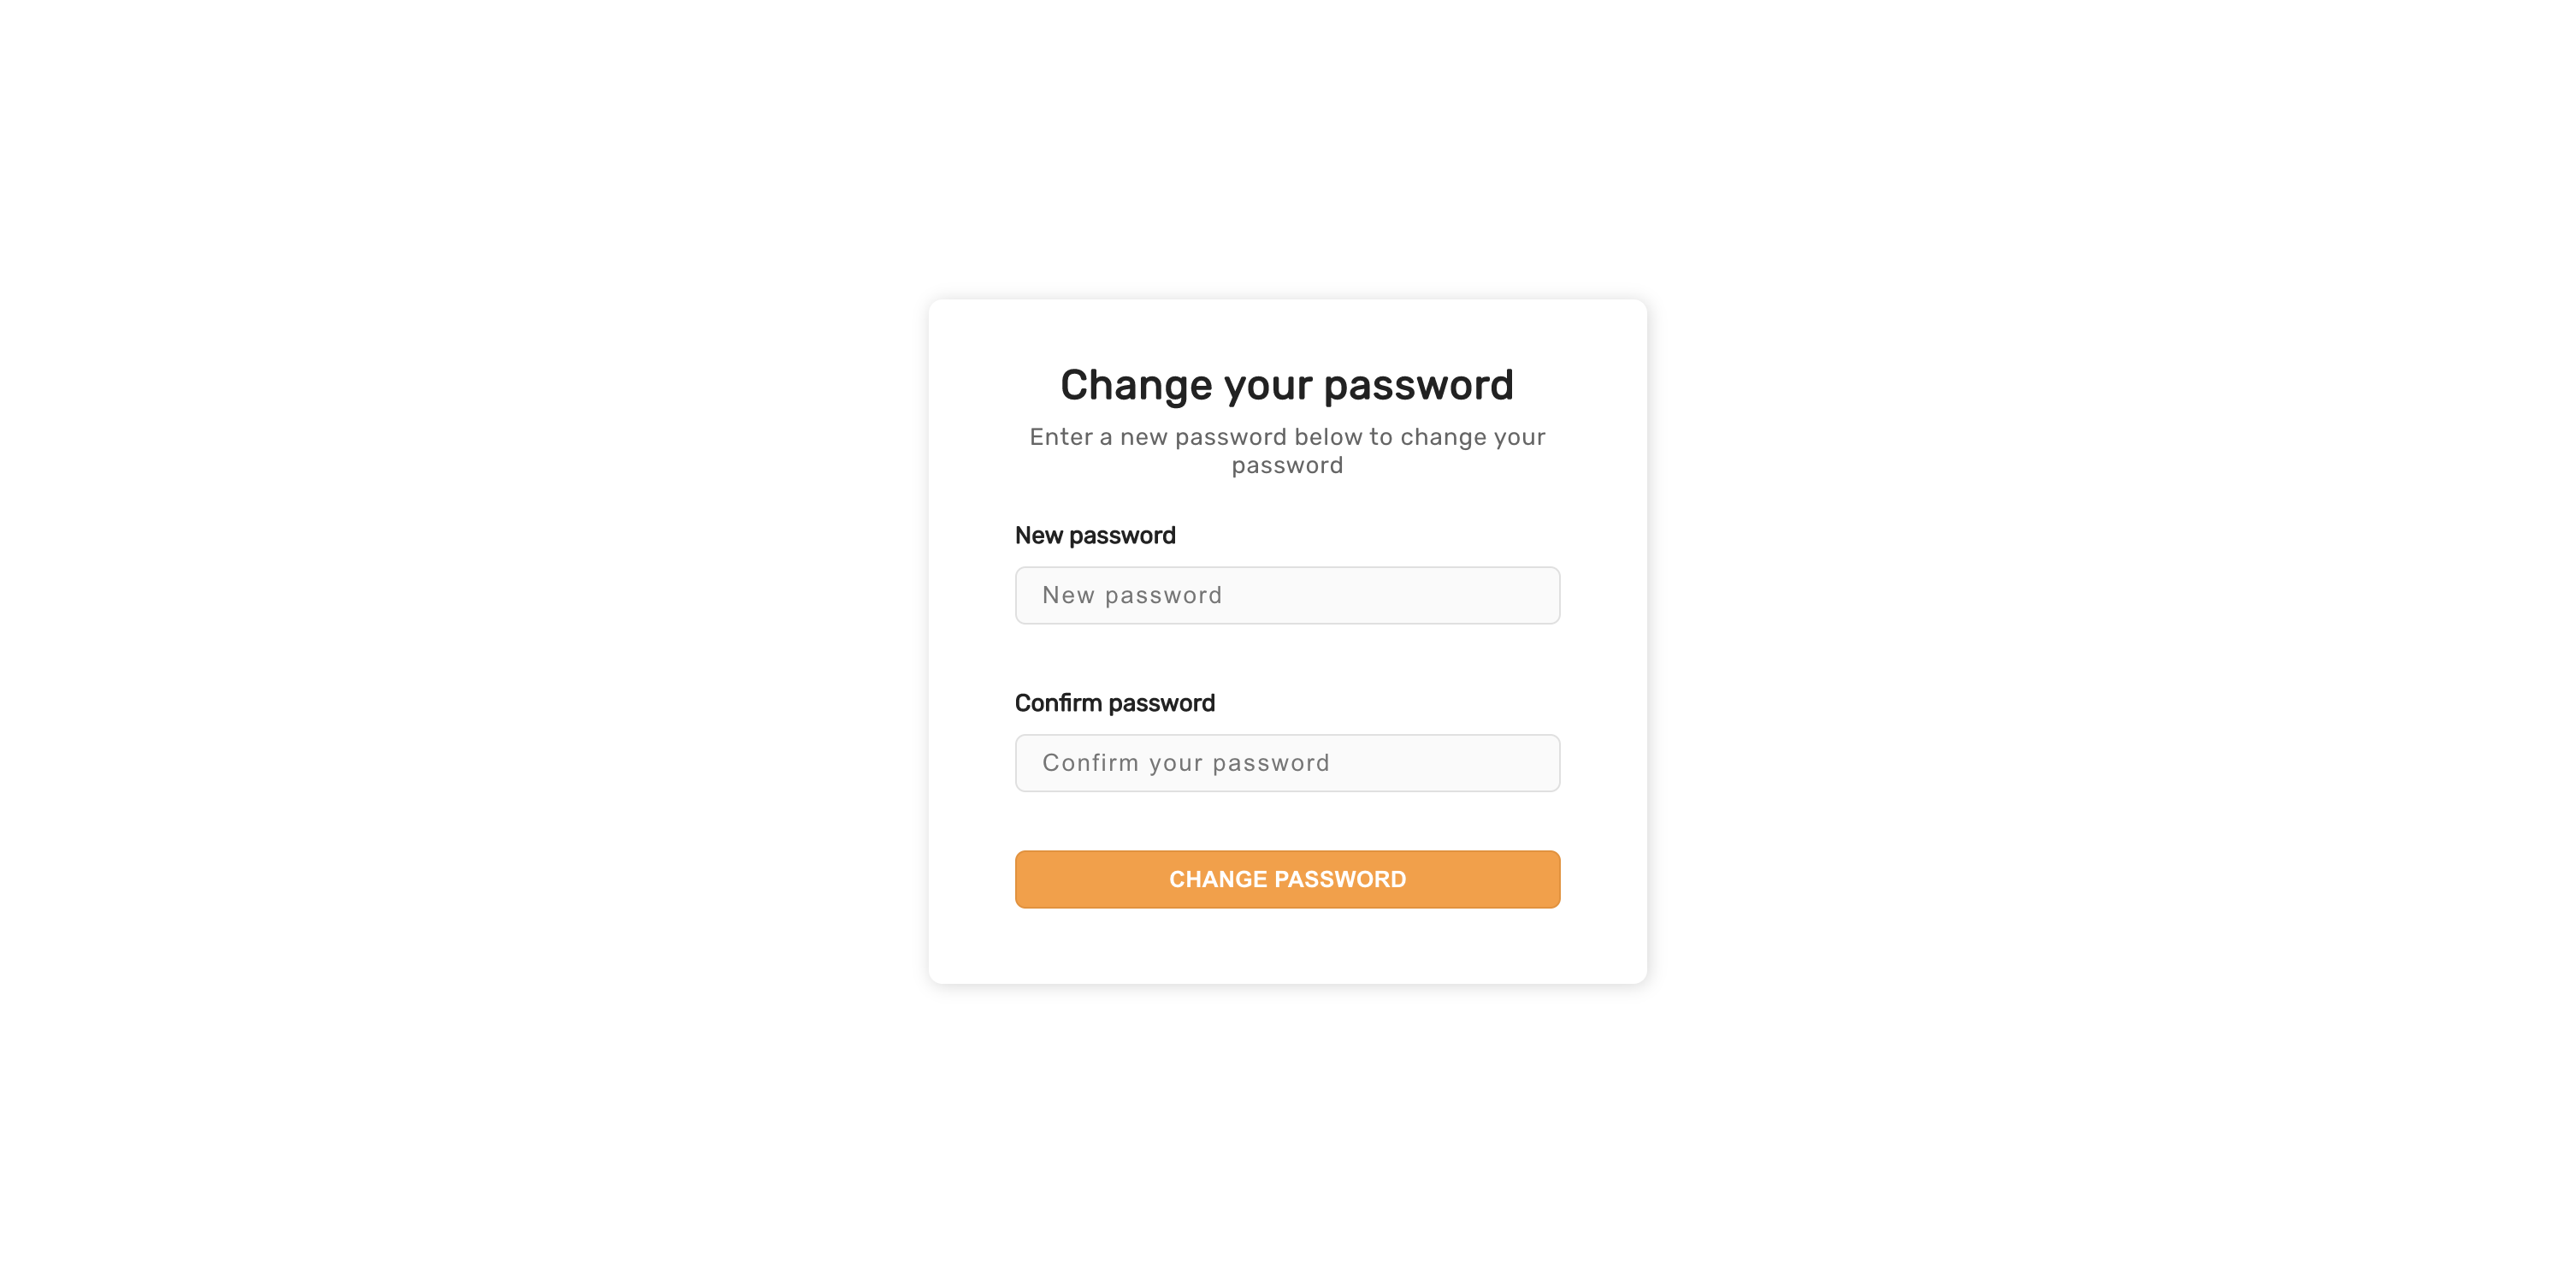 If the reset token has expired or is invalid, the user sees the following message.
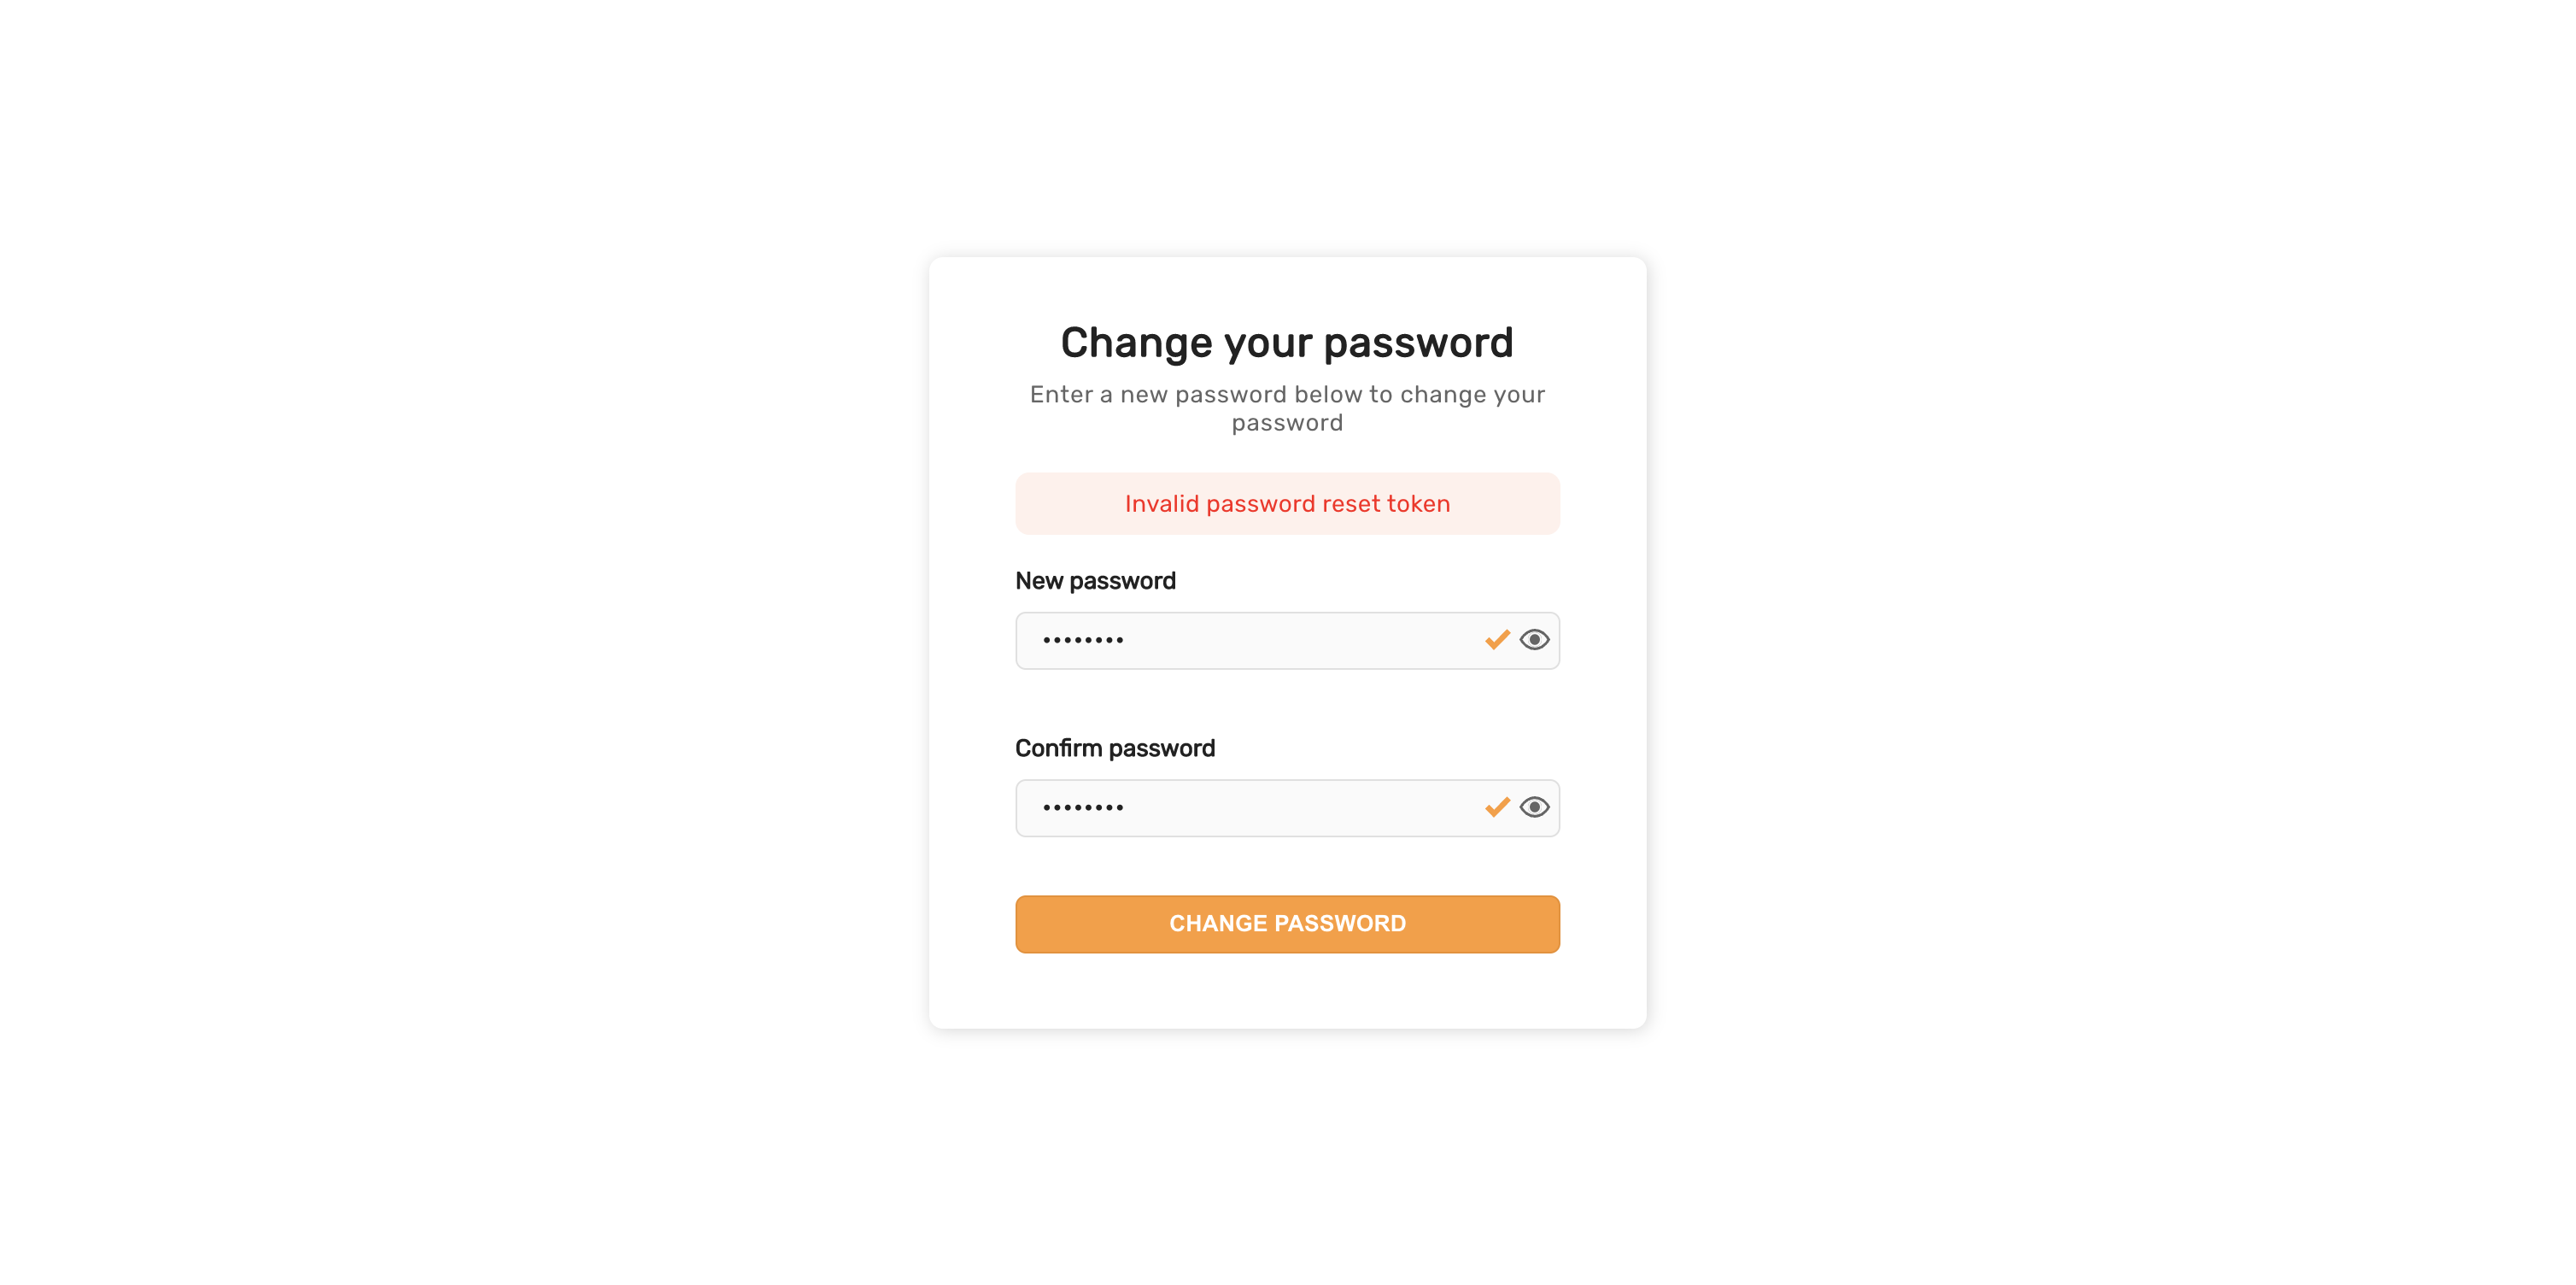 Once the user has successfully changed their password, they see the following success screen
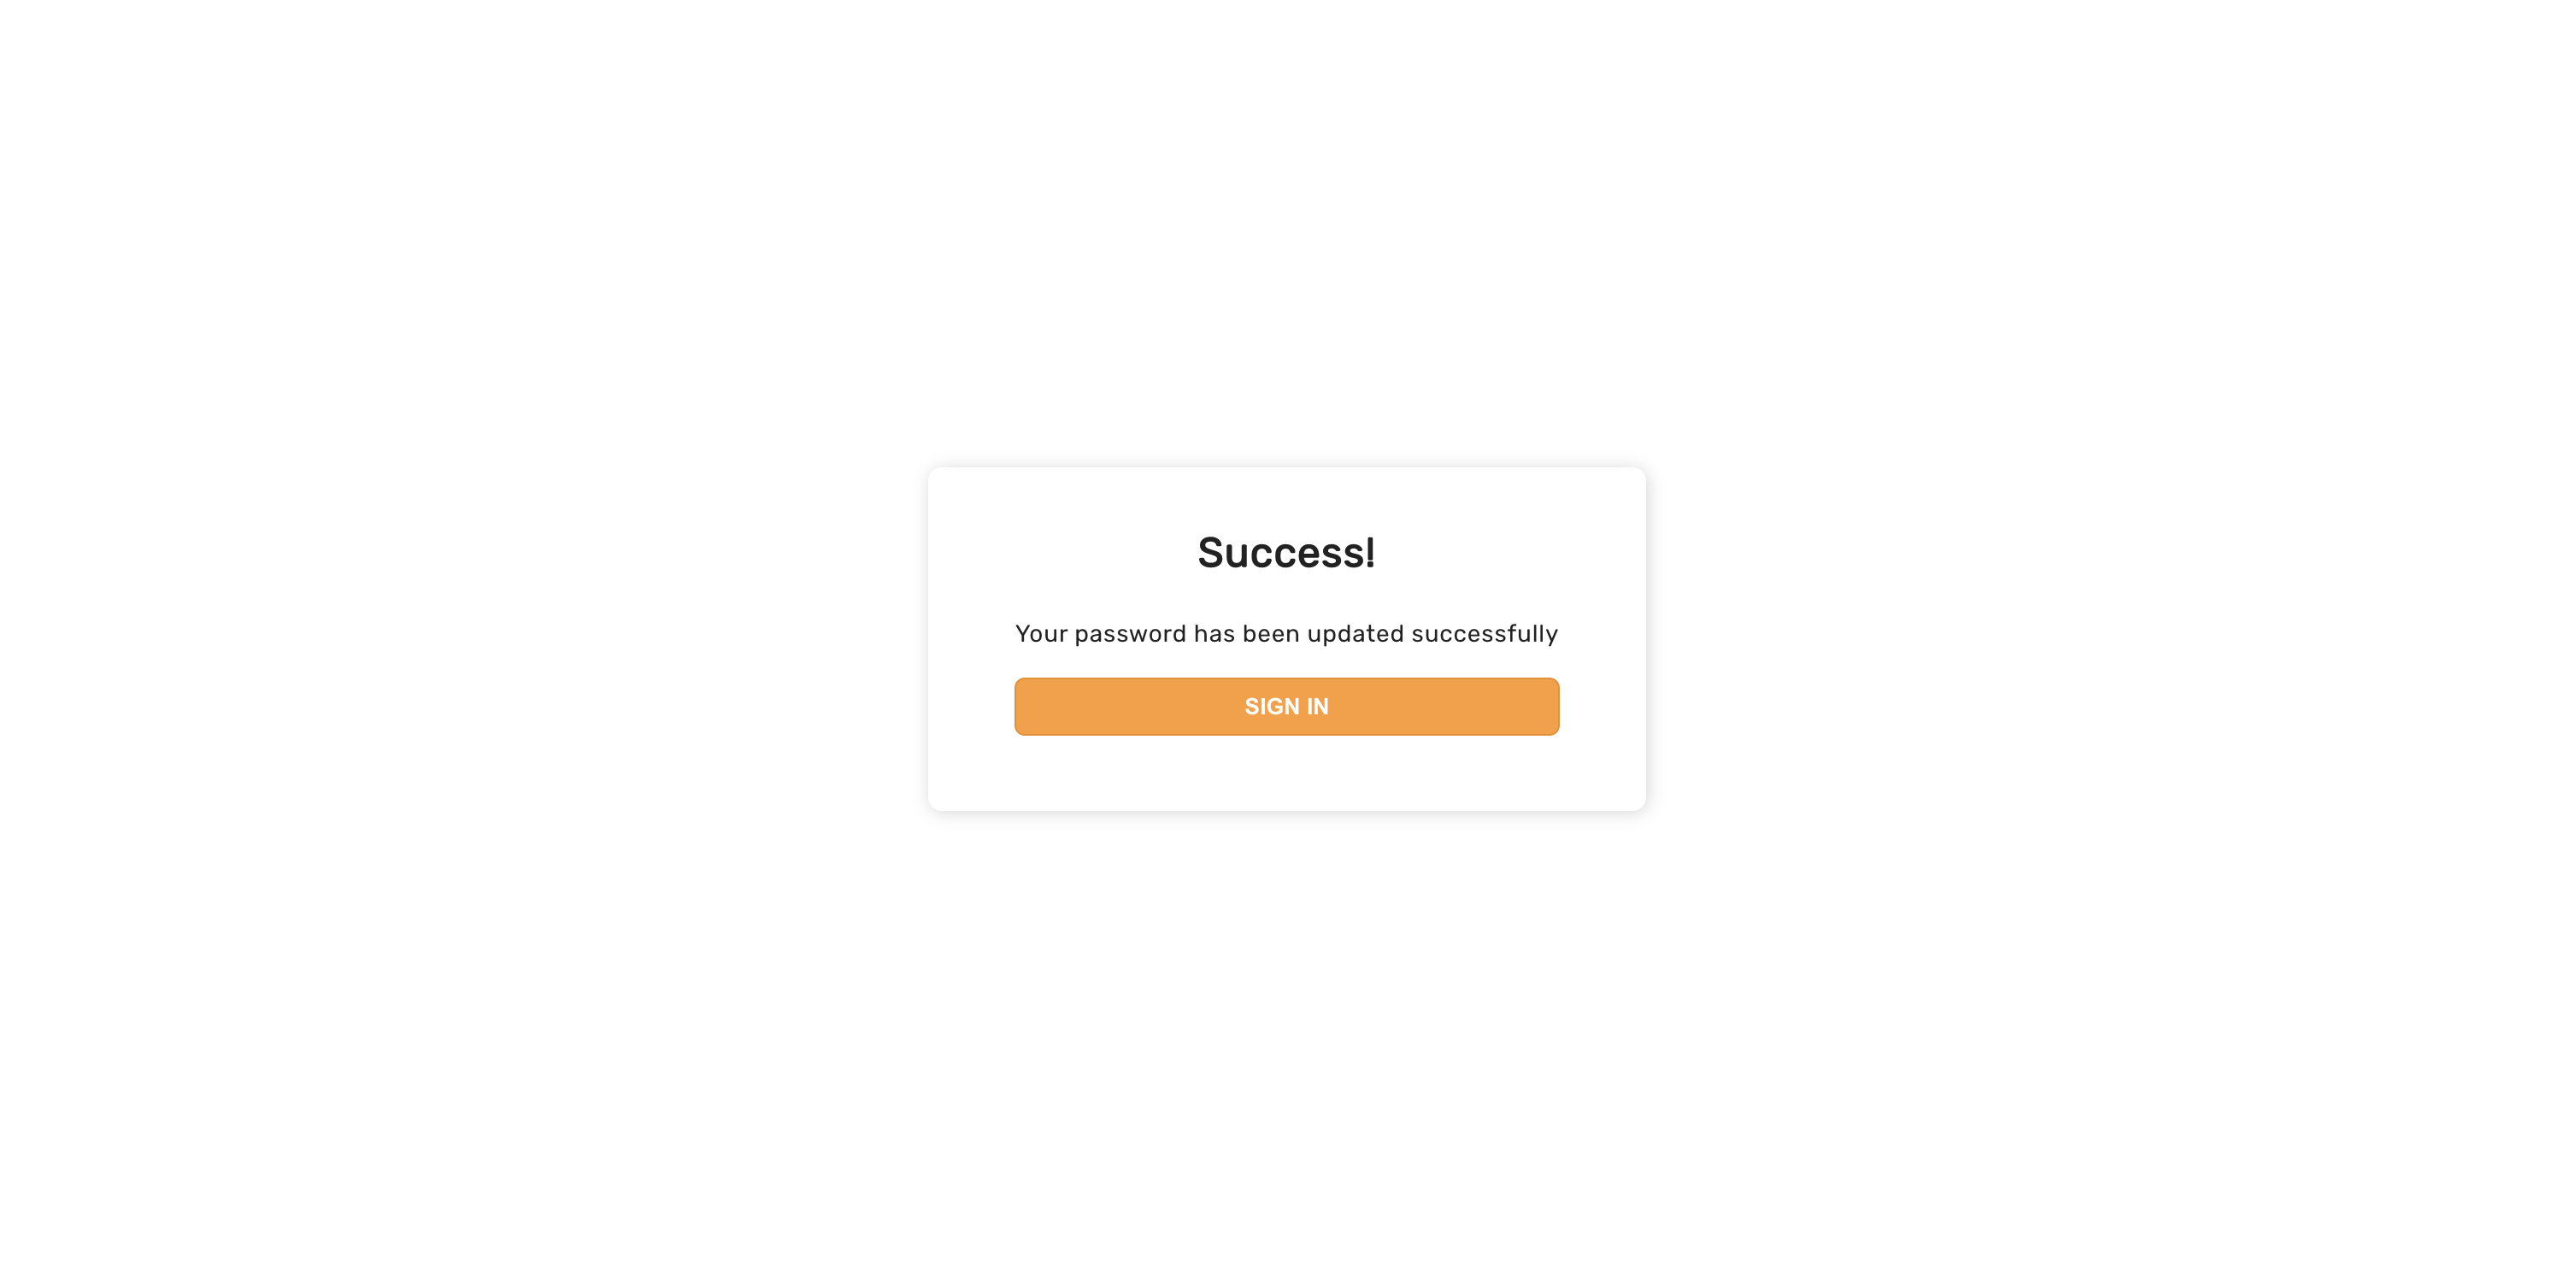 :::info Multi tenancy
For multi tenant use case, the password reset token also includes a `tenantId` query parameter which identifies the tenant for which the system created the password reset token.
:::
## General error UI
If there are network related errors, or the backend sends a status code >= 300, then the following UI appears.
:::info Multi tenancy
For multi tenant use case, the password reset token also includes a `tenantId` query parameter which identifies the tenant for which the system created the password reset token.
:::
## General error UI
If there are network related errors, or the backend sends a status code >= 300, then the following UI appears.
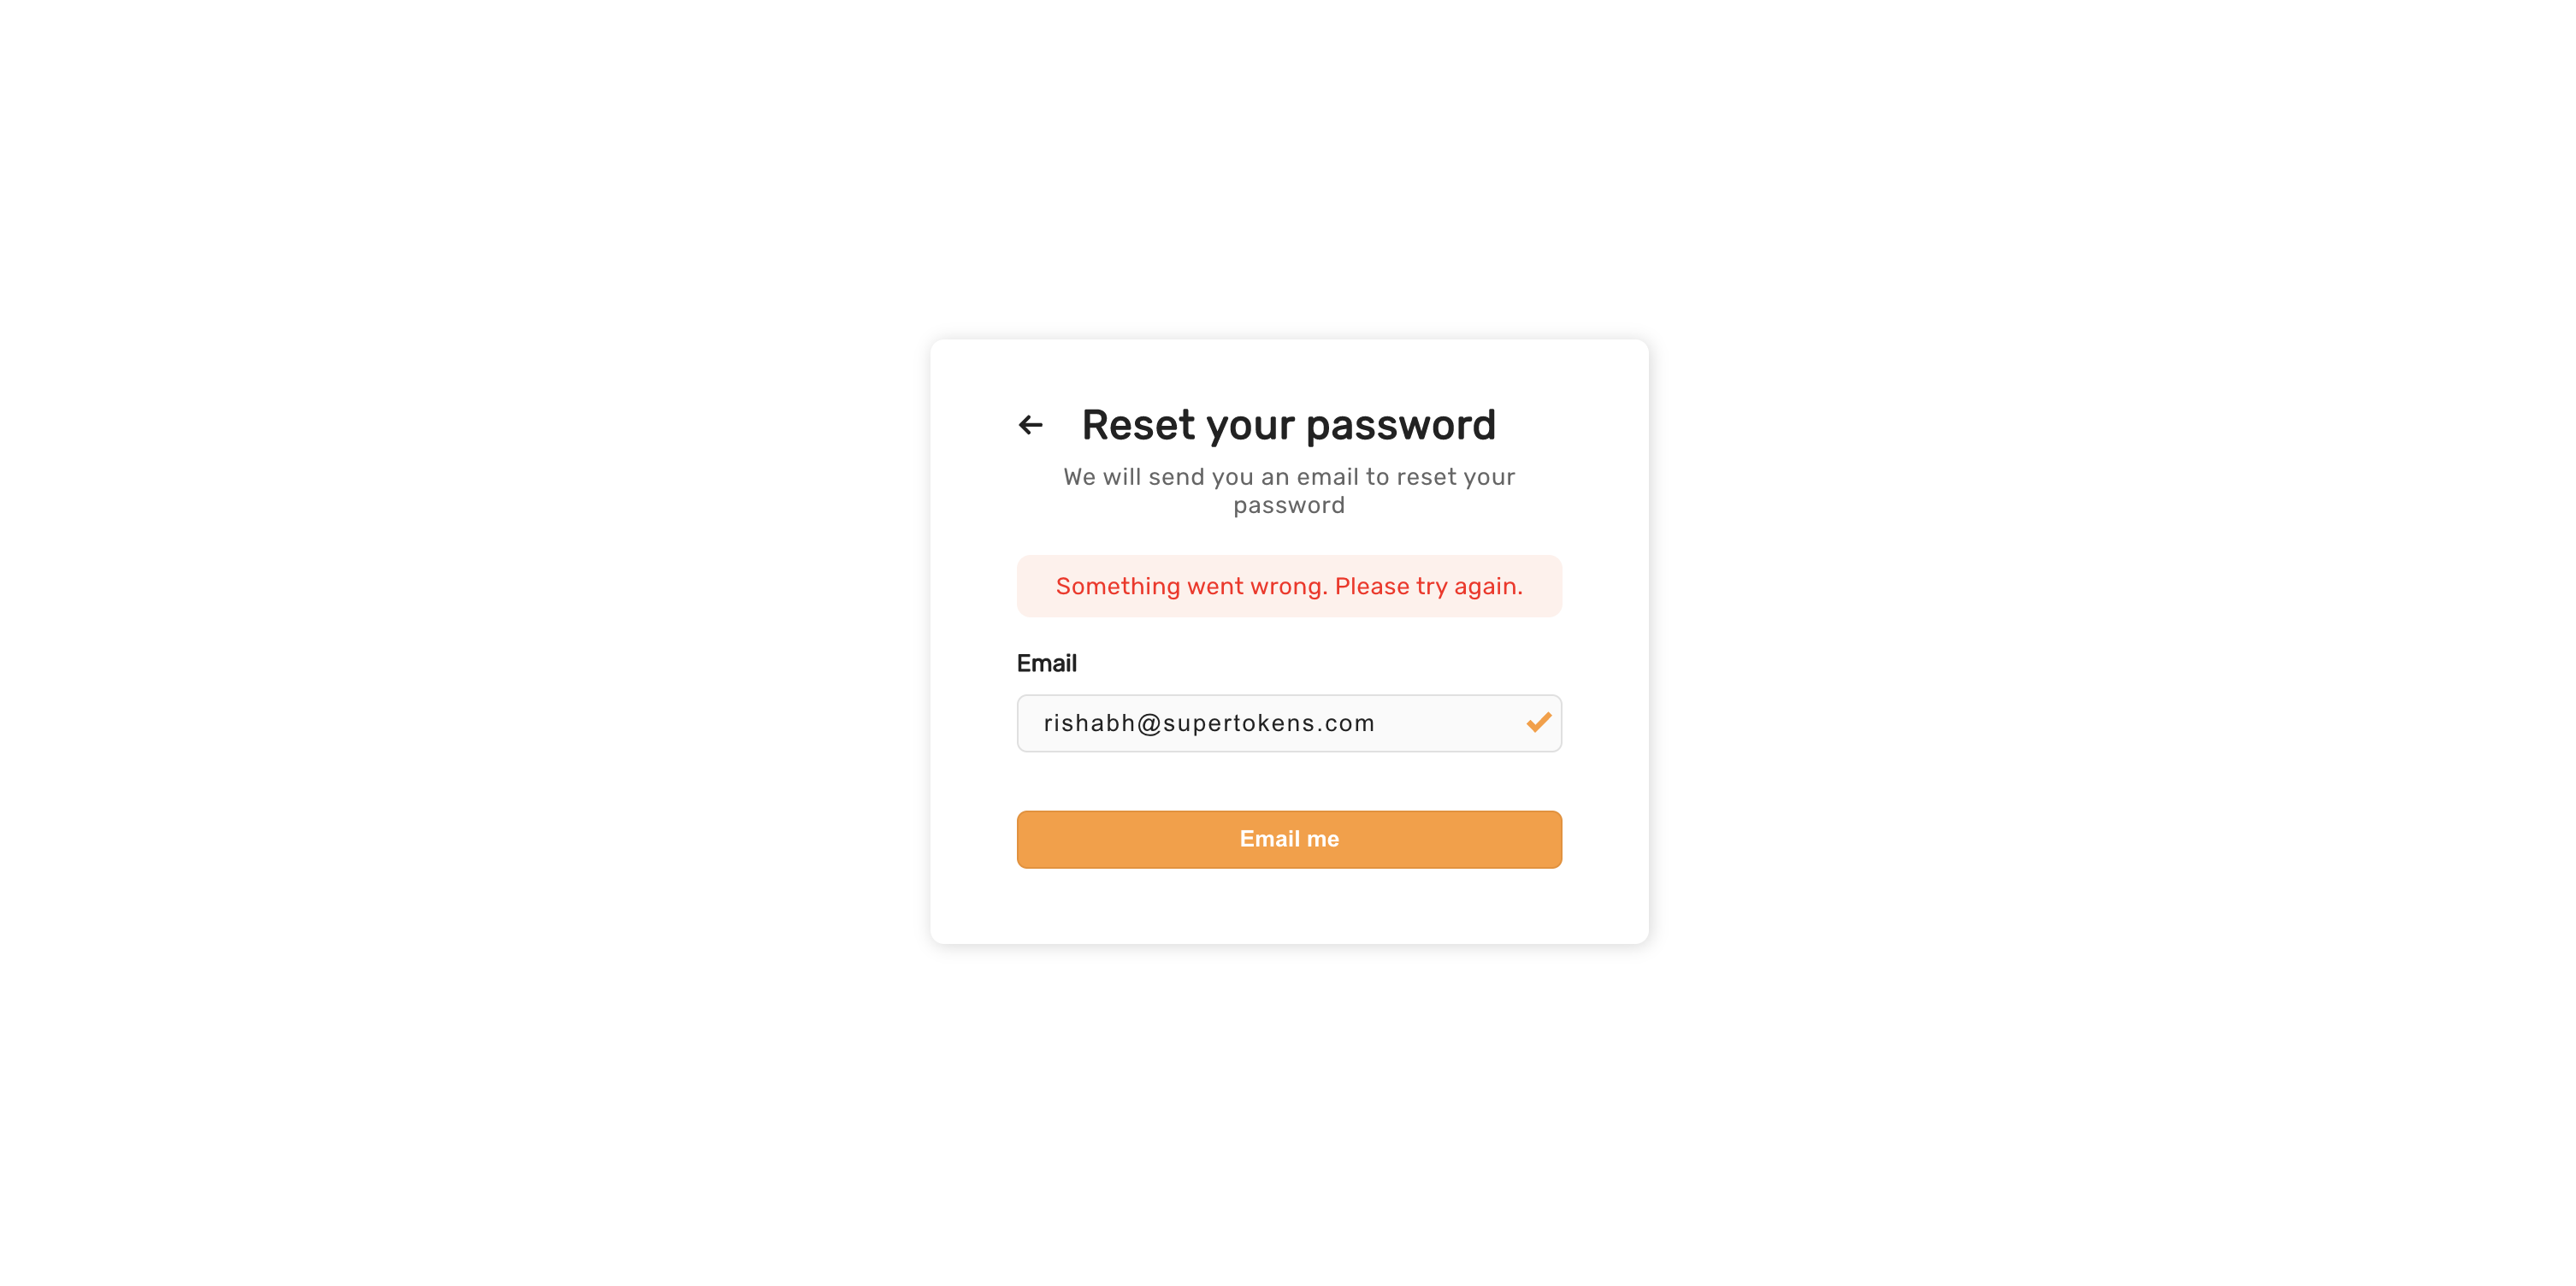
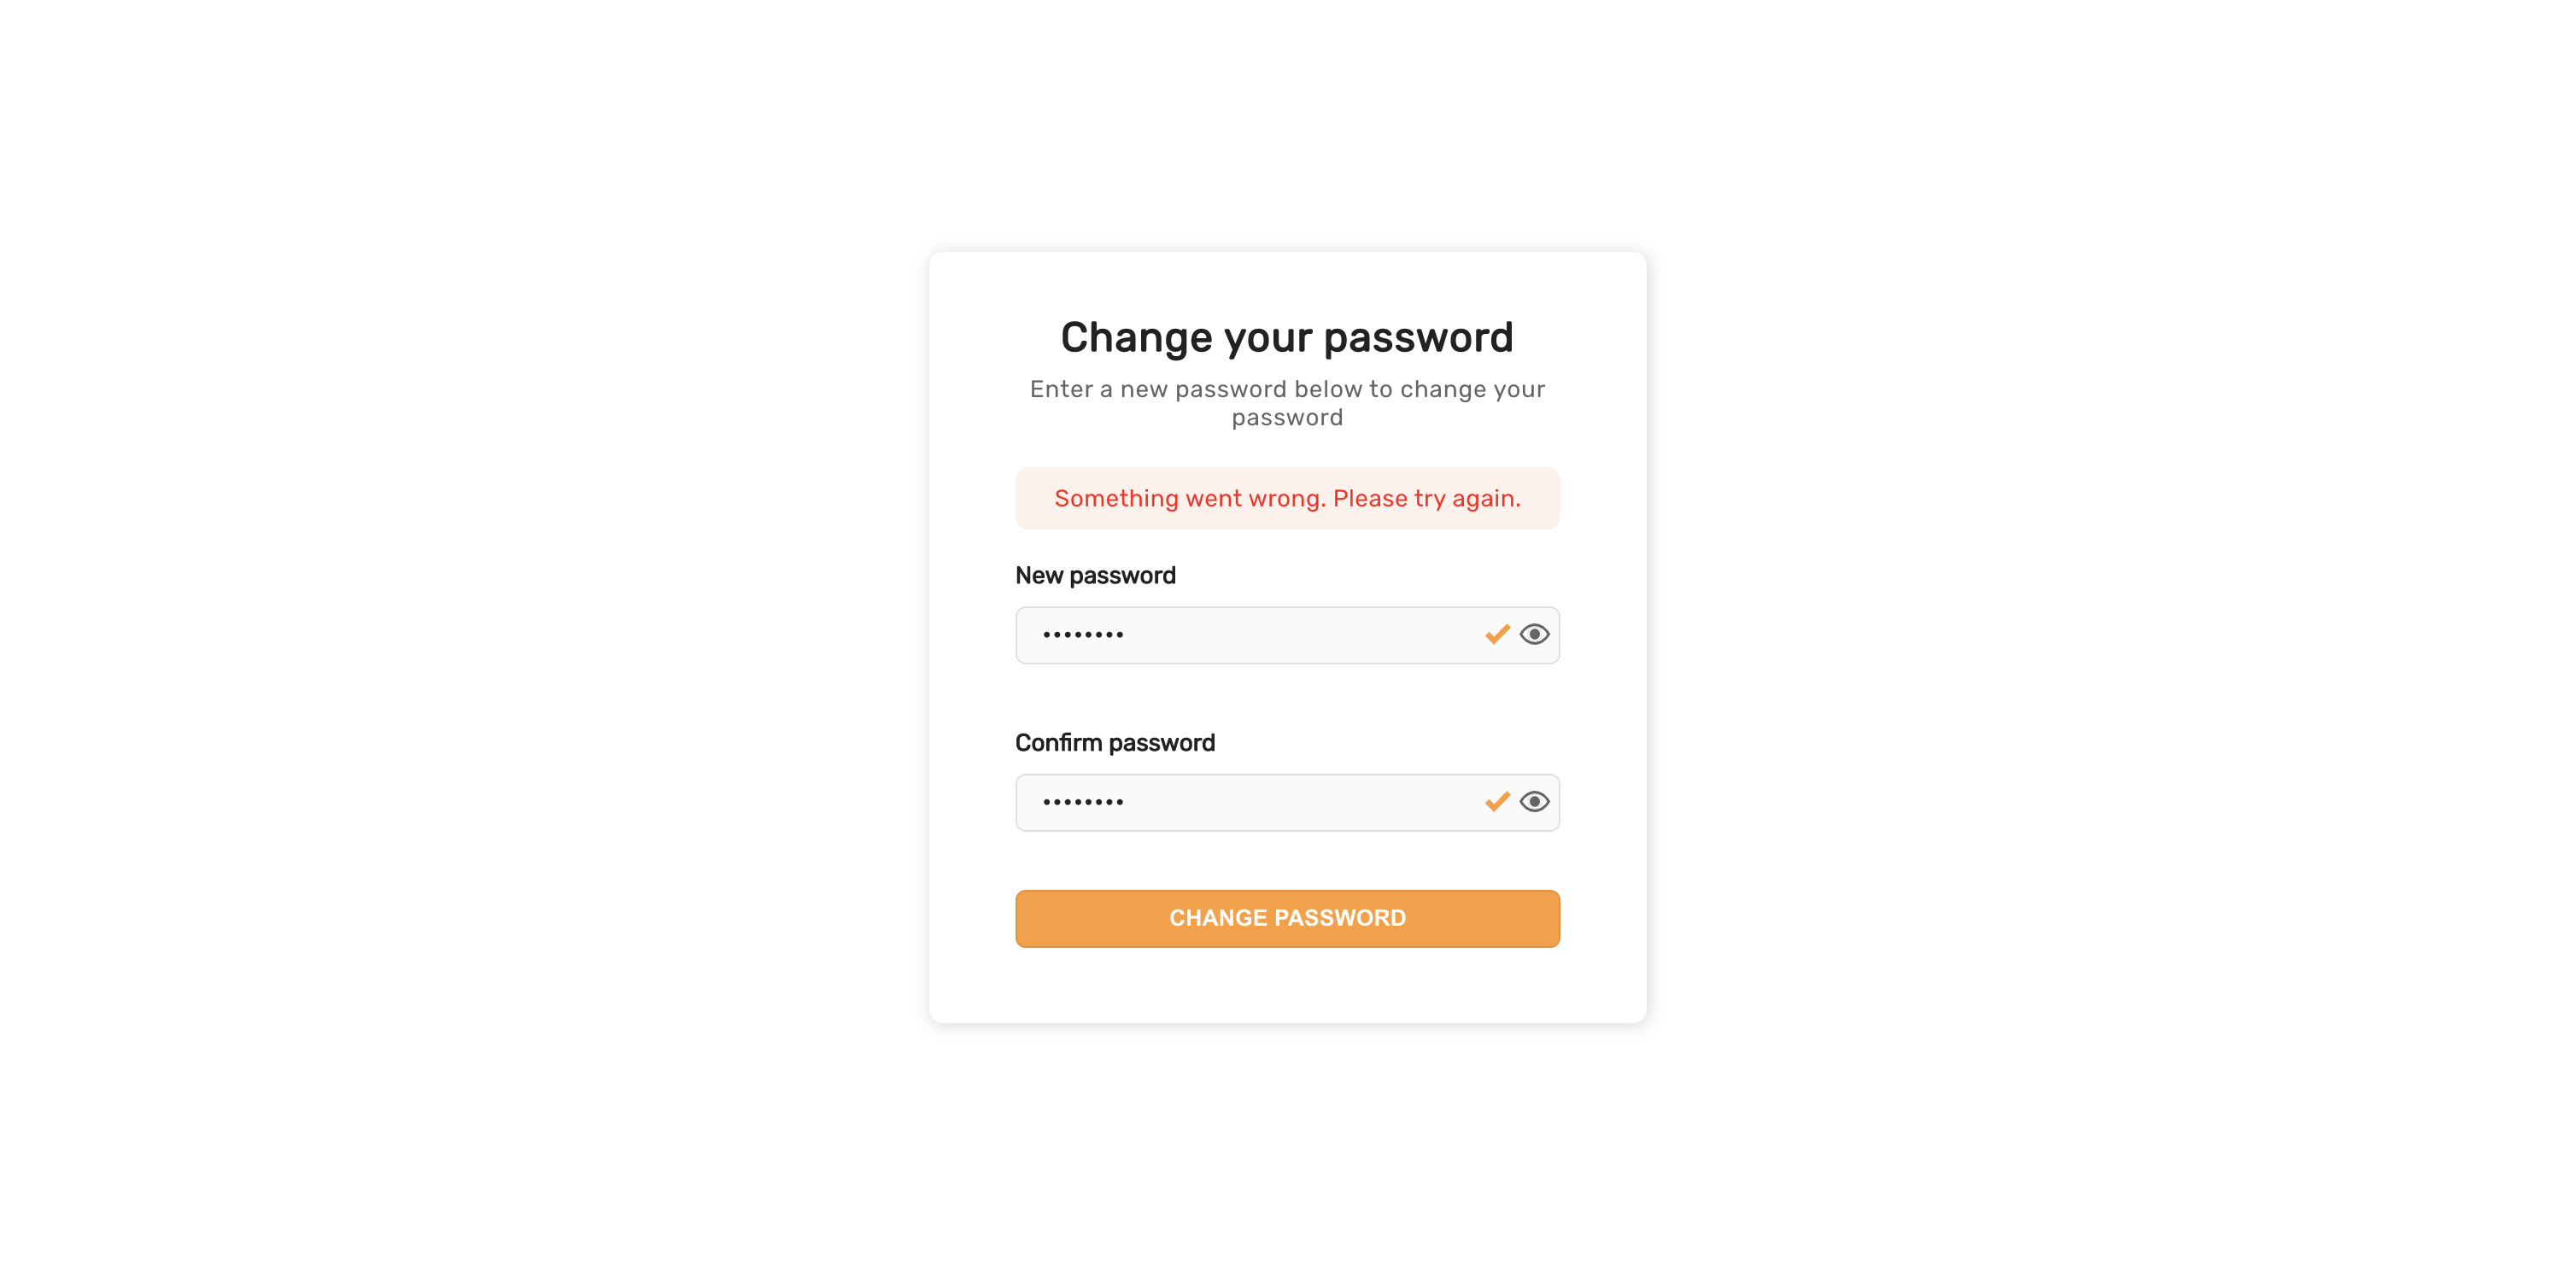 ## Password reset email UI
The default email sent for password reset appears below. The backend SDK sends it, which calls `https://api.supertokens.com` (the API infrastructure). See the links at the end of this page to change the email content or delivery method.
## Password reset email UI
The default email sent for password reset appears below. The backend SDK sends it, which calls `https://api.supertokens.com` (the API infrastructure). See the links at the end of this page to change the email content or delivery method.
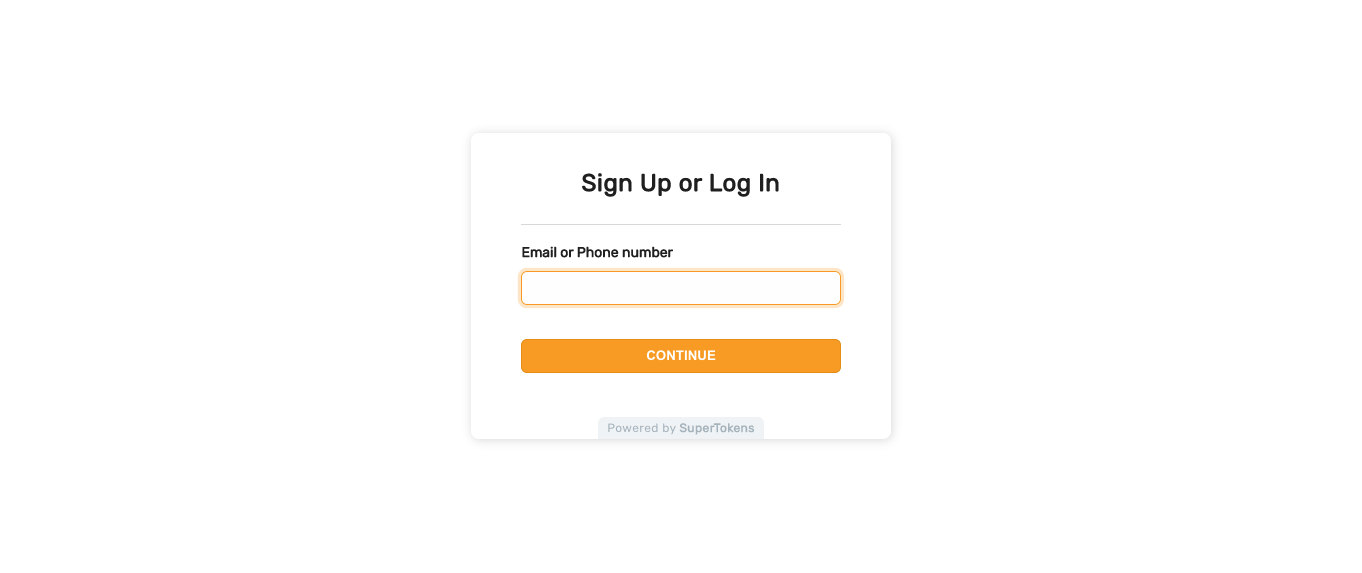 If the user decides to use their phone number and enters a valid phone number with their country code extension, they proceed to the next step. Otherwise, they see an error message asking them to also enter their country code. The UI also changes to show a dropdown containing a list of all countries (equal to the "Only phone input UI" shown below).
## Only email input UI
If the `contactMethod` is `EMAIL`, the user sees the following UI when they visit the login page.
If the user decides to use their phone number and enters a valid phone number with their country code extension, they proceed to the next step. Otherwise, they see an error message asking them to also enter their country code. The UI also changes to show a dropdown containing a list of all countries (equal to the "Only phone input UI" shown below).
## Only email input UI
If the `contactMethod` is `EMAIL`, the user sees the following UI when they visit the login page.
 ## Only phone input UI
If the `contactMethod` is `PHONE`, the user sees the following UI when they visit the login page.
## Only phone input UI
If the `contactMethod` is `PHONE`, the user sees the following UI when they visit the login page.
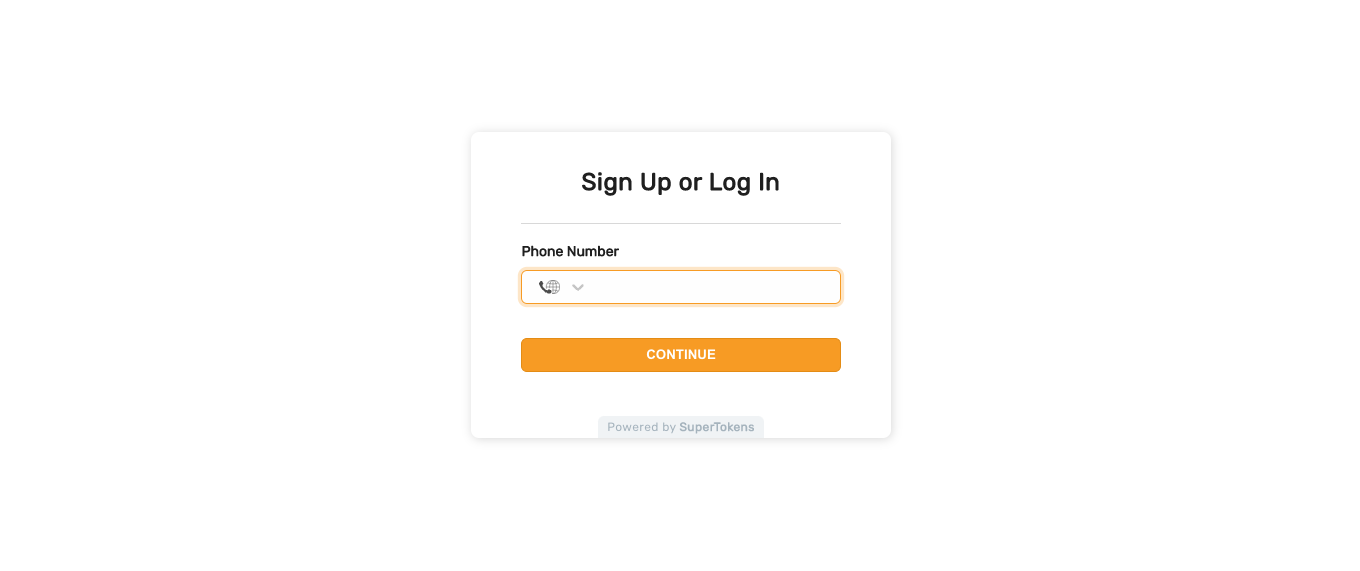 ## Invalid email or phone input UI
If the user enters an invalid phone or email, they see the following message
## Invalid email or phone input UI
If the user enters an invalid phone or email, they see the following message
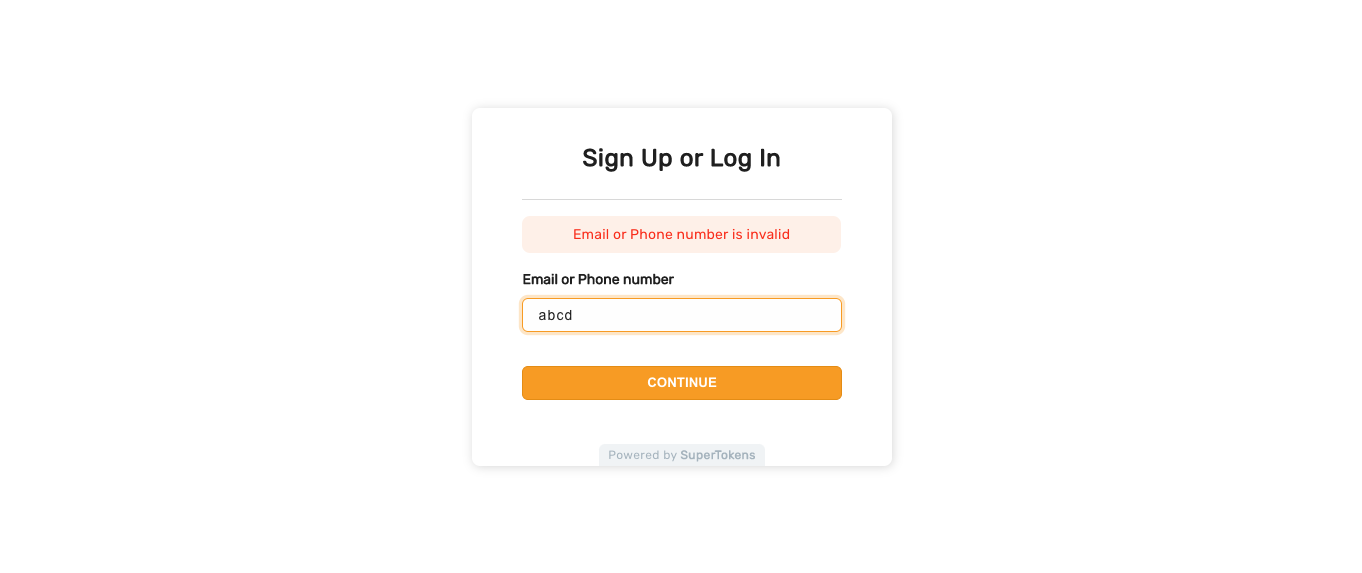 ## Magic link sent screen
If the value of `flowType` on the backend is `MAGIC_LINK`, then after the user has submitted their phone or email, they see the following UI.
## Magic link sent screen
If the value of `flowType` on the backend is `MAGIC_LINK`, then after the user has submitted their phone or email, they see the following UI.
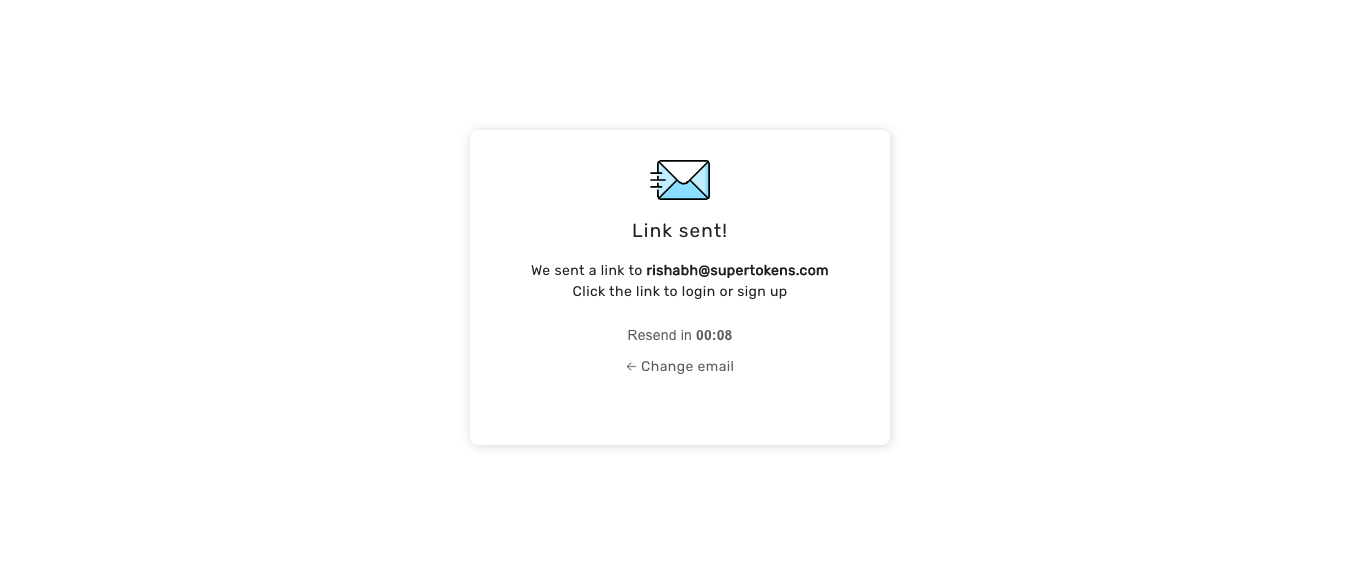 As you can see, a timer makes the user wait for a certain time (15 seconds by default) before they can resend the SMS / email. A button below the input allows them to change the email / SMS (the text on the button changes based on if the user entered an email or phone number).
## Magic link clicked screens
The magic link is of the format: `
As you can see, a timer makes the user wait for a certain time (15 seconds by default) before they can resend the SMS / email. A button below the input allows them to change the email / SMS (the text on the button changes based on if the user entered an email or phone number).
## Magic link clicked screens
The magic link is of the format: ` ### On different device
If the user opens the magic link on a different device, they must take an action before consuming tokens from the link. This prevents email clients from automatically consuming the tokens if they crawl links in the email.
### On different device
If the user opens the magic link on a different device, they must take an action before consuming tokens from the link. This prevents email clients from automatically consuming the tokens if they crawl links in the email.
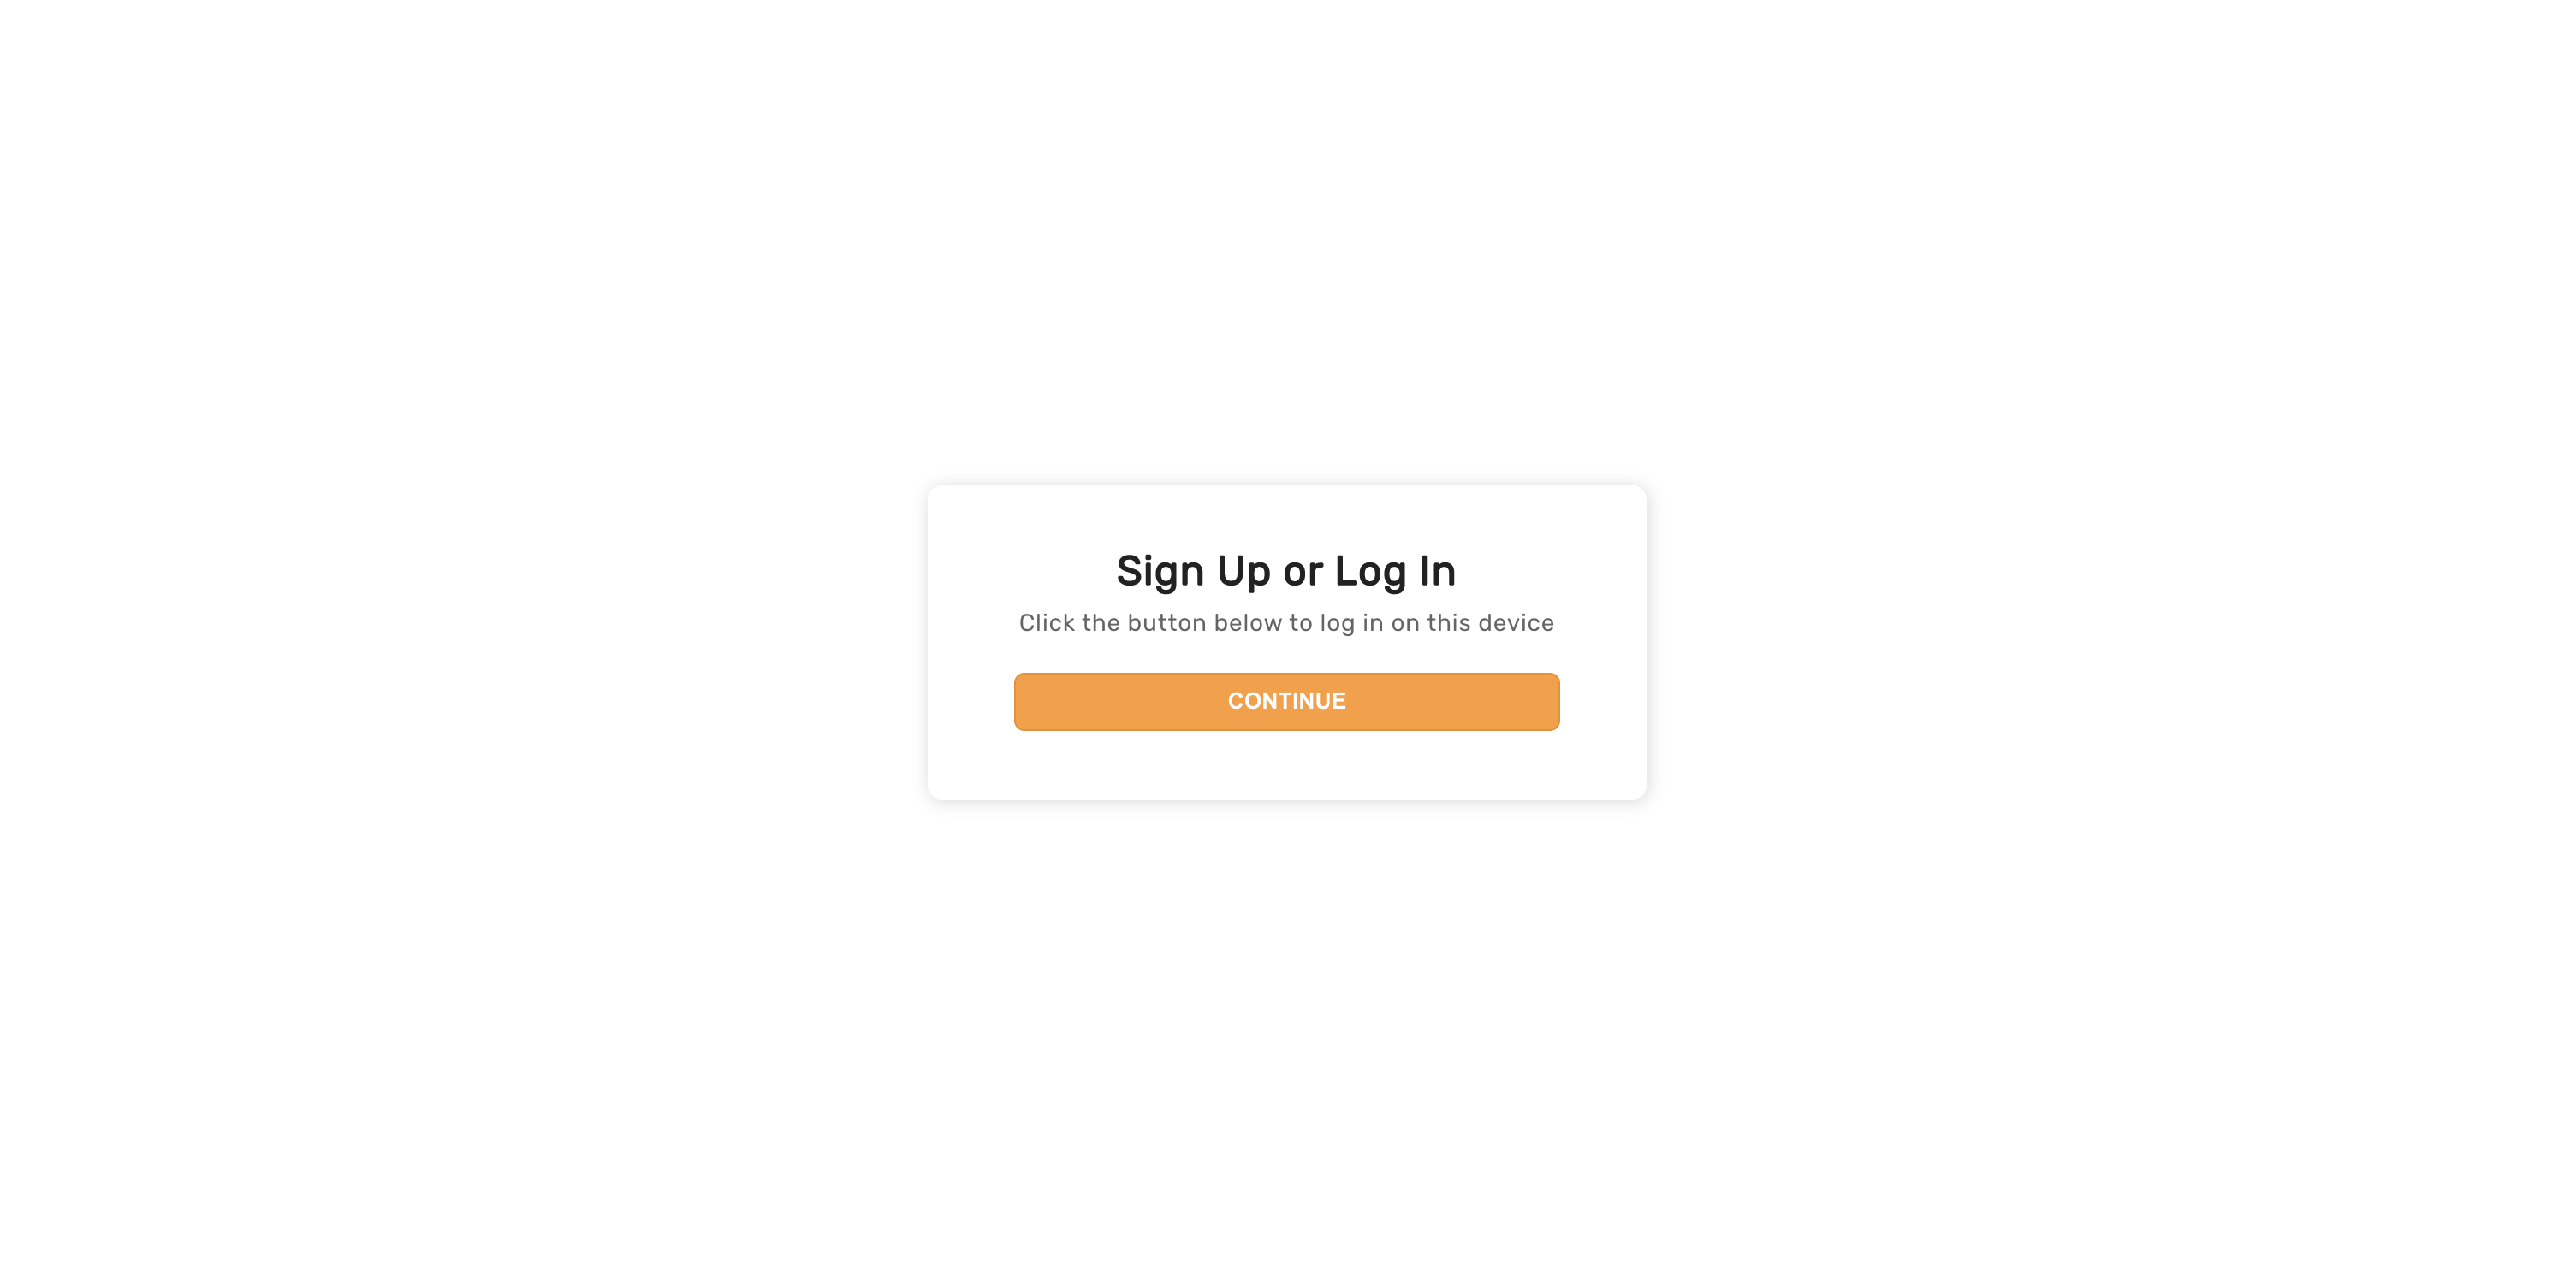 ### Invalid / expired magic link UI
If the user clicks on an invalid magic link or if the token in the magic link has expired, they see the login screen with the following message
### Invalid / expired magic link UI
If the user clicks on an invalid magic link or if the token in the magic link has expired, they see the login screen with the following message
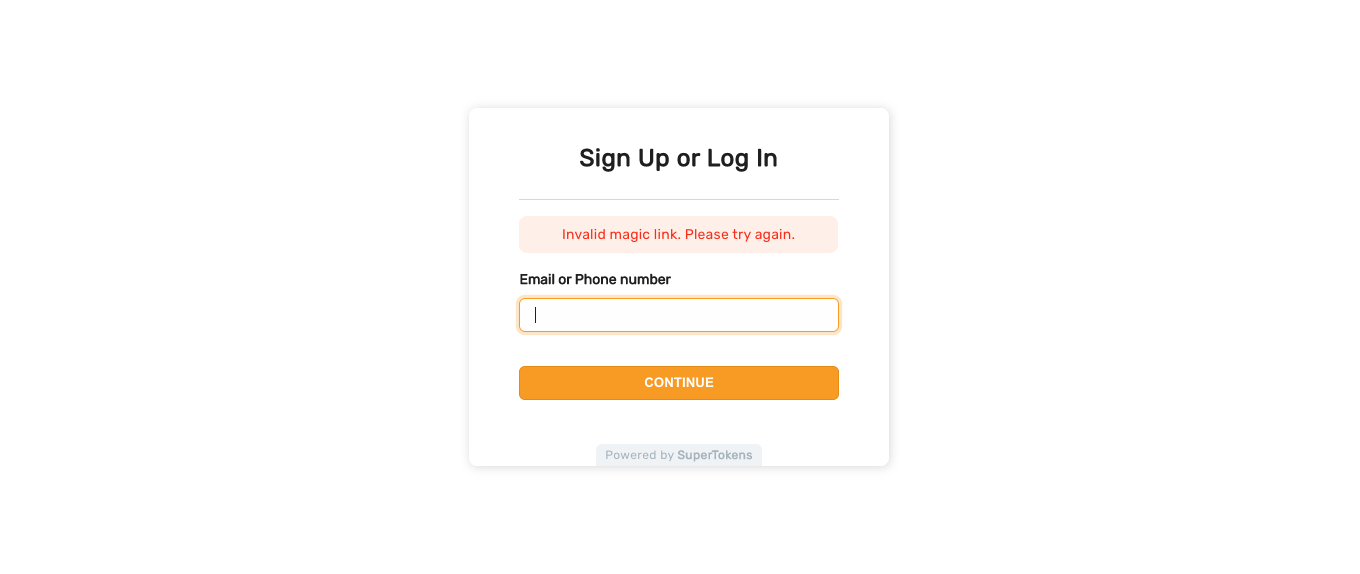 ## Enter OTP screen
If login via OTP is active, then the user sees this screen immediately after their enter their phone number / email.
## Enter OTP screen
If login via OTP is active, then the user sees this screen immediately after their enter their phone number / email.
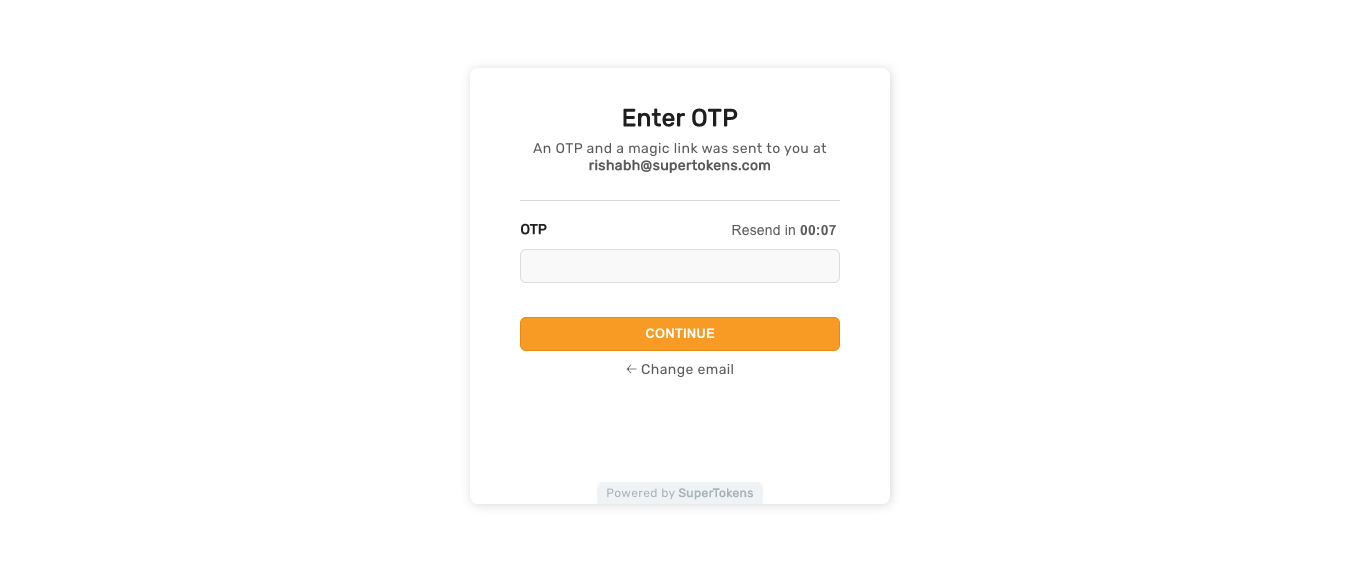 As you can see, a timer makes the user wait for a certain time (15 seconds by default) before they can resend the SMS / email. A button below the input allows them to change the email / SMS (the text on the button changes based on if the user entered an email or phone number).
### Invalid OTP
If the user enters an incorrect OTP, this is what they see.
As you can see, a timer makes the user wait for a certain time (15 seconds by default) before they can resend the SMS / email. A button below the input allows them to change the email / SMS (the text on the button changes based on if the user entered an email or phone number).
### Invalid OTP
If the user enters an incorrect OTP, this is what they see.
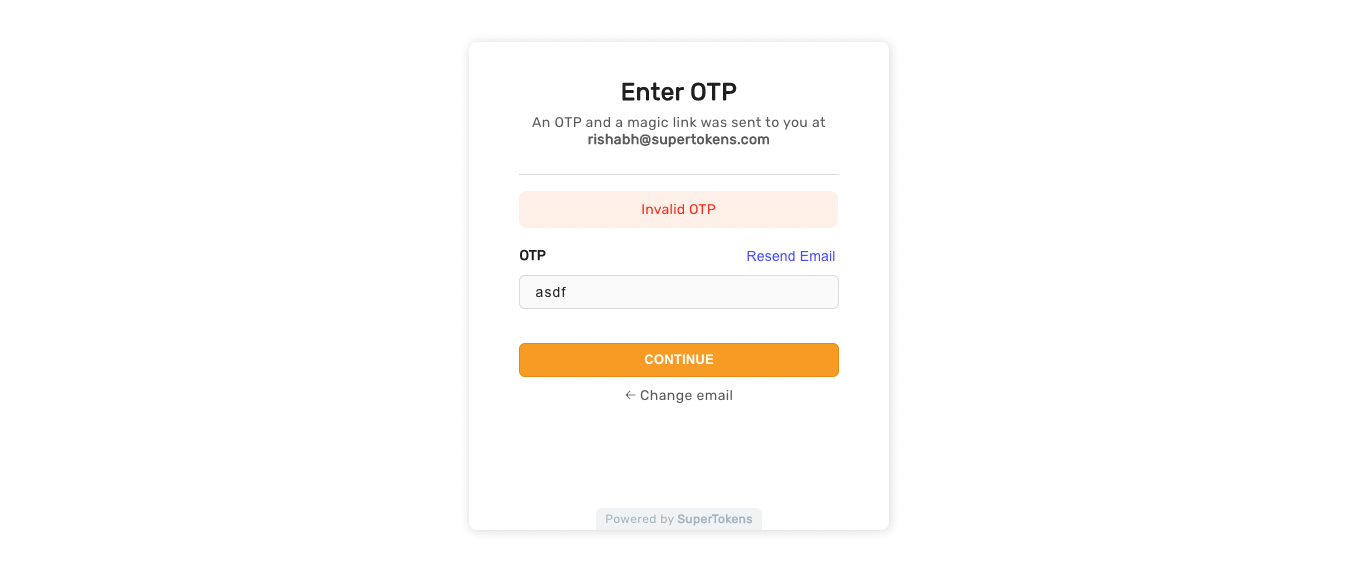 Entering an incorrect OTP too many times results in the user navigating back to the login screen with the following message.
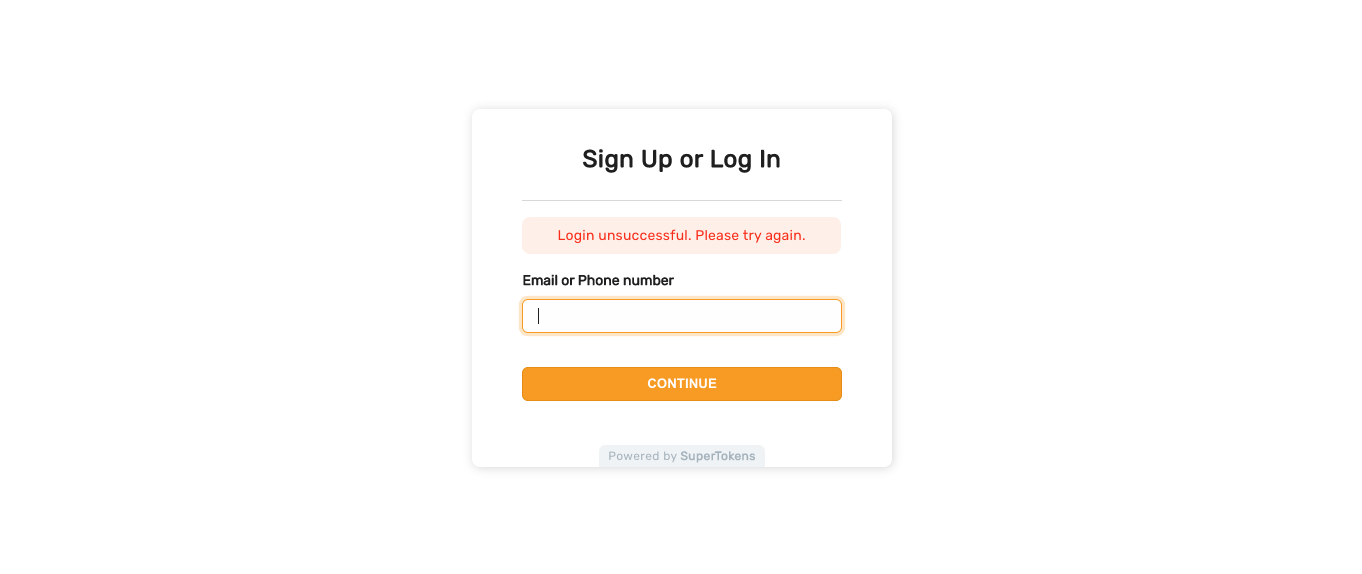 ### Logging in via OTP and Magic link simultaneously
An edge case occurs wherein the end user gets both an OTP and a magic link. Whilst viewing the enter OTP screen, they also click on the magic link. The magic link click opens a new tab and consumes the link to log the user in. The enter OTP screen continues to show the enter OTP UI until the user refreshes the page. After the refresh, it redirects to the post login screen.
## Default email and SMS template
You can find the email and SMS templates along with their UI [in one of the GitHub repositories](https://github.com/supertokens/email-sms-templates).
You can change the content of the email & SMSs and / or how they send. For more information on this, please see the links at the end of this page.
## General errors
If there are network related errors, or the backend sends a status code >= 300, then the following UI shows. This UI also appears if there is a similar error in the callback page.
### Logging in via OTP and Magic link simultaneously
An edge case occurs wherein the end user gets both an OTP and a magic link. Whilst viewing the enter OTP screen, they also click on the magic link. The magic link click opens a new tab and consumes the link to log the user in. The enter OTP screen continues to show the enter OTP UI until the user refreshes the page. After the refresh, it redirects to the post login screen.
## Default email and SMS template
You can find the email and SMS templates along with their UI [in one of the GitHub repositories](https://github.com/supertokens/email-sms-templates).
You can change the content of the email & SMSs and / or how they send. For more information on this, please see the links at the end of this page.
## General errors
If there are network related errors, or the backend sends a status code >= 300, then the following UI shows. This UI also appears if there is a similar error in the callback page.
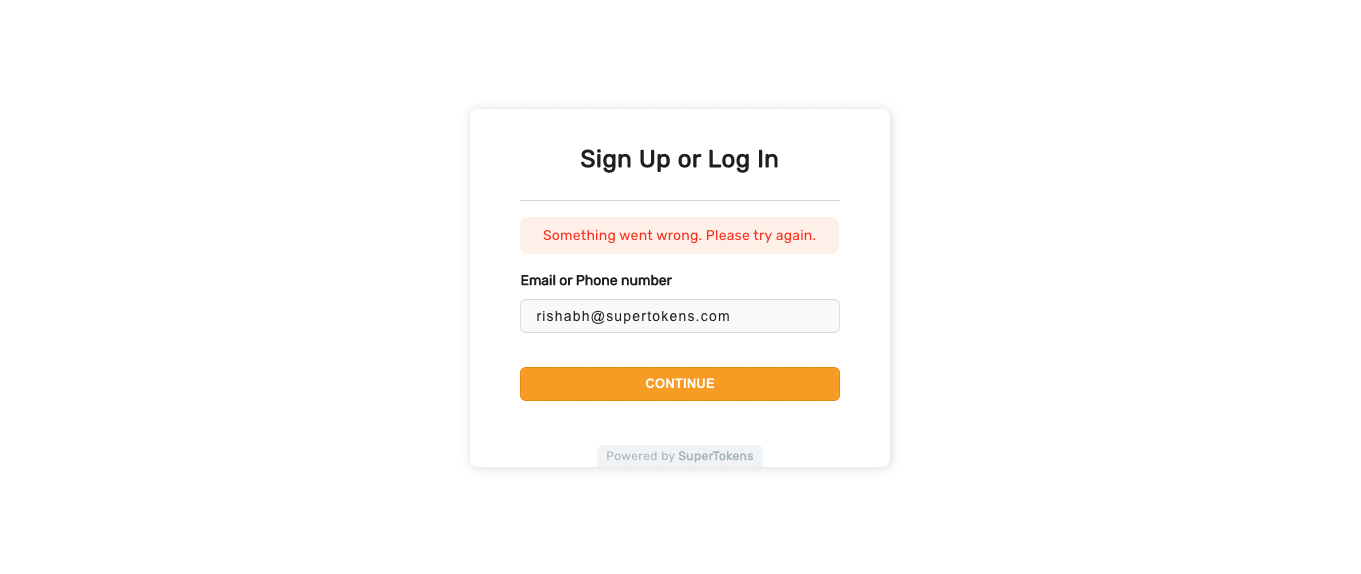
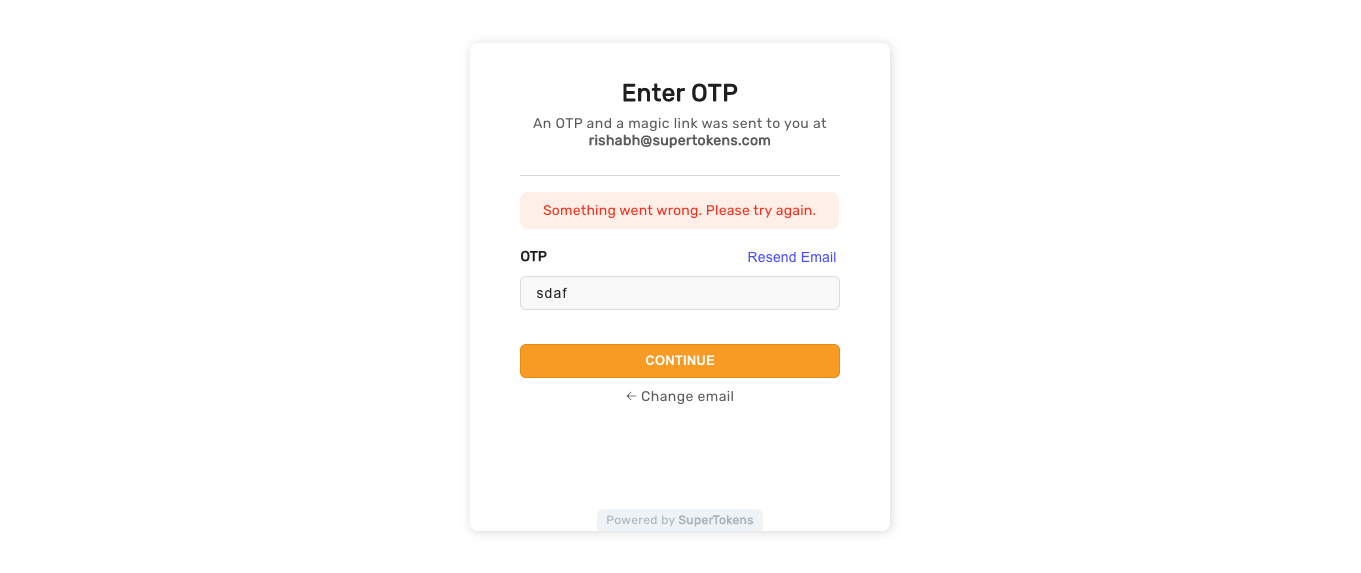
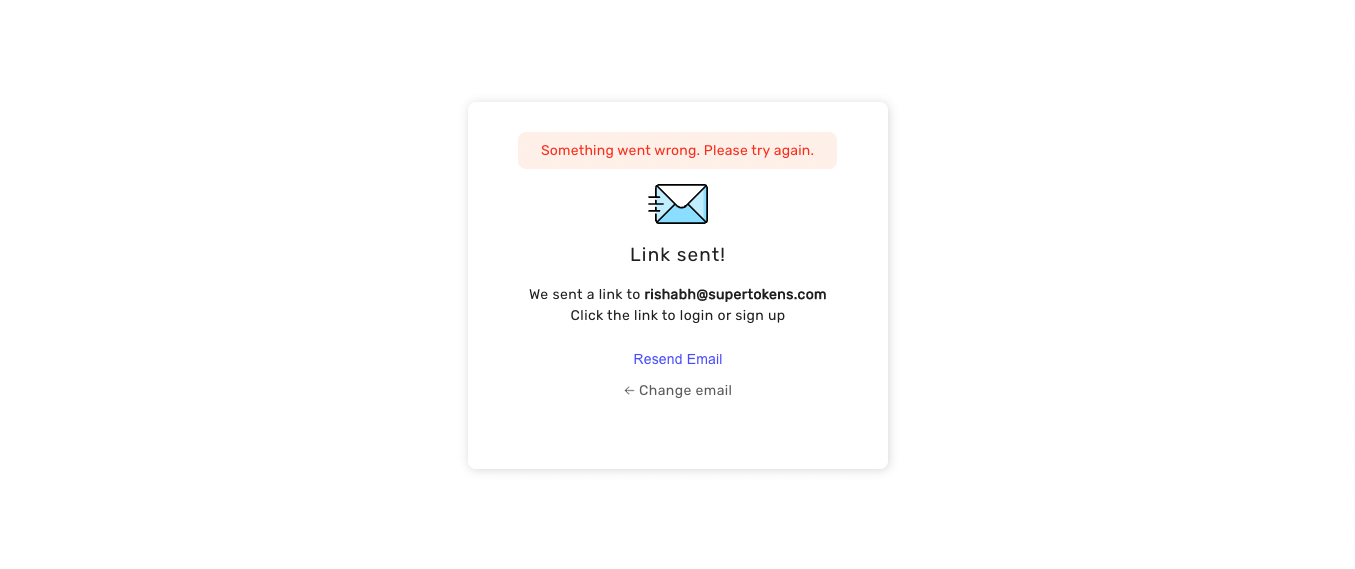 The error below appears if something went wrong after the user clicks on the magic link. Reloading the page should result in a reattempt
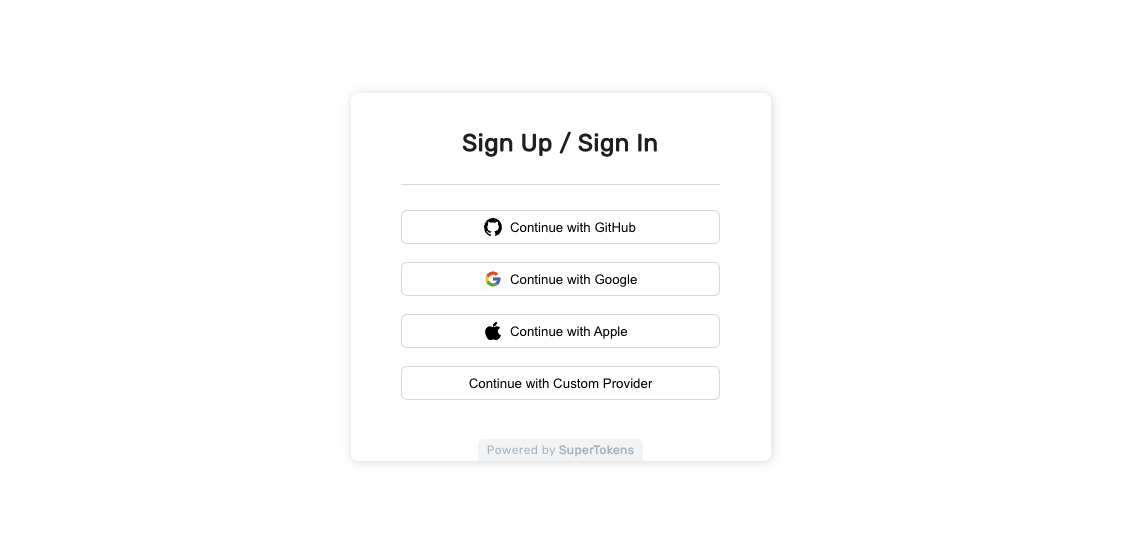 ## Callback page UI
When the user navigates back to your application from the third party provider, they see the following UI. On this screen, SuperTokens takes the authorisation code from the URL (sent by the provider) and sends it to the backend. The backend exchanges that for the user's access token and information.
## Callback page UI
When the user navigates back to your application from the third party provider, they see the following UI. On this screen, SuperTokens takes the authorisation code from the URL (sent by the provider) and sends it to the backend. The backend exchanges that for the user's access token and information.
 ## Sign in / up unsuccessful UI
SuperTokens requires that the third party provider gives an email for the user. If that's not the case for a certain provider, the user sees the following UI.
## Sign in / up unsuccessful UI
SuperTokens requires that the third party provider gives an email for the user. If that's not the case for a certain provider, the user sees the following UI.
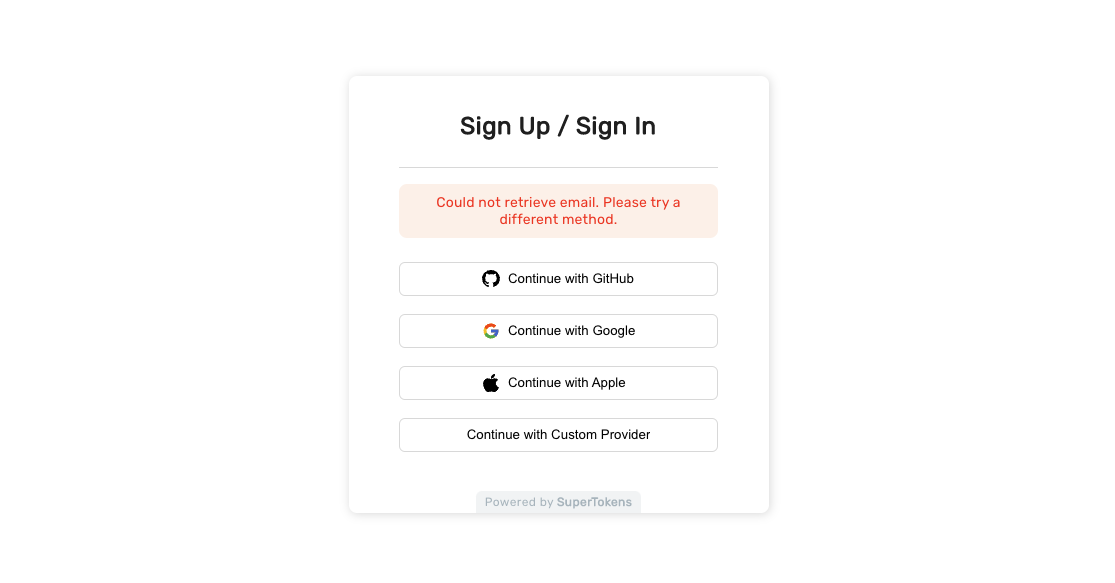 ## General error UI
If there are network related errors, or the backend sends a status code >= 300, then the following UI shows. This UI also appears if there is a similar error in the callback page.
## General error UI
If there are network related errors, or the backend sends a status code >= 300, then the following UI shows. This UI also appears if there is a similar error in the callback page.
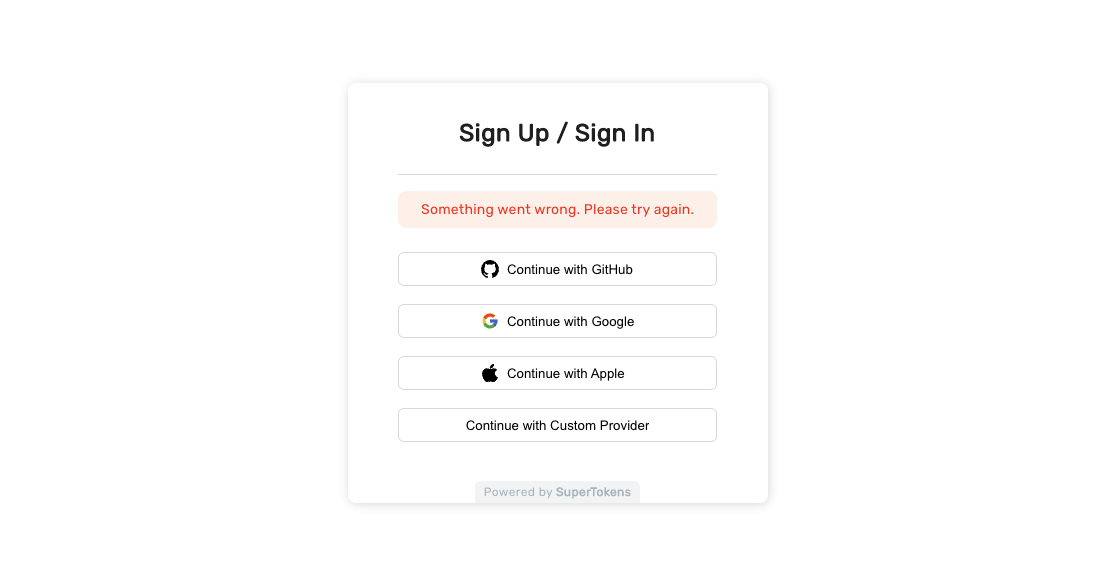
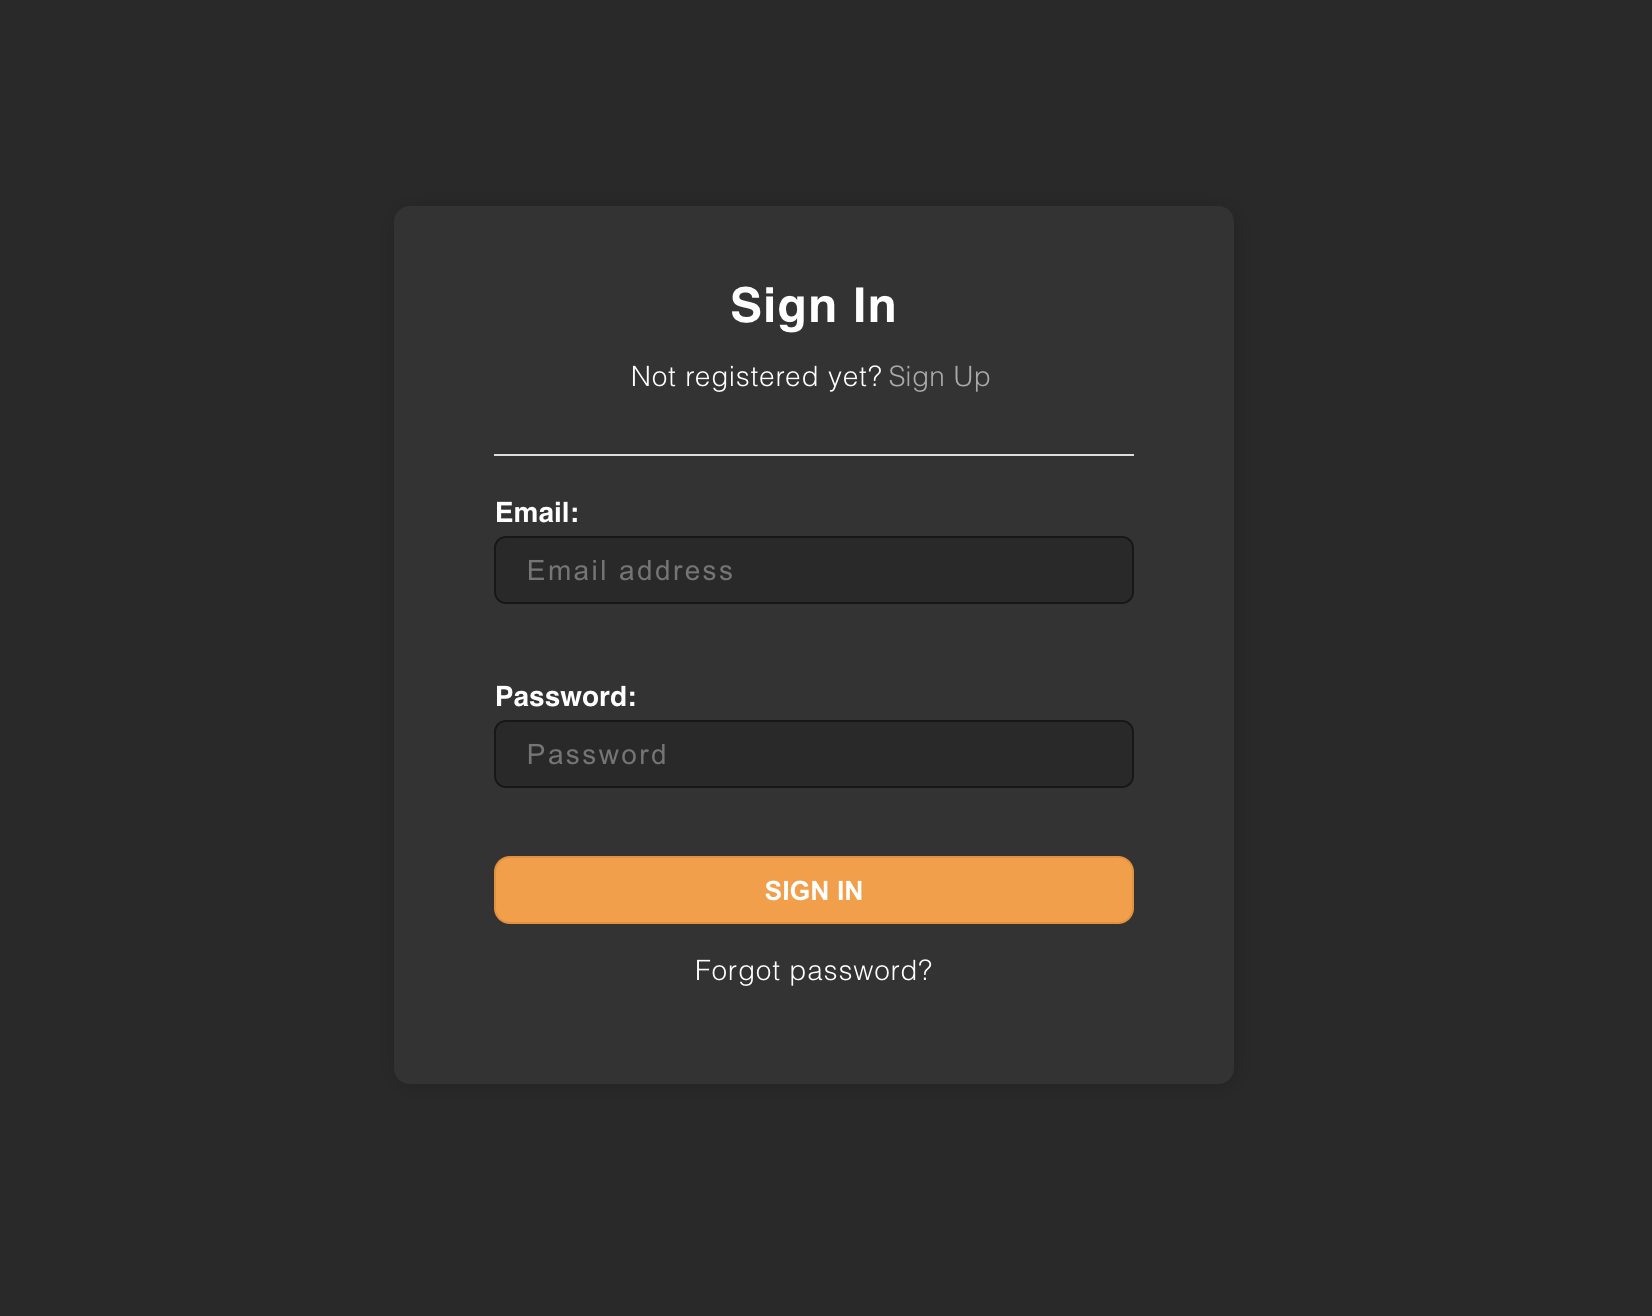 :::important
Changes to the palette apply to all the UI components provided. If you want to change a specific component, please see [this section](changing-style).
:::
### Palette values
| Variable Name | Description | Default Value |
|--------------|-------------|---------------|
| `background` | Background color of all forms | `255, 255, 255` (white) |
| `inputBackground` | Background color of input fields | `250, 250, 250` (light grey) |
| `inputBorder` | Border color of input fields | `224, 224, 224` (light grey) |
| `primary` | Primary color for focused inputs, success states and button backgrounds | `28, 34, 42` |
| `primaryBorder` | Border color for primary buttons | `45, 54, 68` |
| `success` | Color used for success events | `65, 167, 0` (green) |
| `successBackground` | Background color for success notifications | `217, 255, 191` (green) |
| `error` | Color for error highlights and messages | `255, 23, 23` (red) |
| `errorBackground` | Background color for error notifications | `255, 241, 235` (red) |
| `textTitle` | Color of form titles | `0, 0, 0` (black) |
| `textLabel` | Color of form field labels | `0, 0, 0` (black) |
| `textInput` | Color of text in form fields | `0, 0, 0` (black) |
| `textPrimary` | Color of subtitles and footer text | `128, 128, 128` (grey) |
| `textLink` | Color of links | `0, 122, 255` (blue) |
| `buttonText` | Color of text in main buttons | `255, 255, 255` (white) |
| `superTokensBrandingBackground` | Color of SuperTokens branding element | `242, 245, 246` (Alice blue) |
| `superTokensBrandingText` | Color of "Powered by SuperTokens" text | `173, 189, 196` (heather grey) |
# References - Frontend SDKs - User Interface - ## Overview
Source: https://supertokens.com/docs/references/frontend-sdks/prebuilt-ui/changing-style
Updating the CSS allows you to change the UI of the components to meet your needs.
This section guides you through an example of updating the look of buttons.
Note that the process can update any HTML tag from within SuperTokens components.
## Before you start
:::caution no-title
This example is relevant only if you use the prebuilt UI components.
:::
---
## Global style changes
First, open the website at `/auth`. The Sign-in widget should show up. Use the browser console to find out the class name that you'd like to overwrite.
:::important
Changes to the palette apply to all the UI components provided. If you want to change a specific component, please see [this section](changing-style).
:::
### Palette values
| Variable Name | Description | Default Value |
|--------------|-------------|---------------|
| `background` | Background color of all forms | `255, 255, 255` (white) |
| `inputBackground` | Background color of input fields | `250, 250, 250` (light grey) |
| `inputBorder` | Border color of input fields | `224, 224, 224` (light grey) |
| `primary` | Primary color for focused inputs, success states and button backgrounds | `28, 34, 42` |
| `primaryBorder` | Border color for primary buttons | `45, 54, 68` |
| `success` | Color used for success events | `65, 167, 0` (green) |
| `successBackground` | Background color for success notifications | `217, 255, 191` (green) |
| `error` | Color for error highlights and messages | `255, 23, 23` (red) |
| `errorBackground` | Background color for error notifications | `255, 241, 235` (red) |
| `textTitle` | Color of form titles | `0, 0, 0` (black) |
| `textLabel` | Color of form field labels | `0, 0, 0` (black) |
| `textInput` | Color of text in form fields | `0, 0, 0` (black) |
| `textPrimary` | Color of subtitles and footer text | `128, 128, 128` (grey) |
| `textLink` | Color of links | `0, 122, 255` (blue) |
| `buttonText` | Color of text in main buttons | `255, 255, 255` (white) |
| `superTokensBrandingBackground` | Color of SuperTokens branding element | `242, 245, 246` (Alice blue) |
| `superTokensBrandingText` | Color of "Powered by SuperTokens" text | `173, 189, 196` (heather grey) |
# References - Frontend SDKs - User Interface - ## Overview
Source: https://supertokens.com/docs/references/frontend-sdks/prebuilt-ui/changing-style
Updating the CSS allows you to change the UI of the components to meet your needs.
This section guides you through an example of updating the look of buttons.
Note that the process can update any HTML tag from within SuperTokens components.
## Before you start
:::caution no-title
This example is relevant only if you use the prebuilt UI components.
:::
---
## Global style changes
First, open the website at `/auth`. The Sign-in widget should show up. Use the browser console to find out the class name that you'd like to overwrite.
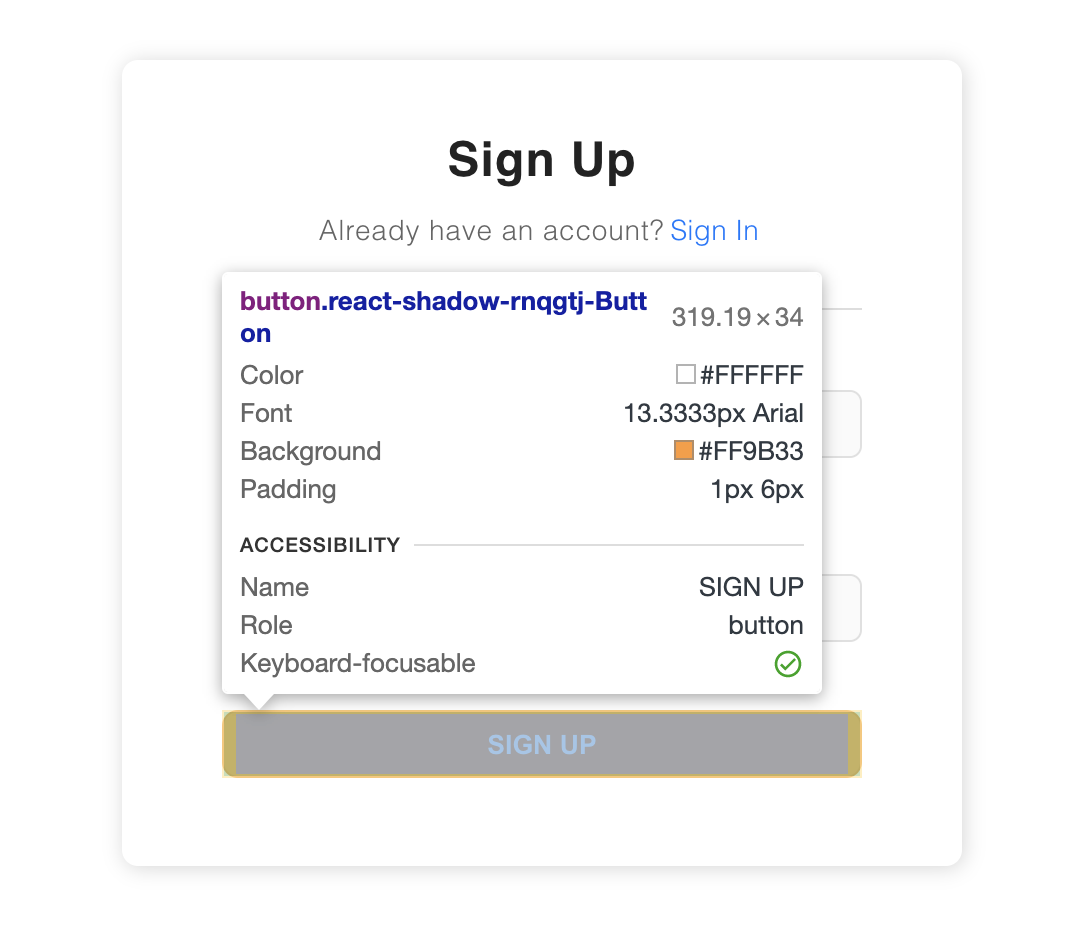
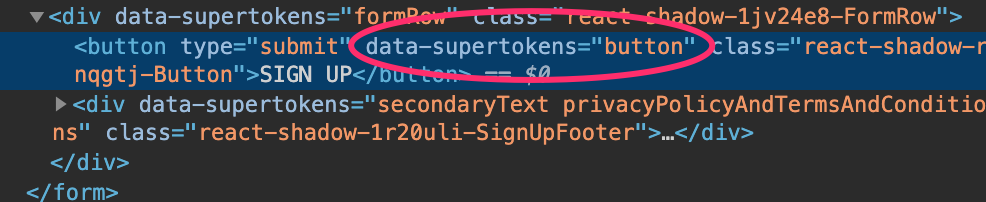 Each stylable component contains `data-supertokens` attributes (in this example `data-supertokens="button"`).
Let's customize elements with the `button` attribute. The syntax for styling is plain CSS.
Each stylable component contains `data-supertokens` attributes (in this example `data-supertokens="button"`).
Let's customize elements with the `button` attribute. The syntax for styling is plain CSS.
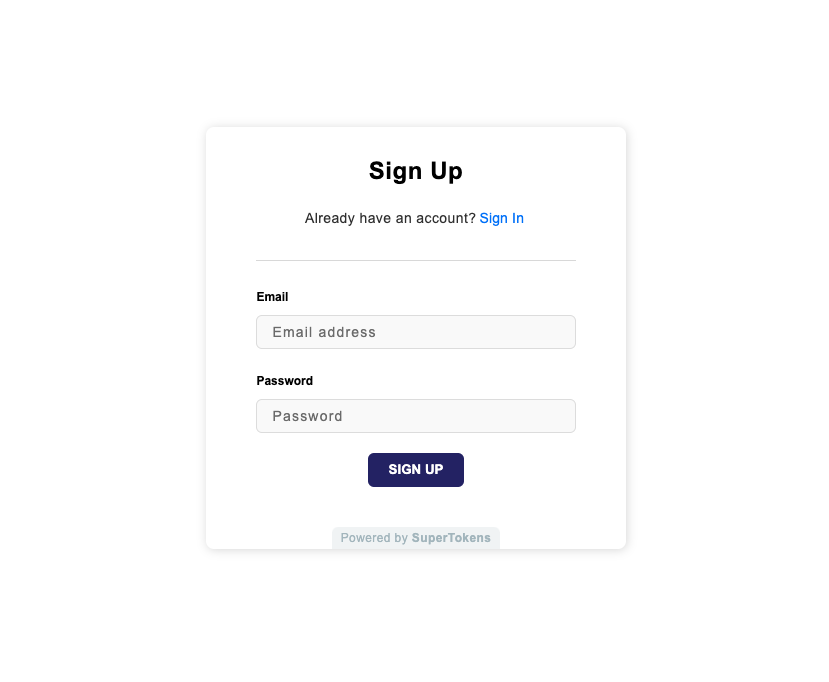 ### Changing fonts
By default, SuperTokens uses the `Arial` font. The best way to override this is to add a `font-family` styling to the `container` component in the recipe configuration.
### Changing fonts
By default, SuperTokens uses the `Arial` font. The best way to override this is to add a `font-family` styling to the `container` component in the recipe configuration.
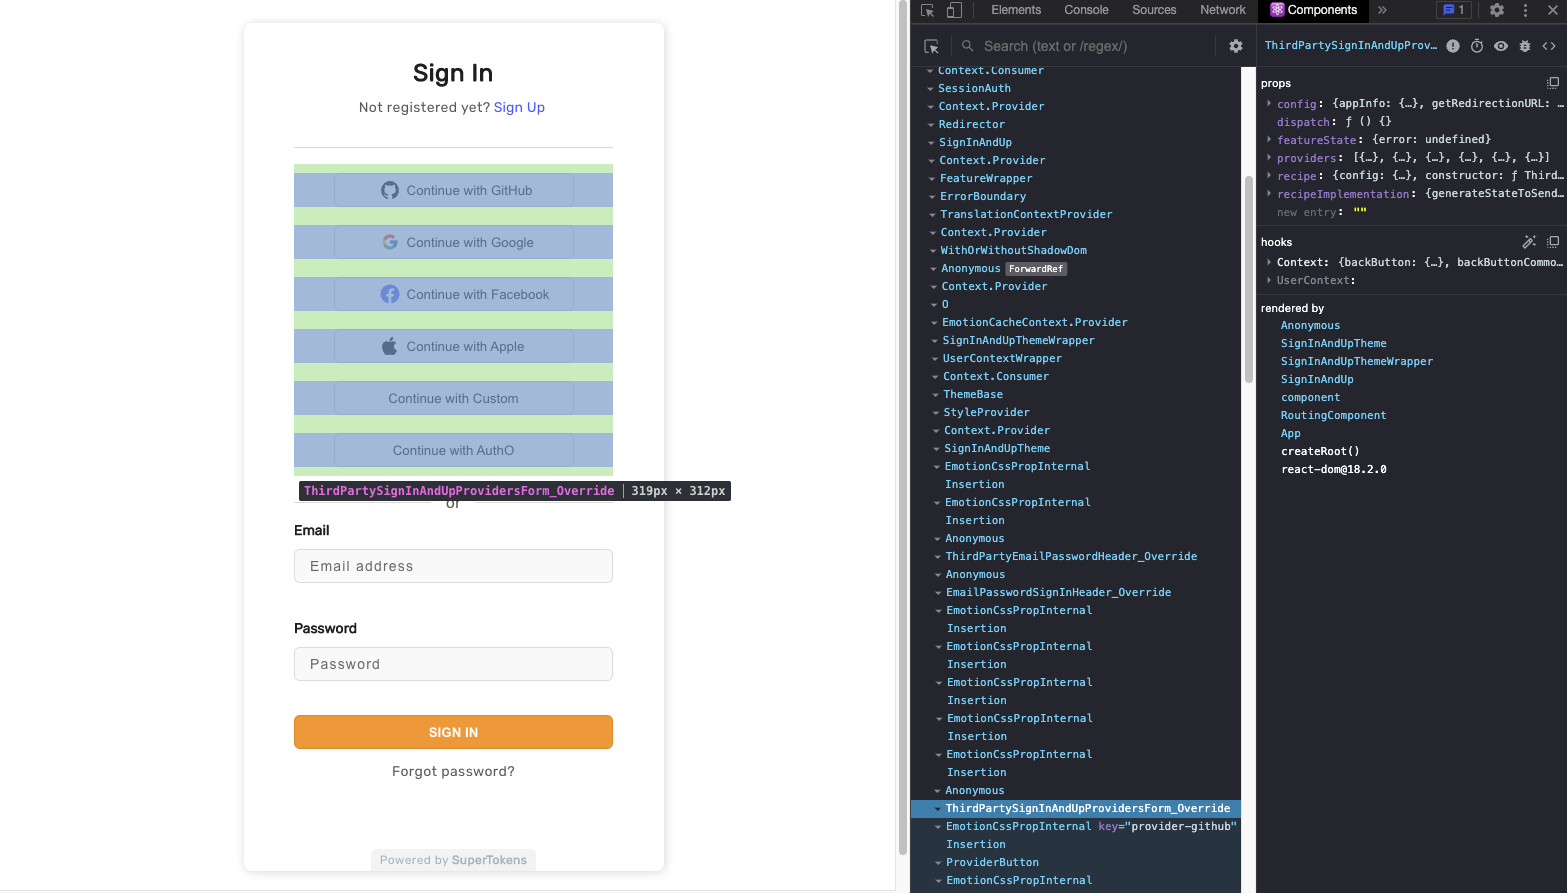 ### 2. Add your override
Inside the `SuperTokensWrapper`, update the recipe specific override context with your next component.
Make sure that it your override renders the SuperTokens components inside it.
### 2. Add your override
Inside the `SuperTokensWrapper`, update the recipe specific override context with your next component.
Make sure that it your override renders the SuperTokens components inside it.

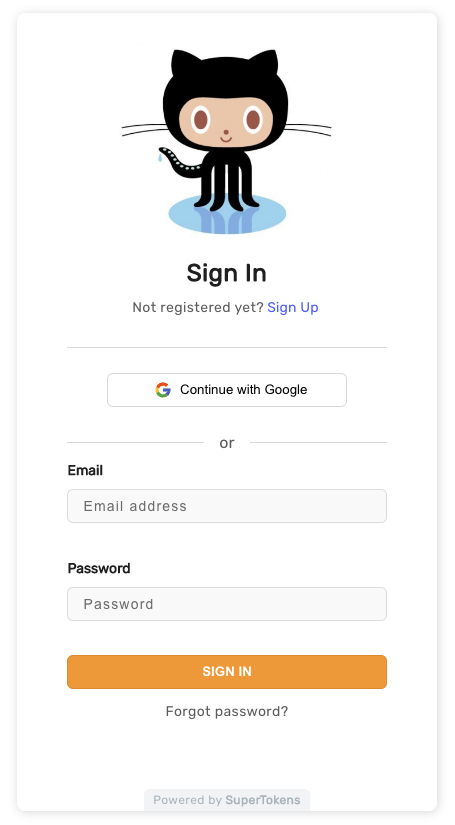 :::important
Please make sure that you specify the configuration in a `.tsx` or ` .jsx` file type.
:::
# References - Frontend SDKs - User Interface - ## Before you start
Source: https://supertokens.com/docs/references/frontend-sdks/prebuilt-ui/embed-sign-in-up-form
:::caution no-title
This example is relevant only if you use the React SDK with prebuilt UI components.
:::
---
## Render the form in a page
The following example shows the scenario where you have a dedicated route, such as `/auth`, for rendering the Auth Widget. Upon a successful login, the user automatically redirects to the return value of `getRedirectionURL` (defaulting to `/`).
:::important
Please make sure that you specify the configuration in a `.tsx` or ` .jsx` file type.
:::
# References - Frontend SDKs - User Interface - ## Before you start
Source: https://supertokens.com/docs/references/frontend-sdks/prebuilt-ui/embed-sign-in-up-form
:::caution no-title
This example is relevant only if you use the React SDK with prebuilt UI components.
:::
---
## Render the form in a page
The following example shows the scenario where you have a dedicated route, such as `/auth`, for rendering the Auth Widget. Upon a successful login, the user automatically redirects to the return value of `getRedirectionURL` (defaulting to `/`).
{sessionContext.doesSessionExist && (
// We wrap this with
)}
{/* highlight-next-line */}
);
}
```
You are logged In!
UserId: {sessionContext.userId}
{sessionContext.doesSessionExist && (
// We wrap this with
)}
{/* highlight-next-line */}
);
}
```
You are logged In!
UserId: {sessionContext.userId}
{sessionContext.doesSessionExist && (
// We wrap this with
)}
{/* highlight-next-line */}
);
}
```
You are logged In!
UserId: {sessionContext.userId}
{t("MY_TRANSLATION_KEY") /* You can use your own custom translation keys as well as the default ones */}
## `websiteDomain` This is the domain part of your website. This is where the login UI appears. For example: - For local development, you are likely using `localhost` with some port (ex `8080`). Then the value of this should be `"http://localhost:8080"`. - If your website is `https://www.example.com`, then the value of this should be `"https://www.example.com"`. - If your website is `https://example.com`, then the value of this should be `"https://example.com"`. - If you have multiple sub domains, and your users login via `https://auth.example.com`, then the value of this should be `"https://auth.example.com"`. By default, the login UI appears on `{websiteDomain}/auth/*`. You can change this by using the `websiteBasePath` configuration. On the frontend, you need the domain for routing purposes, and on the backend, it generates correct email verification and password reset links.
## `apiDomain` This is the domain part of your API endpoint that the frontend talks to. For example: - For local development, you are likely using `localhost` with some port (ex `9000`). Then the value of this should be `"http://localhost:9000"`. - If your frontend queries `https://api.example.com/*`, then the value of this should be `"https://api.example.com"` - If your API endpoint reaches `/api/*`, then the value of this is the same as the `websiteDomain` - since `/api/*` is equal to querying `{websiteDomain}/api/*`. By default, the login widgets query `{apiDomain}/auth/*`. You can change this by using the `apiBasePath` configuration.
## `websiteBasePath` By default, the login UI appears on `{websiteDomain}/auth`. Other authentication-related user interfaces appear on `{websiteDomain}/auth/*`. If you want to change the `/auth` to something else, then you must set this value. For example: - If you want the login UI to show on `{websiteDomain}/user/*`, then the value of this should be `"/user"`. - If you are using a dedicated sub domain for auth, like `https://auth.example.com`, then you probably want the login UI to show up on `https://auth.example.com`. In this case, set this value to `"/"`. :::important Remember to set the same value for this parameter on the backend and the frontend. :::
## `apiBasePath` By default, the frontend SDK queries `{apiDomain}/auth/*`. If you want to change the `/auth` to something else, then you must set this value. For example: - If you have versioning in your API path and want to query `{apiDomain}/v0/auth/*`, then the value of this should be `"/v0/auth"`. - If you want to scope the APIs not via `/auth` but via some other string like `/supertokens`, then you can set the value of this to `"/supertokens"`. This means, the APIs appear on `{apiDomain}/supertokens/*`. - If you do not want to scope the APIs at all, then you can set the values of this to be `"/"`. This means the APIs are available on `{apiDomain}/*` :::important Remember to set the same value for this parameter on the backend and the frontend. ::: :::caution Note that setting a custom `apiBasePath` updates the refresh API path, this can cause an issue where previously issued refresh tokens no longer get sent to the new API endpoint and the user logs out. For example, the default `apiBasePath` value is `/auth`, if it changes to `/supertokens`, then your refresh endpoint updates from `/auth/session/refresh` to `/supertokens/session/refresh`. Previously issued refresh tokens do not get sent to the new API endpoint and the user logs out. :::
## `apiGatewayPath` :::note Most relevant if you are using an API gateway or reverse proxy ::: If you are using an API gateway (like the one provided by AWS) or a reverse proxy (like Nginx), it may add a path to your API endpoints to scope them for different development environments. For example, your APIs for development appear via `{apiDomain}/dev/*`, and for production, they may appear via `{apiDomain}/prod/*`. Whilst the frontend would need to use the `/dev/` and `/prod/`, your backend code would not see that sub path (that is `/dev/` and `/prod/` because the gateway removes them). For these situations, you should set the `apiGatewayPath` to `/dev` or `/prod`. For example: - If your API gateway is using `/development` for scoping, and you want to expose the SuperTokens APIs on `/supertokens/*`, then set `apiGatewayPath: "/development"` & `apiBasePath: "/supertokens"`. This means that the frontend SDK queries `{apiDomain}/development/supertokens/*` to reach the endpoints exposed by the service. - If you set this and not `apiBasePath`, then the frontend SDK queries `{apiDomain}{apiGatewayPath}/auth/*` to reach the endpoints exposed by the service. The reason for this distinction between `apiGatewayPath` and `apiBasePath` is that when routing, the backend SDK does not see the `apiGatewayPath` path from the request because the gateway removes them. Taking the above example, whilst the frontend queries `{apiDomain}/development/supertokens/*`, the backend SDK sees `{apiDomain}/supertokens/*`.
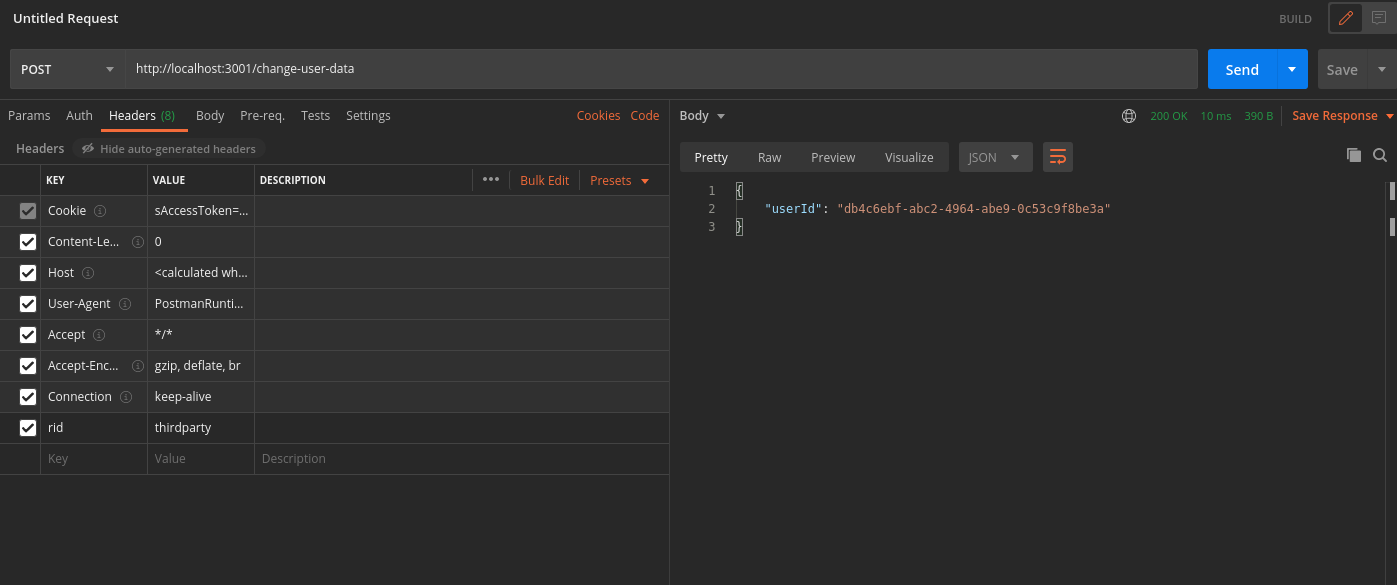 In case you query the `/change-user-data` API with an expired access token, you receive a `401` response with the message `try refresh token`.
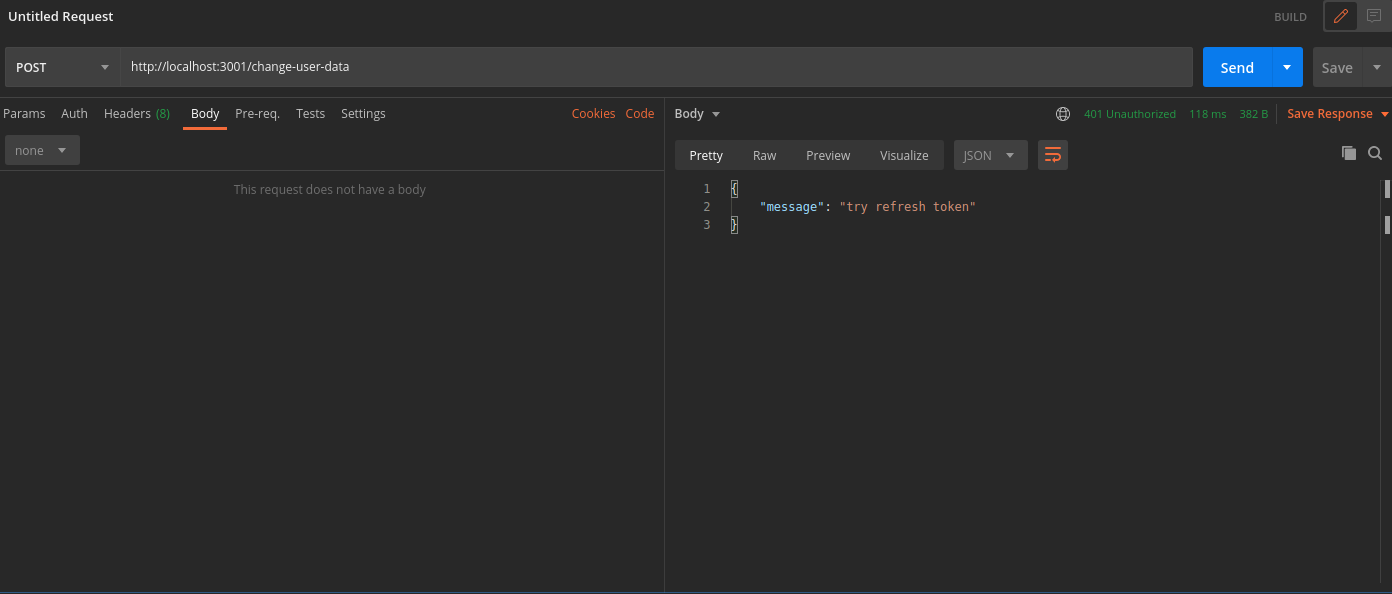 To generate new session tokens you can use the `/auth/session/refresh` API as shown in the next section.
## 3. Refreshing session tokens
In case your `access token` expires you can call the `/auth/session/refresh` API to generate a new `access token` and `refresh token`.
- In Postman, set the request type to `POST`.
- Set the URL to `http://localhost:3001/auth/session/refresh`
- On a successful response, the system sets new session tokens.
To generate new session tokens you can use the `/auth/session/refresh` API as shown in the next section.
## 3. Refreshing session tokens
In case your `access token` expires you can call the `/auth/session/refresh` API to generate a new `access token` and `refresh token`.
- In Postman, set the request type to `POST`.
- Set the URL to `http://localhost:3001/auth/session/refresh`
- On a successful response, the system sets new session tokens.
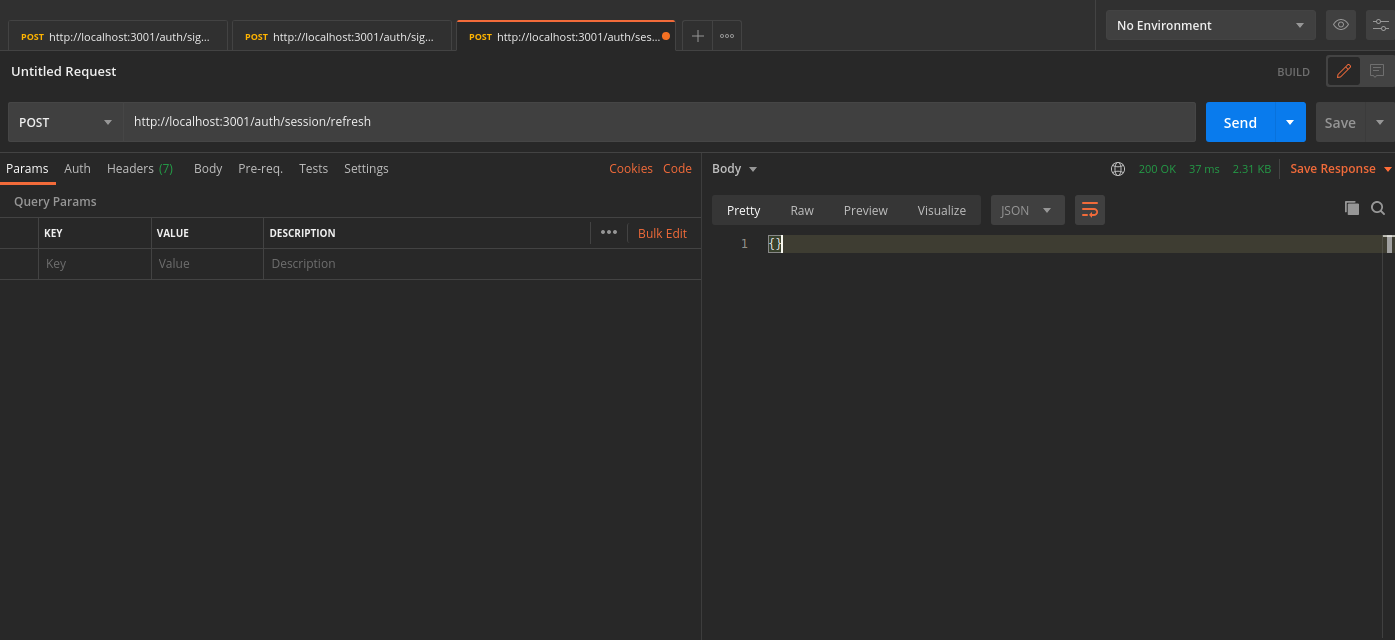 You can see the new session tokens by switching to the cookies tab
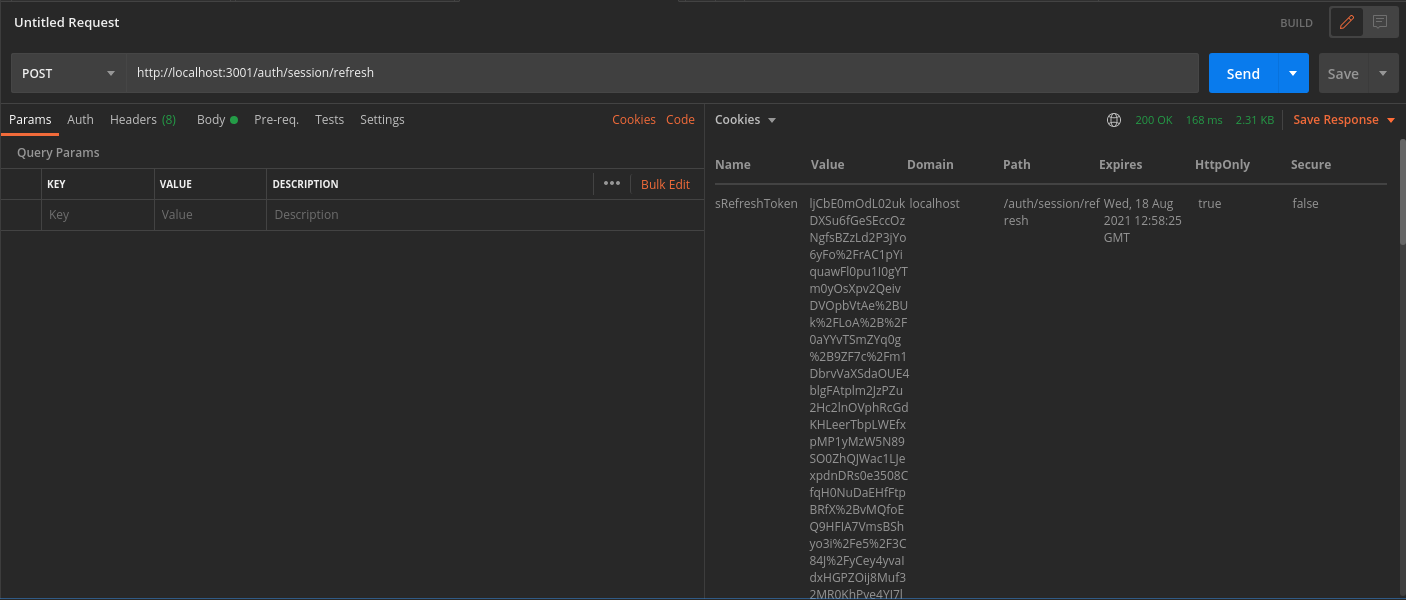 ## 4. Logout
The `/auth/signout` API invalidates the user sessions. This clears the session cookies set in Postman.
- In Postman, set the request type to `POST`.
- Set the URL to `http://localhost:3001/auth/signout`
- On a successful response, Postman and the database clear the session tokens.
## 4. Logout
The `/auth/signout` API invalidates the user sessions. This clears the session cookies set in Postman.
- In Postman, set the request type to `POST`.
- Set the URL to `http://localhost:3001/auth/signout`
- On a successful response, Postman and the database clear the session tokens.
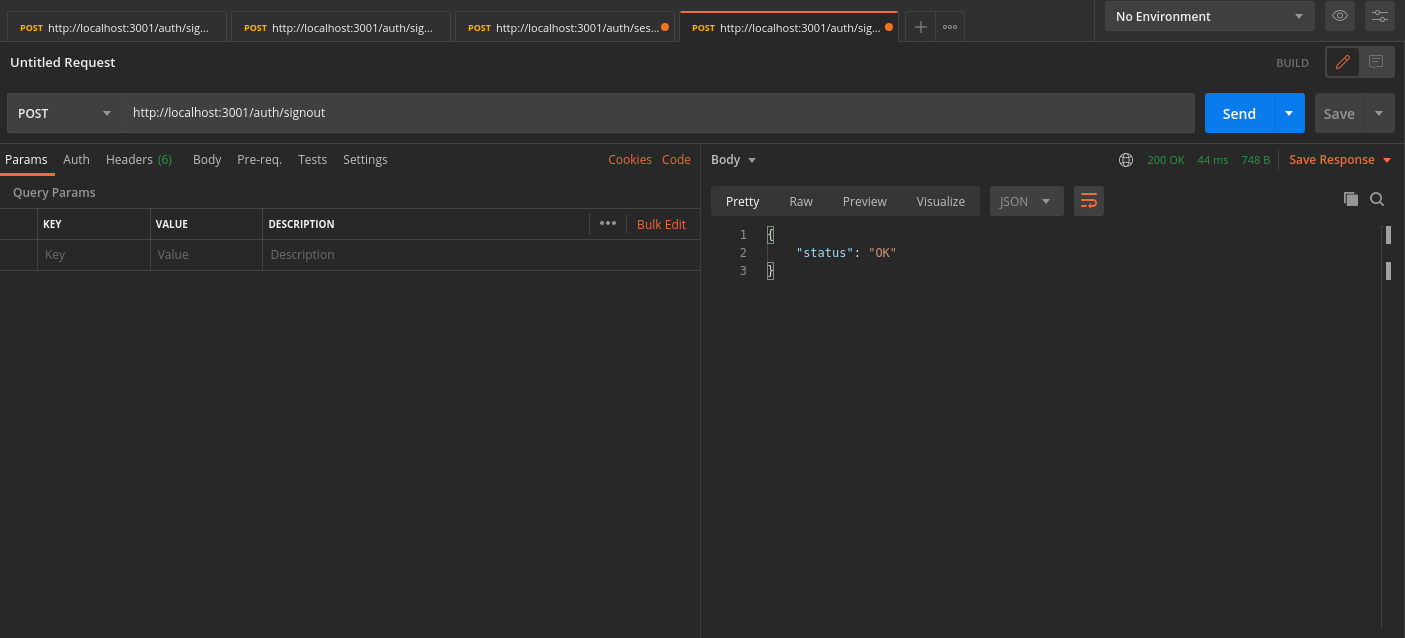 # References - Testing and Debugging - How to enable debug logs
Source: https://supertokens.com/docs/references/testing-and-debugging/how-to-troubleshoot
## Backend logs
:::important
This is only available on versions:
- SuperTokens-node >= v9.1.2
- SuperTokens-golang >= v0.5.5
- SuperTokens-python >= v0.6.3
:::
Our backend SDK provides useful logs that can help with debugging.
To enable logging, you need to set the debug setting to `true` in the `init` function call:
# References - Testing and Debugging - How to enable debug logs
Source: https://supertokens.com/docs/references/testing-and-debugging/how-to-troubleshoot
## Backend logs
:::important
This is only available on versions:
- SuperTokens-node >= v9.1.2
- SuperTokens-golang >= v0.5.5
- SuperTokens-python >= v0.6.3
:::
Our backend SDK provides useful logs that can help with debugging.
To enable logging, you need to set the debug setting to `true` in the `init` function call:


### Origin http://localhost:3000 is not allowed by Access-Control-Allow-Origin. Status code: 204 A couple of cases might cause this to happen. 1. When the `Access-Control-Allow-Origin` doesn't have `http://localhost:3000` (website domain) in its values and the website request gets blocked. Ensure the `origin` field lines up with the website domain located in other parts of the code to remedy this issue. 2. The CORS middleware is after the SuperTokens middleware - in this case, the OPTIONS API has the right value for `Access-Control-Allow-Origin`, but the actual `GET` / `POST` / `PUT` API does not since the SuperTokens middleware returns a response before the CORS middleware is even called. To fix this, put the CORS middleware before the SuperTokens middleware. 3. Another variant of this error occurs when the OPTIONS API returns a 404 error. If the `origin` field is correctly set up, then the error is likely a misconfigured API gateway or reverse proxy. ```tsx supertokens.init({ supertokens: { connectionURI: "...", }, appInfo: { appName: "...", apiDomain: "...", // highlight-next-line websiteDomain: "http://localhost:3000", }, recipeList: [/* ... */], }); const app = express(); app.use( cors({ //highlight-start origin: "http://localhost:3000", // Make sure this is the same as the website domain //highlight-end allowedHeaders: ["content-type", ...supertokens.getAllCORSHeaders()], methods: ["GET", "PUT", "POST", "DELETE"], credentials: true, }) ); ```
--- ### Cannot use wildcard in Access-Control-Allow-Origin when credentials flag is true. This appears when `Access-Control-Allow-Origin` header uses `*`. To fix, add the correct origin value in the CORS settings. ```tsx const app = express(); app.use( cors({ //highlight-start origin: "http://localhost:3000", // Make sure this is the same as the website domain //highlight-end allowedHeaders: ["content-type", ...supertokens.getAllCORSHeaders()], methods: ["GET", "PUT", "POST", "DELETE"], credentials: true, }) ); ```
--- ### Origin 'HTTP://localhost:3000' gets blocked by CORS policy ... the value of 'Access-Control-Allow-Origin' header in the response must not be the wildcard '*' when the request's credential mode is 'include' Similar to the previous issue, this appears when `Access-Control-Allow-Origin` header includes `*`. To fix, add in the correct origin value, `http://localhost:3000` in this case, in the CORS settings. ```tsx const app = express(); app.use( cors({ //highlight-start origin: "http://localhost:3000", // Make sure this is the same as the website domain //highlight-end allowedHeaders: ["content-type", ...supertokens.getAllCORSHeaders()], methods: ["GET", "PUT", "POST", "DELETE"], credentials: true, }) ); ``` --- Have an error not mentioned above? Join the [discord server](https://supertokens.com/discord) and we will provide assistance to debug the error! # References - Updating SuperTokens core and SDKs Source: https://supertokens.com/docs/references/updating-supertokens ## Overview Follow these steps to update SuperTokens. To maintain compatibility and keep up on new features, you should update your core and SDKs whenever possible. --- ## Update SuperTokens core You need to shut down your core to update it. After it's off, run the migration scripts for all versions in-between your starting version and the latest version. You may then bring your core back online. ### Self-hosted core See the migration sections in the [SuperTokens-core changelog](https://github.com/supertokens/supertokens-core/blob/master/CHANGELOG.md). ### Managed core Access the the [SaaS dashboard](https://supertokens.com/dashboard) and click on the **Upgrade** button. You can find the action in the top right corner of the environment card. --- ## Update the Backend SDK Follow the steps in the migration sections of the linked changelog from your current version up to the latest version. | Backend | Changelog | |---------|-----------| | NodeJS | [SuperTokens-node](https://github.com/supertokens/supertokens-node/blob/master/CHANGELOG.md) | | GoLang | [SuperTokens-golang](https://github.com/supertokens/supertokens-golang/blob/master/CHANGELOG.md) | | Python | [SuperTokens-python](https://github.com/supertokens/supertokens-python/blob/master/CHANGELOG.md) | --- ## Update the Frontend SDK Follow the steps in the migration sections of the linked changelog from your current version up to the latest version. | Framework/Platform | Changelog | |-------------------|-----------| | ReactJS | [SuperTokens-auth-react](https://github.com/supertokens/supertokens-auth-react/blob/master/CHANGELOG.md) | | Vanilla JS | [SuperTokens-web-js](https://github.com/supertokens/supertokens-web-js/blob/master/CHANGELOG.md) | | React Native | [SuperTokens-react-native](https://github.com/supertokens/supertokens-react-native/blob/master/CHANGELOG.md) | | iOS | [SuperTokens-ios](https://github.com/supertokens/supertokens-ios/blob/master/CHANGELOG.md) | | Flutter | [SuperTokens-flutter](https://github.com/supertokens/supertokens-flutter/blob/master/CHANGELOG.md) | | Android | [SuperTokens-android](https://github.com/supertokens/supertokens-android/blob/master/CHANGELOG.md) | # Frontend Driver Interface Source: https://supertokens.com/docs/references/fdi/introduction ## Overview The **FDI**, Frontend Driver Interface, is the API exposed by the **SuperTokens Backend SDKs**. It is meant to be consumed only by your frontend applications. :::info no-title In most cases, you don't need to directly interact with the API, since the existing [frontend SDKS](/docs/references/backend-sdks/reference) are built on top of it. If you are using something that does not have SDK support, then you can make use of the FDI resources. ::: ### URL Structure All the endpoints are prefixed with `{apiBasePath}`. This is the property with the same name that you set during [backend SDK initialization](/docs/quickstart/backend-setup#2-initialize-the-sdk). Tenant specific actions include a `{tenantId}` parameter. If not set, the default tenant will be used. Given the following endpoint: `/{apiBasePath}/{tenantId}/signinup`, and the `apiBasePath` set to `auth` during [initialization](/docs/quickstart/backend-setup#2-initialize-the-sdk): - You can call it without the actual parameter, using `/auth/signinup` in your action. - You can set the values to target a specific tenant: `/auth/myTenant/signinup`. ### Versioning At the moment, the documentation pages only show the latest version of the API. If you want to check an older release, please access the [Swagger page](https://app.swaggerhub.com/apis/supertokens/FDI) To know which version you should see: 1. Go to the GitHub page of the backend or frontend SDK you are using 2. Switch to the branch that matches the version of the SDK 3. Open the file called `frontendDriverInterfaceSupported.json` 4. In there, you see an array of `X.Y` values, pick the latest one, and see the API spec for that. ## Authentication Since this API allows users to sign up or login, most of the endpoints do not require any type of credentials. However, in some situations you have to authenticate your requests. In those cases, you need to choose between using cookies or headers. The method that you have to use depends on the [token transfer method](/docs/post-authentication/session-management/switch-between-cookies-and-header-authentication) used in your application. ## Get MFA factors information Source: https://supertokens.com/docs/references/fdi/mfa/put-mfa-info Endpoint: PUT /{apiBasePath}/mfa/info ## List TOTP devices Source: https://supertokens.com/docs/references/fdi/mfa/get-totp-device-list Endpoint: GET /{apiBasePath}/totp/device/list ## Create TOTP device Source: https://supertokens.com/docs/references/fdi/mfa/post-totp-device Endpoint: POST /{apiBasePath}/totp/device ## Remove TOTP device Source: https://supertokens.com/docs/references/fdi/mfa/post-totp-device-remove Endpoint: POST /{apiBasePath}/totp/device/remove ## Verify TOTP device Source: https://supertokens.com/docs/references/fdi/mfa/post-totp-device-verify Endpoint: POST /{apiBasePath}/totp/device/verify ## Verify TOTP code Source: https://supertokens.com/docs/references/fdi/mfa/post-totp-verify Endpoint: POST /{apiBasePath}/totp/verify ## Start passwordless sign in/up Source: https://supertokens.com/docs/references/fdi/passwordless/post-signinup-code Endpoint: POST /{apiBasePath}/{tenantId}/signinup/code ## Resend passwordless code Source: https://supertokens.com/docs/references/fdi/passwordless/post-signinup-code-resend Endpoint: POST /{apiBasePath}/{tenantId}/signinup/code/resend ## Complete passwordless sign in/up Source: https://supertokens.com/docs/references/fdi/passwordless/post-signinup-code-consume Endpoint: POST /{apiBasePath}/{tenantId}/signinup/code/consume ## Check email exists Source: https://supertokens.com/docs/references/fdi/passwordless/get-passwordless-email-exists Endpoint: GET /{apiBasePath}/{tenantId}/passwordless/email/exists ## Check phone exists Source: https://supertokens.com/docs/references/fdi/passwordless/get-passwordless-phoneNumber-exists Endpoint: GET /{apiBasePath}/{tenantId}/passwordless/phoneNumber/exists ## Sign out user Source: https://supertokens.com/docs/references/fdi/session/post-signout Endpoint: POST /{apiBasePath}/signout ## Refresh user session Source: https://supertokens.com/docs/references/fdi/session/post-session-refresh Endpoint: POST /{apiBasePath}/session/refresh ## Sign in with email Source: https://supertokens.com/docs/references/fdi/email-password/post-signin Endpoint: POST /{apiBasePath}/{tenantId}/signin ## Sign up with email Source: https://supertokens.com/docs/references/fdi/email-password/post-signup Endpoint: POST /{apiBasePath}/{tenantId}/signup ## Check email exists Source: https://supertokens.com/docs/references/fdi/email-password/get-emailpassword-email-exists Endpoint: GET /{apiBasePath}/{tenantId}/emailpassword/email/exists ## Generate password reset token Source: https://supertokens.com/docs/references/fdi/email-password/post-user-password-reset-token Endpoint: POST /{apiBasePath}/{tenantId}/user/password/reset/token ## Reset user password Source: https://supertokens.com/docs/references/fdi/email-password/post-user-password-reset Endpoint: POST /{apiBasePath}/{tenantId}/user/password/reset ## Sign in/up with third party Source: https://supertokens.com/docs/references/fdi/thirdparty/post-signinup Endpoint: POST /{apiBasePath}/{tenantId}/signinup ## Get third party auth URL Source: https://supertokens.com/docs/references/fdi/thirdparty/get-authorisationurl Endpoint: GET /{apiBasePath}/{tenantId}/authorisationurl ## Get enabled login methods Source: https://supertokens.com/docs/references/fdi/get-loginmethods Endpoint: GET /{apiBasePath}/{tenantId}/loginmethods ## Handle Apple sign in Source: https://supertokens.com/docs/references/fdi/thirdparty/post-callback-apple Endpoint: POST /{apiBasePath}/callback/apple ## Send email verification Source: https://supertokens.com/docs/references/fdi/email-verification/post-user-email-verify-token Endpoint: POST /{apiBasePath}/{tenantId}/user/email/verify/token ## Verify email address Source: https://supertokens.com/docs/references/fdi/email-verification/post-user-email-verify Endpoint: POST /{apiBasePath}/{tenantId}/user/email/verify ## Check email verification status Source: https://supertokens.com/docs/references/fdi/email-verification/get-user-email-verify Endpoint: GET /{apiBasePath}/user/email/verify ## Get JWT keys Source: https://supertokens.com/docs/references/fdi/get-jwt-jwks-json Endpoint: GET /{apiBasePath}/jwt/jwks.json ## Get OpenID config Source: https://supertokens.com/docs/references/fdi/get-well-known-openid-configuration Endpoint: GET /{apiBasePath}/.well-known/openid-configuration ## Continue OAuth login Source: https://supertokens.com/docs/references/fdi/oauth/get-oauth-login Endpoint: GET /{apiBasePath}/oauth/login ## Start OAuth login Source: https://supertokens.com/docs/references/fdi/oauth/get-oauth-auth Endpoint: GET /{apiBasePath}/oauth/auth ## Exchange OAuth grant Source: https://supertokens.com/docs/references/fdi/oauth/post-oauth-token Endpoint: POST /{apiBasePath}/oauth/token ## Get OAuth user info Source: https://supertokens.com/docs/references/fdi/oauth/get-oauth-userinfo Endpoint: GET /{apiBasePath}/oauth/userinfo ## Revoke OAuth token Source: https://supertokens.com/docs/references/fdi/oauth/post-oauth-revoke Endpoint: POST /{apiBasePath}/oauth/revoke ## Introspect OAuth token Source: https://supertokens.com/docs/references/fdi/oauth/post-oauth-introspect Endpoint: POST /{apiBasePath}/oauth/introspect ## End OAuth session Source: https://supertokens.com/docs/references/fdi/oauth/post-oauth-end_session Endpoint: POST /{apiBasePath}/oauth/end_session ## End session redirect Source: https://supertokens.com/docs/references/fdi/oauth/get-oauth-end_session Endpoint: GET /{apiBasePath}/oauth/end_session ## Get OAuth login info Source: https://supertokens.com/docs/references/fdi/oauth/get-oauth-logininfo Endpoint: GET /{apiBasePath}/oauth/logininfo ## Logout OAuth user Source: https://supertokens.com/docs/references/fdi/oauth/post-oauth-logout Endpoint: POST /{apiBasePath}/oauth/logout ## Test authentication Source: https://supertokens.com/docs/references/fdi/get-example Endpoint: GET /example ## Get WebAuthn registration options Source: https://supertokens.com/docs/references/fdi/webauthn/post-webauthn-register-options Endpoint: POST /{apiBasePath}/{tenantId}/webauthn/register/options ## Get WebAuthn sign in options Source: https://supertokens.com/docs/references/fdi/webauthn/post-webauthn-signin-options Endpoint: POST /{apiBasePath}/{tenantId}/webauthn/signin/options ## Sign up with WebAuthn Source: https://supertokens.com/docs/references/fdi/webauthn/post-webauthn-signup Endpoint: POST /{apiBasePath}/{tenantId}/webauthn/signup ## Sign in with WebAuthn Source: https://supertokens.com/docs/references/fdi/webauthn/post-webauthn-signin Endpoint: POST /{apiBasePath}/{tenantId}/webauthn/signin ## Generate WebAuthn recovery token Source: https://supertokens.com/docs/references/fdi/webauthn/post-webauthn-recover-account-token Endpoint: POST /{apiBasePath}/{tenantId}/webauthn/recover/account/token ## Recover WebAuthn account Source: https://supertokens.com/docs/references/fdi/webauthn/post-webauthn-recover-account Endpoint: POST /{apiBasePath}/{tenantId}/webauthn/recover/account ## Register WebAuthn credential Source: https://supertokens.com/docs/references/fdi/webauthn/post-webauthn-credential Endpoint: POST /{apiBasePath}/{tenantId}/webauthn/credential ## Check WebAuthn email exists Source: https://supertokens.com/docs/references/fdi/webauthn/get-webauthn-email-exists Endpoint: GET /{apiBasePath}/{tenantId}/webauthn/email/exists # Core Driver Interface Source: https://supertokens.com/docs/references/cdi/introduction ## Overview The **CDI**, Core Driver Interface, is the API exposed by the **SuperTokens Core** service. It is meant to be consumed only by your backend only. :::info no-title In most cases, you don't need to directly interact with the API, since the existing [backend SDKS](/docs/references/backend-sdks/reference) are built on top of it. ::: ### URL Structure Most of the endpoints take in two path parameters: `appid-{appId}` and `{tenantId}`. Both are optional. If not set, the default app and tenant will be used. Given the following endpoint: `/appid-{appId}/{tenantId}/recipe/totp/device/verify`: - You can call it without the actual path parameters, using `/recipe/totp/device/verify` in your action. - You can set both values and end up with a path that looks like this: `/appid-myApp/myTenant/recipe/totp/device/verify`. ### Versioning At the moment, the documentation pages only show the latest version of the API. If you want to check an older release, please access the [Swagger page](https://app.swaggerhub.com/apis/supertokens/CDI) To know which version you should see: 1. Check the version of the core you are running (for managed service, visit the dashboard, else run `supertokens --version` command) 2. Go to the [**SuperTokens Core** GitHub page](https://github.com/supertokens/supertokens-core) 3. Switch to the branch that matches the version of the core your running 4. Open the file called `coreDriverInterfaceSupported.json` 5. In there, you see an array of `X.Y` values, pick the latest one, and see the API spec for that. ## Authentication The API uses JWT tokens for authentication. In order for the core service to accept a request you need to set the `api-key` header with the value of your token. If you are using the managed service, the token can be accessed from [the dashboard](https://supertokens.com/dashboard-saas). In the context of a self-hosted instance, keys are not created by default. You have to explicitly [generate them](/docs/platform-configuration/supertokens-core/api-keys). ## Check primary user creation possibility Source: https://supertokens.com/docs/references/cdi/account-linking/get-accountlinking-user-primary-check Endpoint: GET /appid-{appId}/recipe/accountlinking/user/primary/check ## Check account linking possibility Source: https://supertokens.com/docs/references/cdi/account-linking/get-accountlinking-user-link-check Endpoint: GET /appid-{appId}/recipe/accountlinking/user/link/check ## Create primary user account Source: https://supertokens.com/docs/references/cdi/account-linking/post-accountlinking-user-primary Endpoint: POST /appid-{appId}/recipe/accountlinking/user/primary ## Link user accounts together Source: https://supertokens.com/docs/references/cdi/account-linking/post-accountlinking-user-link Endpoint: POST /appid-{appId}/recipe/accountlinking/user/link ## Unlink user accounts Source: https://supertokens.com/docs/references/cdi/account-linking/post-accountlinking-user-unlink Endpoint: POST /appid-{appId}/recipe/accountlinking/user/unlink ## Add TOTP device for user Source: https://supertokens.com/docs/references/cdi/mfa/post-totp-device Endpoint: POST /appid-{appId}/recipe/totp/device ## Update TOTP device name Source: https://supertokens.com/docs/references/cdi/mfa/put-totp-device Endpoint: PUT /appid-{appId}/recipe/totp/device ## List user TOTP devices Source: https://supertokens.com/docs/references/cdi/mfa/get-totp-device-list Endpoint: GET /appid-{appId}/recipe/totp/device/list ## Import existing TOTP device Source: https://supertokens.com/docs/references/cdi/mfa/post-totp-device-import Endpoint: POST /recipe/totp/device/import ## Remove TOTP device Source: https://supertokens.com/docs/references/cdi/mfa/post-totp-device-remove Endpoint: POST /appid-{appId}/recipe/totp/device/remove ## Verify TOTP code Source: https://supertokens.com/docs/references/cdi/mfa/post-totp-verify Endpoint: POST /appid-{appId}/{tenantId}/recipe/totp/verify ## Verify TOTP device Source: https://supertokens.com/docs/references/cdi/mfa/post-totp-device-verify Endpoint: POST /appid-{appId}/{tenantId}/recipe/totp/device/verify ## Create user ID mapping Source: https://supertokens.com/docs/references/cdi/core/post-userid-map Endpoint: POST /appid-{appId}/recipe/userid/map ## Get user ID mapping Source: https://supertokens.com/docs/references/cdi/core/get-userid-map Endpoint: GET /appid-{appId}/recipe/userid/map ## Remove user ID mapping Source: https://supertokens.com/docs/references/cdi/core/post-userid-map-remove Endpoint: POST /appid-{appId}/recipe/userid/map/remove ## Update external user info Source: https://supertokens.com/docs/references/cdi/core/put-userid-external-user-id-info Endpoint: PUT /appid-{appId}/recipe/userid/external-user-id-info ## Check passwordless code Source: https://supertokens.com/docs/references/cdi/passwordless/post-signinup-code-check Endpoint: POST /appid-{appId}/{tenantId}/recipe/signinup/code/check ## Consume passwordless code Source: https://supertokens.com/docs/references/cdi/passwordless/post-signinup-code-consume Endpoint: POST /appid-{appId}/{tenantId}/recipe/signinup/code/consume ## Start passwordless sign in Source: https://supertokens.com/docs/references/cdi/passwordless/post-signinup-code Endpoint: POST /appid-{appId}/{tenantId}/recipe/signinup/code ## Revoke passwordless code Source: https://supertokens.com/docs/references/cdi/passwordless/post-signinup-code-remove Endpoint: POST /appid-{appId}/{tenantId}/recipe/signinup/code/remove ## List passwordless codes Source: https://supertokens.com/docs/references/cdi/passwordless/get-signinup-codes Endpoint: GET /appid-{appId}/{tenantId}/recipe/signinup/codes ## Revoke all user codes Source: https://supertokens.com/docs/references/cdi/passwordless/post-signinup-codes-remove Endpoint: POST /appid-{appId}/{tenantId}/recipe/signinup/codes/remove ## Update passwordless user Source: https://supertokens.com/docs/references/cdi/passwordless/put-user Endpoint: PUT /appid-{appId}/{tenantId}/recipe/user ⠀ ## Sign in user Source: https://supertokens.com/docs/references/cdi/email-password/post-signin Endpoint: POST /appid-{appId}/{tenantId}/recipe/signin ## Sign up user Source: https://supertokens.com/docs/references/cdi/email-password/post-signup Endpoint: POST /appid-{appId}/{tenantId}/recipe/signup ## Update user info Source: https://supertokens.com/docs/references/cdi/email-password/put-user Endpoint: PUT /appid-{appId}/{tenantId}/recipe/user ## Generate password reset token Source: https://supertokens.com/docs/references/cdi/email-password/post-user-password-reset-token Endpoint: POST /appid-{appId}/{tenantId}/recipe/user/password/reset/token ## Import user with hash Source: https://supertokens.com/docs/references/cdi/email-password/post-user-passwordhash-import Endpoint: POST /appid-{appId}/{tenantId}/recipe/user/passwordhash/import ## Consume password reset token Source: https://supertokens.com/docs/references/cdi/email-password/post-user-password-reset-token-consume Endpoint: POST /appid-{appId}/{tenantId}/recipe/user/password/reset/token/consume ## Sign in/up third party user Source: https://supertokens.com/docs/references/cdi/thirdparty/post-signinup Endpoint: POST /appid-{appId}/{tenantId}/recipe/signinup ## Generate email verification token Source: https://supertokens.com/docs/references/cdi/email-verification/post-user-email-verify-token Endpoint: POST /appid-{appId}/{tenantId}/recipe/user/email/verify/token ## Remove email verification tokens Source: https://supertokens.com/docs/references/cdi/email-verification/post-user-email-verify-token-remove Endpoint: POST /appid-{appId}/{tenantId}/recipe/user/email/verify/token/remove ## Verify email Source: https://supertokens.com/docs/references/cdi/email-verification/post-user-email-verify Endpoint: POST /appid-{appId}/{tenantId}/recipe/user/email/verify ## Check email verification Source: https://supertokens.com/docs/references/cdi/email-verification/get-user-email-verify Endpoint: GET /appid-{appId}/recipe/user/email/verify ## Unverify email Source: https://supertokens.com/docs/references/cdi/email-verification/post-user-email-verify-remove Endpoint: POST /appid-{appId}/recipe/user/email/verify/remove ## Get user metadata Source: https://supertokens.com/docs/references/cdi/user-metadata/get-user-metadata Endpoint: GET /appid-{appId}/recipe/user/metadata ## Update user metadata Source: https://supertokens.com/docs/references/cdi/user-metadata/put-user-metadata Endpoint: PUT /appid-{appId}/recipe/user/metadata ## Remove user metadata Source: https://supertokens.com/docs/references/cdi/user-metadata/post-user-metadata-remove Endpoint: POST /appid-{appId}/recipe/user/metadata/remove ## Add user role Source: https://supertokens.com/docs/references/cdi/user-roles/put-user-role Endpoint: PUT /appid-{appId}/{tenantId}/recipe/user/role ## Remove user role Source: https://supertokens.com/docs/references/cdi/user-roles/post-user-role-remove Endpoint: POST /appid-{appId}/{tenantId}/recipe/user/role/remove ## Get user roles Source: https://supertokens.com/docs/references/cdi/user-roles/get-user-roles Endpoint: GET /appid-{appId}/{tenantId}/recipe/user/roles ## Get users with role Source: https://supertokens.com/docs/references/cdi/user-roles/get-role-users Endpoint: GET /appid-{appId}/{tenantId}/recipe/role/users ## Create or update role Source: https://supertokens.com/docs/references/cdi/user-roles/put-role Endpoint: PUT /appid-{appId}/recipe/role ## Get role permissions Source: https://supertokens.com/docs/references/cdi/user-roles/get-role-permissions Endpoint: GET /appid-{appId}/recipe/role/permissions ## Remove role permissions Source: https://supertokens.com/docs/references/cdi/user-roles/post-role-permissions-remove Endpoint: POST /appid-{appId}/recipe/role/permissions/remove ## Get permission roles Source: https://supertokens.com/docs/references/cdi/user-roles/get-permission-roles Endpoint: GET /appid-{appId}/recipe/permission/roles ## Delete role Source: https://supertokens.com/docs/references/cdi/user-roles/post-role-remove Endpoint: POST /appid-{appId}/recipe/role/remove ## Get all roles Source: https://supertokens.com/docs/references/cdi/user-roles/get-roles Endpoint: GET /appid-{appId}/recipe/roles ## Create new session Source: https://supertokens.com/docs/references/cdi/session/post-session Endpoint: POST /appid-{appId}/{tenantId}/recipe/session ## Get session info Source: https://supertokens.com/docs/references/cdi/session/get-session Endpoint: GET /appid-{appId}/recipe/session ## Delete session Source: https://supertokens.com/docs/references/cdi/session/post-session-remove Endpoint: POST /appid-{appId}/{tenantId}/recipe/session/remove ## Verify session Source: https://supertokens.com/docs/references/cdi/session/post-session-verify Endpoint: POST /appid-{appId}/recipe/session/verify ## Refresh session Source: https://supertokens.com/docs/references/cdi/session/post-session-refresh Endpoint: POST /appid-{appId}/recipe/session/refresh ## Get user session handles Source: https://supertokens.com/docs/references/cdi/session/get-session-user Endpoint: GET /appid-{appId}/{tenantId}/recipe/session/user ## Regenerate session Source: https://supertokens.com/docs/references/cdi/session/post-session-regenerate Endpoint: POST /appid-{appId}/recipe/session/regenerate ## Update session data Source: https://supertokens.com/docs/references/cdi/session/put-session-data Endpoint: PUT /appid-{appId}/recipe/session/data ## Create signed JWT Source: https://supertokens.com/docs/references/cdi/session/post-jwt Endpoint: POST /appid-{appId}/recipe/jwt ## Get well-known JWT keys Source: https://supertokens.com/docs/references/cdi/oauth/get-well-known-jwks Endpoint: GET /appid-{appId}/.well-known/jwks.json ## Update JWT data Source: https://supertokens.com/docs/references/cdi/session/put-jwt-data Endpoint: PUT /appid-{appId}/{tenantId}/recipe/jwt/data ## Create dashboard user Source: https://supertokens.com/docs/references/cdi/dashboard/post-dashboard-user Endpoint: POST /appid-{appId}/recipe/dashboard/user ## Update dashboard user Source: https://supertokens.com/docs/references/cdi/dashboard/put-dashboard-user Endpoint: PUT /appid-{appId}/recipe/dashboard/user ## Delete dashboard user Source: https://supertokens.com/docs/references/cdi/dashboard/delete-dashboard-user Endpoint: DELETE /appid-{appId}/recipe/dashboard/user ## Get all dashboard users Source: https://supertokens.com/docs/references/cdi/dashboard/get-dashboard-users Endpoint: GET /appid-{appId}/recipe/dashboard/users ## Verify dashboard user session Source: https://supertokens.com/docs/references/cdi/dashboard/post-dashboard-session-verify Endpoint: POST /appid-{appId}/recipe/dashboard/session/verify ## Revoke dashboard user session Source: https://supertokens.com/docs/references/cdi/dashboard/delete-dashboard-session Endpoint: DELETE /appid-{appId}/recipe/dashboard/session ## Sign in dashboard user Source: https://supertokens.com/docs/references/cdi/dashboard/post-dashboard-signin Endpoint: POST /appid-{appId}/recipe/dashboard/signin ## Get all sessions for dashboard user Source: https://supertokens.com/docs/references/cdi/dashboard/get-dashboard-user-sessions Endpoint: GET /appid-{appId}/recipe/dashboard/user/sessions ## Get API version Source: https://supertokens.com/docs/references/cdi/core/get-apiversion Endpoint: GET /appid-{appId}/apiversion ## Get config file path Source: https://supertokens.com/docs/references/cdi/core/get-config Endpoint: GET /config ## Get hello message on root path Source: https://supertokens.com/docs/references/cdi/core/get-root Endpoint: GET /appid-{appId}/{tenantId}/ ## Get hello message Source: https://supertokens.com/docs/references/cdi/core/get-hello Endpoint: GET /appid-{appId}/{tenantId}/hello ## Put hello message Source: https://supertokens.com/docs/references/cdi/core/put-hello Endpoint: PUT /appid-{appId}/{tenantId}/hello ## Post hello message Source: https://supertokens.com/docs/references/cdi/core/post-hello Endpoint: POST /appid-{appId}/{tenantId}/hello ## Delete hello message Source: https://supertokens.com/docs/references/cdi/core/delete-hello Endpoint: DELETE /appid-{appId}/{tenantId}/hello ## Get telemetry ID Source: https://supertokens.com/docs/references/cdi/core/get-telemetry Endpoint: GET /appid-{appId}/telemetry ## Get users count Source: https://supertokens.com/docs/references/cdi/core/get-users-count Endpoint: GET /appid-{appId}/{tenantId}/users/count ## Get active users count Source: https://supertokens.com/docs/references/cdi/core/get-users-count-active Endpoint: GET /appid-{appId}/users/count/active ## Get users Source: https://supertokens.com/docs/references/cdi/core/get-users Endpoint: GET /appid-{appId}/{tenantId}/users ## Delete user Source: https://supertokens.com/docs/references/cdi/core/post-user-remove Endpoint: POST /appid-{appId}/user/remove ## Get search tags Source: https://supertokens.com/docs/references/cdi/core/get-user-search-tags Endpoint: GET /appid-{appId}/user/search/tags ## Get enterprise features Source: https://supertokens.com/docs/references/cdi/core/get-ee-featureflag Endpoint: GET /appid-{appId}/ee/featureflag ## Set license key Source: https://supertokens.com/docs/references/cdi/core/put-ee-license Endpoint: PUT /appid-{appId}/ee/license ## Delete license key Source: https://supertokens.com/docs/references/cdi/core/delete-ee-license Endpoint: DELETE /appid-{appId}/ee/license ## Get license key Source: https://supertokens.com/docs/references/cdi/core/get-ee-license Endpoint: GET /appid-{appId}/ee/license ## Get user ID Source: https://supertokens.com/docs/references/cdi/core/get-user-id Endpoint: GET /appid-{appId}/user/id ## Get users by account info Source: https://supertokens.com/docs/references/cdi/core/get-users-by-accountinfo Endpoint: GET /appid-{appId}/{tenantId}/users/by-accountinfo ## Get requests stats Source: https://supertokens.com/docs/references/cdi/core/get-requests-stats Endpoint: GET /appid-{appId}/requests/stats ## Upsert connection uri domain Source: https://supertokens.com/docs/references/cdi/multitenancy/put-multitenancy-connectionuridomain-v2 Endpoint: PUT /recipe/multitenancy/connectionuridomain/v2 ## Remove connection uri domain Source: https://supertokens.com/docs/references/cdi/multitenancy/post-multitenancy-connectionuridomain-remove Endpoint: POST /recipe/multitenancy/connectionuridomain/remove ## List connection uri domains Source: https://supertokens.com/docs/references/cdi/multitenancy/get-multitenancy-connectionuridomain-list-v2 Endpoint: GET /recipe/multitenancy/connectionuridomain/list/v2 ## Upsert app Source: https://supertokens.com/docs/references/cdi/multitenancy/put-multitenancy-app-v2 Endpoint: PUT /recipe/multitenancy/app/v2 ## Delete app Source: https://supertokens.com/docs/references/cdi/multitenancy/post-multitenancy-app-remove Endpoint: POST /recipe/multitenancy/app/remove ## List apps Source: https://supertokens.com/docs/references/cdi/multitenancy/get-multitenancy-app-list-v2 Endpoint: GET /recipe/multitenancy/app/list/v2 ## Upsert tenant Source: https://supertokens.com/docs/references/cdi/multitenancy/put-multitenancy-tenant-v2 Endpoint: PUT /appid-{appId}/recipe/multitenancy/tenant/v2 ## Get tenant configuration Source: https://supertokens.com/docs/references/cdi/multitenancy/get-multitenancy-tenant-v2 Endpoint: GET /appid-{appId}/{tenantId}/recipe/multitenancy/tenant/v2 ## Get the core config Source: https://supertokens.com/docs/references/cdi/dashboard/get-dashboard-tenant-core-config Endpoint: GET /appid-{appId}/{tenantId}/recipe/dashboard/tenant/core-config ## Delete a tenant Source: https://supertokens.com/docs/references/cdi/multitenancy/post-multitenancy-tenant-remove Endpoint: POST /appid-{appId}/recipe/multitenancy/tenant/remove ## List tenants in an app Source: https://supertokens.com/docs/references/cdi/multitenancy/get-multitenancy-tenant-list-v2 Endpoint: GET /appid-{appId}/recipe/multitenancy/tenant/list/v2 ## Upsert ThirdParty Provider configuration Source: https://supertokens.com/docs/references/cdi/multitenancy/put-multitenancy-config-thirdparty Endpoint: PUT /appid-{appId}/{tenantId}/recipe/multitenancy/config/thirdparty ## Delete ThirdParty Provider configuration Source: https://supertokens.com/docs/references/cdi/multitenancy/post-multitenancy-config-thirdparty-remove Endpoint: POST /appid-{appId}/{tenantId}/recipe/multitenancy/config/thirdparty/remove ## Add user tenant association Source: https://supertokens.com/docs/references/cdi/multitenancy/post-multitenancy-tenant-user Endpoint: POST /appid-{appId}/{tenantId}/recipe/multitenancy/tenant/user ## Remove user tenant association Source: https://supertokens.com/docs/references/cdi/multitenancy/post-multitenancy-tenant-user-remove Endpoint: POST /appid-{appId}/{tenantId}/recipe/multitenancy/tenant/user/remove ## Get OAuth2 Client Source: https://supertokens.com/docs/references/cdi/oauth/get-oauth2-client Endpoint: GET /appid-{appId}/recipe/oauth/clients ## Create OAuth2 Client Source: https://supertokens.com/docs/references/cdi/oauth/post-oauth2-client Endpoint: POST /appid-{appId}/recipe/oauth/clients ## Update OAuth2 Client Source: https://supertokens.com/docs/references/cdi/oauth/put-oauth2-client Endpoint: PUT /appid-{appId}/recipe/oauth/clients ## List OAuth2 Clients Source: https://supertokens.com/docs/references/cdi/oauth/get-oauth2-clients Endpoint: GET /appid-{appId}/recipe/oauth/clients/list ## Remove OAuth2 Client Source: https://supertokens.com/docs/references/cdi/oauth/post-oauth2-client-remove Endpoint: POST /appid-{appId}/recipe/oauth/clients/remove ## Get OAuth2 Consent Request Source: https://supertokens.com/docs/references/cdi/oauth/get-oauth2-consent-request Endpoint: GET /appid-{appId}/recipe/oauth/auth/requests/consent ## Accept OAuth2 Consent Request Source: https://supertokens.com/docs/references/cdi/oauth/post-oauth2-consent-request-accept Endpoint: PUT /appid-{appId}/recipe/oauth/auth/requests/consent/accept ## Reject OAuth2 Consent Request Source: https://supertokens.com/docs/references/cdi/oauth/post-oauth2-consent-request-reject Endpoint: PUT /appid-{appId}/recipe/oauth/auth/requests/consent/reject ## Get OAuth2 Login Request Source: https://supertokens.com/docs/references/cdi/oauth/get-oauth2-login-request Endpoint: GET /appid-{appId}/recipe/oauth/auth/requests/login ## Accept OAuth2 Login Request Source: https://supertokens.com/docs/references/cdi/oauth/post-oauth2-login-request-accept Endpoint: PUT /appid-{appId}/recipe/oauth/auth/requests/login/accept ## Reject OAuth2 Login Request Source: https://supertokens.com/docs/references/cdi/oauth/post-oauth2-login-request-reject Endpoint: PUT /appid-{appId}/recipe/oauth/auth/requests/login/reject ## Accept OAuth2 Logout Request Source: https://supertokens.com/docs/references/cdi/oauth/post-oauth2-logout-request-accept Endpoint: PUT /appid-{appId}/recipe/oauth/auth/requests/logout/accept ## Reject OAuth2 Logout Request Source: https://supertokens.com/docs/references/cdi/oauth/post-oauth2-logout-request-reject Endpoint: PUT /appid-{appId}/recipe/oauth/auth/requests/logout/reject ## Revoke OAuth2 Session Source: https://supertokens.com/docs/references/cdi/oauth/post-oauth2-session-revoke Endpoint: POST /appid-{appId}/recipe/oauth/session/revoke ## Revoke OAuth2 Token Source: https://supertokens.com/docs/references/cdi/oauth/post-oauth2-token-revoke Endpoint: POST /appid-{appId}/recipe/oauth/token/revoke ## Revoke OAuth2 Token Source: https://supertokens.com/docs/references/cdi/oauth/post-oauth2-tokens-revoke Endpoint: POST /appid-{appId}/recipe/oauth/tokens/revoke ## Get OAuth2 Auth Source: https://supertokens.com/docs/references/cdi/oauth/get-oauth2-auth Endpoint: GET /appid-{appId}/recipe/oauth/auth ## Get OAuth2 Token Source: https://supertokens.com/docs/references/cdi/oauth/get-oauth2-token Endpoint: POST /appid-{appId}/recipe/oauth/token ## Get OAuth2 Sessions Logout Source: https://supertokens.com/docs/references/cdi/oauth/get-oauth2-sessions-logout Endpoint: GET /appid-{appId}/recipe/oauth/sessions/logout ## Introspect OAuth2 Token Source: https://supertokens.com/docs/references/cdi/oauth/post-oauth2-token-introspect Endpoint: POST /appid-{appId}/recipe/oauth/introspect ## List bulk import users Source: https://supertokens.com/docs/references/cdi/import/get-bulk-import-users Endpoint: GET /appid-{appId}/bulk-import/users ## Add bulk import users Source: https://supertokens.com/docs/references/cdi/import/post-bulk-import-users Endpoint: POST /appid-{appId}/bulk-import/users ## Delete bulk import users Source: https://supertokens.com/docs/references/cdi/import/delete-bulk-import-users Endpoint: POST /appid-{appId}/bulk-import/users/remove ## Count bulk import users Source: https://supertokens.com/docs/references/cdi/import/post-bulk-import-import Endpoint: GET /appid-